Installation and Update BookingPress
Note: The BookingPress pro will only work if the Lite version of the BookingPress plugin is installed on the website.
You need to follow very simple steps for getting started with BookingPress Plugin.
BookingPress – WordPress Appointment Booking Plugin Installation
- To Download the BookingPress plugin, go to the BookingPress website.
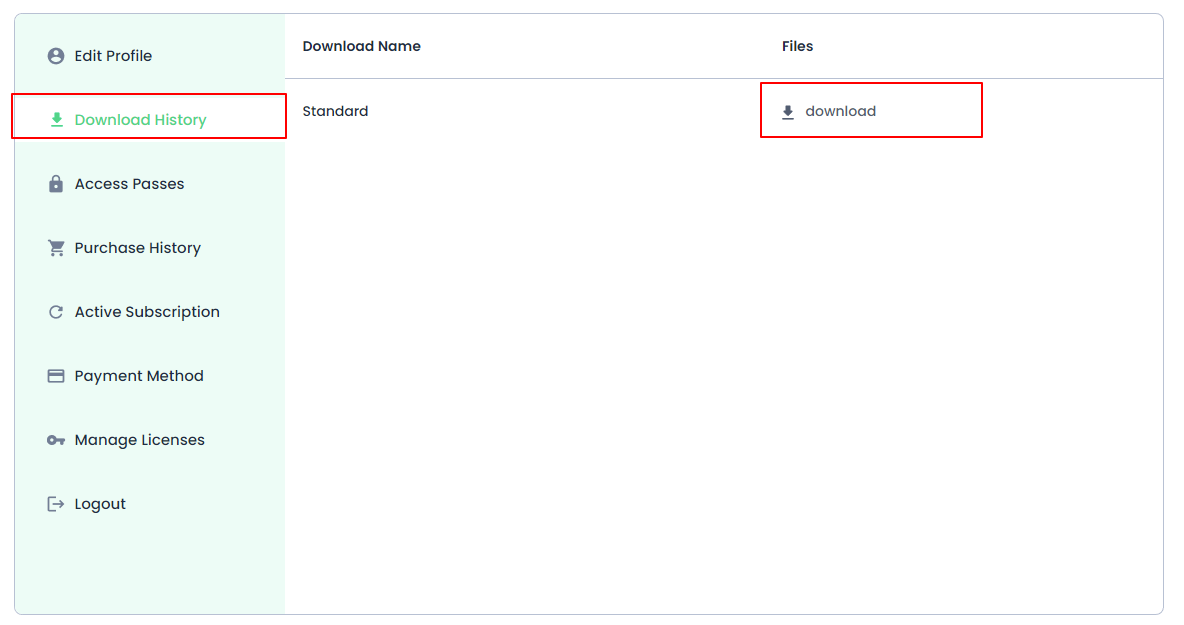
- After purchasing the BookingPress Premium, go to
BookingPress Website -> My Account -> Download Historyand download the plugin.
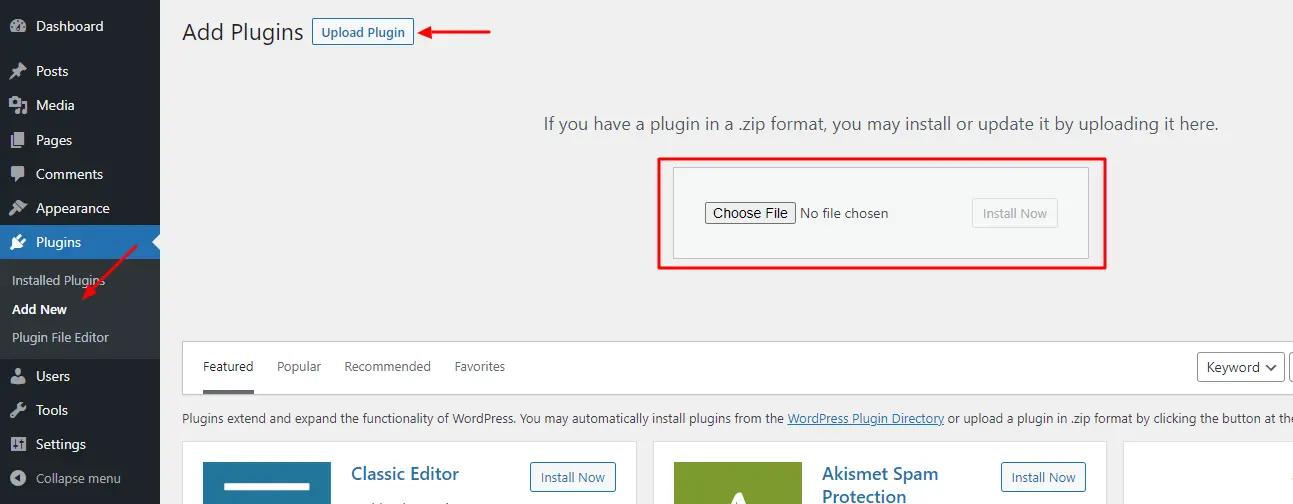
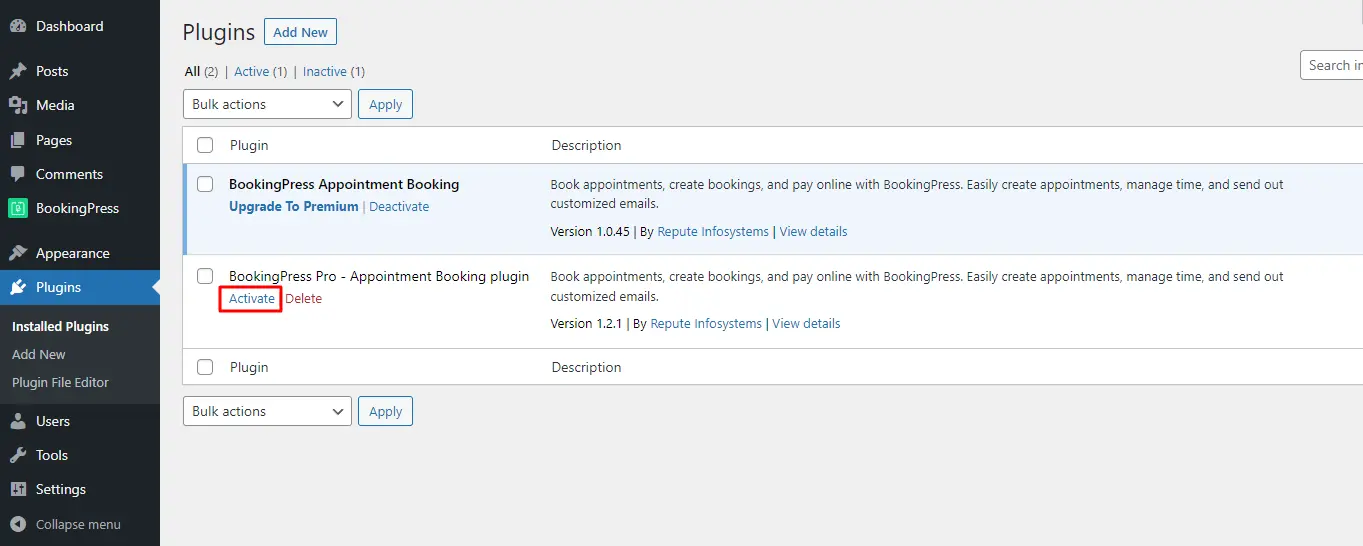
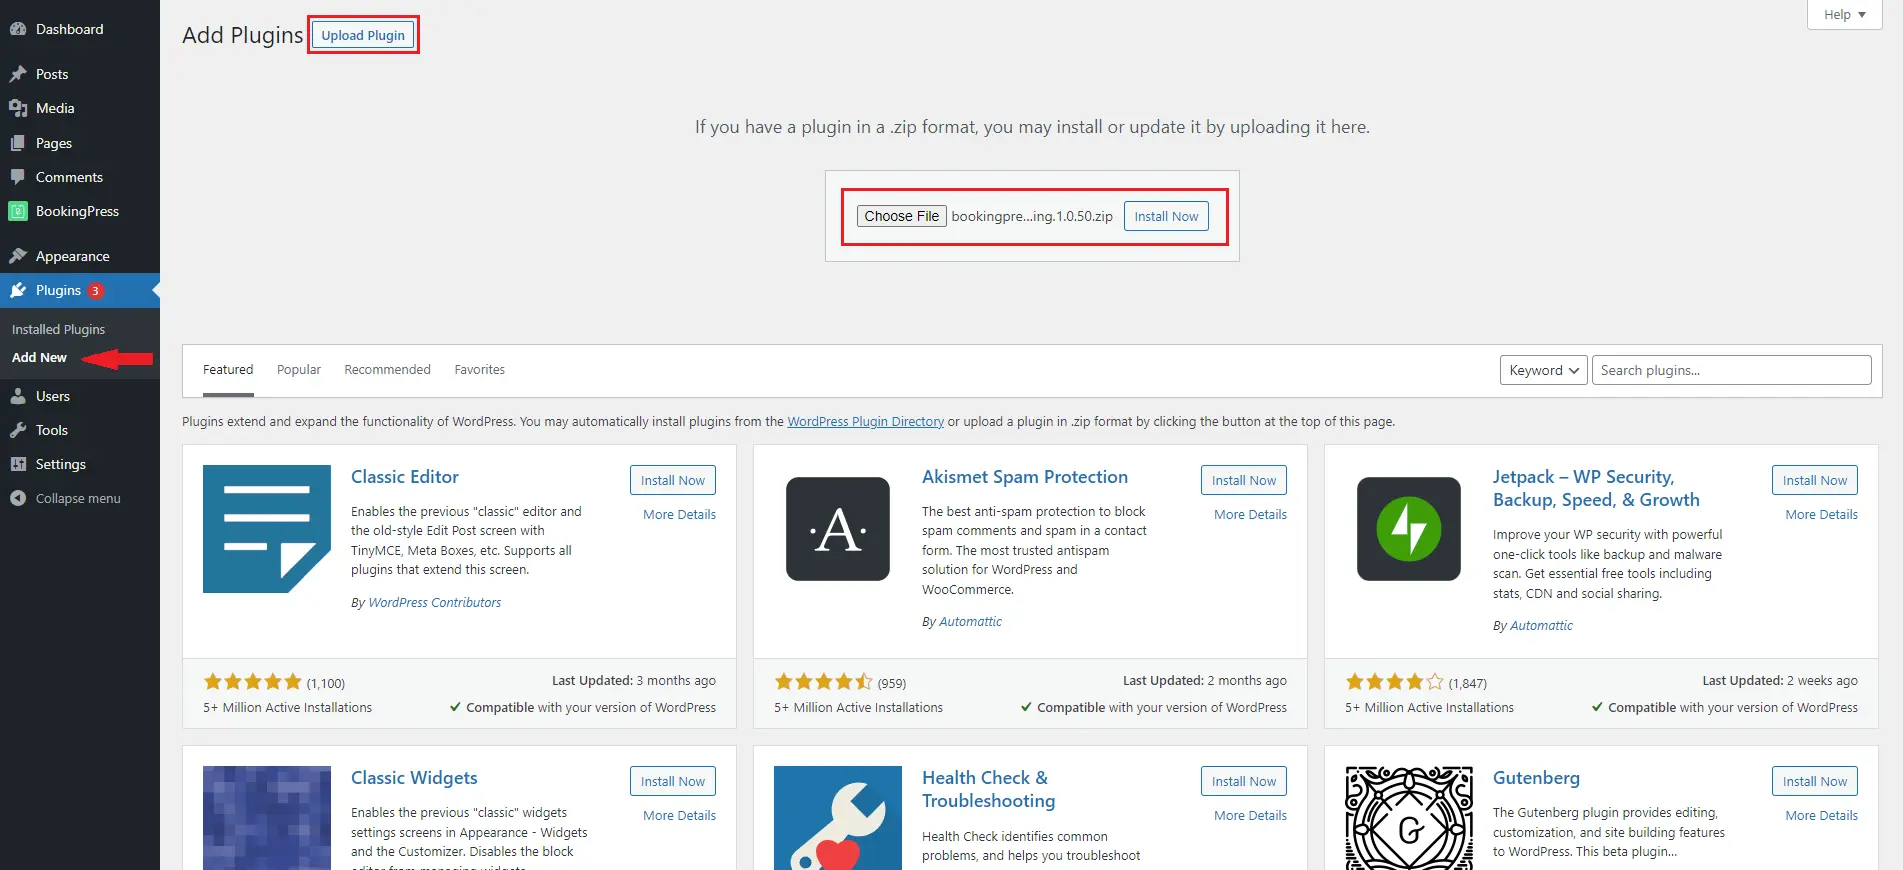
- Now to install the plugin via WordPress Uploader: In your WordPress admin, go to
Plugins > Add New > Uploadand upload the available ZIP of BookingPress to install the Plugin.
- Manual Installation :
- Download the latest version of the BookingPress plugin.
- Unzip the downloaded file to your computer.
- Upload the
/bookingpress-appointment-booking-pro/directory to the/wp-content/plugins/directory of your site. - Activate the plugin from the ‘Plugins’ menu in WordPress.
Activate License:
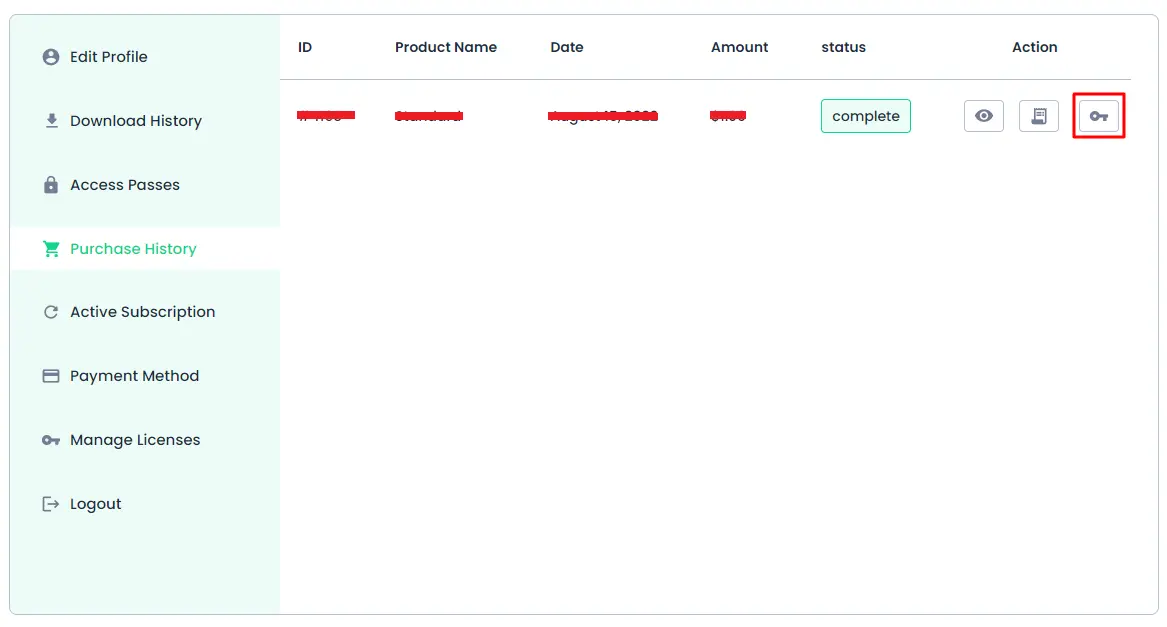
After installation of the plugin is done, to use the plugin, you will need to enter the license key. To get the key, go to the BookingPress website and login with your credentials, and navigate to the “Purchase History” section.
Now click on the “Key” icon.
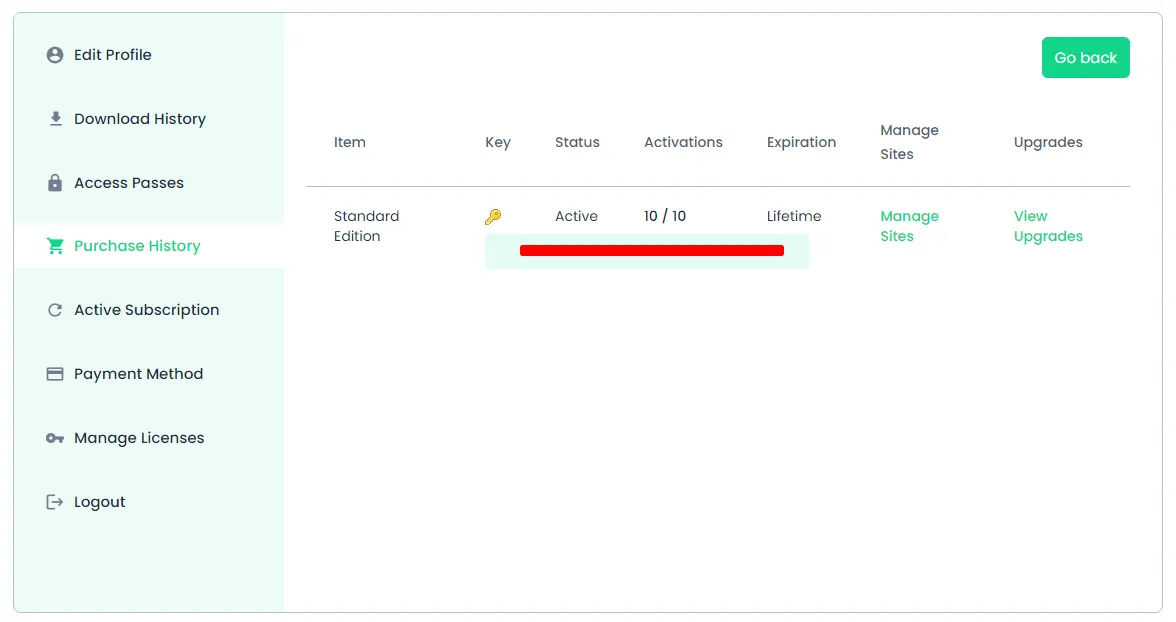
Now, you will be able to see the purchased product plan, next to it will be another key icon, click on it and you will be able to see your purchase code. Copy the code.
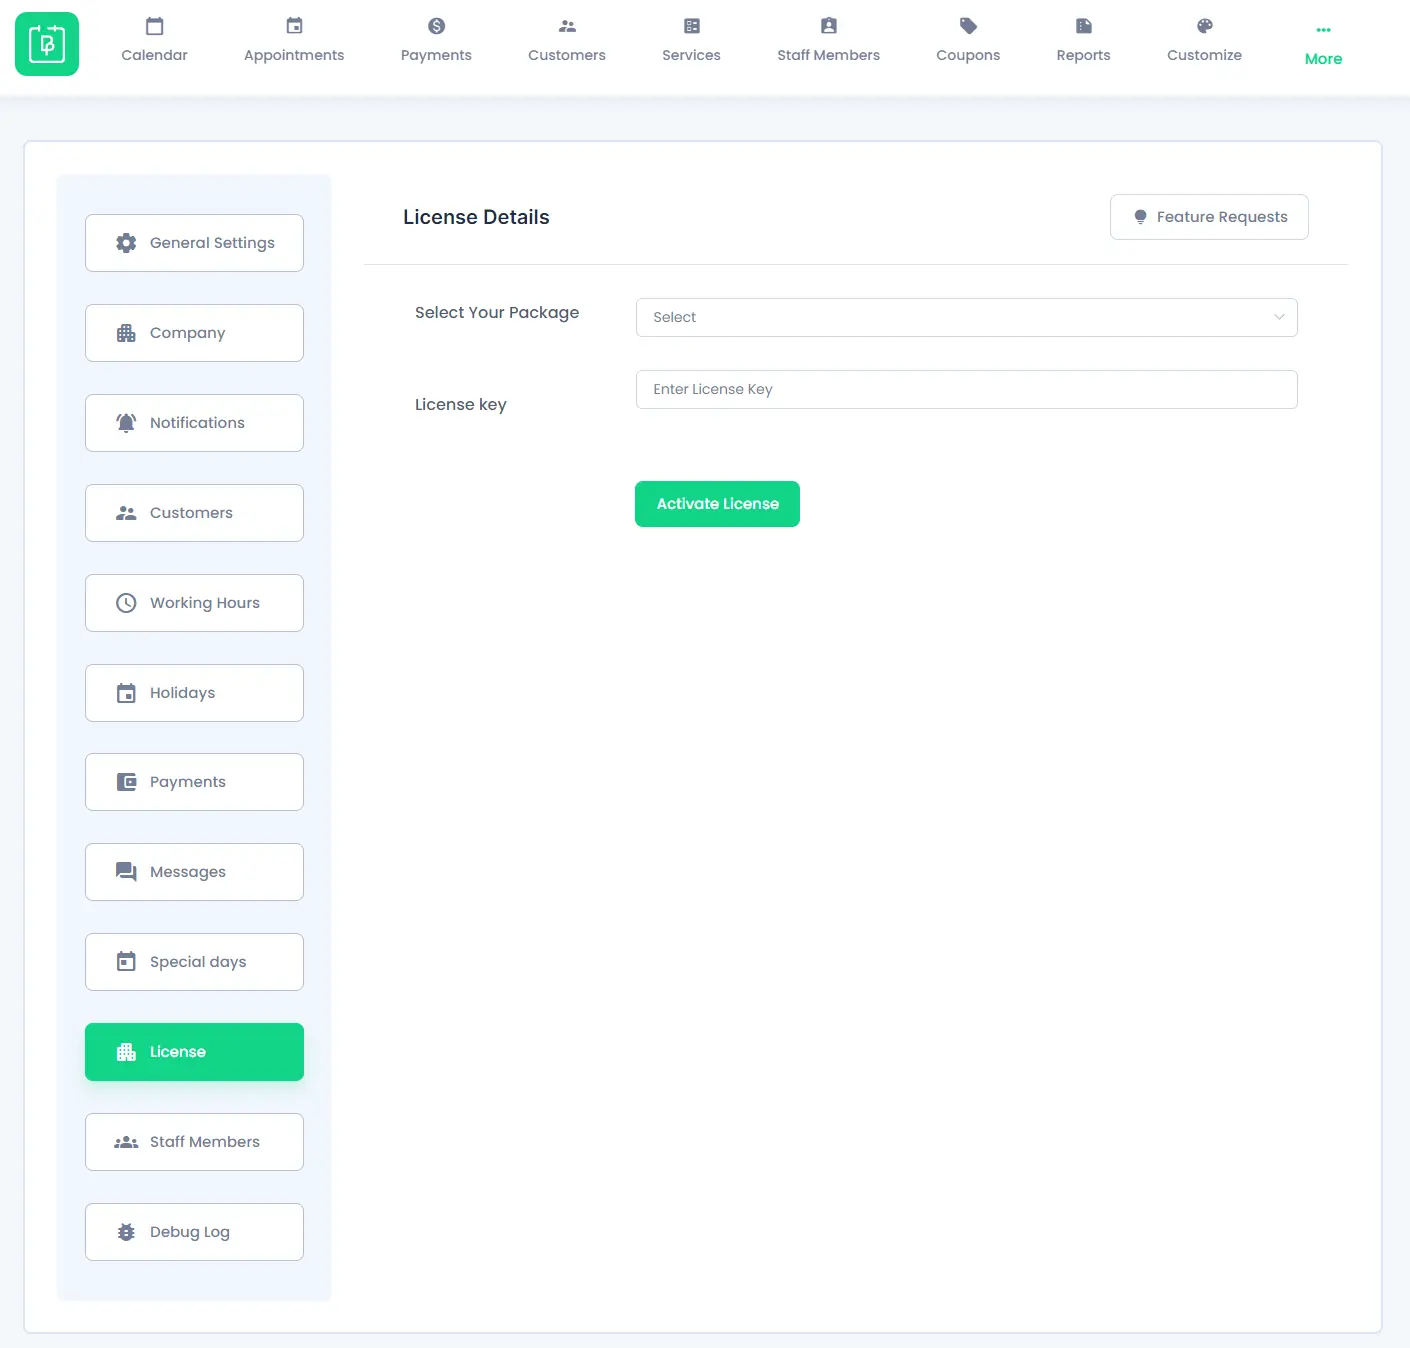
Now go to WordPress admin panel -> BookingPress -> License. Select your plugin’s package at “Select Your Package”, and then enter the license key you copied and then click on the “Activate License” button. That’s it, now your BookingPress pro plugin is ready to use.
BookingPress – WordPress Appointment Booking Plugin Update :
Important: Whether you update BookingPress manually or automatically, we recommend you backup your website data before making any updates. Read more about WordPress backups here.
There are two ways to update the plugin:
- Auto Update:
- In your WordPress admin, go to
Plugins > Installed Pluginsto update BookingPress Plugin directly from an available update link for BookingPress Pro.
- Manual Update Using WordPress Installer:
- Download the latest version of the BookingPress website.
- Now to update the plugin via WordPress Uploader: In your WordPress admin, go to
Plugins > Add New > Uploadand upload the available ZIP of BookingPress and click on the Install button.
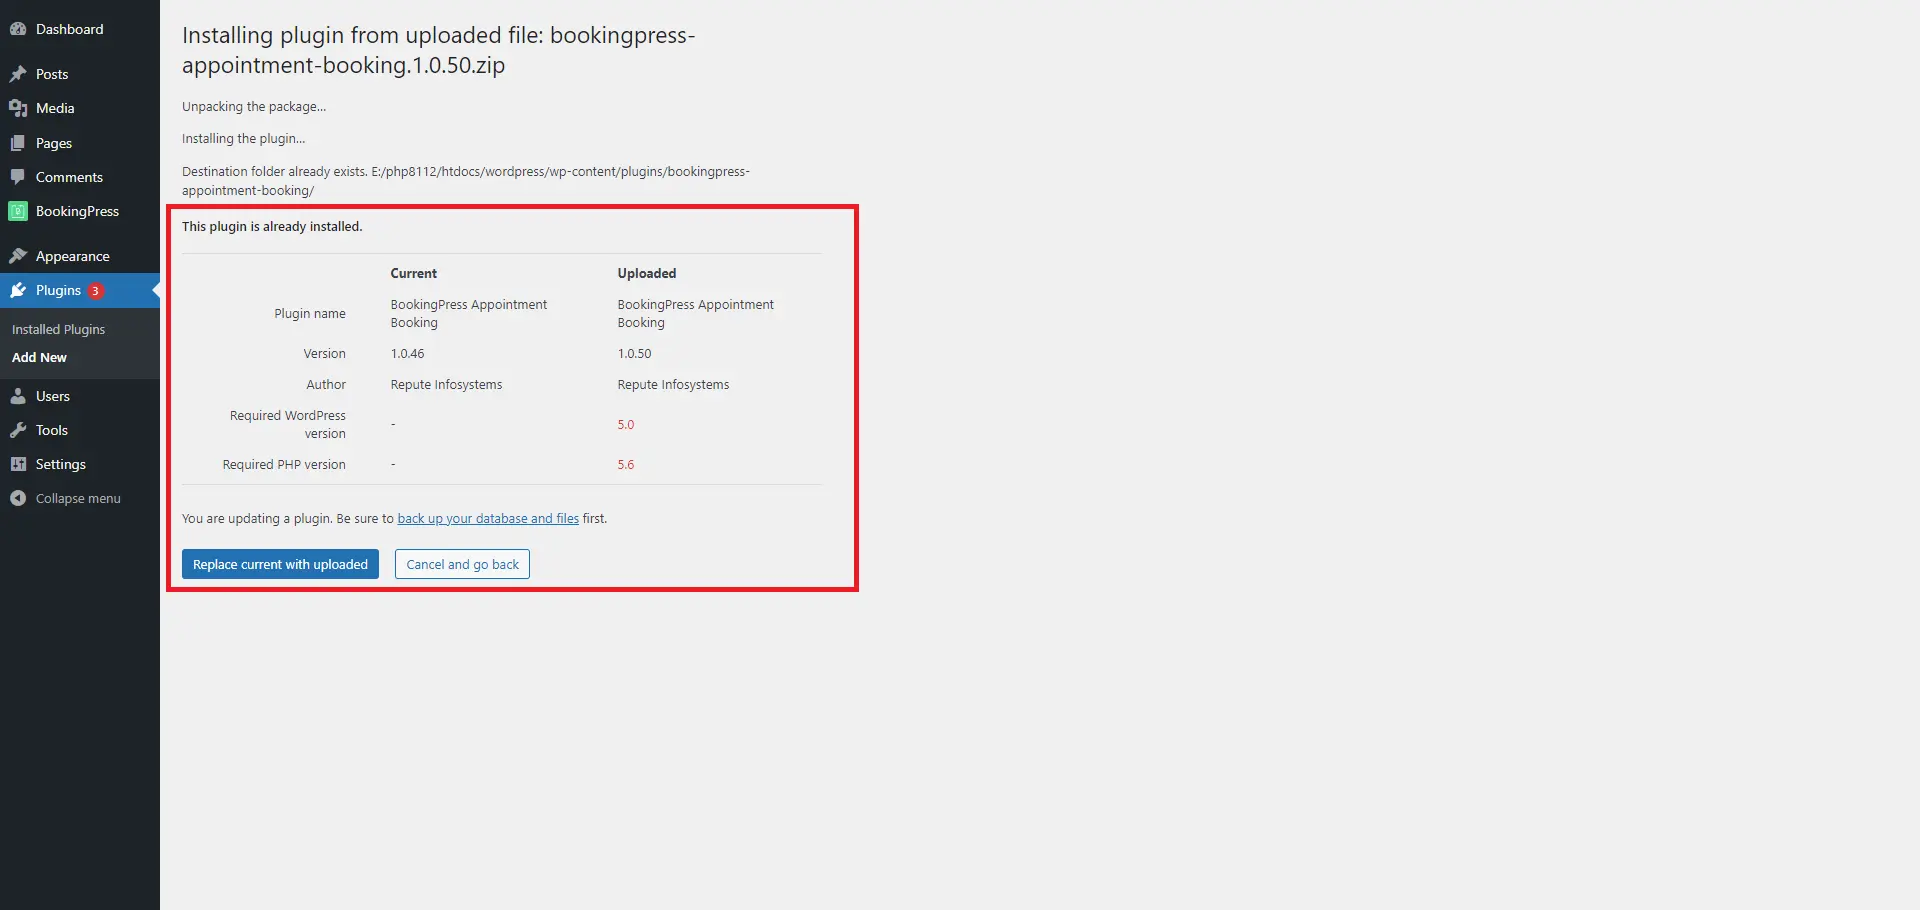
- As the BookingPress plugin of the old version already exists, a confirmation message will appear, to confirm the update of the plugin, click on “Replace current with uploaded” and after that the plugin will be updated to a new version.
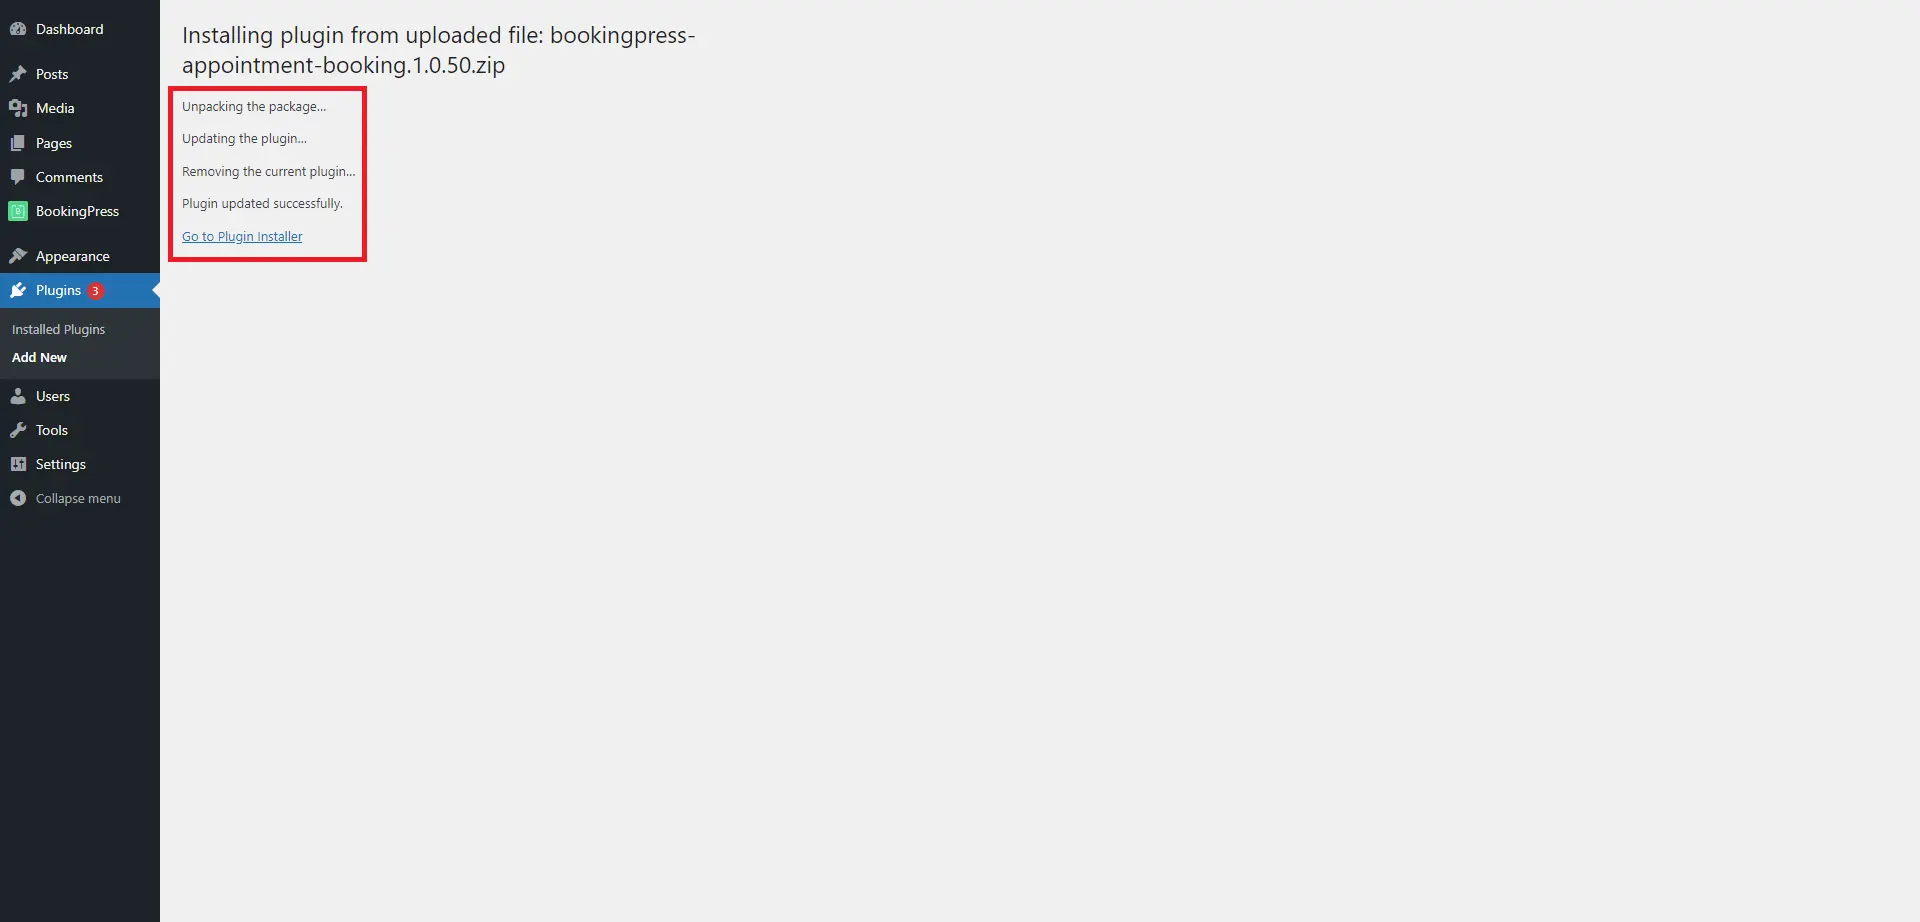
- After the plugin is updated and installed, a message will appear. That’s it.
- Manual Update via FTP:
- Download the latest version of the BookingPress website.
- Unzip the downloaded file to your computer.
- Upload the new plugin source code /bookingpress-appointment-booking-pro/ directory to the /wp-content/plugins/ directory of your site.
- Refresh the BookingPress admin pages to confirm the update.
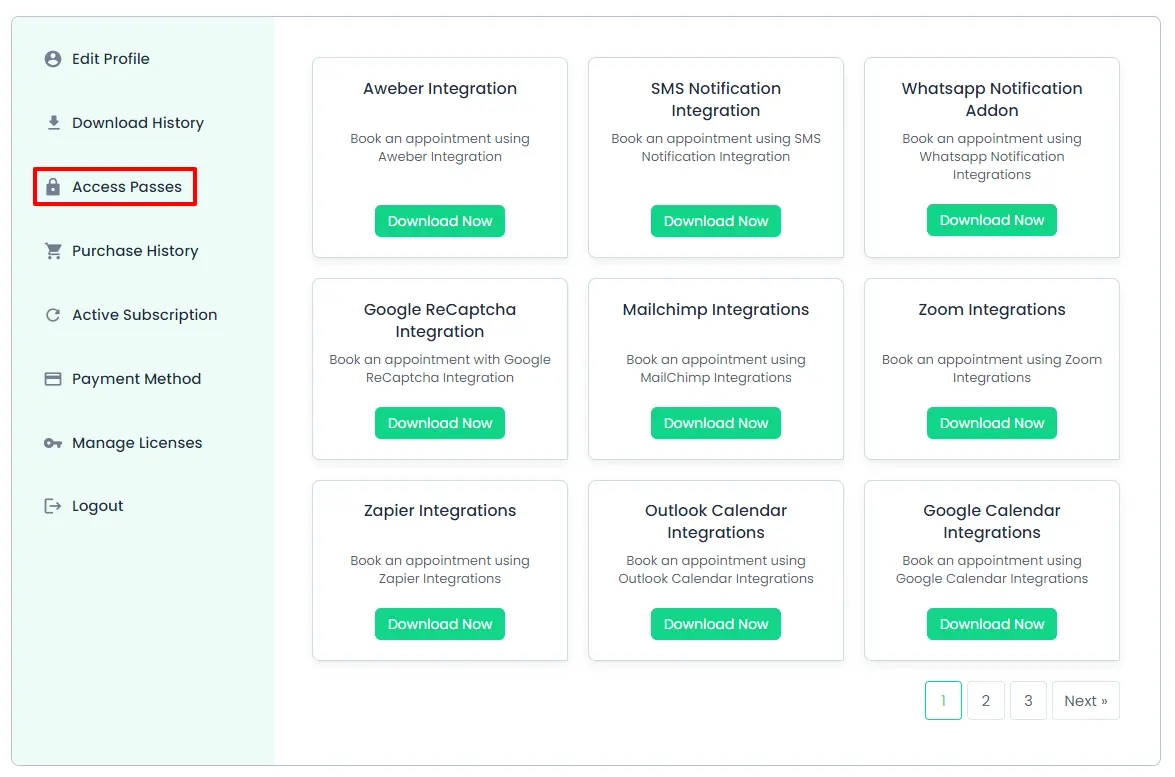
How to download the addons?
- First, login to the BookingPress Website, and you will be redirected to the My Account page.
- Now, click on the “Access Passes” link from the left menu panel.
- After going to the Access Passes, click on the “View your downloads” button.
- From the list, click on the download button for the add-on you want to install, and it will automatically start downloading the add-on. After the download is finished, upload the downloaded zip file to WordPress just link any other WordPress Plugin, then install and activate the addon to use it.