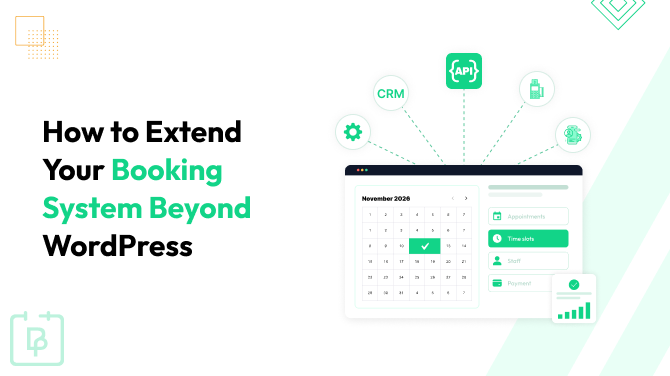
What is Buffer Time and How to Set It up with BookingPress

Looking to add some cushion time between appointments? Rely on your appointment scheduling software with buffer time settings! Almost all quality digital tools that provide appointment scheduling allow for a smooth transition between appointments, with prep time (for before) and wrap-up time (for after).
If you need more details, as well as a tutorial for WordPress, here we go.
What is Buffer Time, More Exactly?
Buffer time, also known as extra time or a grace period, is a time for the service provider to prepare, reset, or move between clients and appointments.
There could be several reasons why buffer time may be necessary. This padding time is needed to ensure there’s enough leeway to avoid delays, handle unexpected situations, or enable your staff to take a quick break.
If you are setting up your appointment scheduling system, this is the time that clients don’t actually book, but which is taken into account in the booking software.
Normally, booking software allows customers to adjust this prep time (before the service) and wrap-up time (after the service) to suit the needs of each specific appointment or service.
Why Does Buffer Time Matter to Service Provider Businesses?
Obviously, buffer time settings allow for more flexibility in setting up your availability and shifts, overall improving staff productivity. Here are more details:
- Avoid back-to-back appointments (when no transition time is taken into account).
- Decrease the risks of running too late because of the possible delays between appointments.
- Improve the performance and productivity of your staff thanks to smartly thought-up breaks.
- Decrease administration errors.
- Serve your clients better thanks to reduced hustle and waiting times in the salon or office.
So, if you decide to automate appointment scheduling online (great decision!), make sure that the booking system includes buffer time settings.
How to Customize Buffer Time in BookingPress?
BookingPress is the ultimate service scheduling software for WordPress, which gives you, among other tools, the flexibility to set up buffer times and have the needed extra time for every appointment.
Note: To follow this tutorial, make sure your services are set up in BookingPress and your availability (working hours) is customized accordingly.
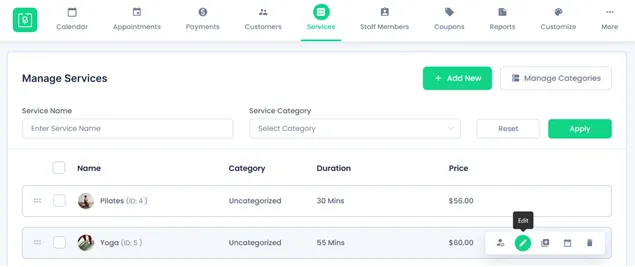
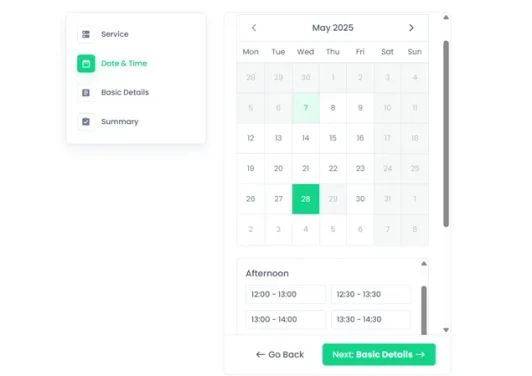
To add a buffer time to a service, follow these steps: choose a service → click Edit.
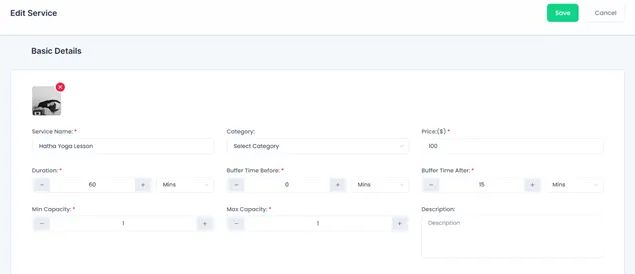
Next to the Duration settings, choose ‘Buffer Time Before’ or ‘Buffer Time After’ (in minutes or hours).
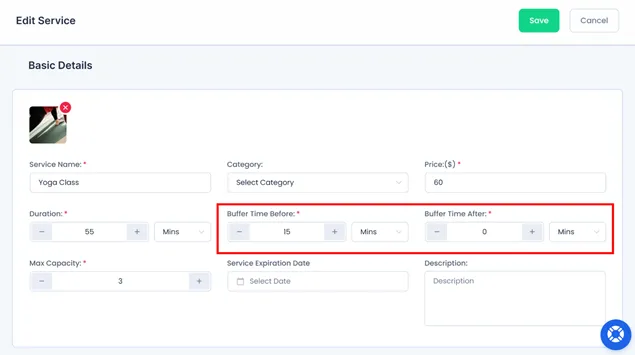
These settings let you add extra time before and after a service. Very simple – the “Buffer Before” is time the provider needs to prepare, and “Buffer After” is time to wrap up or rest before the next appointment.
Let’s create an example for a 75-minute calendar window with BookingPress – WordPress booking plugin.
For instance, for a 60-minute private yoga session, your instructor needs 15 minutes afterward to sanitize the space and reset for the next client or group. In this case, add a 15-minute buffer time after the class appointment.
In your public calendar created with BookingPress, the whole lesson will block off 75 minutes in total, while customers will only see the actual duration of the lesson starting at the time calculated according to the time step settings in the BookingPress plugin (‘Default Time Slot Step’ in General Settings).
Curious how using buffer times with BookingPress benefits you even more?
- Create the needed shift flexibility for your staff.
- Set extra buffer times differently for each service.
- Get the booking slots automatically created in your calendar with buffer time included.
What are related settings?
To further customize availability and booking rules that will be reflected in your calendar, also visit these settings in BookingPress: Setting → General Settings → Global Settings & Appointment Settings. Here you can customize multiple things, including:
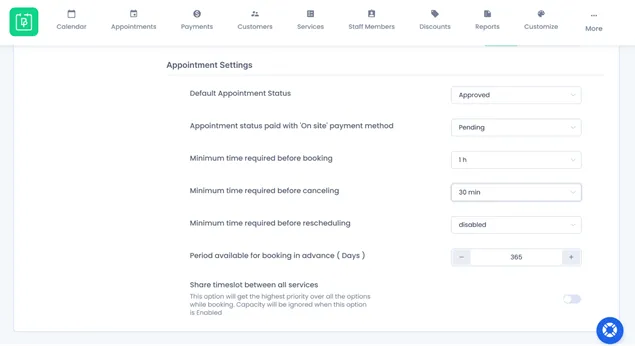
- Specify the default step settings for calculating slot times in the calendar.
- Set the minimum time required in advance for clients to book an appointment.
- Set how much time in advance clients must cancel their appointments.
- Define the minimum advance time required for rescheduling appointments.
- Specify how far in advance appointments can be booked.
Related articles:


Brian is a WordPress expert with a decade of developing experience & technical-writing. He enjoys blogging, movies & hiking.

Get BookingPress Premium
60+ Premium Addons
21+ Payment Gateways
Plan starts at just $89
Get Premium NowLike our insights? Click the badge to add BookingPress as your preferred source on Google.

Add as a Preferred
Source on Google