Getting BookingPress Ready on Your Website
Installing BookingPress WordPress booking plugin is a simple process that involves downloading, installing and activating the license (and optionally adding extensions).
Follow the steps below to get started right away.
Do You Need BookingPress Lite First?
Yes, the BookingPress Pro will only work if the Lite version of the BookingPress plugin is installed on WordPress. However, you don’t need to install it manually.
If the BookingPress Lite version is not already installed, BookingPress Pro will automatically install and activate it for you during setup.
Where Can You Download the BookingPress Plugin File?
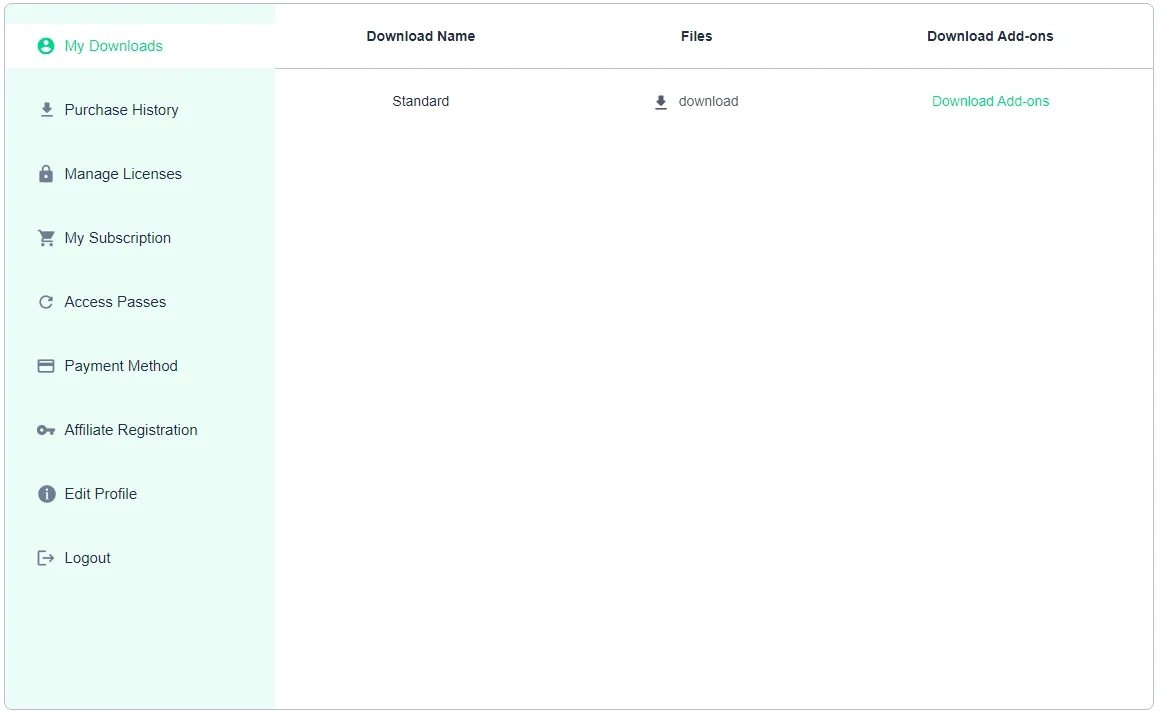
First you have to buy the BookingPress pro from its official website. Then download your plugin version file (bookingpress-appointment-booking-pro.zip) from My Account → My Downloads.
How To Install BookingPress WordPress Booking Plugin?
The BookingPress plugin installation can be done through two methods:
- Your WordPress Dashboard.
- Or, manually via FTP.
Installing BookingPress through your WordPress dashboard is the easiest.
Method 1: Upload via WordPress
BookingPress can be installed in just a few simple steps from your WordPress dashboard.
- Log in to your WordPress dashboard. (If you haven’t already.)
- Go to Plugins → Add New → Upload Plugin.
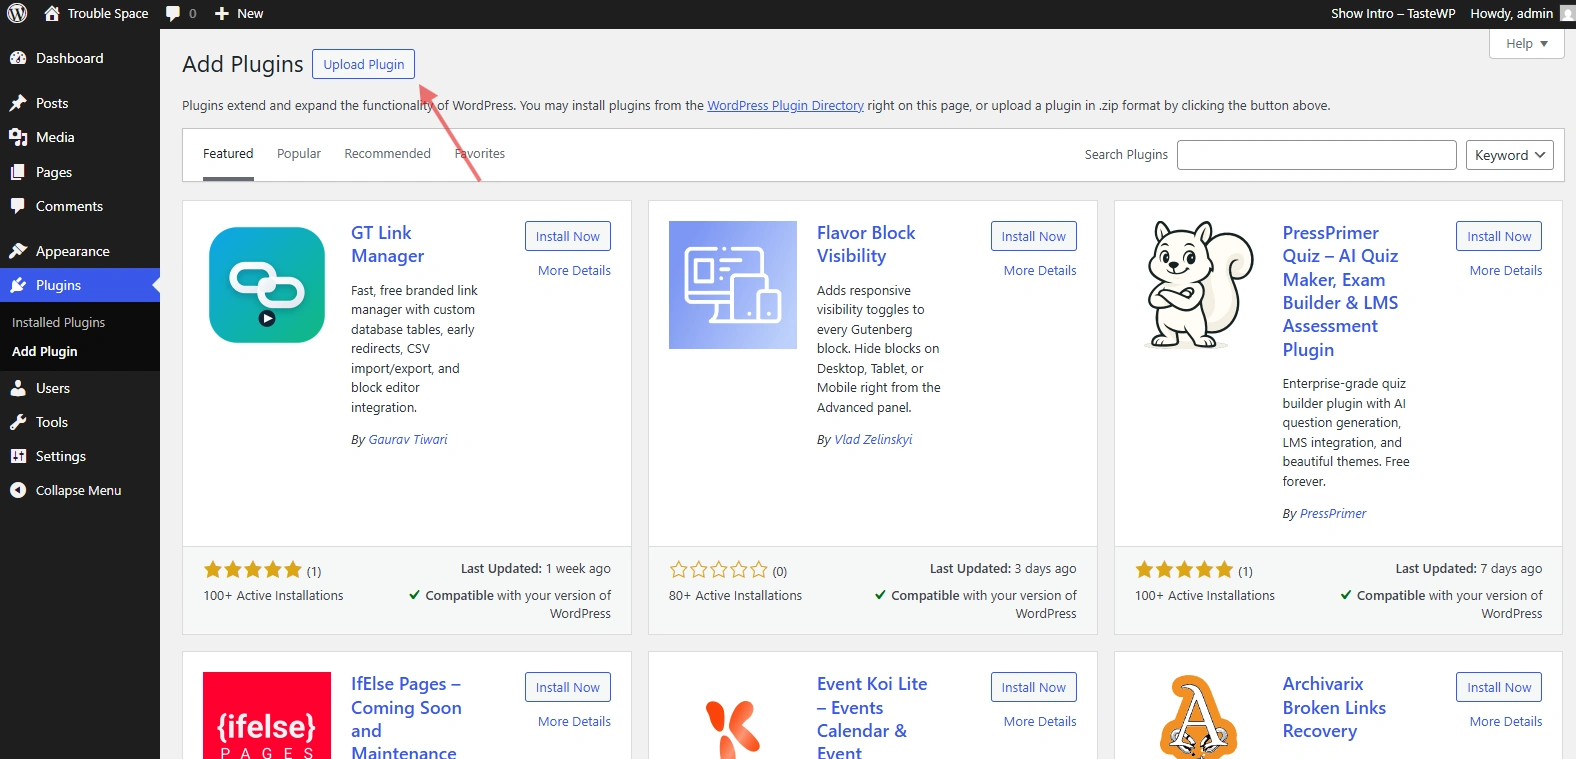
- Choose the BookingPress Pro zip file, and Upload it.

- Click Install Now, then Activate.
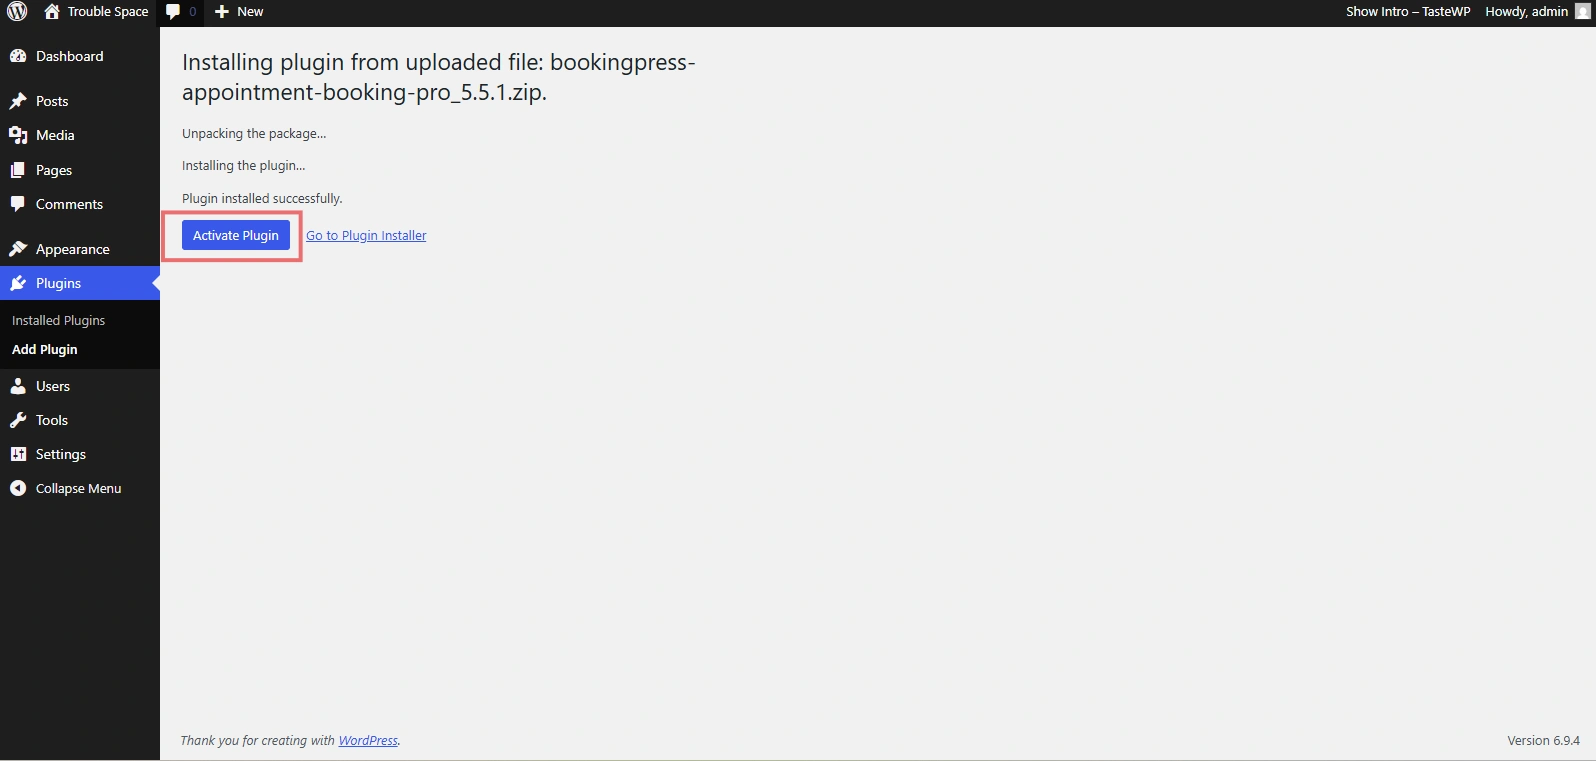
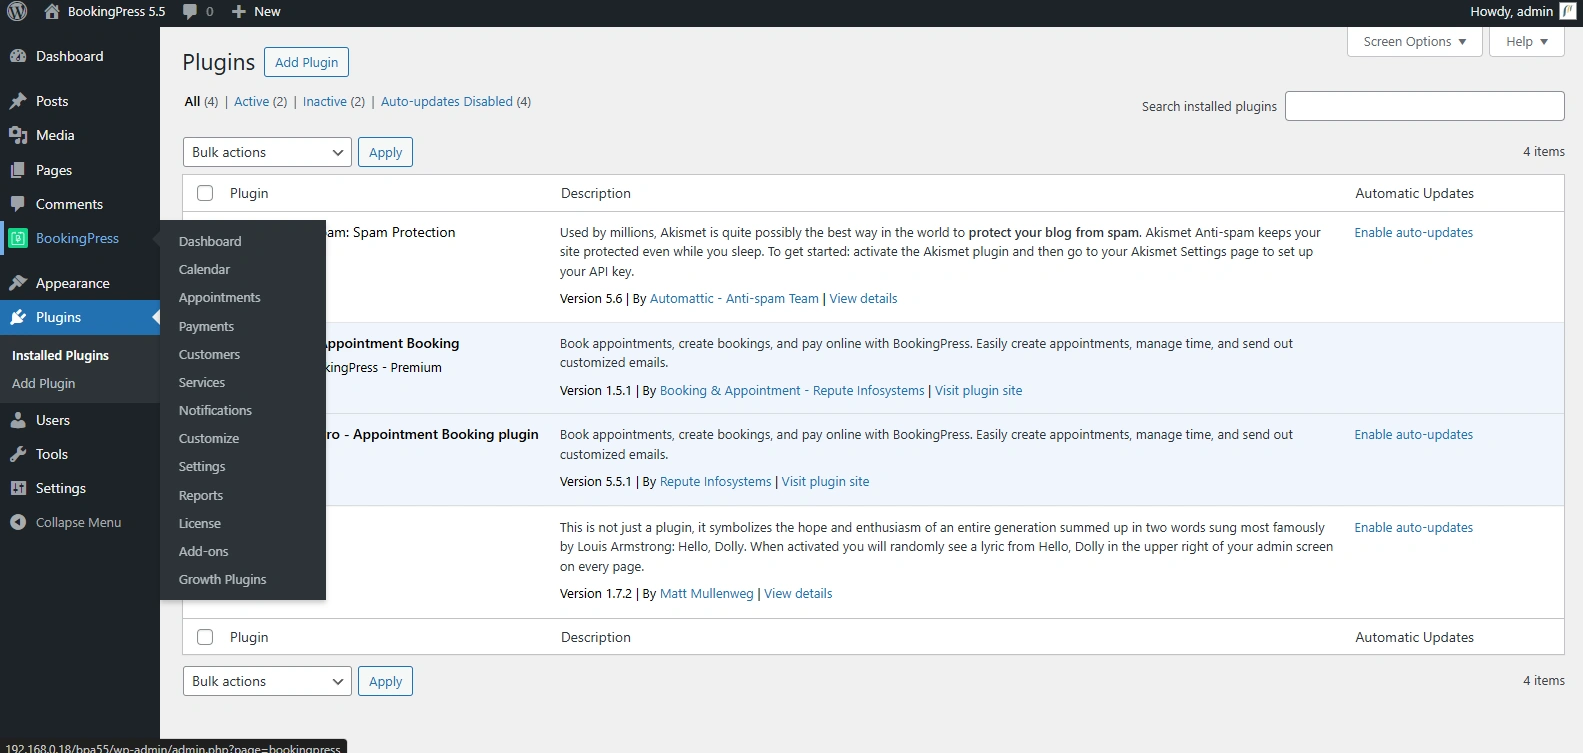
After activation, the BookingPress icon will appear in your WordPress dashboard menu.
Method 2: Manual Installation (FTP)
BookingPress also supports manual installation yet this method is only useful if the plugin upload fails (Rare) or you want to manage files directly.
For installing BookingPress manually via FTP:
- Download the latest version of the BookingPress plugin. (Also we did already)
- Unzip the downloaded file to your computer.
- Upload the
/bookingpress-appointment-booking-pro/directory to the/wp-content/plugins/directory of your site. - Activate it from the ‘Plugins’ menu in WordPress.

After activation, the BookingPress icon will be shown in your WordPress dashboard menu.
What happens when you Install BookingPress Pro?
During installation, BookingPress prepares your website for booking functionality.
- BookingPress Pro is added to your Website.
- The Lite version is automatically installed. (if not already present)
- The plugin becomes available in your dashboard.
This completes your BookingPress installation setup without any manual management or coding
How To Activate the BookingPress License?
Activating the BookingPress license is not just a formality. It unlocks all Pro features and keeps your plugin connected to your developer’s update system.
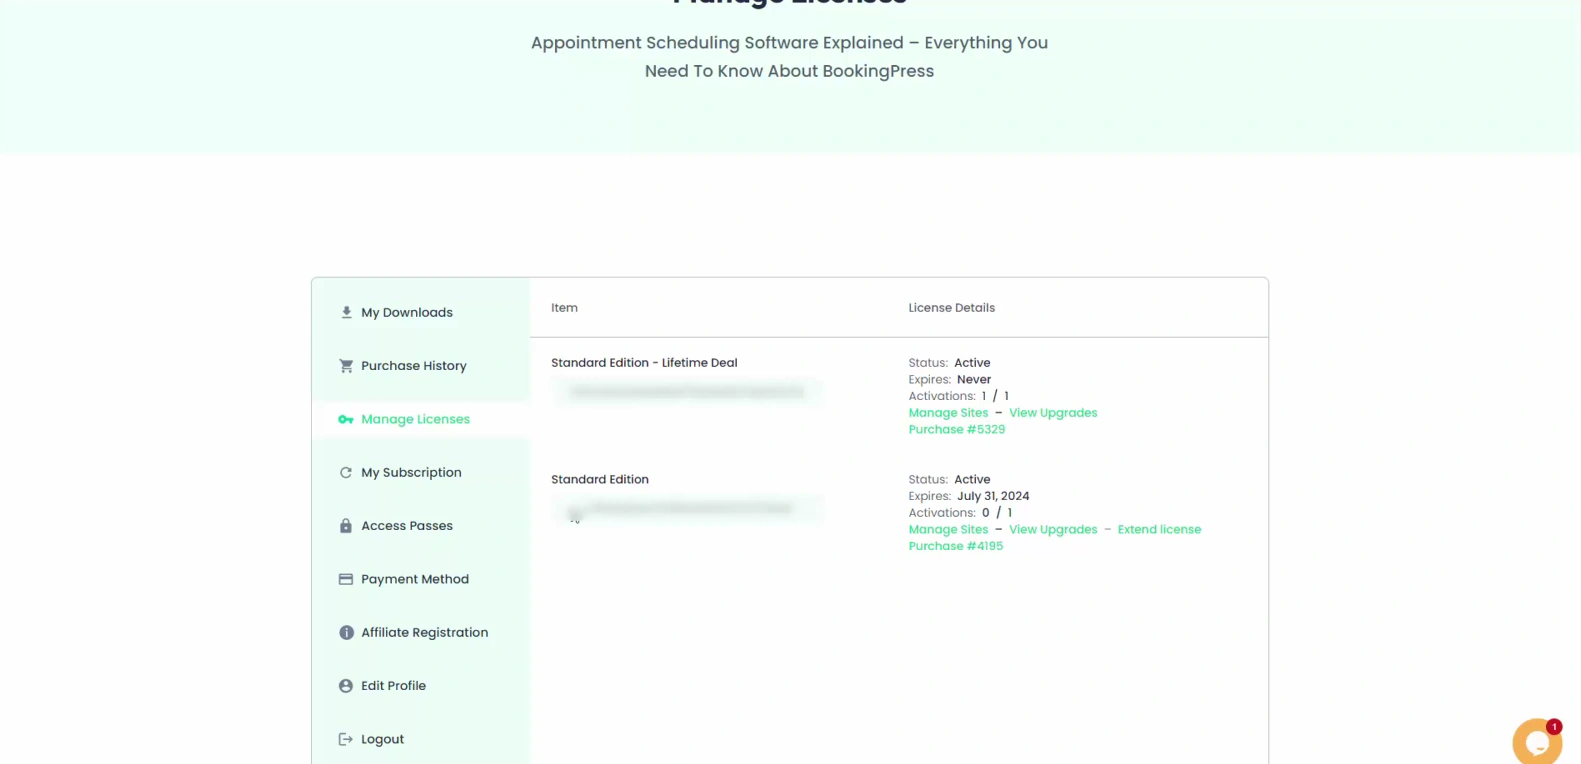
- Log in to your BookingPress account.
- Head over to the Manage License.
- Here you’ll see your License Key.
- Copy the license key.
Now reach to your WordPress dashboard and continue the following:
- Go to the BookingPress → License page.
- Select your BookingPress Package (Standard, Professional, or Enterprise)
- Enter your license key.
- Click on Activate License.
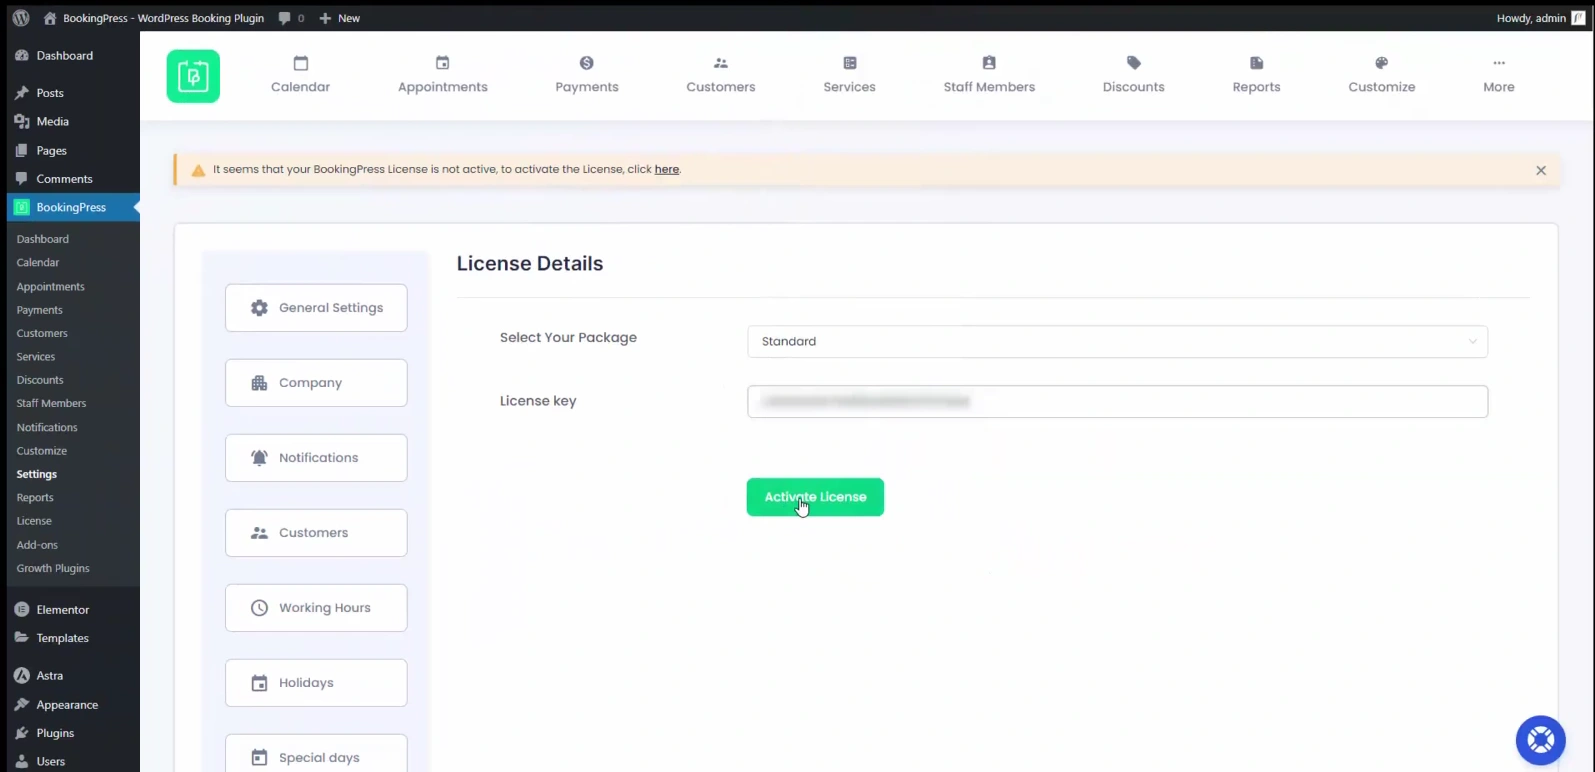
Once activated, you’ll be able to see all the license details.
How To Update BookingPress WordPress Booking Plugin?
Attention: Back up your site before updating BookingPress. (Applies to both manual and automatic updates.) Learn more here.
BookingPress can be updated in three ways:
- Auto Update.
- Manual Update using WordPress Installer.
- Manual Update Via WordPress FTP.
The easiest way to update BookingPress is through your WordPress dashboard.
Method 1: Auto Update from WordPress Dashboard
BookingPress can be updated easily from your WordPress admin panel when an update is available.
- First, log in to your WordPress dashboard (if you haven’t already)
- In your WordPress admin dashboard, go to Plugins → Installed Plugins.
- Find BookingPress in the list, and click the available Update link
After BookingPress is updated, it will run the latest version while keeping your existing settings and data intact.
Method 2: Manual Update Using WordPress Uploader
BookingPress can also be updated manually using the WordPress uploader.
- Download the latest version of the BookingPress plugin from your account.
- In your WordPress admin dashboard, go to Plugins → Add New → Upload Plugin.
- Upload the latest BookingPress ZIP file and click Install Now.
Since an older version already exists, a confirmation message will appear. Simply click on “Replace current with uploaded” to proceed with the update.
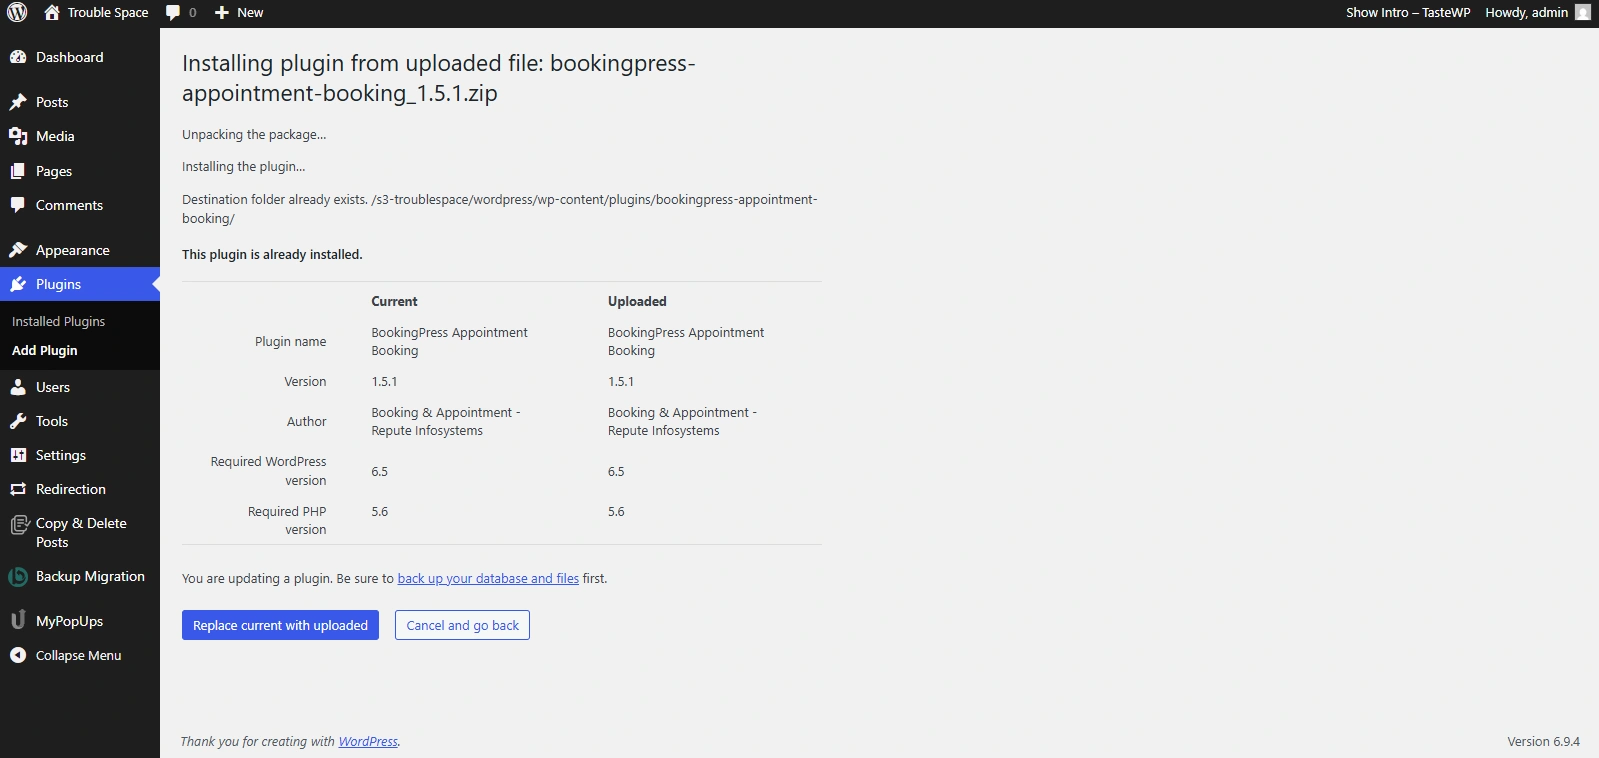
After installation, the plugin will be updated to the latest version and a success message will pop up.
Method 3: Manual Update via FTP
Manual update via FTP is useful if you want to manage your files directly or if dashboard upload is not available.
- Download the latest version of the BookingPress plugin.
- Unzip the downloaded file to your computer.
- Upload the
/bookingpress-appointment-booking-pro/folder to the/wp-content/plugins/directory of your site, replacing the existing files.
At last, refresh your WordPress dashboard to confirm the plugin is updated successfully.
How To Download and Get BookingPress Add-Ons?
If you activate BookingPress Pro, you’ll get access to 60+ premium addons – all available inside BookingPress Add-ons.
BookingPress addons can be installed individually based on your needs to keep your user interface clean and lightweight.
- In your BookingPress account, go to the Access Passes.
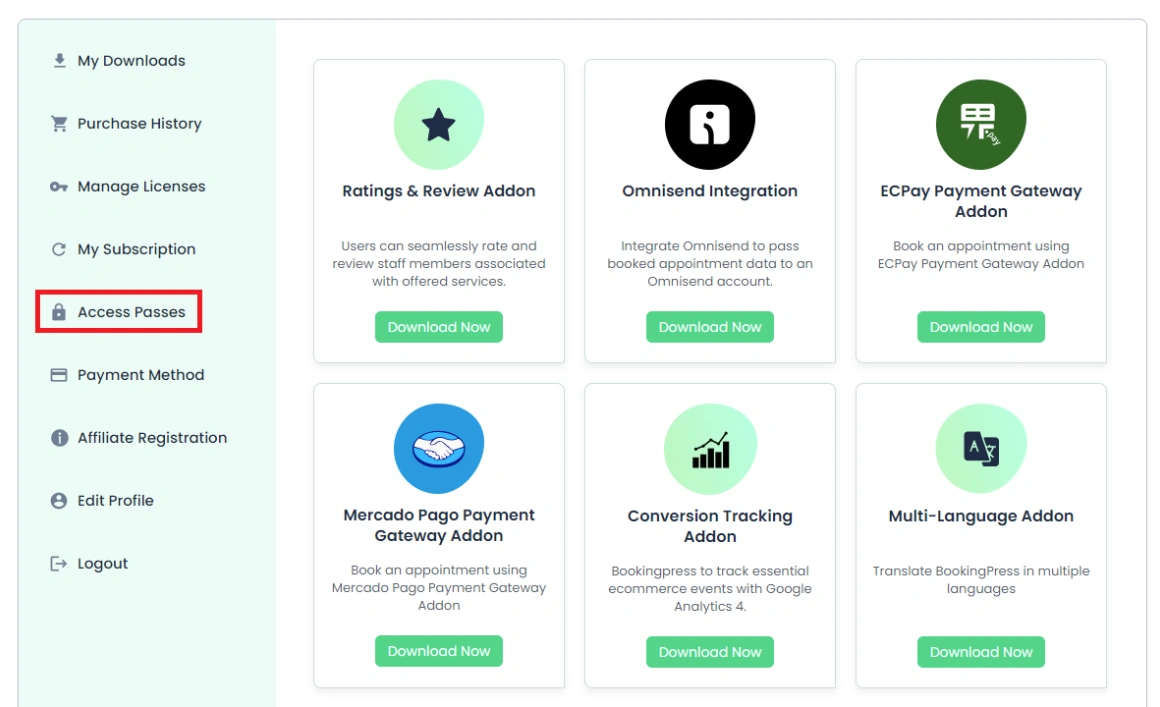
- Click on the “Download Now” button of any addon or integration you want.
- Head back to your WordPress dashboard → Plugins → Add New → Upload Plugin.
- Upload the zip files of addons, and click on “Install Now“, then Activate.
After activating addons in WordPress, go to BookingPress → Add-ons, and simply “Activate” the BookingPress addon you downloaded here.
Need a hand?
Our world-class support team is happy to help. Send us a message and we’ll take it from there.