

WhatsApp Notification Setup (Addon + Message Configuration)
WhatsApp notifications Addon in BookingPress allow you to automatically send booking updates via Twilio or Meta API.
In this guide, we’ll cover complete setup, template creation and message configuration.
How to Enable the WhatsApp Notification Addon
To start sending automatic notifications via WhatsApp, you first need to activate the WhatsApp Notification add-on from your BookingPress dashboard.
1. From your WordPress dashboard, head over to the BookingPress → Add-ons.
2. Activate the “Whatsapp Notification” addon which you’ll find under the Integrations section.
3. Click the Activate button.
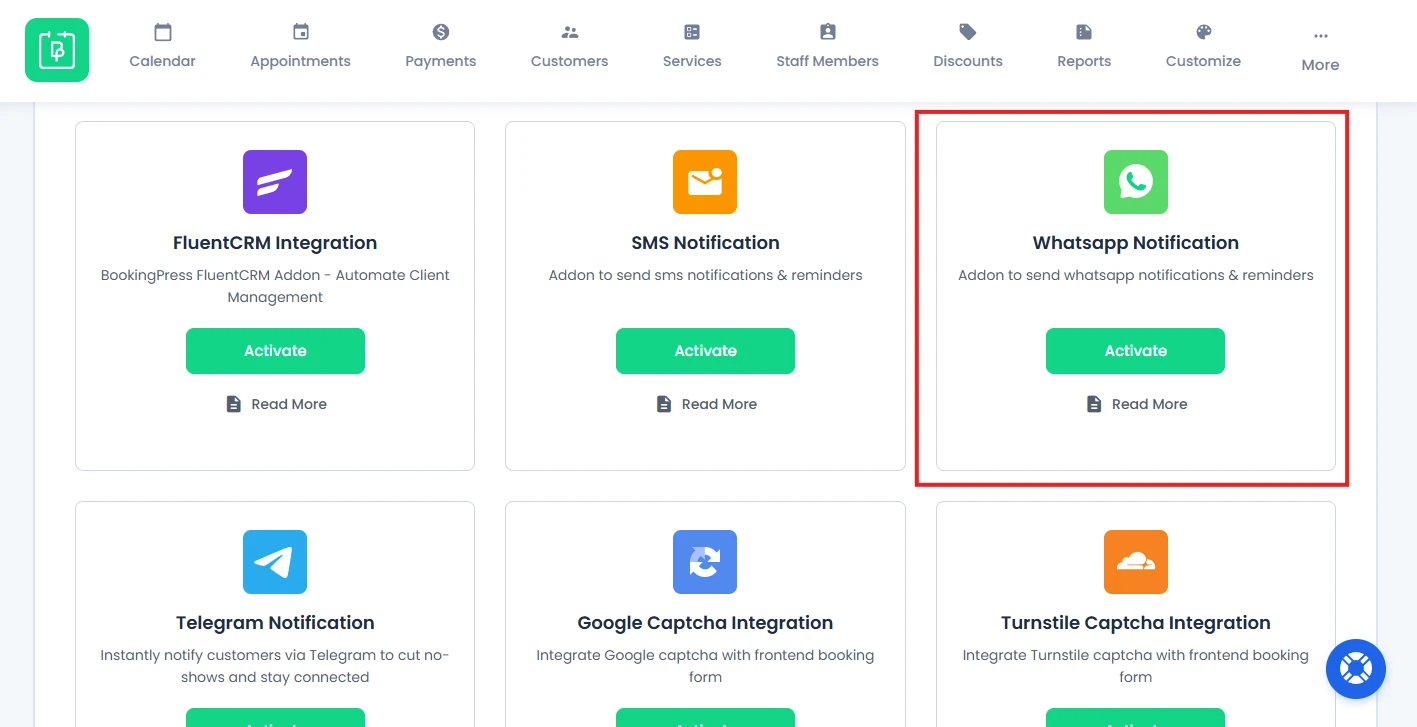
After activation, WhatsApp settings will be available under BookingPress → Settings → Notifications. Then scroll it till the Whatsapp Settings section.
WhatsApp Notification Integration Options
BookingPress comes with two WhatsApp gateways:
- Twilio
- WhatsApp Business (Meta Developer Platform)
You can choose either method based on your setup preference.
1. Twilio WhatsApp Configuration
How to Connect Twilio with BookingPress?
Inside API Configuration of Whatsapp Settings, select “Twilio” as the WhatsApp Gateway.
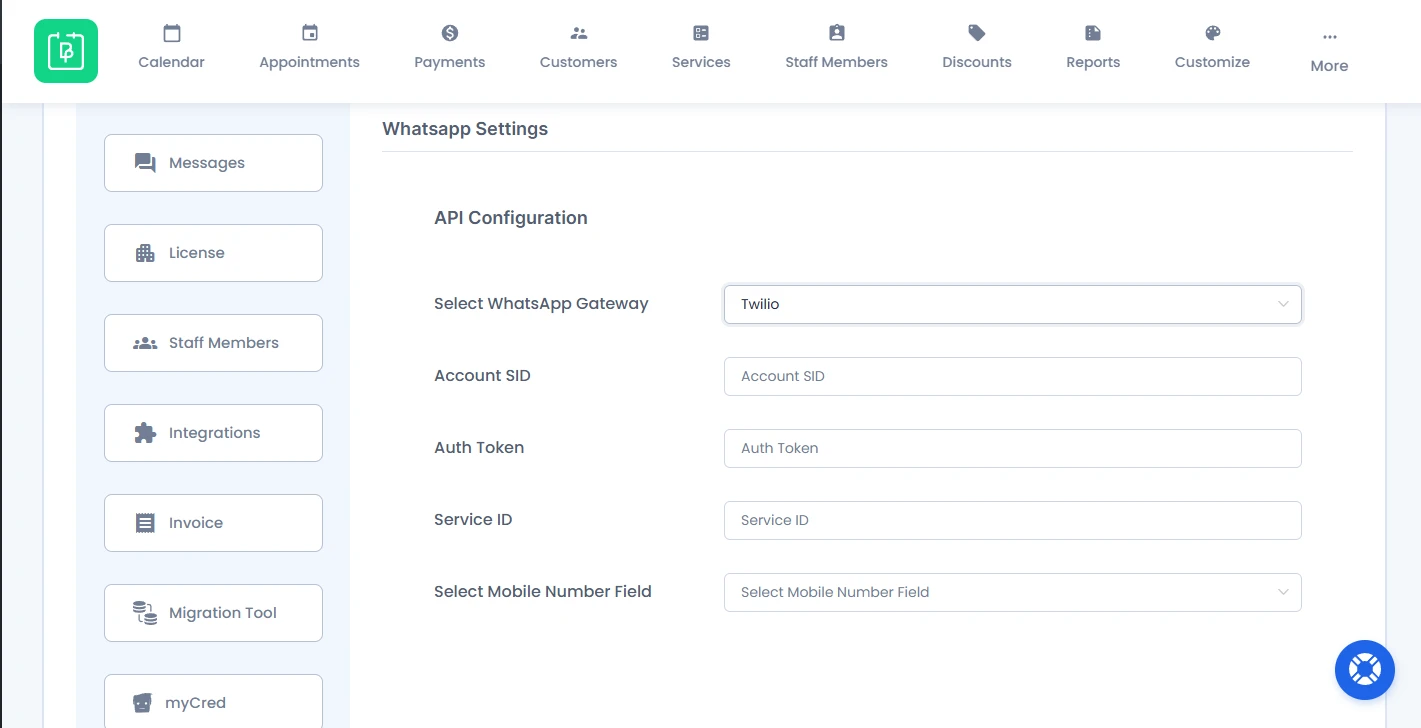
Now before moving forward, if you don’t have a Twilio account, then create one from here.
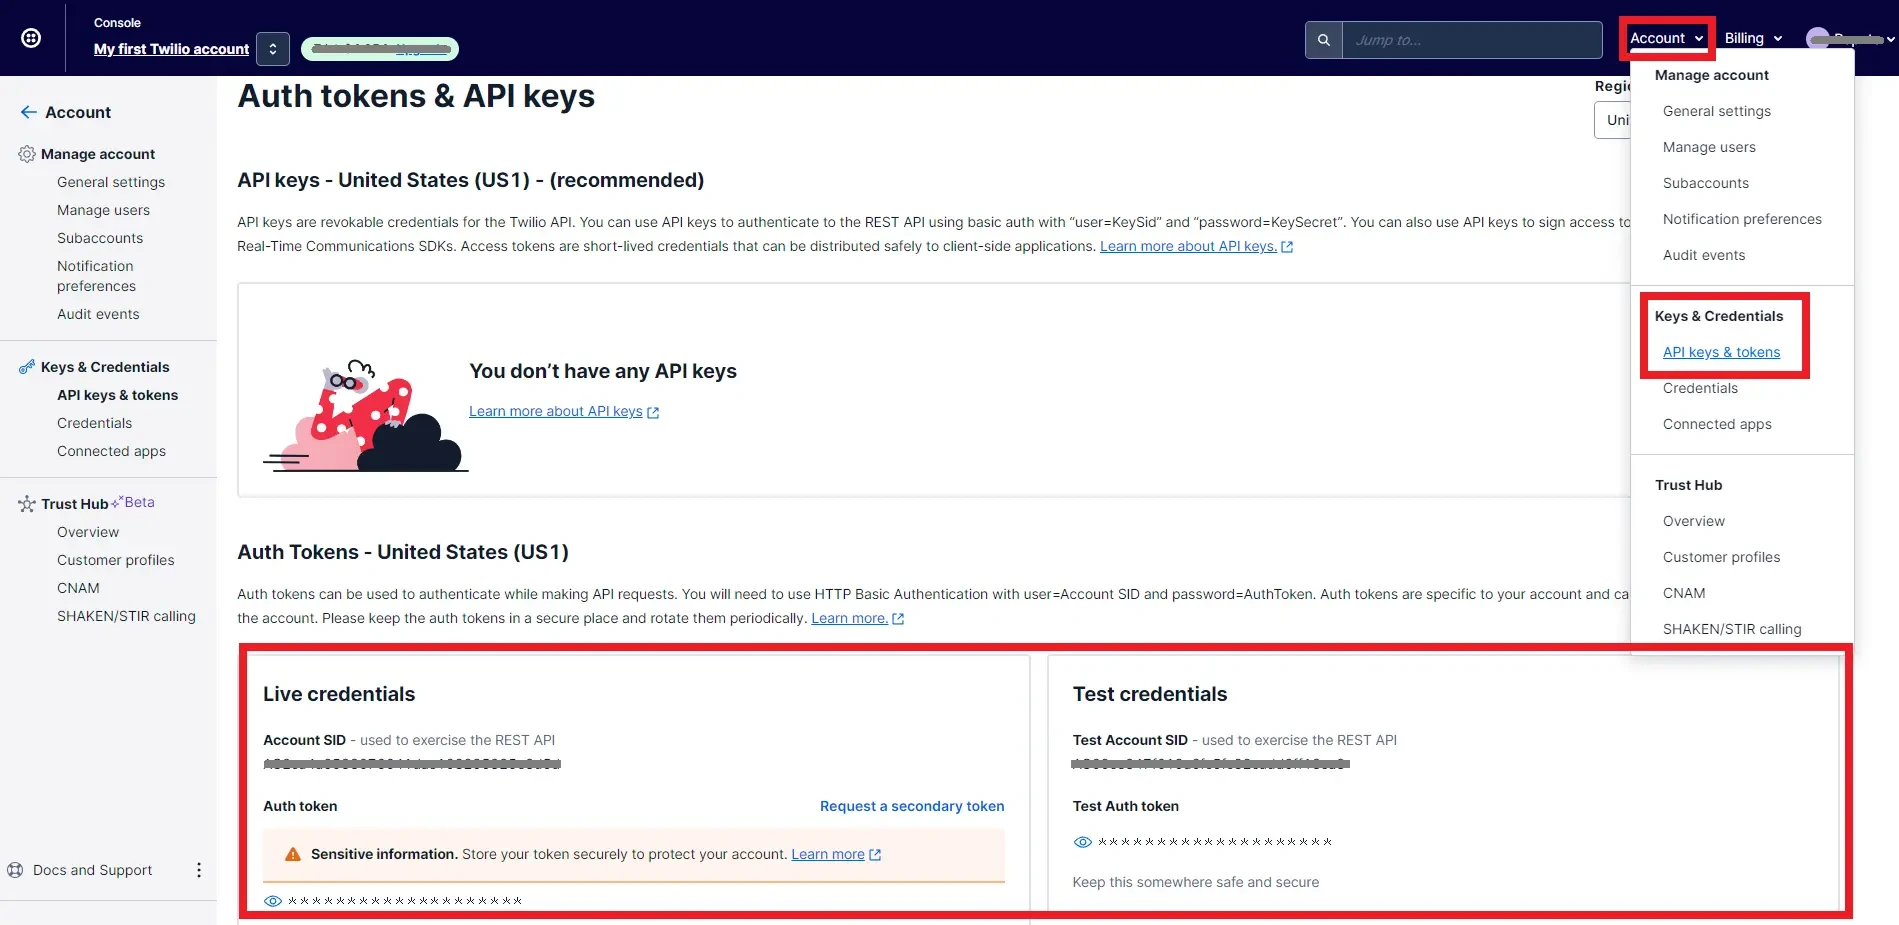
After creating the account, you can find your Account SID and Auth Token from Twilio → Account → Keys & Credentials → API Keys & Tokens
How to Get and Add a Phone Number for sending notifications?
After signing up and creating an account, get your “WhatsApp number” ready for sending notifications by following the below steps:
From the left side panel, under the “Develop” section, go and click on #Phone Number → Manage → Buy a number .
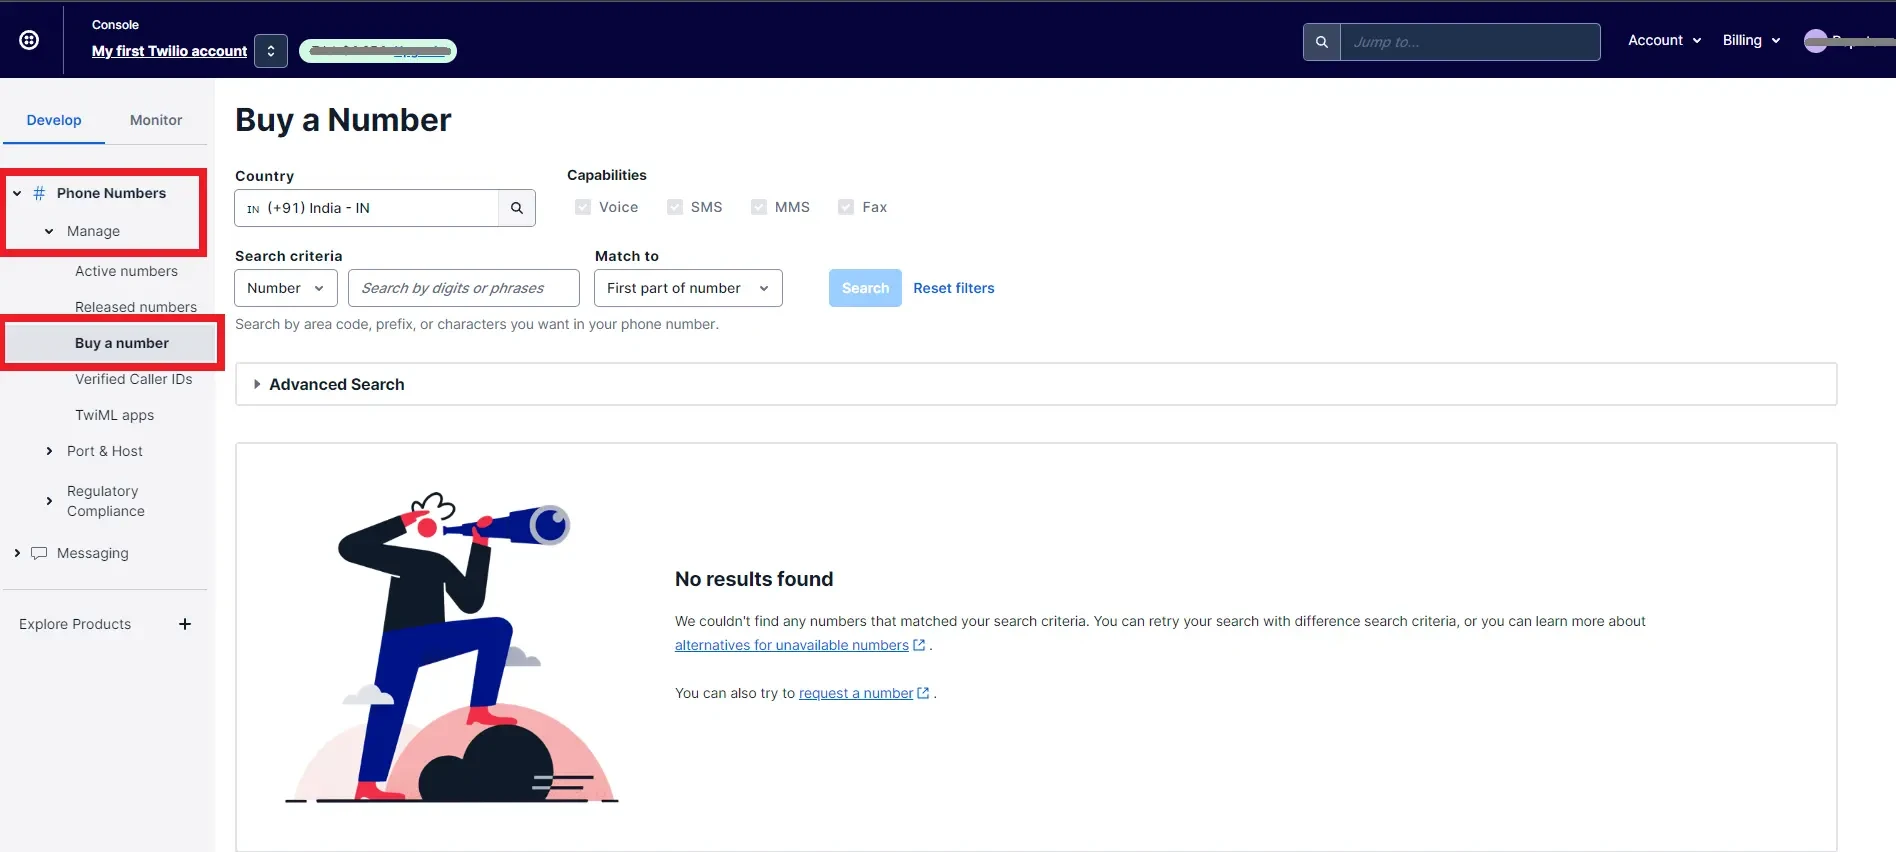
Here you can purchase the number according to your requirements.
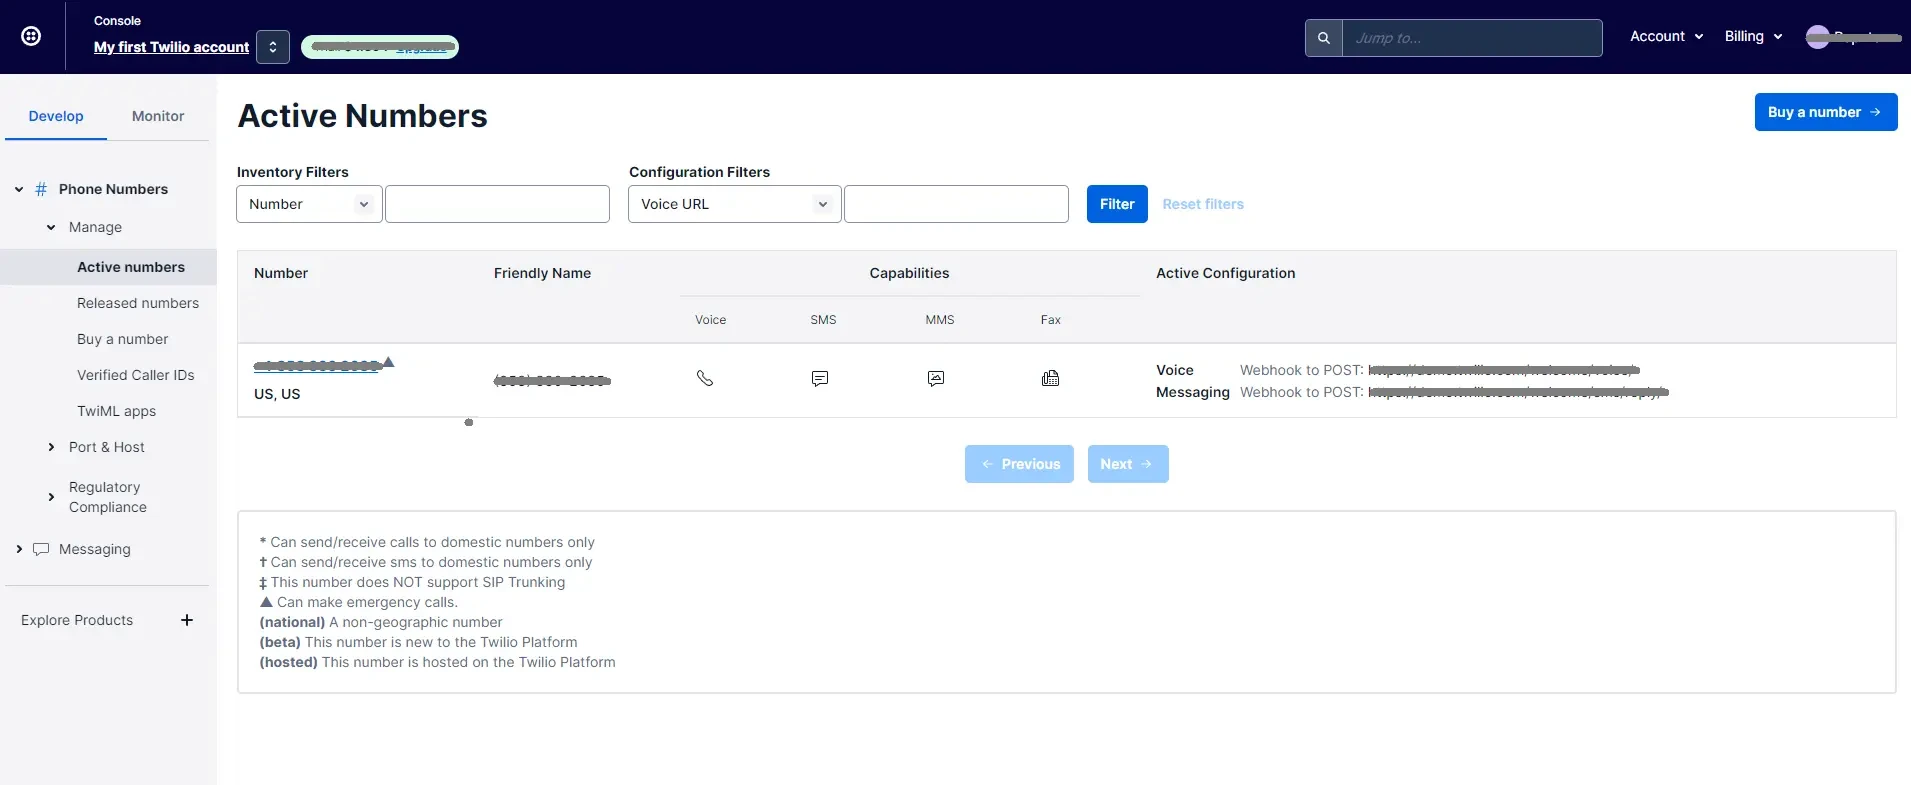
After purchasing the phone number for sending messages, you can view and copy your active numbers from #Phone Number → Manage → Active numbers.
Changes in the BookingPress Panel (For Old Users Only)
Note: This step is applicable only for old BookingPress WhatsApp add-on users (v1.8 and prior).
A new section titled Message Type has been introduced in BookingPress → Settings → Notifications
It offers two options:
- Template.
- Free Form.
It is recommended to use Template, as Free Form is an older version and does not comply with the new WhatsApp standards.
When selecting Template, you will need to add a Service ID.
Fetching Service ID for Twilio and Configuring It
1. Log in to the Twilio console.
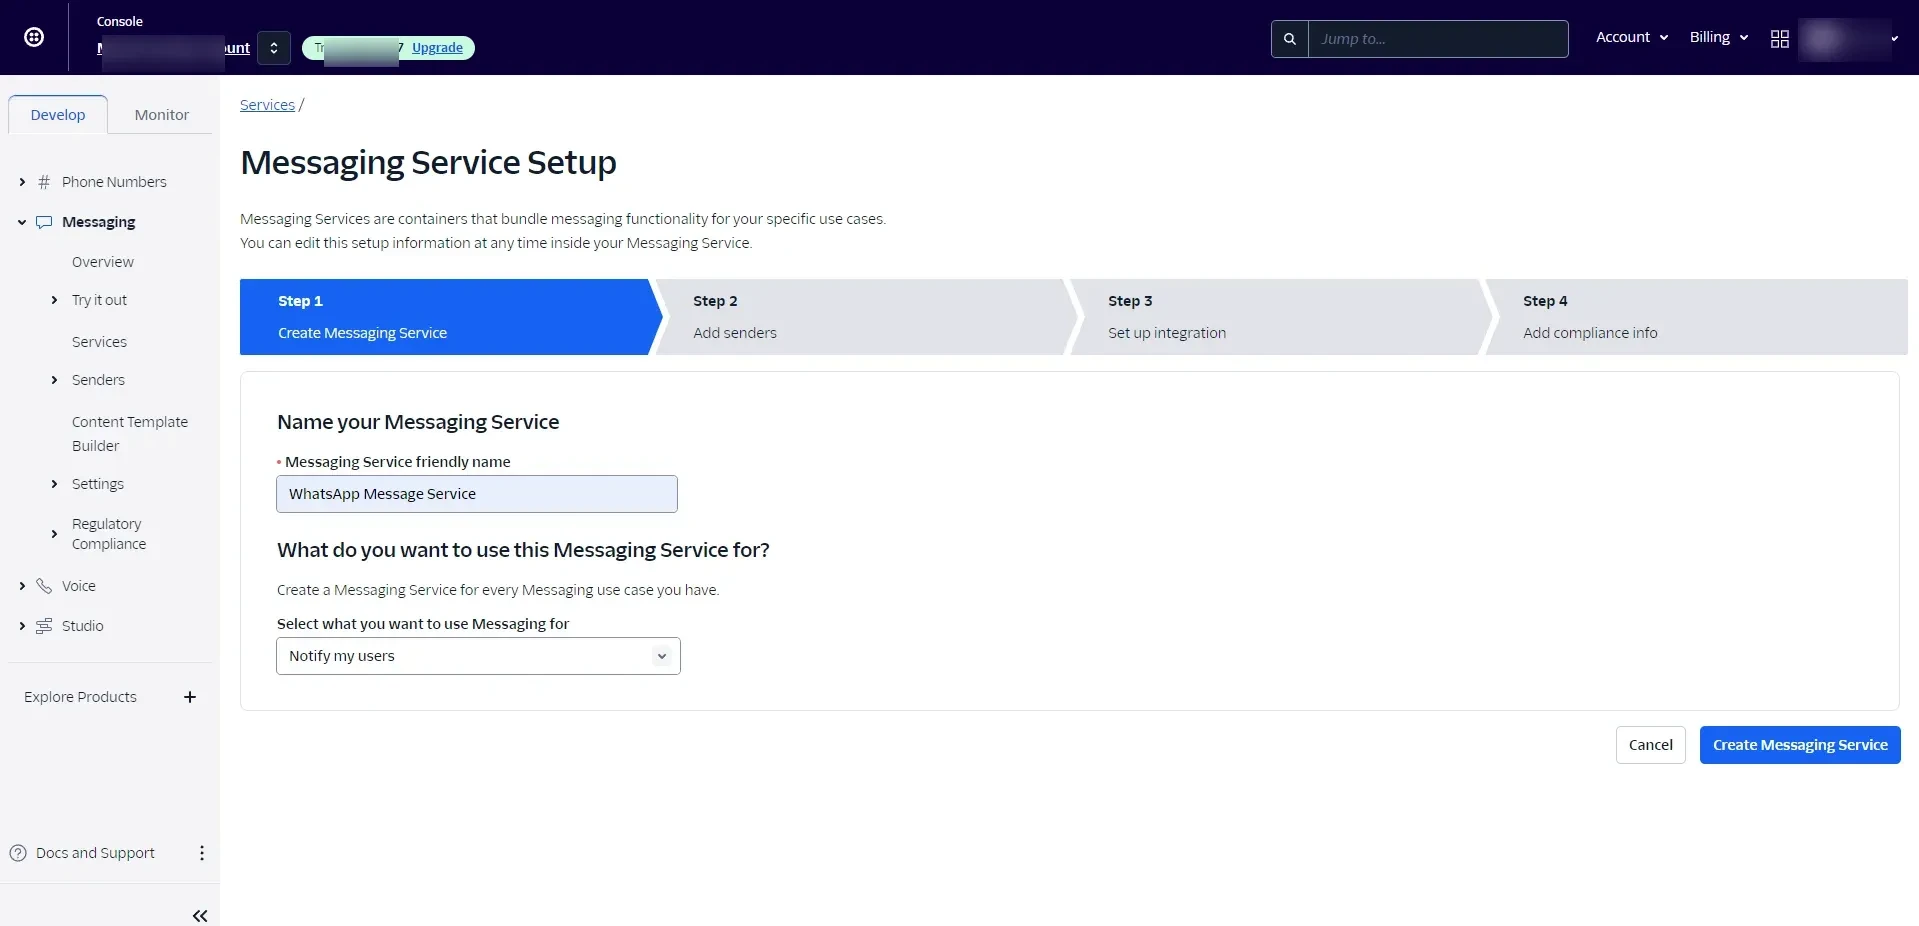
2. Now go to Develop → Messaging → Services. If needed, click Create Service.
3. Enter basic details such as the service name.
4. Ensure to select Notify My users for the option Select what you want to use Messaging for.
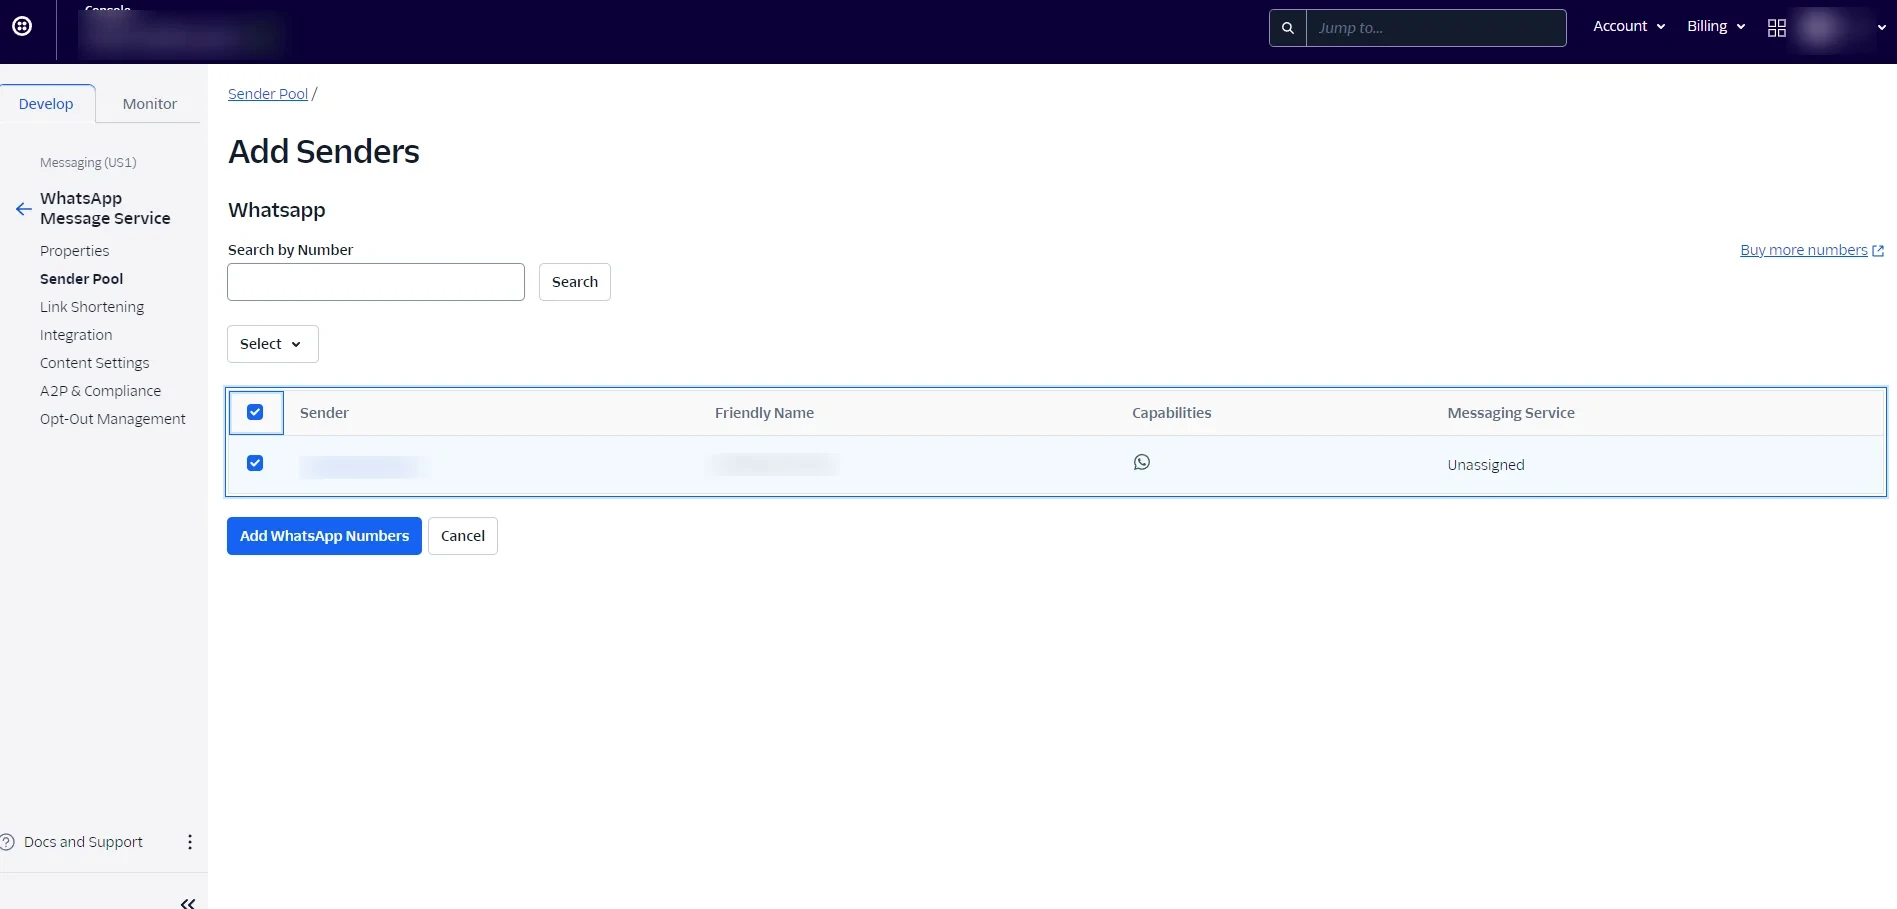
5. Click Add Senders, and choose the WhatsApp Phone Number.
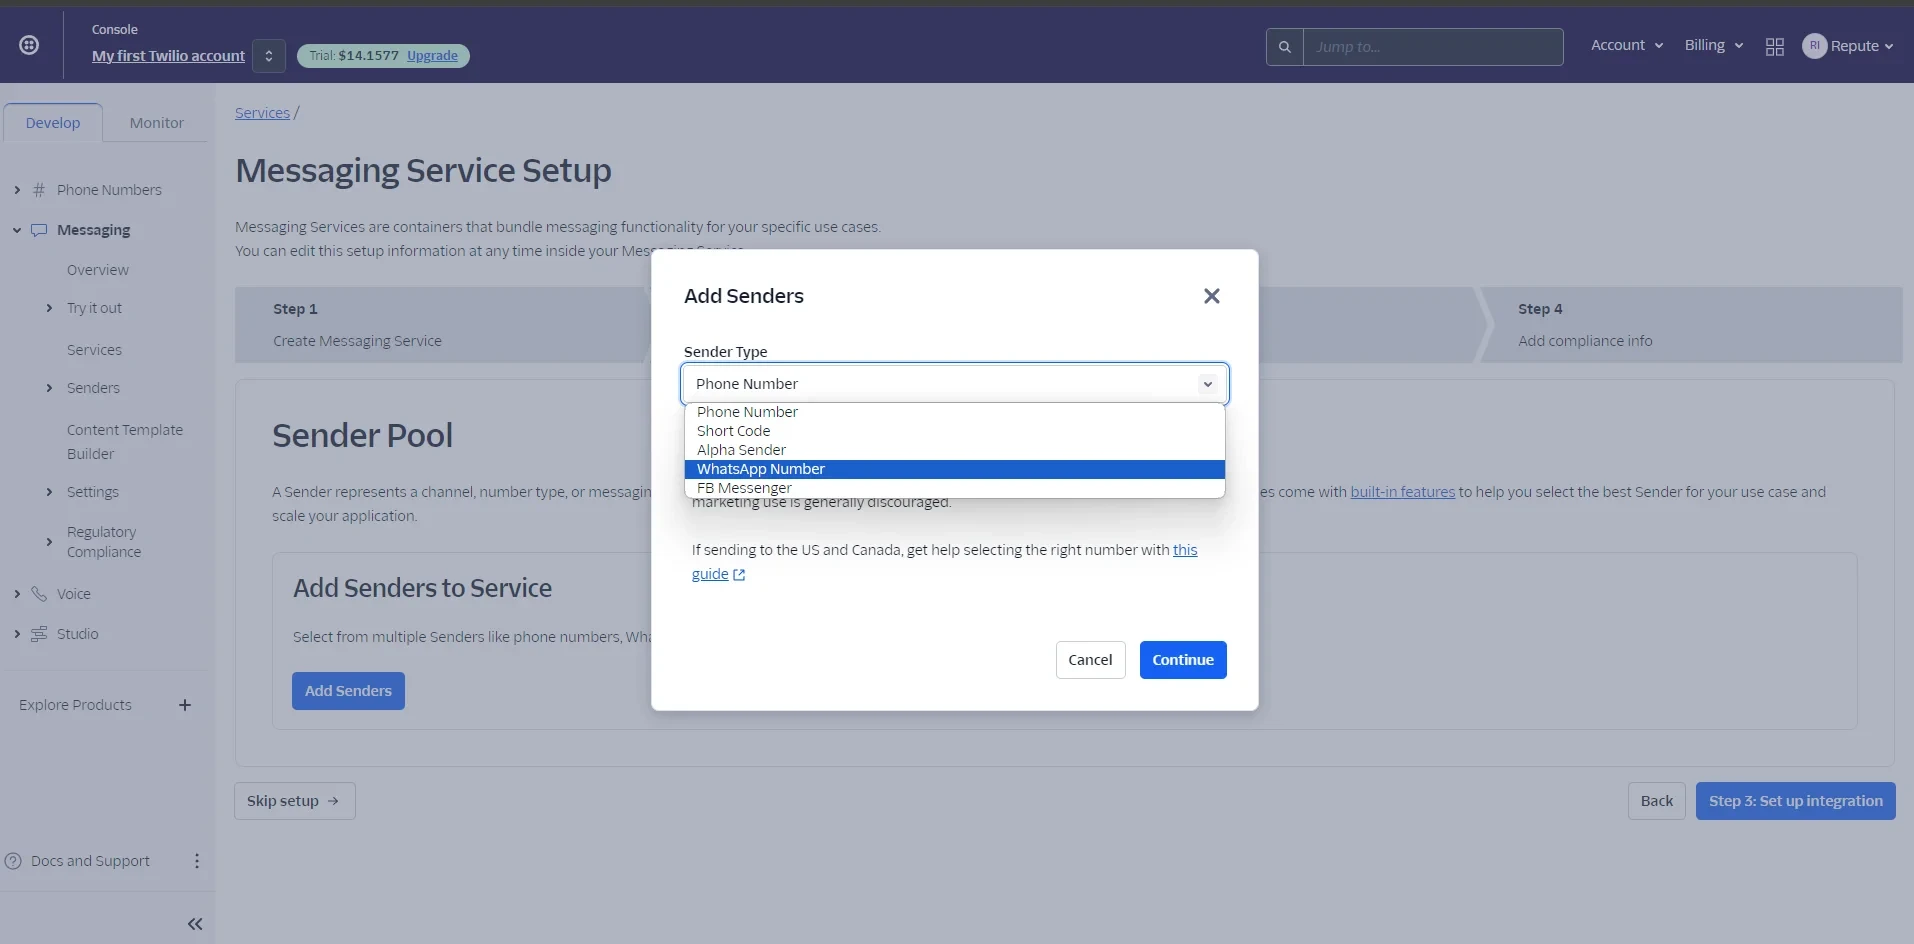
6. In the Sender Type, choose WhatsApp Phone number exclusively. Your WhatsApp numbers will be displayed; select the desired number and click on Add WhatsApp Numbers.
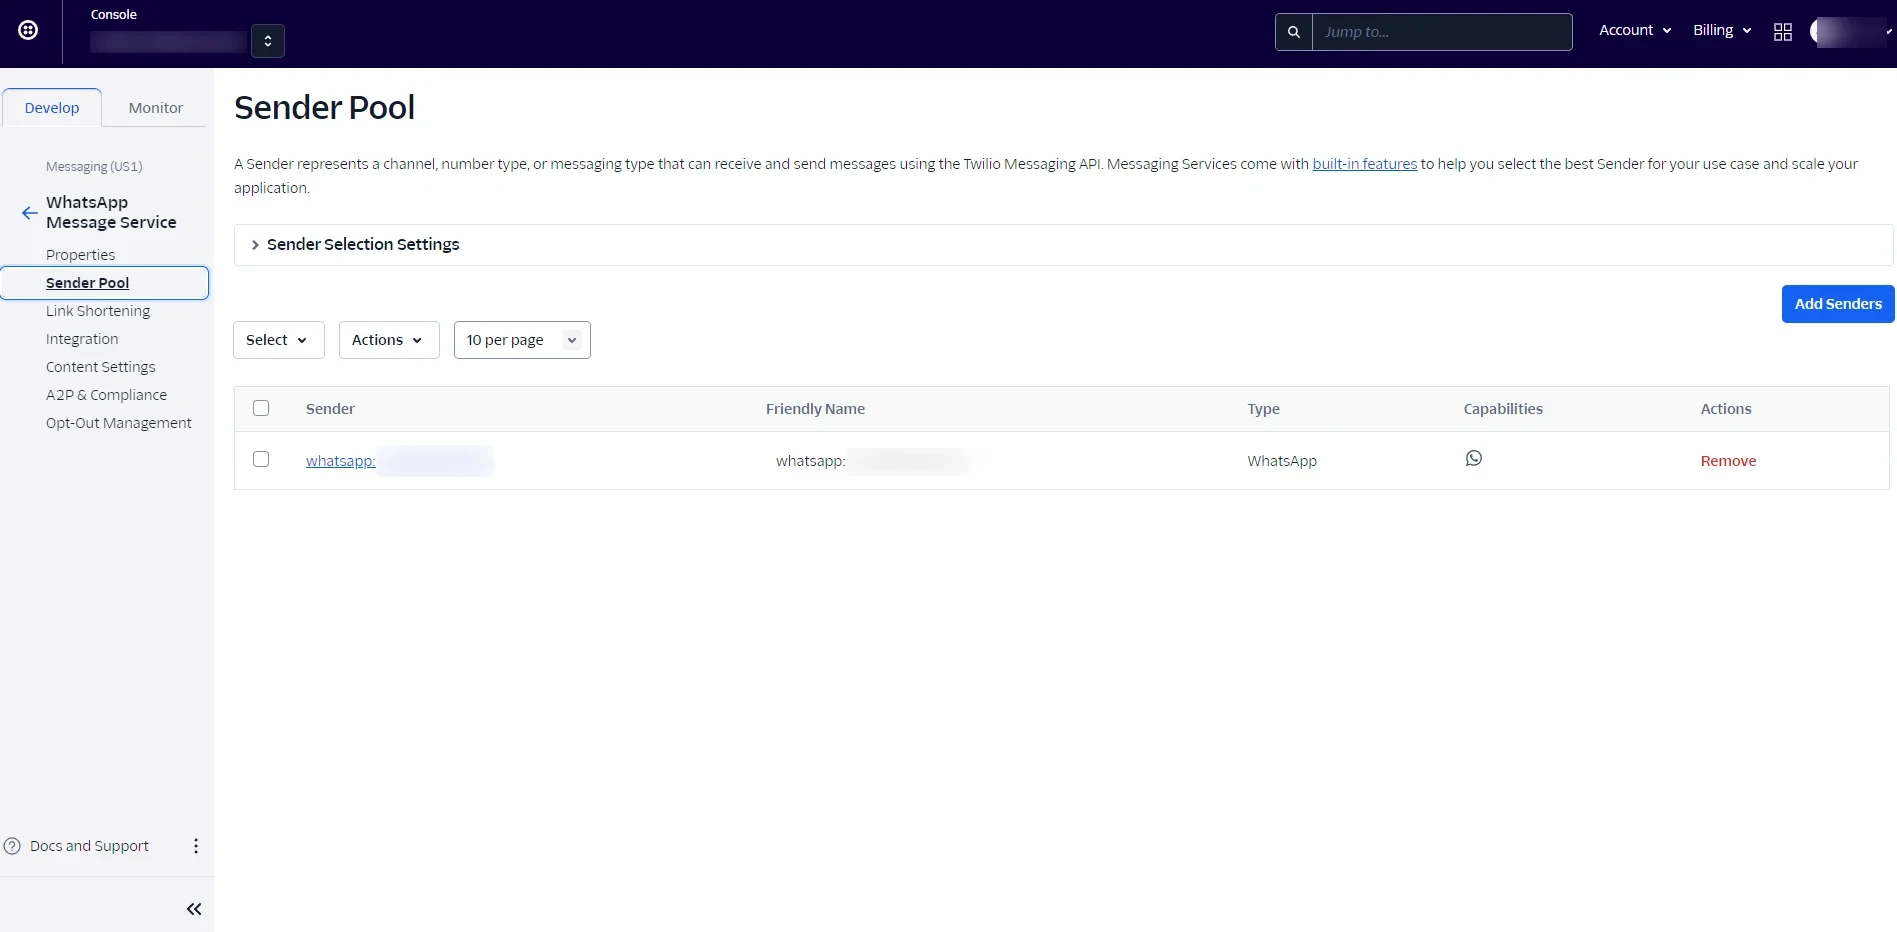
7. If the Actions status updates to Remove, it shows that your number has been successfully assigned to this service.
8. At last, ensure to select Drop the Message. Now hit the Complete to finish the setup and return to the main page.
Once done, you will receive a Service ID (SID).
Simply add this Service ID in BookingPress → Settings → Notification → WhatsApp Settings.
Content Template Builder for Twilio
Now we will have to create a template for your WhatsApp message which will be shared with your customers.
To create a template please follow the below instructions go to the Develop → Messaging → Content Template Builder.
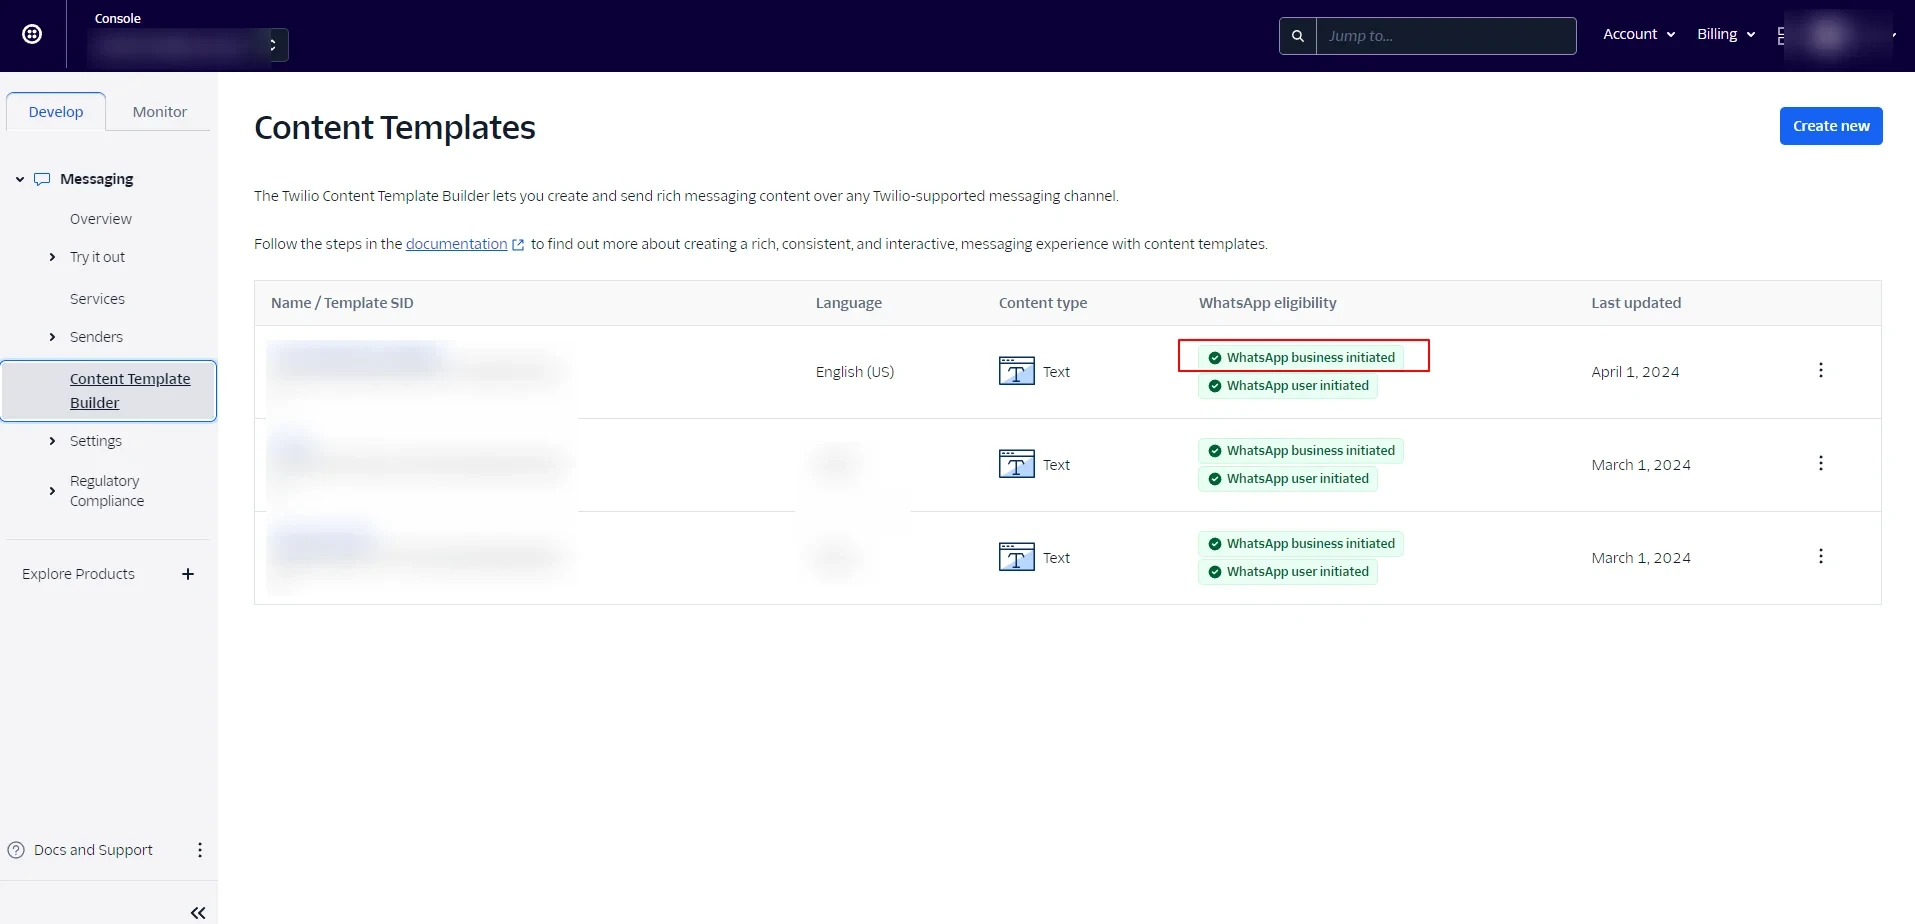
This dashboard shows all created templates along with their status.
Please Note: The templates only WhatsApp business initiated in green will work properly. This indicates that it follows the updated guidelines, if it is in red then your message/template wont be forwarded.
Creating a New Template
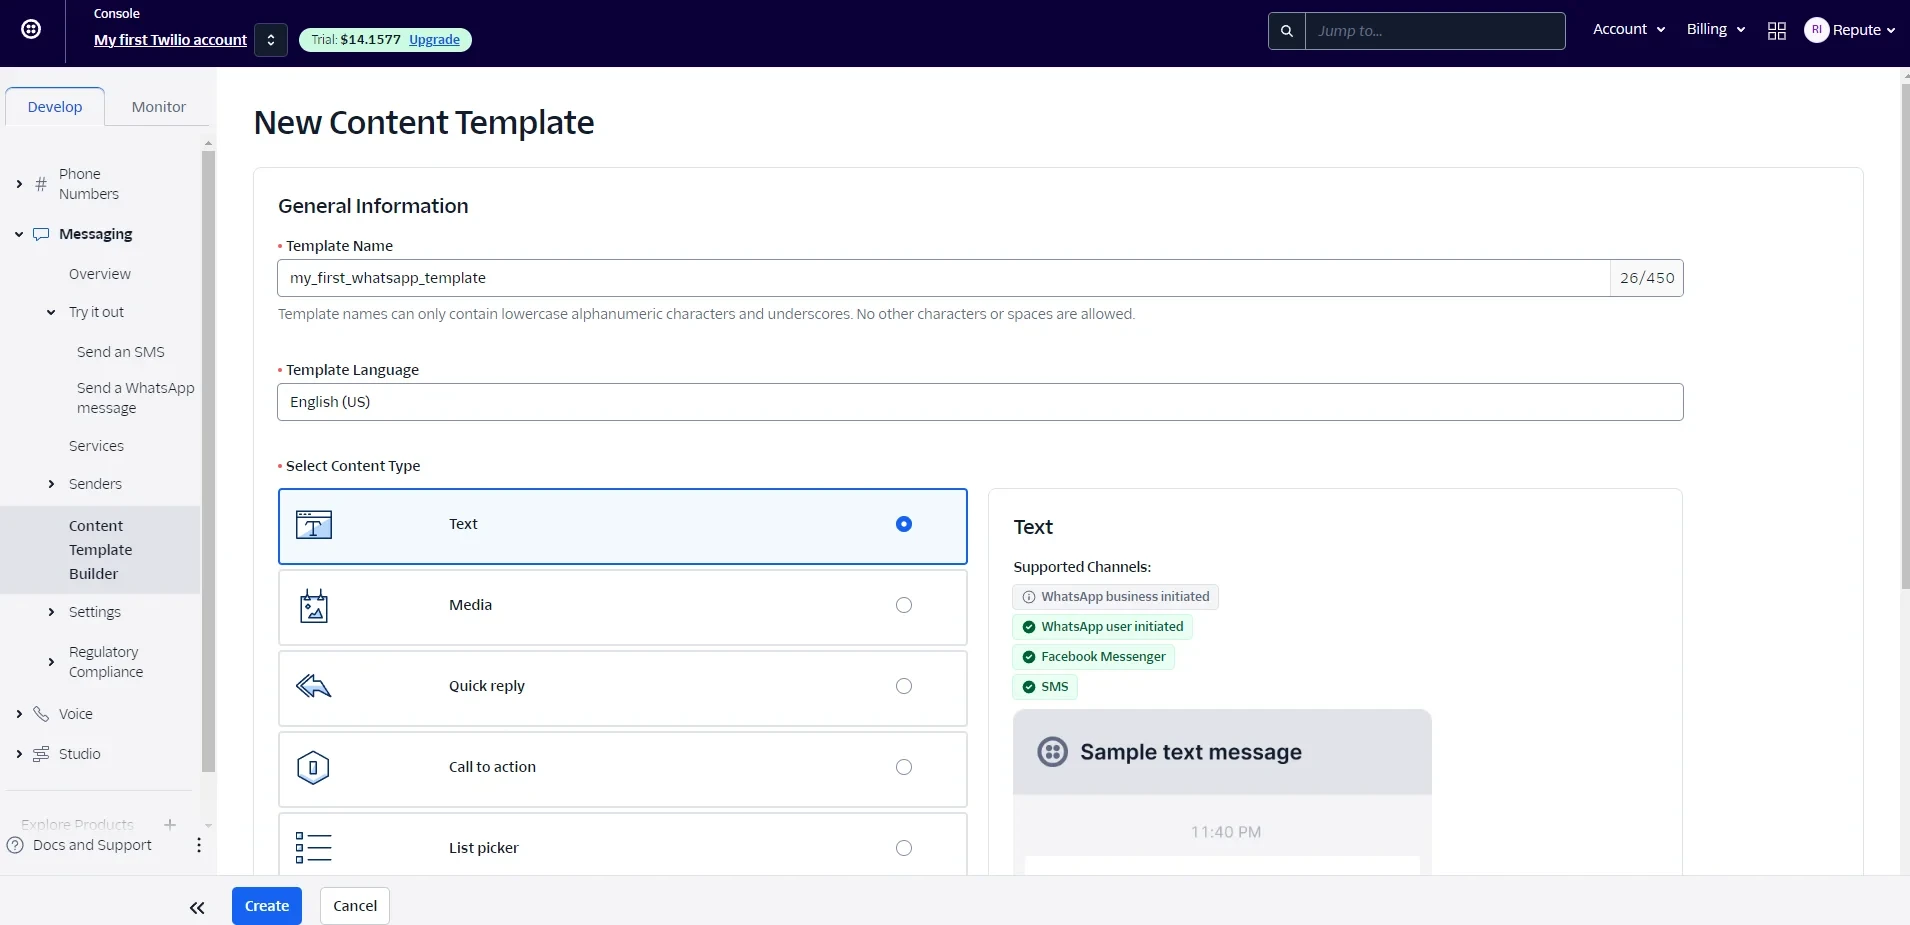
- Click on the Create New button to start crafting a new template.
- Enter your desired template name and select the template language.
- For Content Type, ensure you select Text only, then click Save.
Adding Message Content
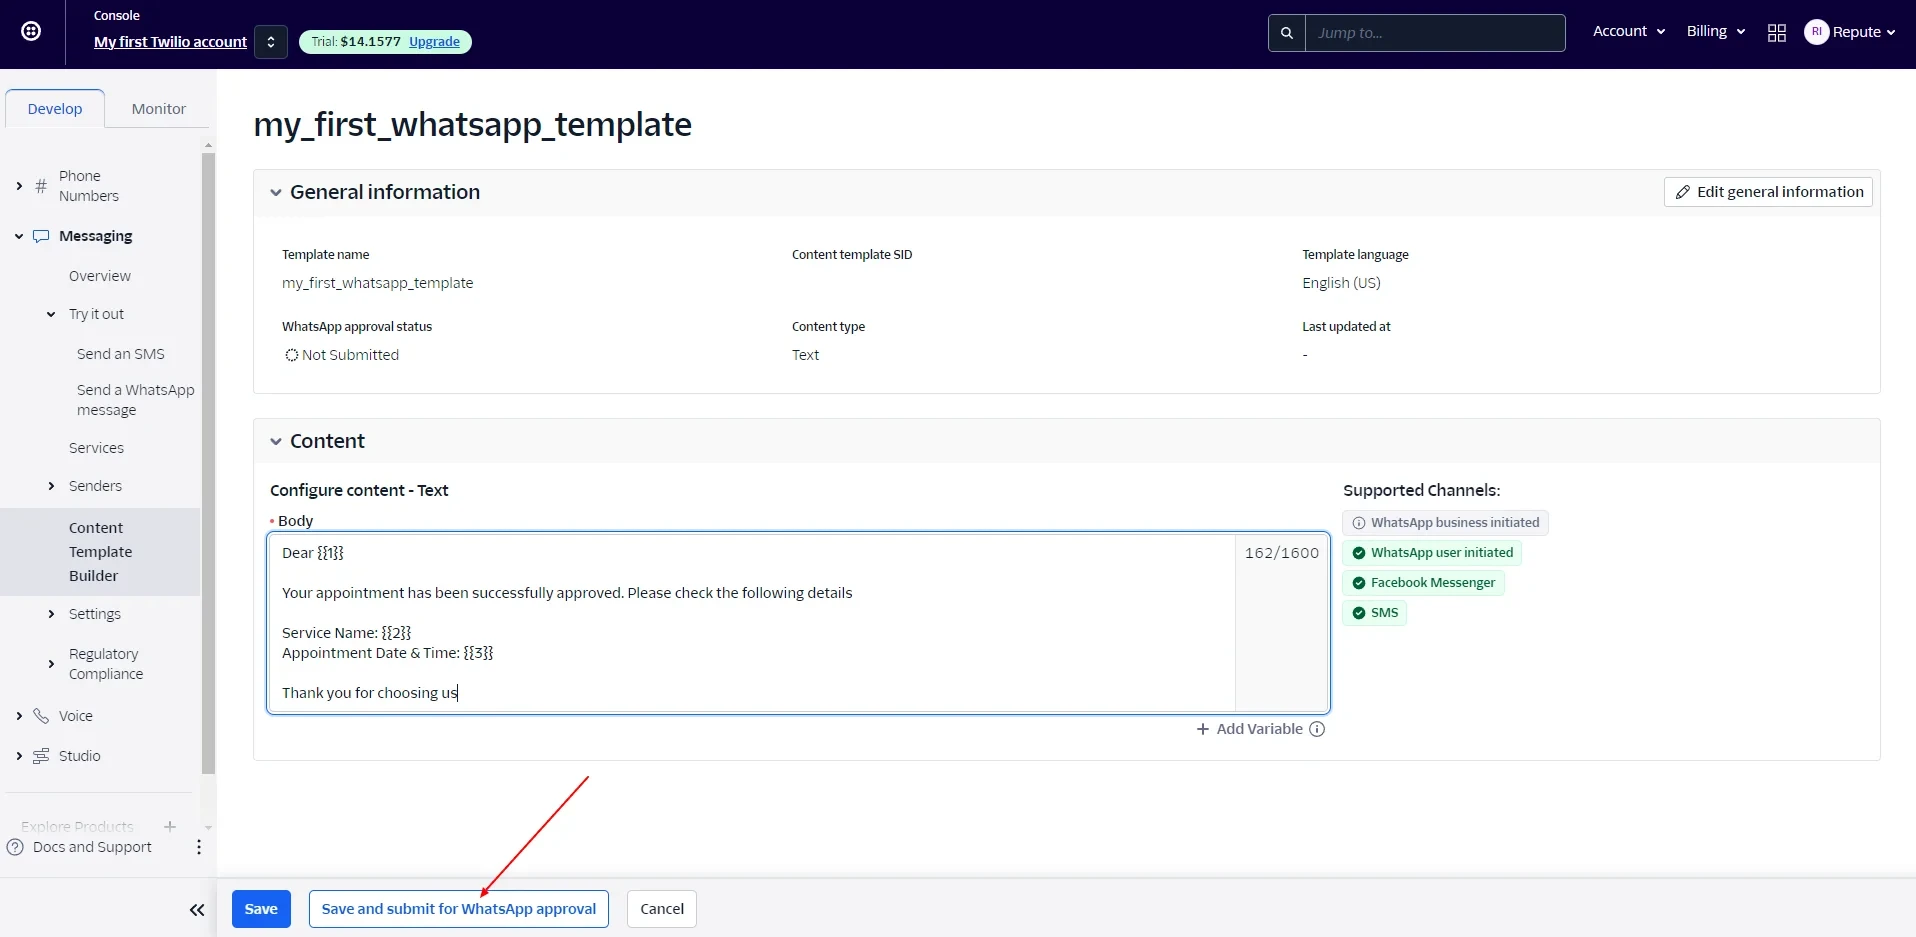
- Enter your message in the textbox.
- Click + Add Variable to insert placeholders.
Note: Avoid ending your message with a variable, as it may increase chances of rejection.
Submitting for WhatsApp Approval
1. After entering your content and variables, click on save and submit for WhatsApp Approval, not just save alone.
2. A pop-up will appear from where you can enter your Samples of variables. After the samples are entered Save with Samples.
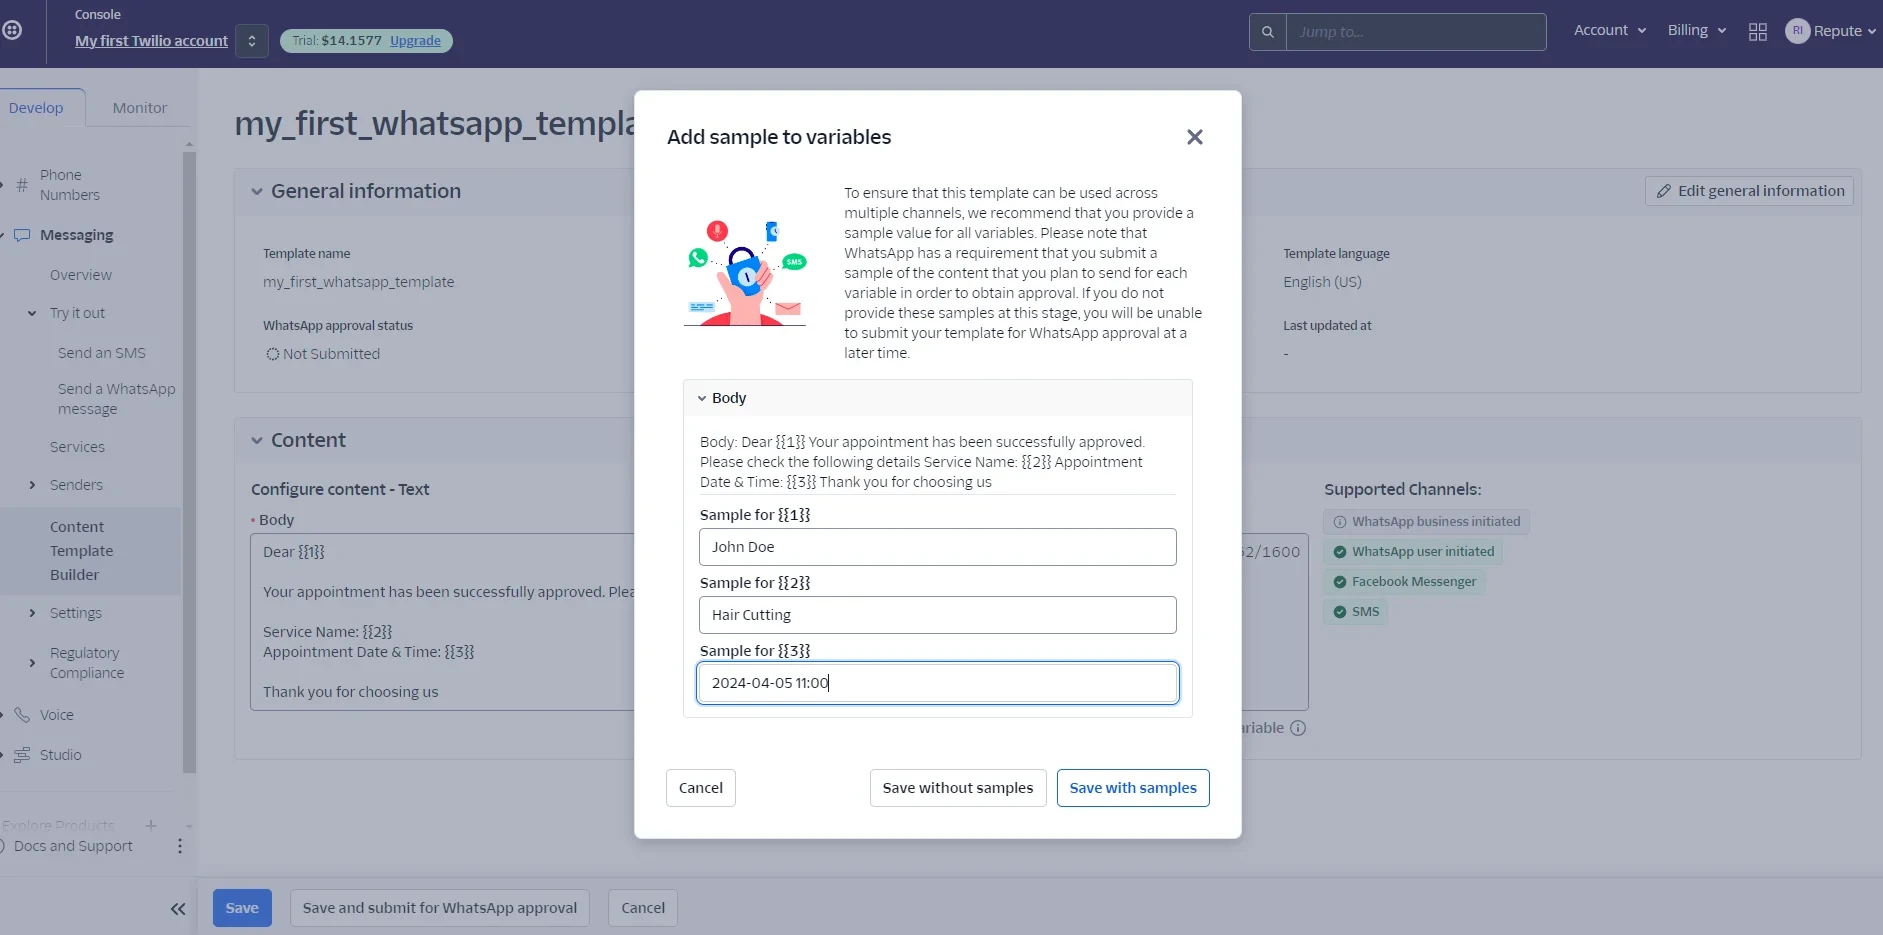
3. After that, make sure to select Utility under the category. Also, keep the Allow WhatsApp to recategorize this template checkbox ticked to increase the chances of approval.
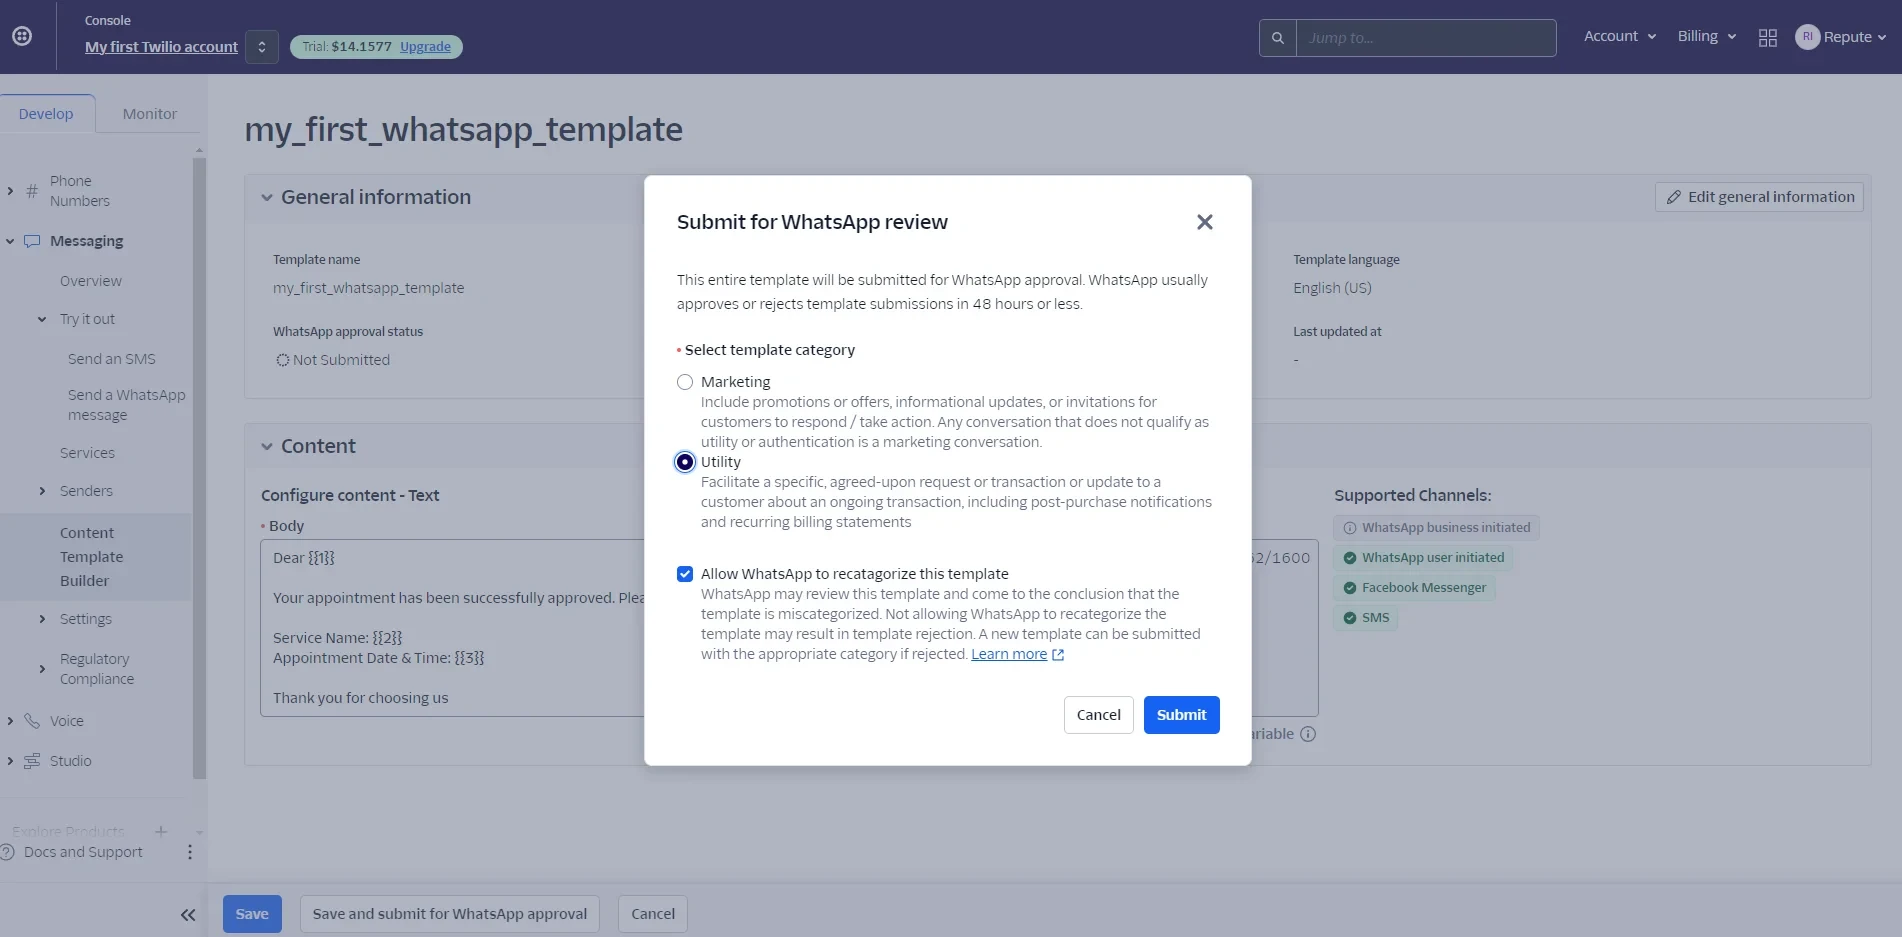
4. Hit on the submit button, and that’s it.
Configuring BookingPress Settings
Last but not the least. Go back to your WordPress dashboard →BookingPress→ Settings → Notifications. Now enter the Service ID you got from Twilio.
Don’t forget to hit on the Save button to apply the changes.
2. WhatsApp Business (Meta) Configuration
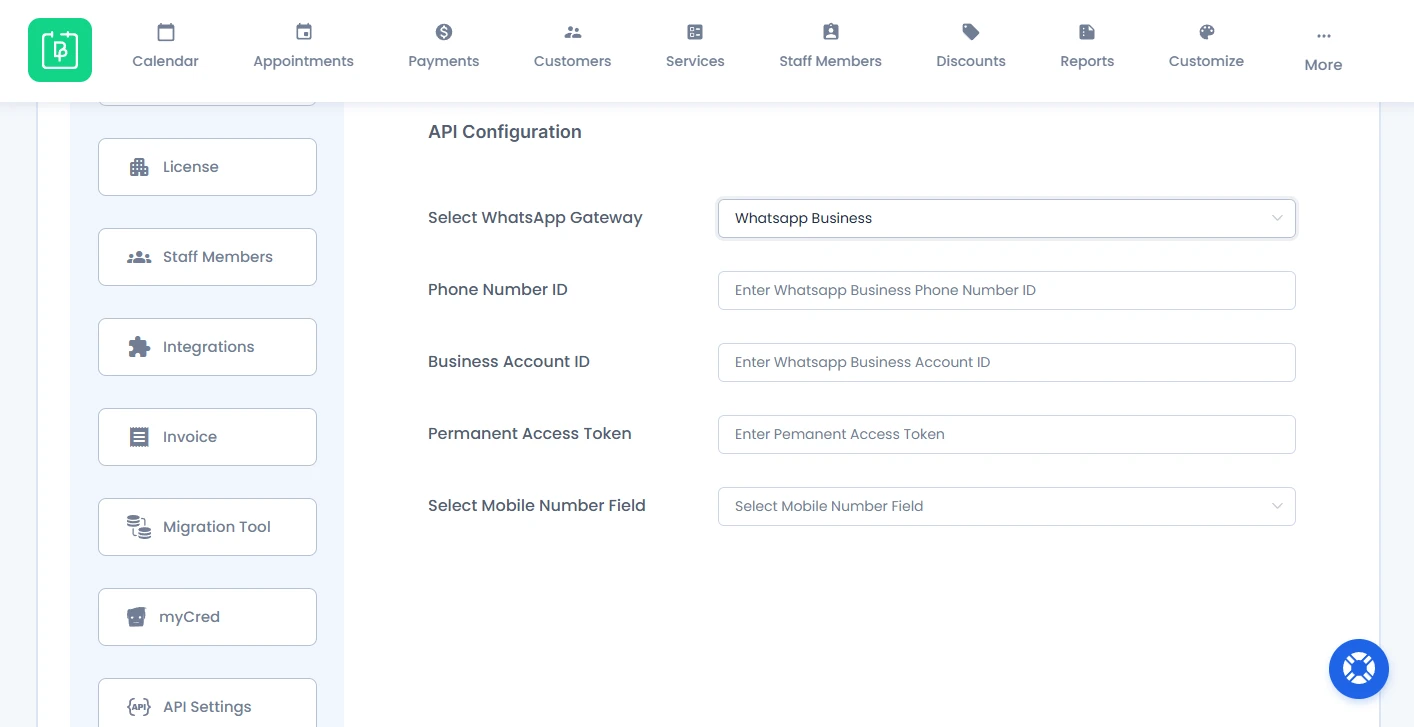
If you want to use WhatsApp Business as your WhatsApp Message Gateway, there are many steps to follow.
Most importantly, understand that these steps adhere to the official Facebook Meta guidelines for creating templates for your WhatsApp Integration. These templates are designated for notifications exclusively; they cannot be utilized for direct client communication afterward.
Getting Started
Firstly, Visit Facebook for Developers to access the platform for app development and integration.
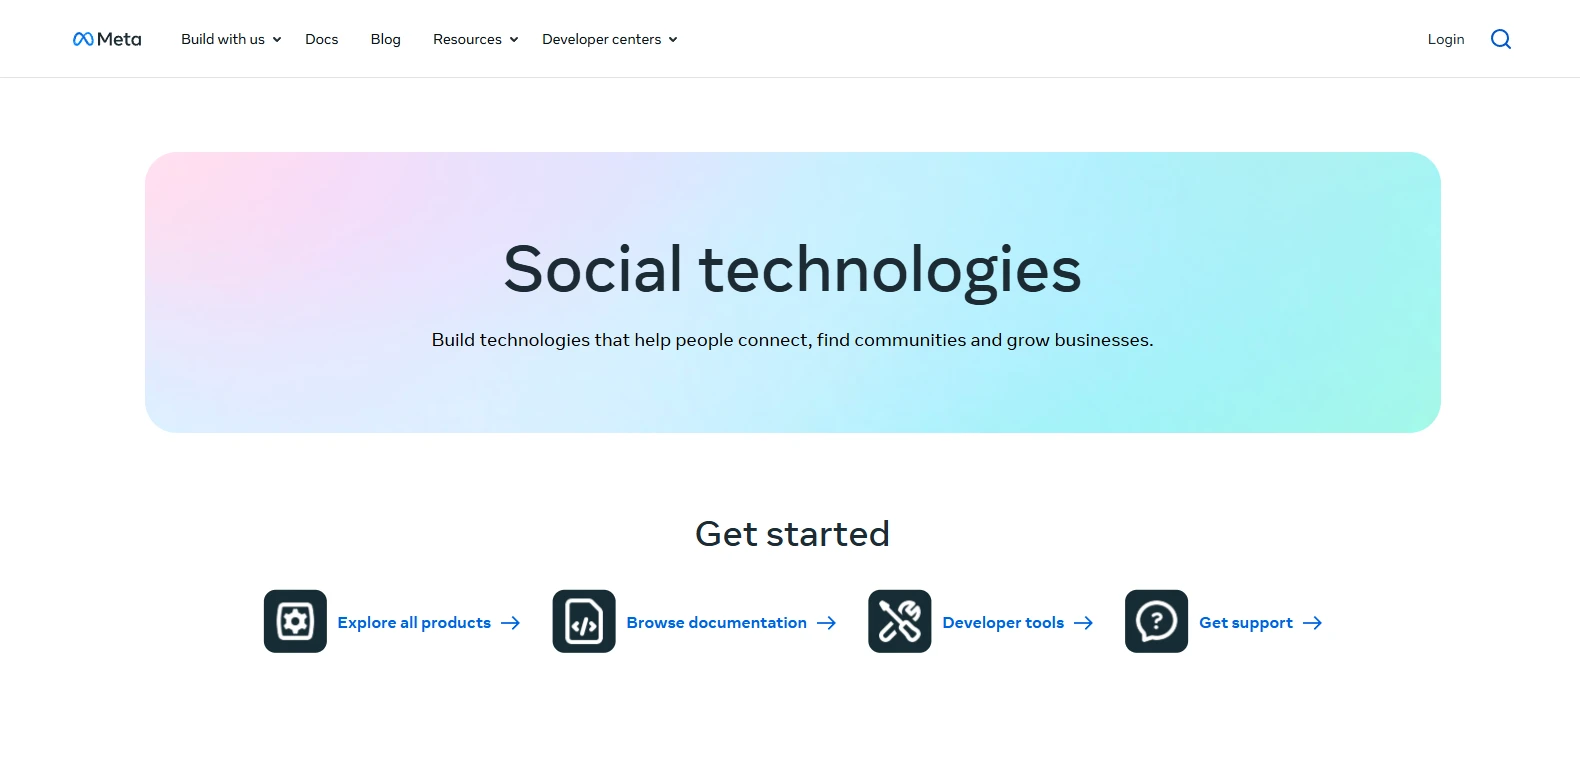
In the upper right corner, click on “Log In” and use your existing Facebook account credentials to log into the Facebook Developer platform.
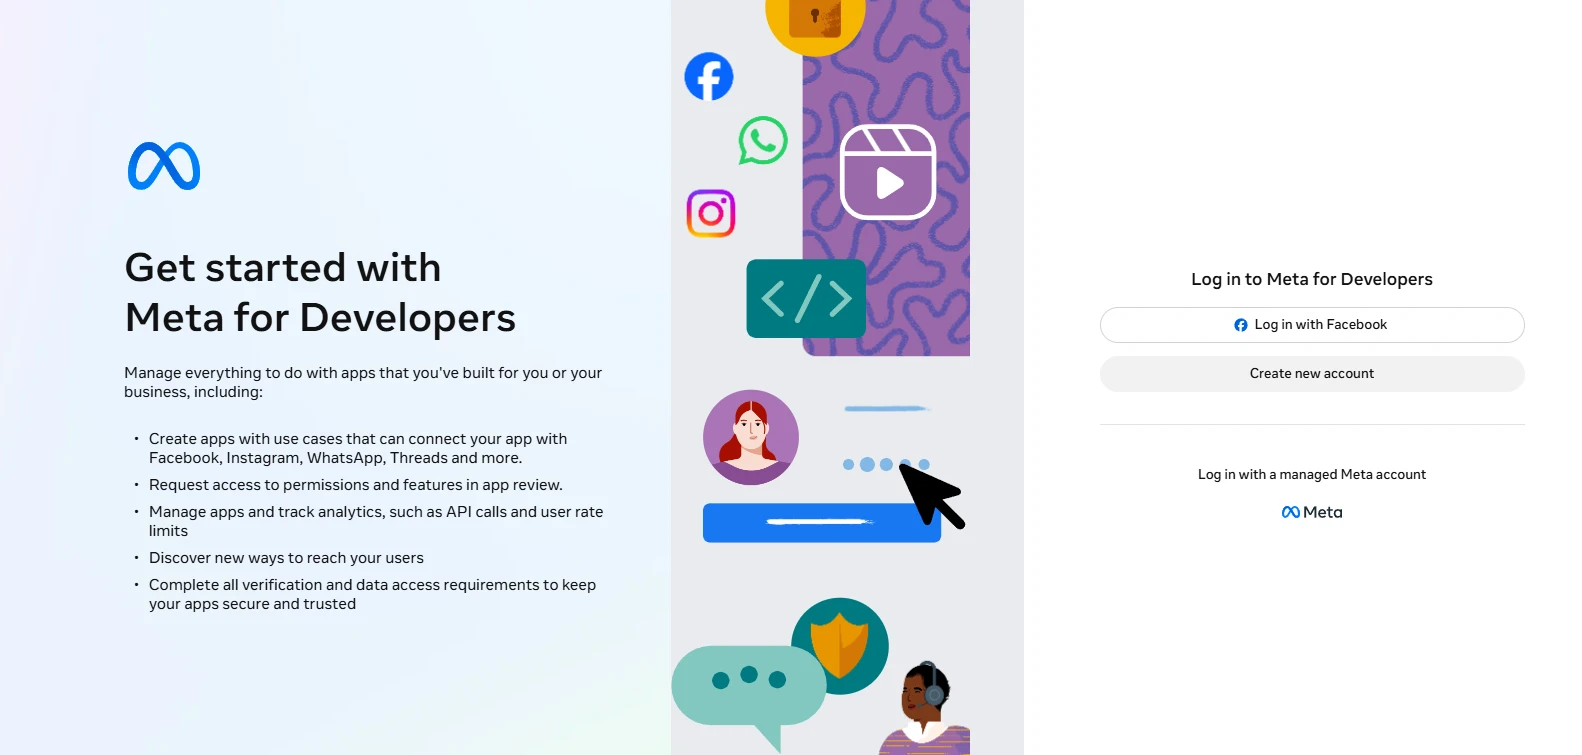
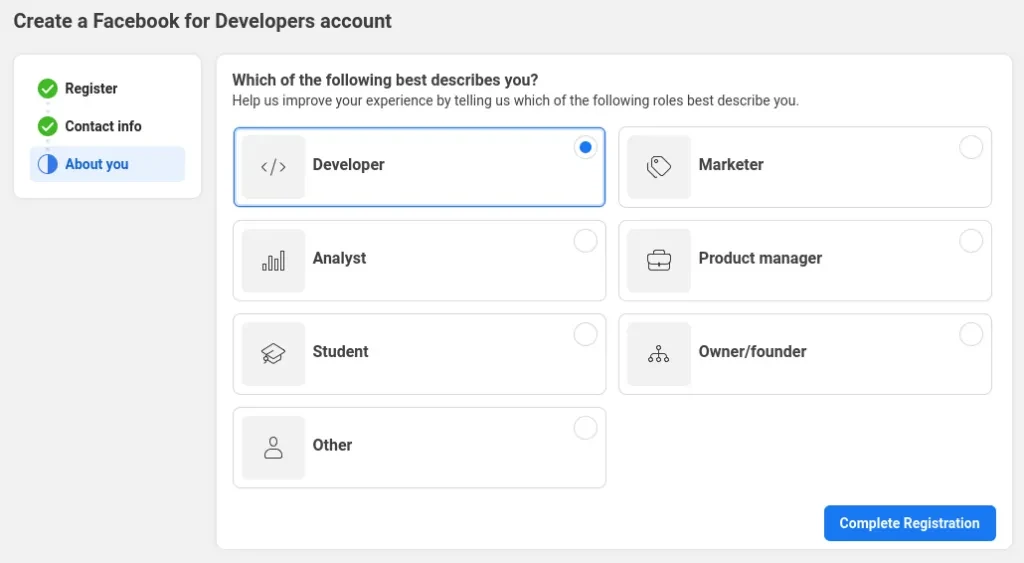
After login in, complete your registration and all verification (phone/email) asked.
Once the email is verified you can move to the next step which is the last step. We recommend you to select “Developer” but that totally depends on you it can be selected as per your liking.
App Creation
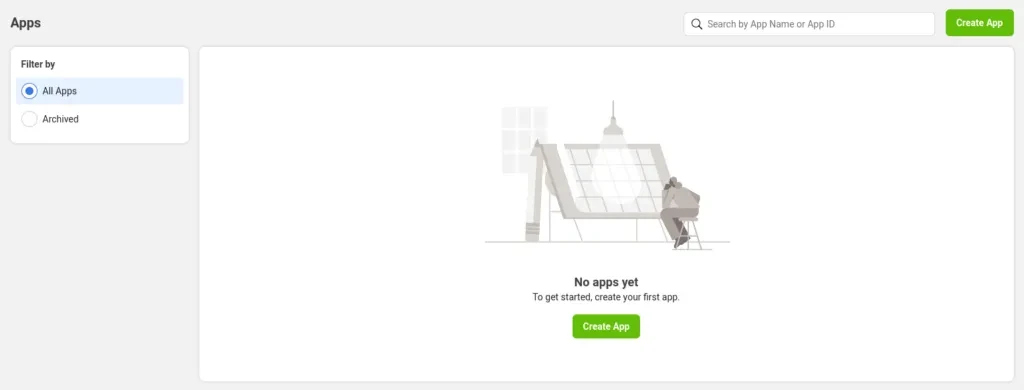
Within your Facebook Developer account, navigate to the dashboard or app creation section and click on “Create App”.
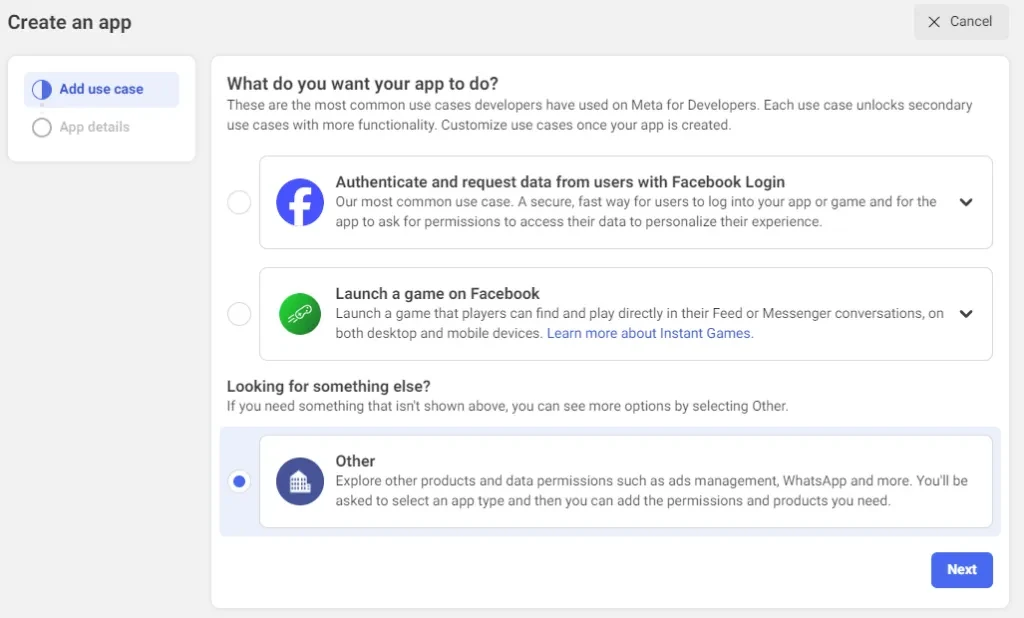
Choose the app type as “Other”.
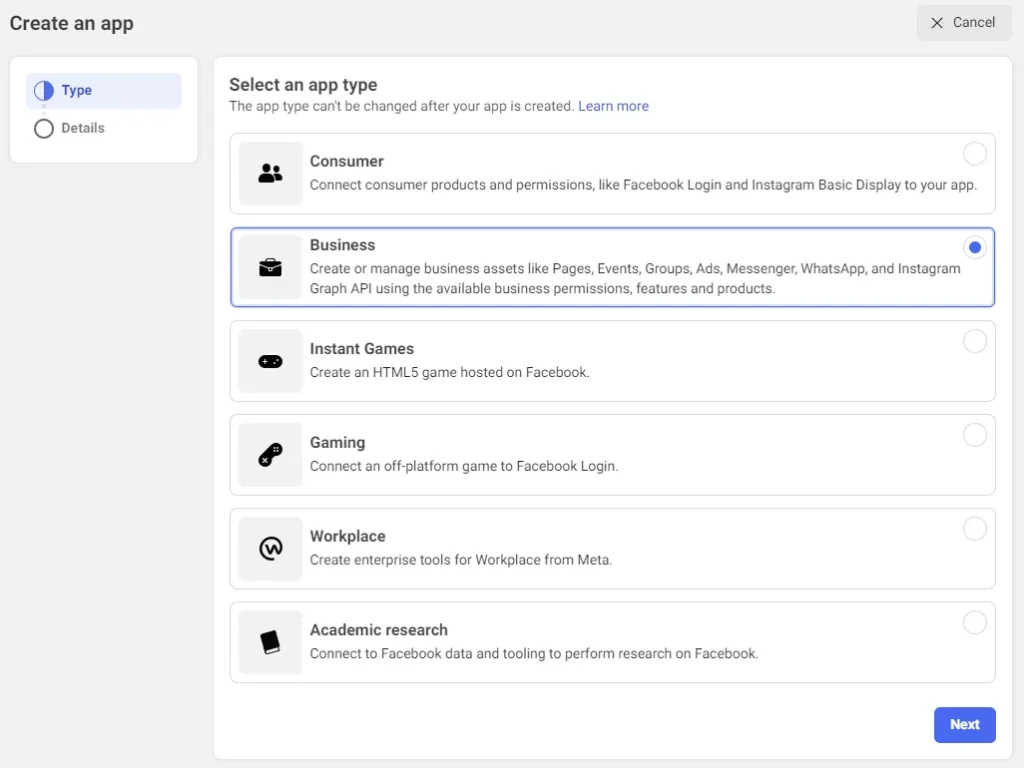
Moving further in the next step you’ll be asked to choose an app type. Select the “Business” app type regardless of whether you’re an individual or an enterprise and hit next to move to the next step.
Here, enter your basic information such as the display name of your app. You can change this later if needed. Other details like the email associated with your account are automatically populated.
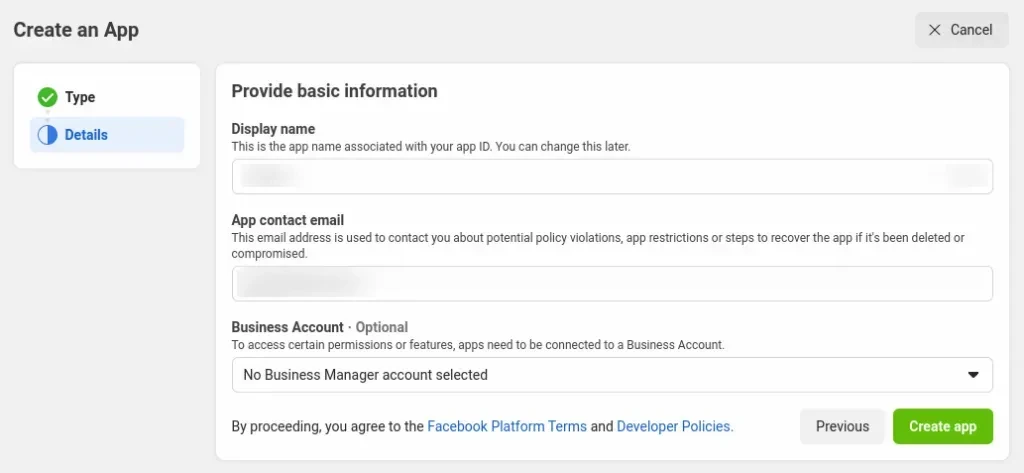
Note: Facebook imposes restrictions on the usage of certain terms, such as “WhatsApp”. Specifically, developers are prohibited from incorporating Meta’s trademarks or brand elements, which include terms like FB, Face, Book, Insta, Gram, and Rift, or any terms that may be confusingly similar to them, within their app names. This restriction applies to any term that could be perceived as referencing Facebook or its affiliated brands.
Once all that is done simply click on Create App. Here it will ask you to enter your password again please ensure to type in the correct password for the same.
The app creation process is now complete, and the next step involves adding a product to the app, specifically WhatsApp. To proceed, navigate to the bottom of the page and locate the ‘WhatsApp’ card. Click on ‘Set up’ located in the lower right corner of the card to initiate the setup process.
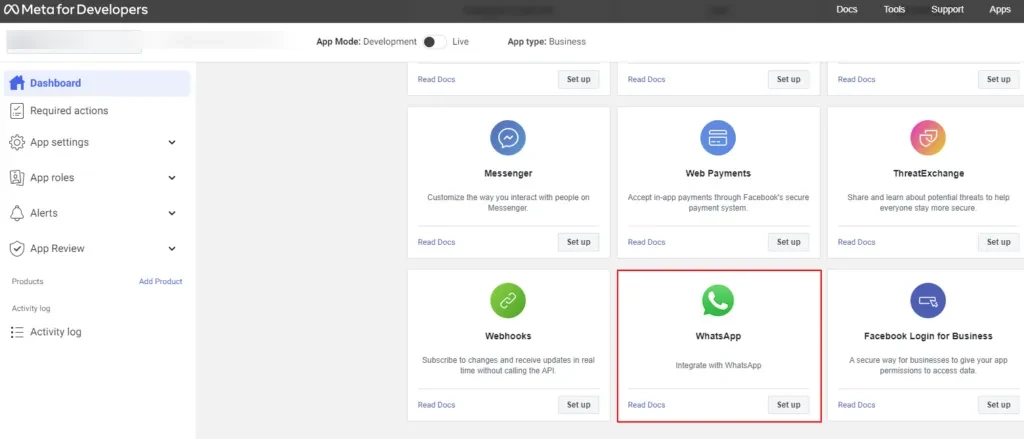
As soon as you click on “Set up”, you will be greeted with the following screen which provides details on what’s encompassed within the Business Platform API.
By continuing, you are consenting to the Facebook Terms for WhatsApp Business and the Meta Hosting Terms for Cloud API. Simply click on “Continue” to move forward with the process.
A quickstart section will show up where you have to click on the “Start Using the API” button to move forward and your App Creation part is done.
Configuring WhatsApp Settings
From the dashboard, you will get:
- Temporary Access Token
- Phone Number ID
- WhatsApp Business Account ID
Important: Always use a permanent token for WhatsApp Business.
Want to put it to the test? Let’s do it:
If you have been successful so far by clicking on sending a “Test message”. But for that, you will have to List “To number”. You can add up to 5 numbers for test messages.
Note that WhatsApp will send a confirmation code to verify each phone number. You can also directly click on add numbers to move ahead where you will have to provide your business information such as name, email, country, and website.
After that, verify your business phone number for WhatsApp messaging and find your “To” field which is now filled with the newly added number. At last, hit “Send Message” and you will receive a message for the same.
Generating Permanent Access Token
This is a very important part so make sure to pay attention as we’re going to create a permanent access token that will never expire.
1. Go to the Business Settings Page within your Facebook Developer account or you can simply click the link here.
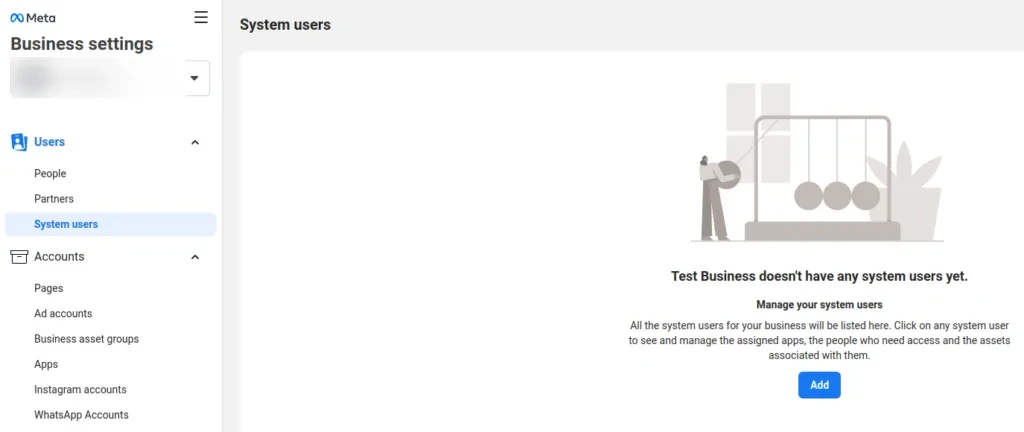
2. Here under the User section click on System Users. Where we will create an admin user and enable full control for the app.
3. This will be initially blank. Thus, click on “Add user”.
4. Now agree to Facebook’s Non-discrimination policy by clicking on the ‘I accept’ located in the bottom right corner of the pop-up to confirm your acceptance.
5. After skipping the formal “Thank You” message from Facebook, click on ‘Done’ located in the bottom right corner and continue.
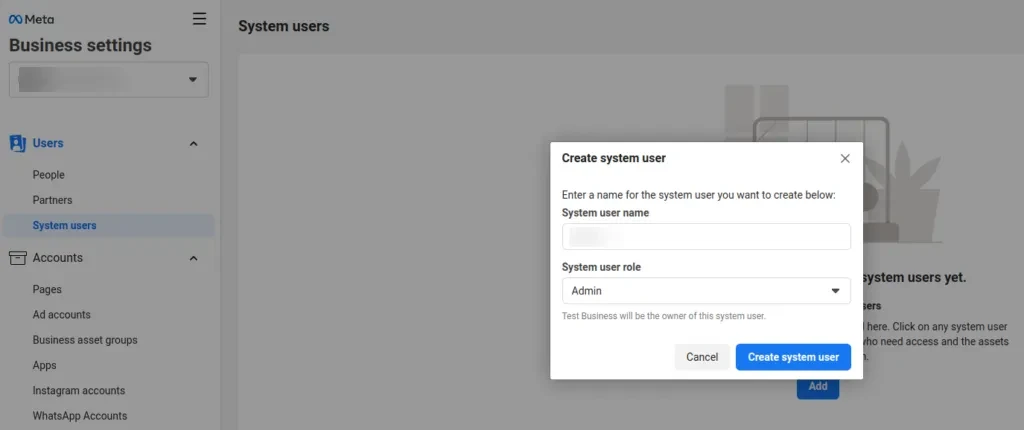
6. Enter the desired username and select the role ‘Admin’. After completion, click on ‘Create system user’ to finalize the process
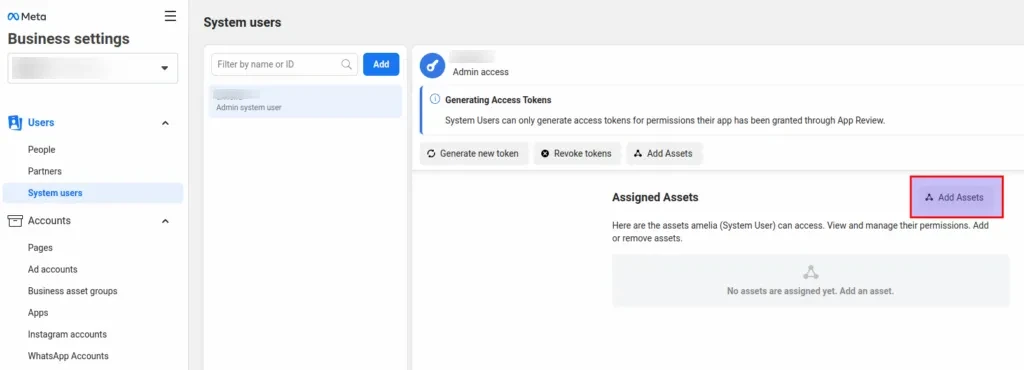
7. Now you will see the newly created Admin user. In the right section of the screen, proceed by clicking on the “Add Assets” button.
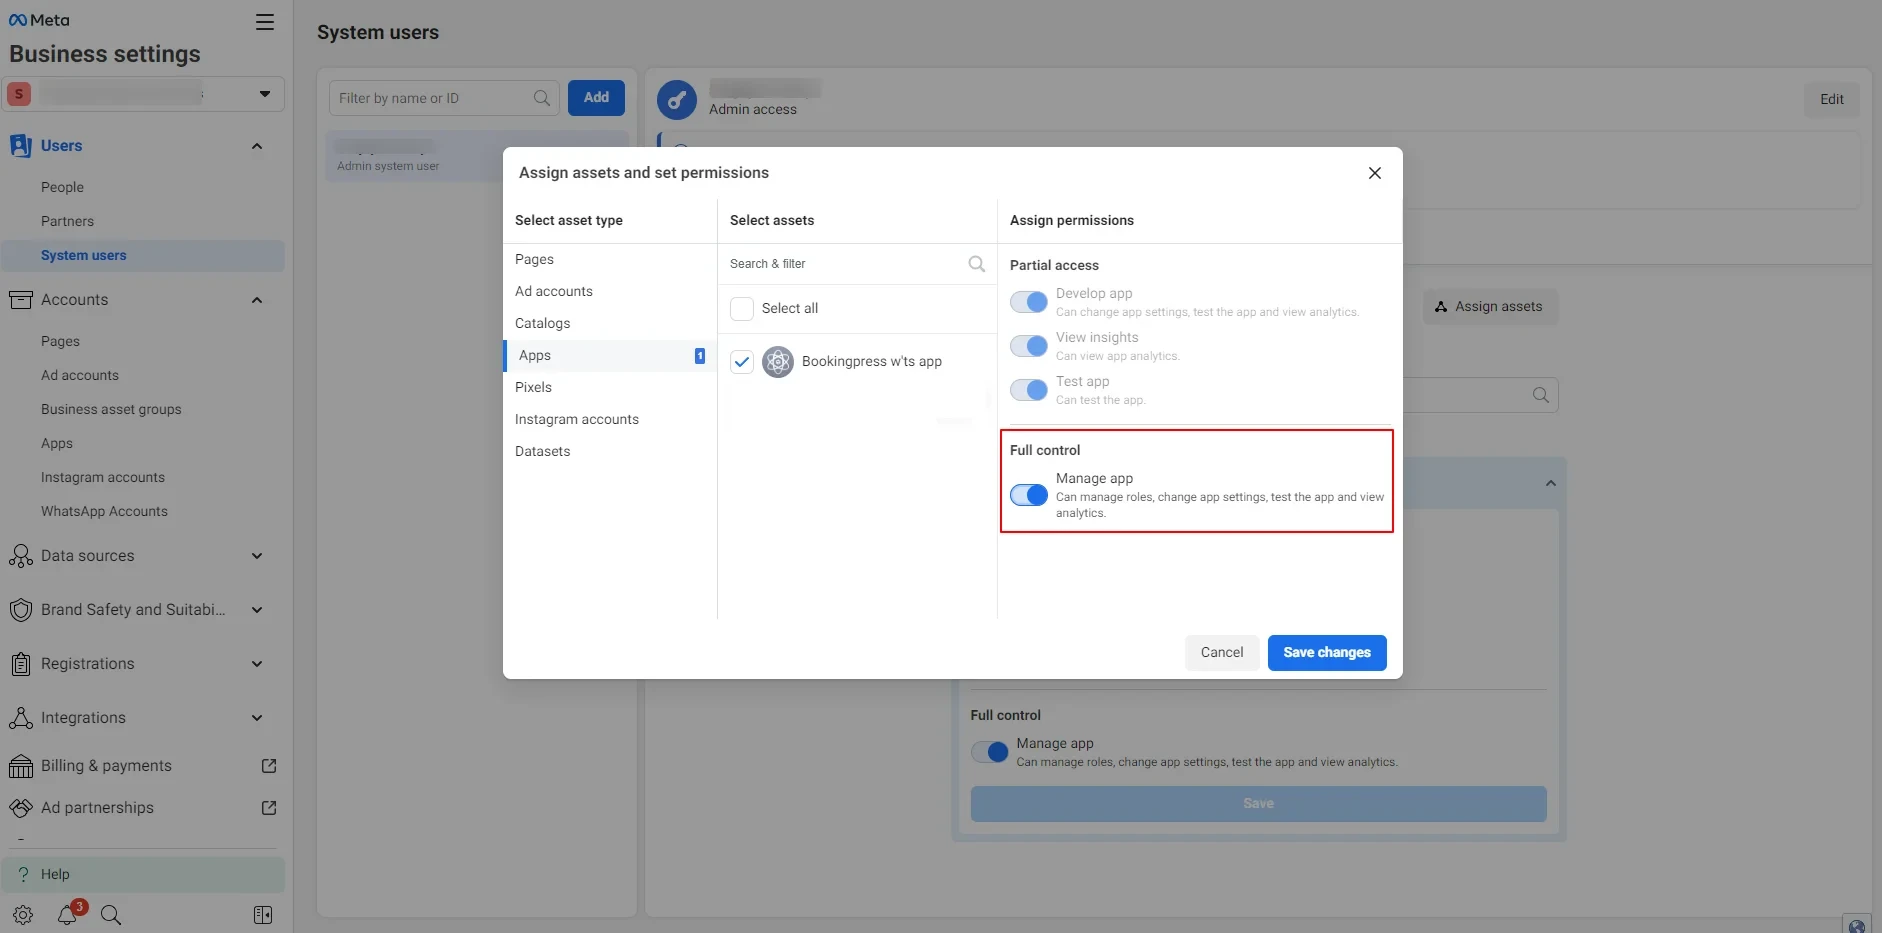
8. In the pop-up that appears, head over to the ‘Apps’ and select the app previously created for WhatsApp integration. Now enable the Full Control (“Manage App”) slider, and then click on “Save Changes” to confirm.
9. After the pop-up notifies you that a new asset has been added. Simply click on “Done” to proceed.
10. Simply click on the “Generate Token” and make sure the correct app is selected. Now just set the “Token Expiration” to “Never” because we want a permanent one.
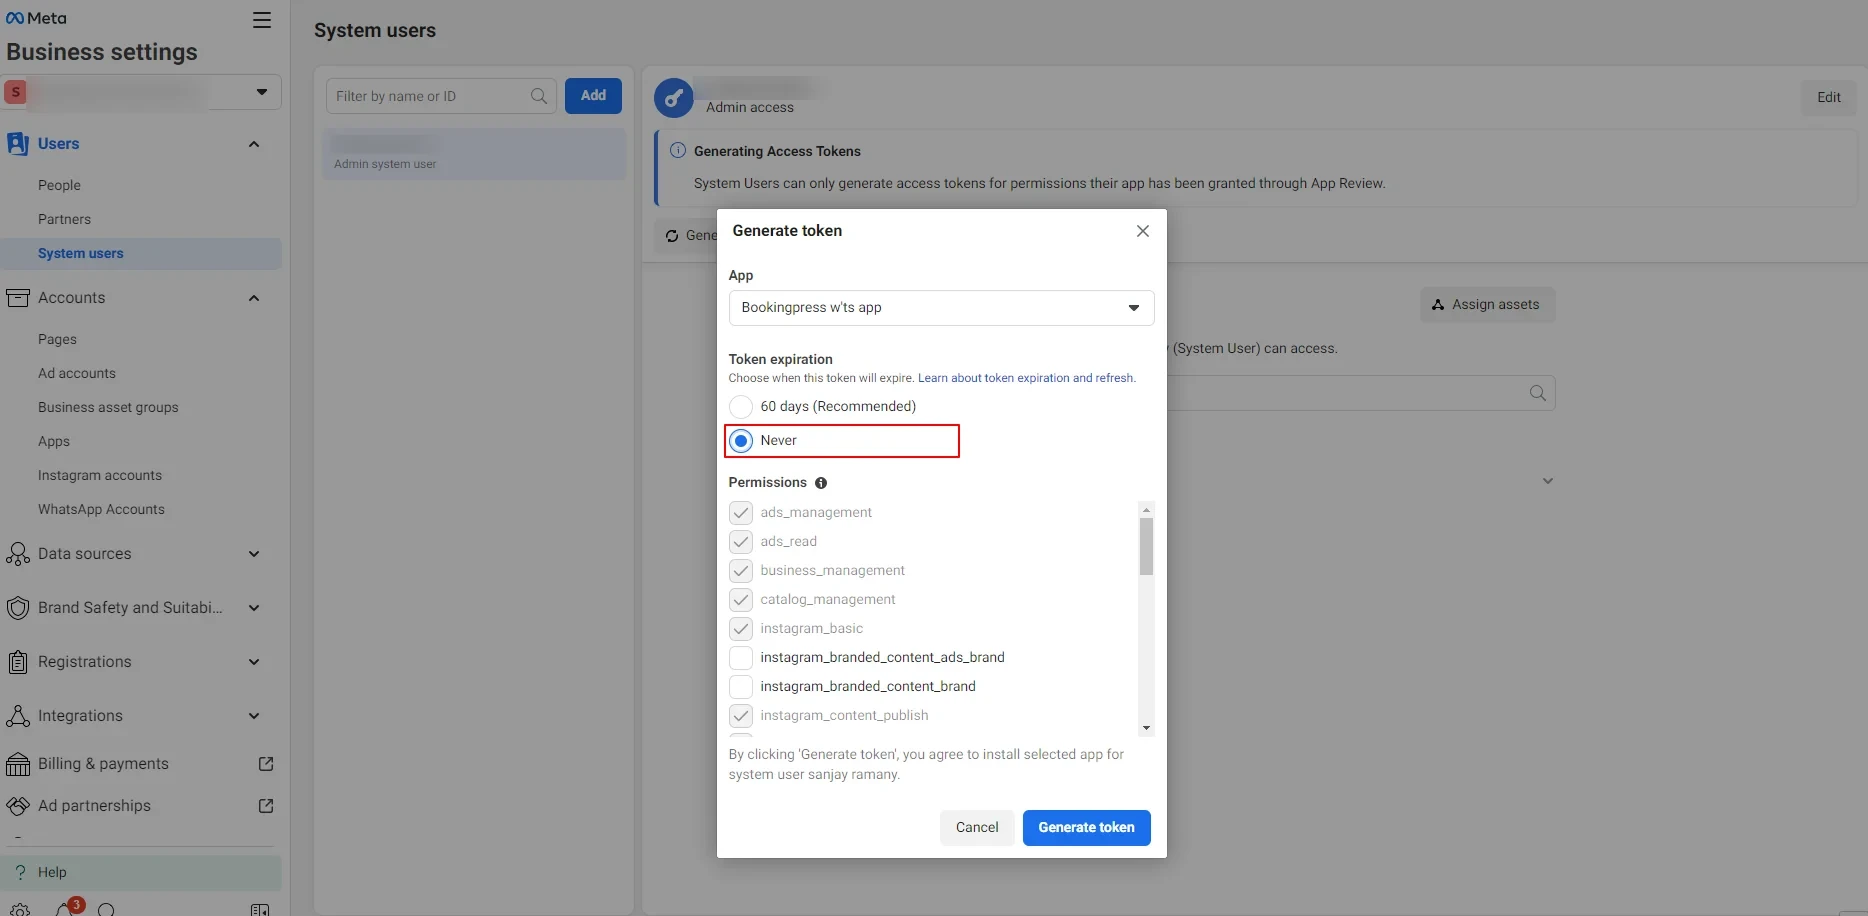
11. At last, click on the “Generate token” button to Generate the Permanent Token.
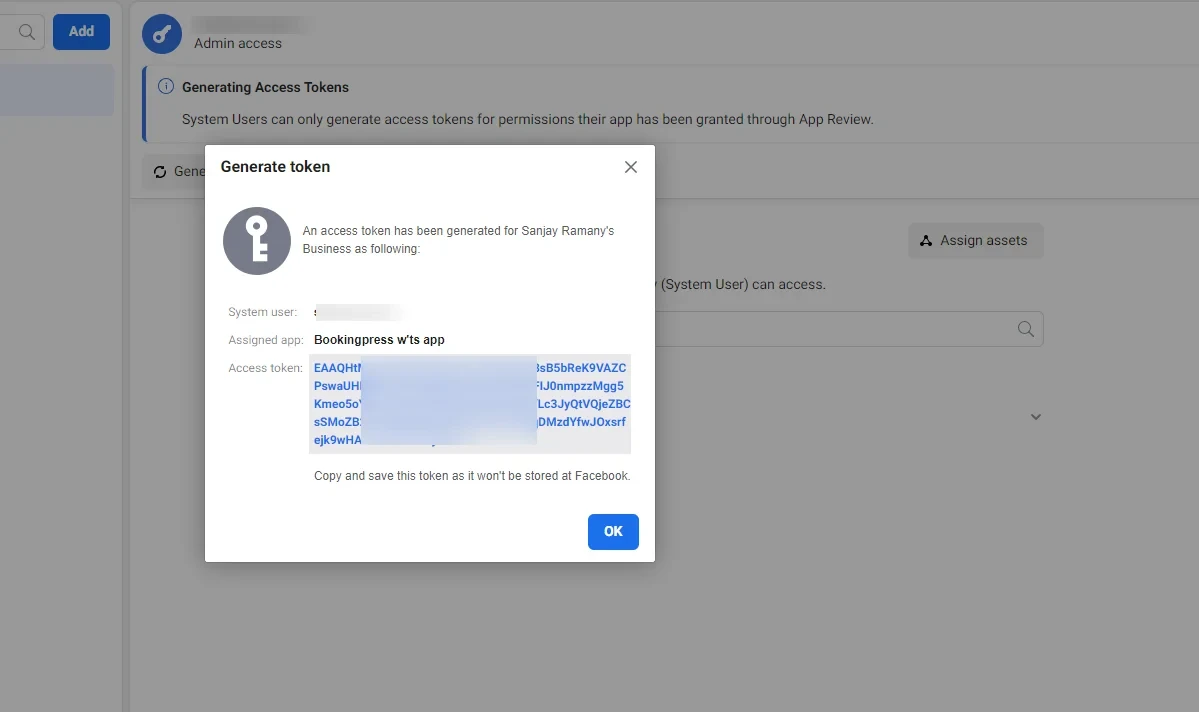
And that’s all!
Now copy and paste the following into BookingPress → Settings → Notifications.
- Permanent Token
- Phone Number ID
- WhatsApp Business Account ID
Creating WhatsApp Message Templates
Once the main part of getting credentials for WhatsApp business, we can head over to create Templates/Messages for your WhatsApp Notification in BookingPress.
To start with Navigate to WhatsApp Manager within your Facebook Developer account:
- Go to WhatsApp Manager
- Click Create Template
- Select:
- Category: Utility
- Add your message content in the Body only
Note :
- Do NOT add header, footer, or buttons
- Use variables like {{1}}, {{2}}
- Add sample values
- Submit for approval
Templates will be available after approval.
How to Configure WhatsApp Notification Message in BookingPress
For configuring WhatsApp Notification, add all the credentials of the gateways you pick inside BookingPress → Settings → Notifications.
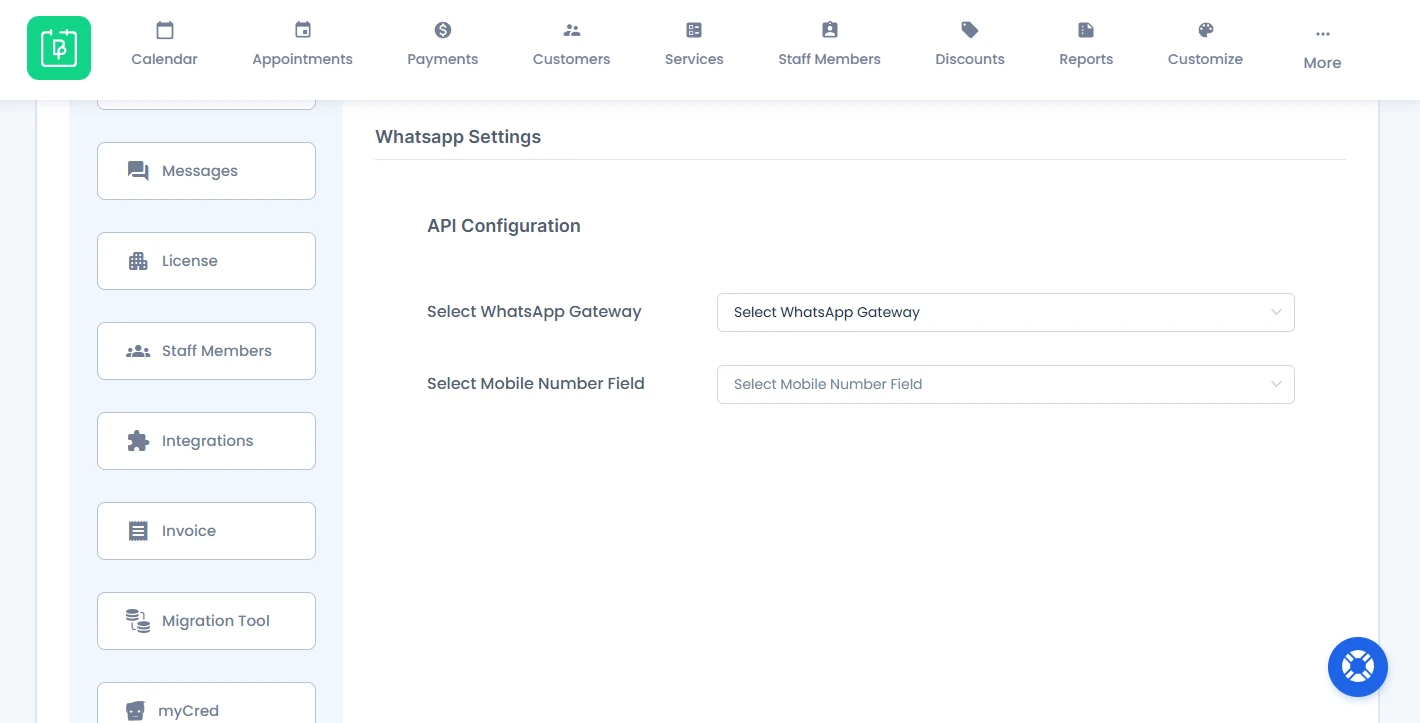
Once all these credentials are saved, it’s time to decide what message will be sent to customers from WhatsApp.
For that, head over to the Notifications and scroll down till you find the “Send WhatsApp Notification”. Toggle it on to set the automatic notification via WhatsApp.
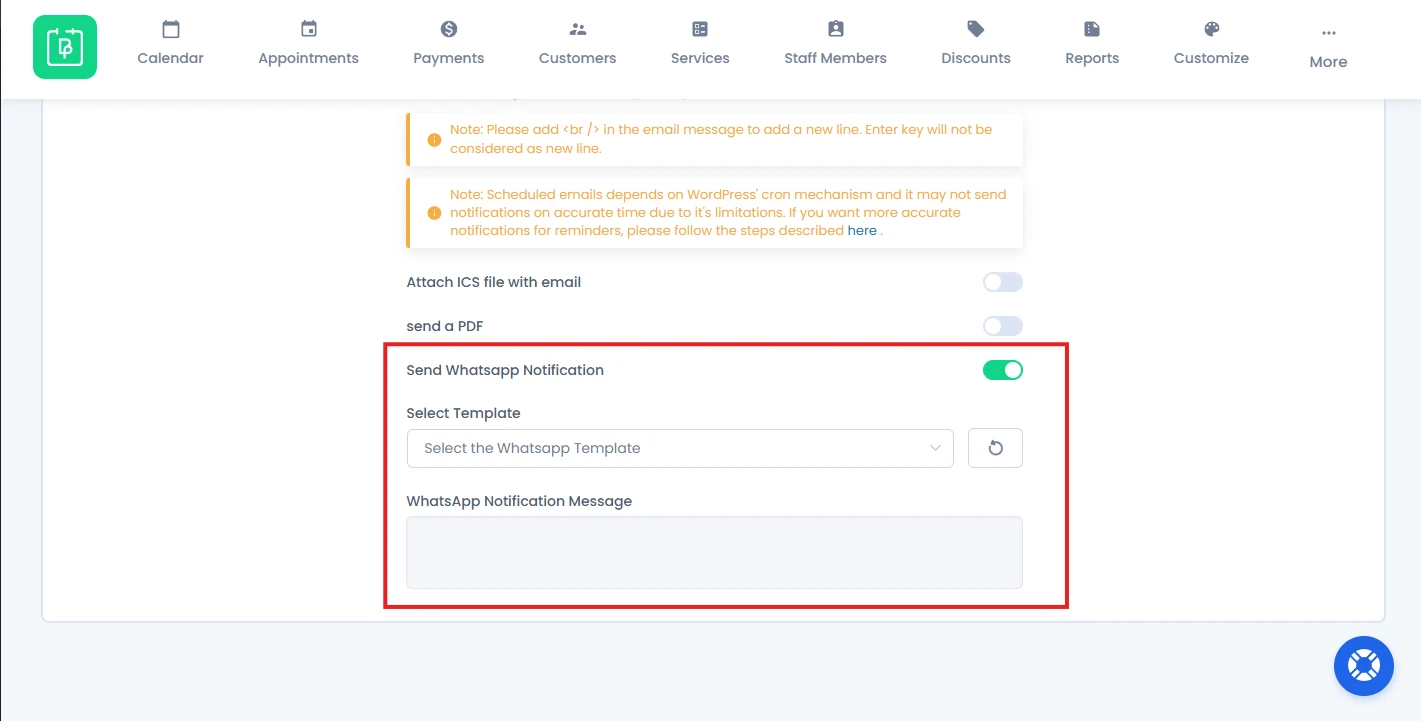
Please Note: Unlike Email and SMS notifications, you cannot copy placeholders directly into the message box. You must select a template created in Twilio or WhatsApp Business
After enabling the “Send WhatsApp Notification”, select your approved template. If your template is newly approved, Click the Refresh icon to update the template list.
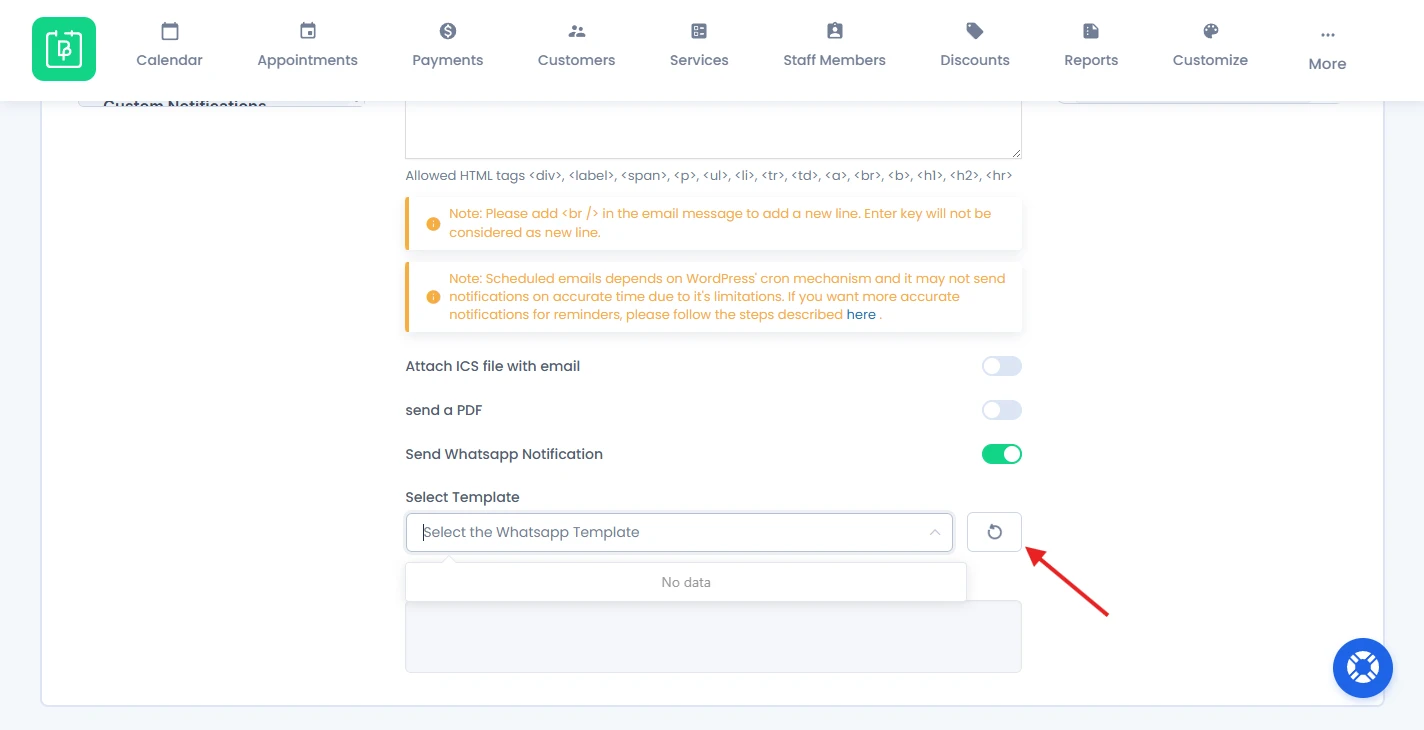
Now you will see fields like:
- Placeholder for 1
- Placeholder for 2
Use the dropdown to select the placeholder for each variable.
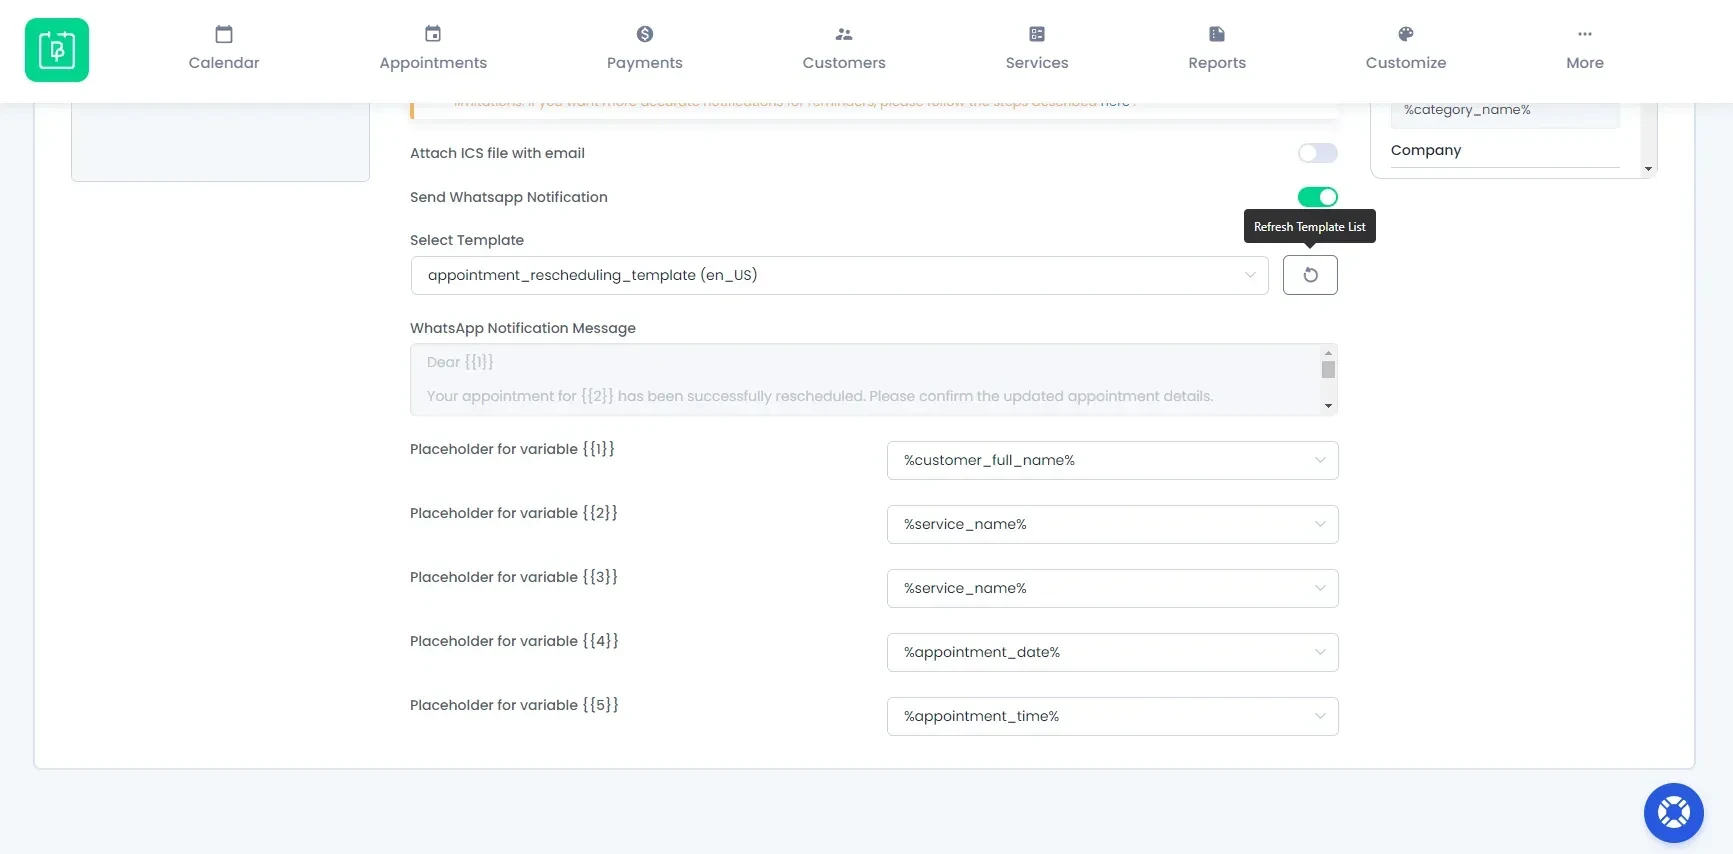
Important: Templates must be approved before they can be used.
How WhatsApp Notifications Work
First of all, a customer books an appointment from the BookingPress booking form.
After the booking is successful, the BookingPress system triggers the WhatApp notification automatically.
The approved template is sent via WhatsApp.
Need a hand?
Our world-class support team is happy to help. Send us a message and we’ll take it from there.
 14-day money-back guarantee