Staff Members Overview
The BookingPress Staff Members page allows you to view, assign services and manage all your staff members.
Here we’ll show you how to manage your staff members in BookingPress.
How to Enable the Staff Member Add-On
To start managing staff members in BookingPress, you first need to activate the Staff Member add-on from your BookingPress dashboard.
1. From your WordPress dashboard, head over to the BookingPress → Add-ons.
2. Activate the “Staff Member” addon which you’ll find under Additional Modules.
3. Click the Activate button.
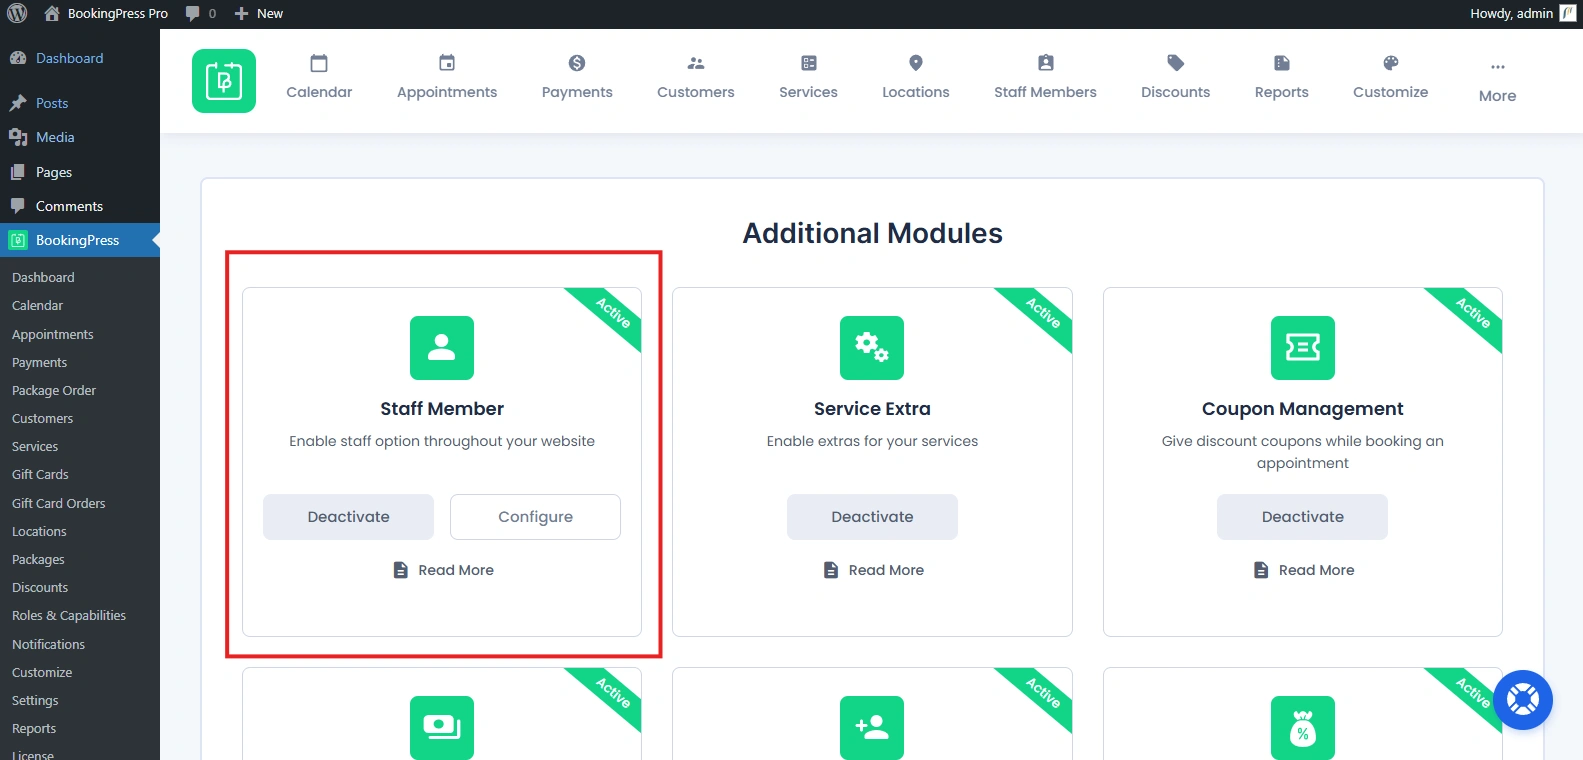
Now a new Staff Members menu will appear in the BookingPress dashboard. Click on the “Staff Members” icon and you’ll be able to create, assign and manage all employees from there.
Important Note
- After activating the Staff Member addon, you must assign at least one staff member to a service.
- If a service has no staff assigned, it will not appear on the front end booking form.
After the Staff Member add-on is active, you can move on to adding and configuring staff members.
How to Add a New Staff Member in BookingPress?
You can create/add a new staff member inside BookingPress by going to BookingPress → Staff Members. Here, click on the “Add New” button at the top right corner.
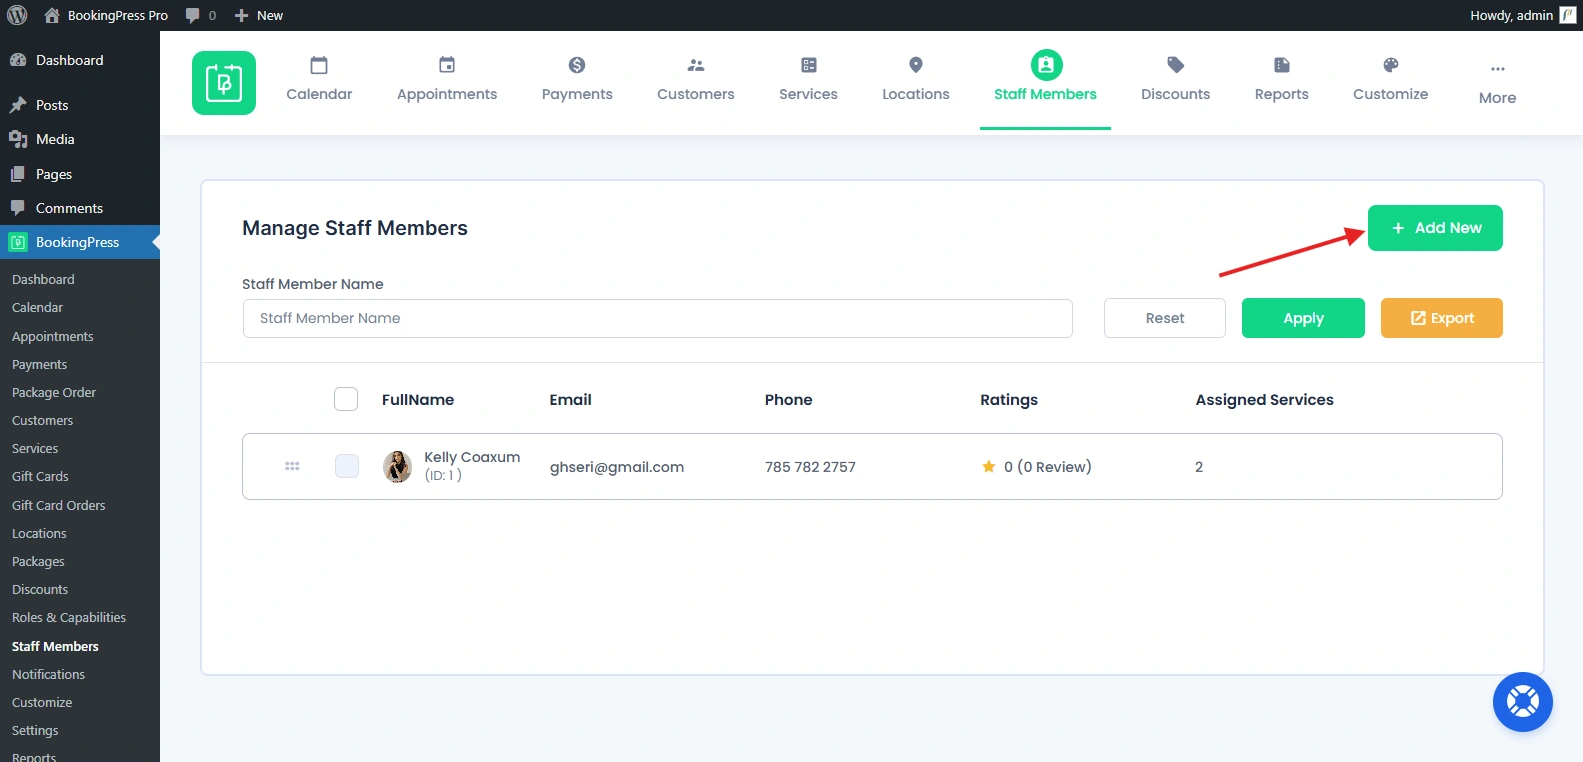
This will open the Add Staff Member page where you can enter the staff member’s all details.
Basic Details of Staff Member
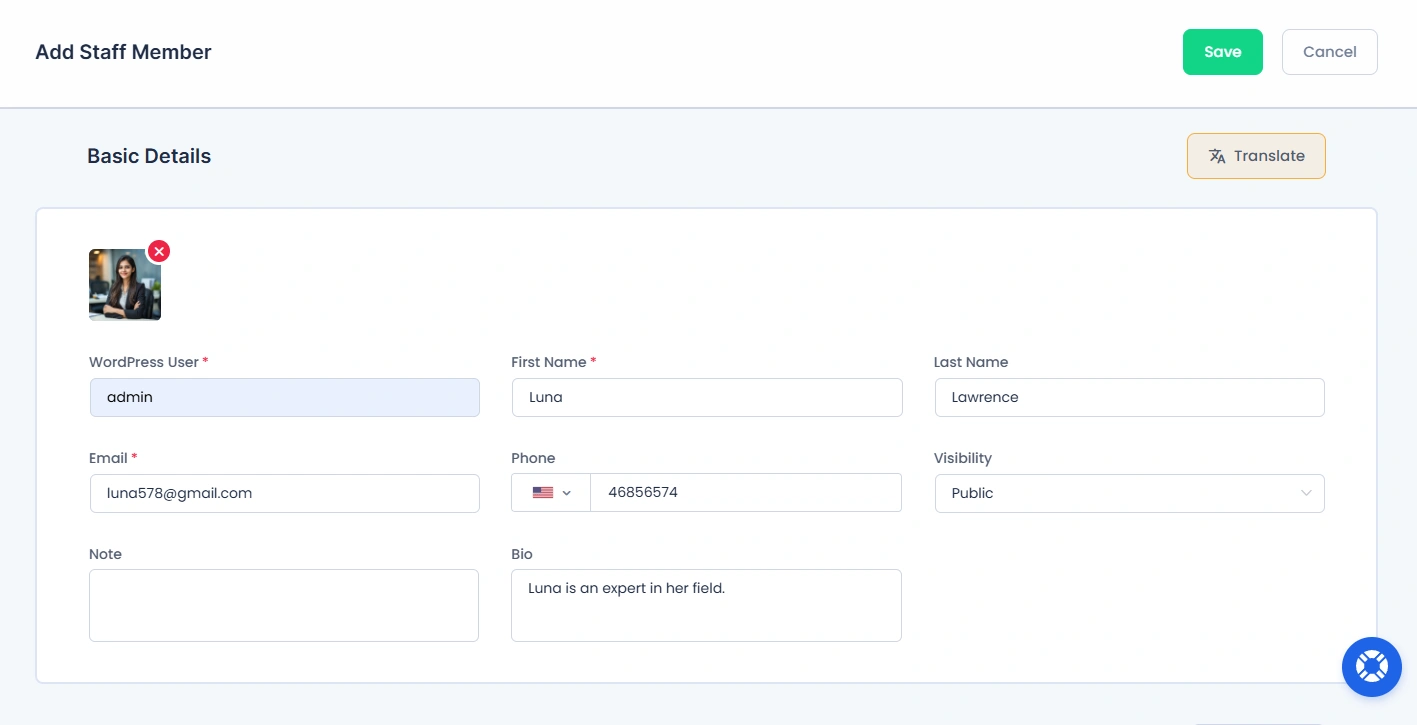
Let’s start by filling the basic information for the staff member such as:
- Staff Member Image: Upload an .jpg .png .webp image (recommended size under 1 MB)
- WordPress User: Select an existing user or create a new one.
- First Name & Last Name: Enter the staff member’s name.
- Email & Mobile Number: Add contact details here. (Email is must needed)
- Visibility:
- Public: Shows staff members on the front-end booking form to customers.
- Private: Hidden from customers, but can still be assigned to services.
- Notes: Add any internal notes for reference.
- Bio: Description of staff member.
How to Assign Services to a Staff Member
Next, scroll down to the Assigned Services section.
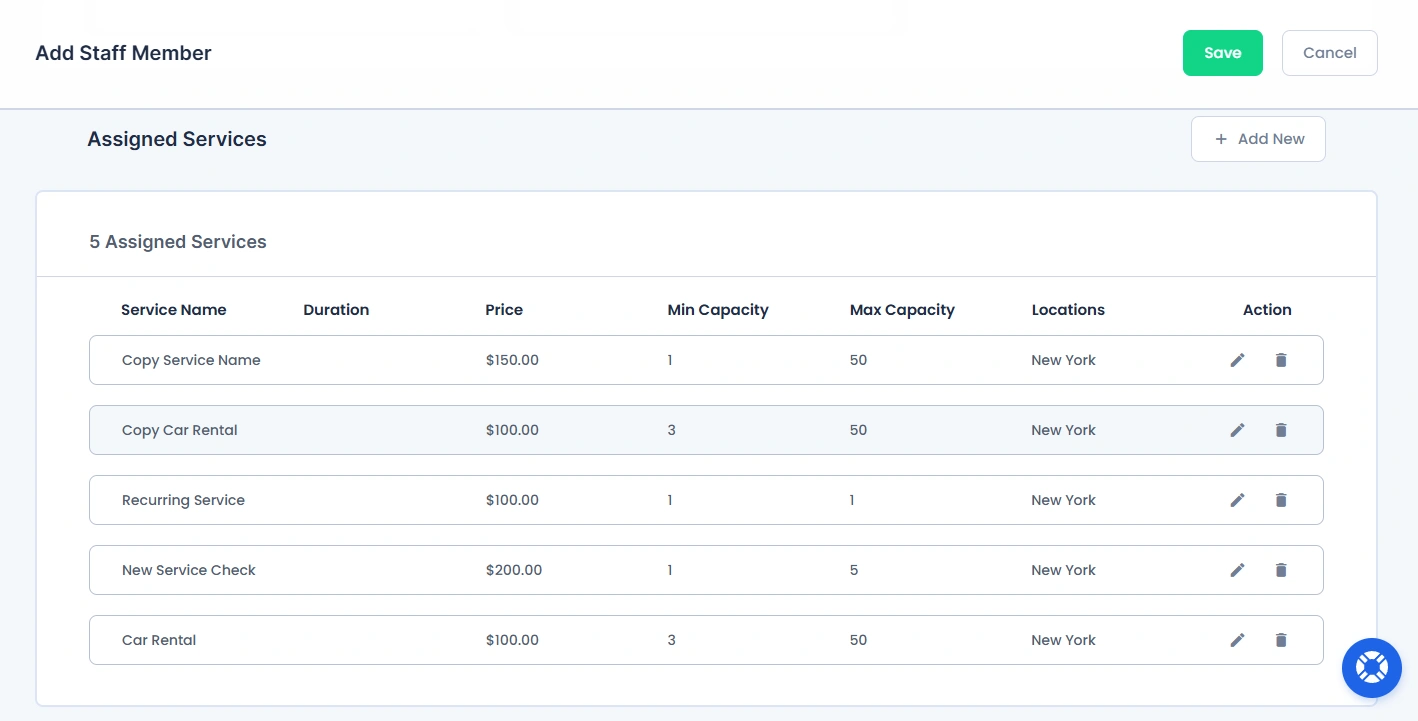
You can assign service directly to staff members from here, or assign them later from the BookingPress Services page.
For assigning services to staff member:
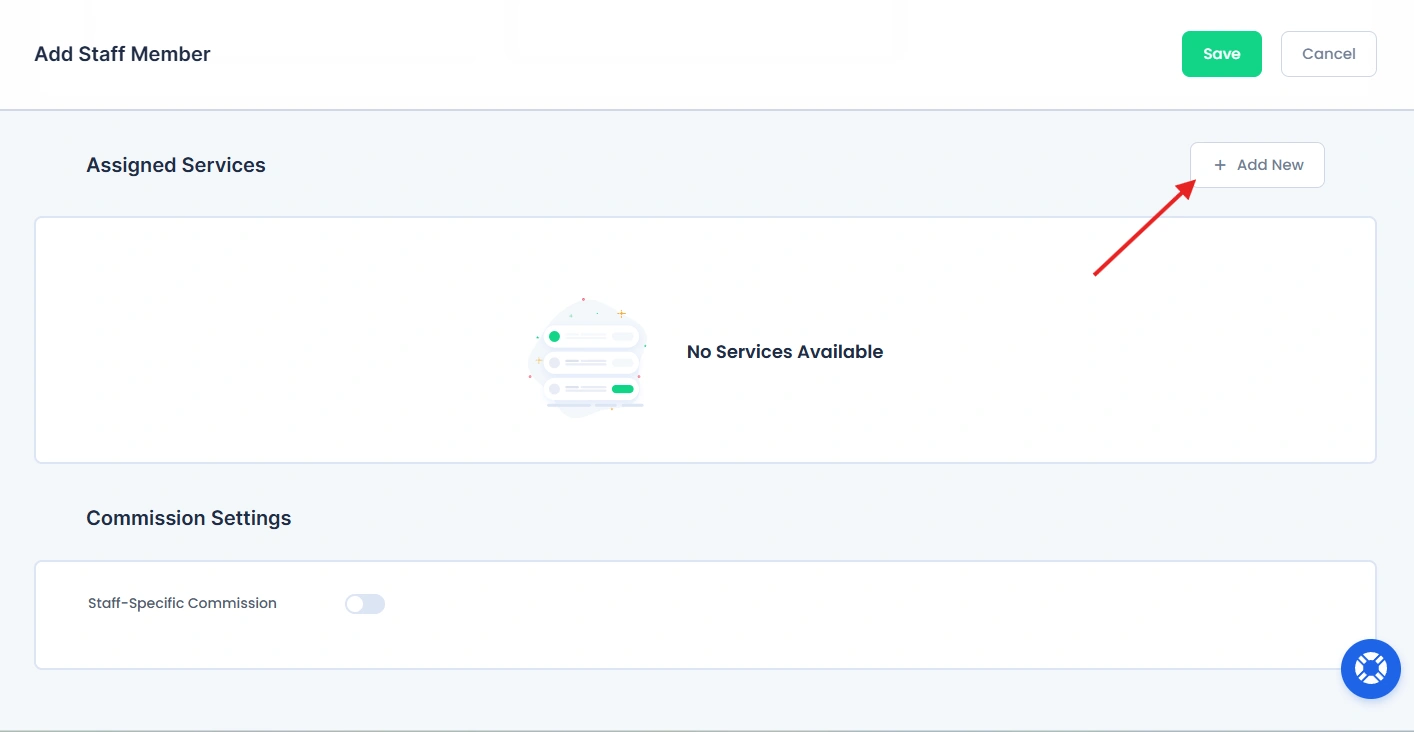
1. Click the “Add New” button under the Assigned Services section, inside the Add Staff Member page.
2. Next, Select the service from the drop down.
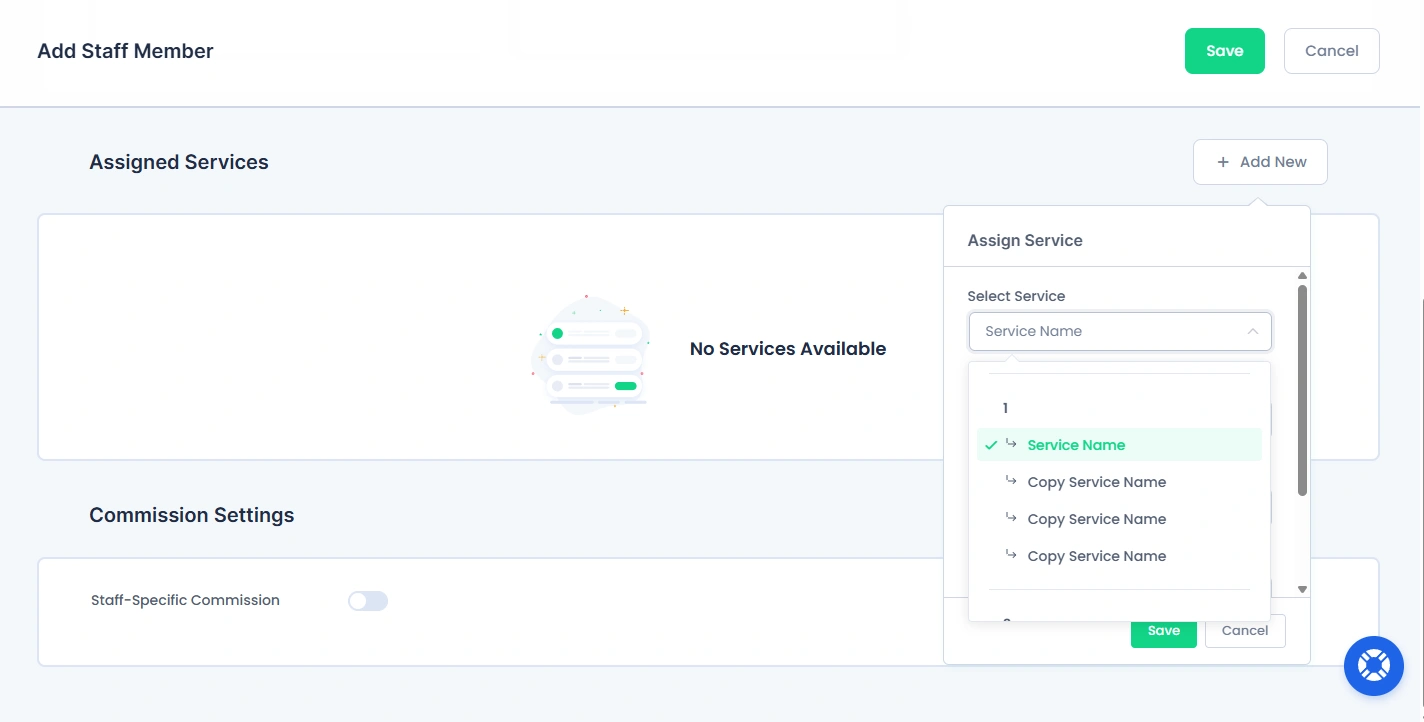
Here, you can either:
- Assign individual services.
- Assign an full category (All services under it)
Assigning a category saves time but then you still have to configure each service individually.
3. Set Min/Max Capacity
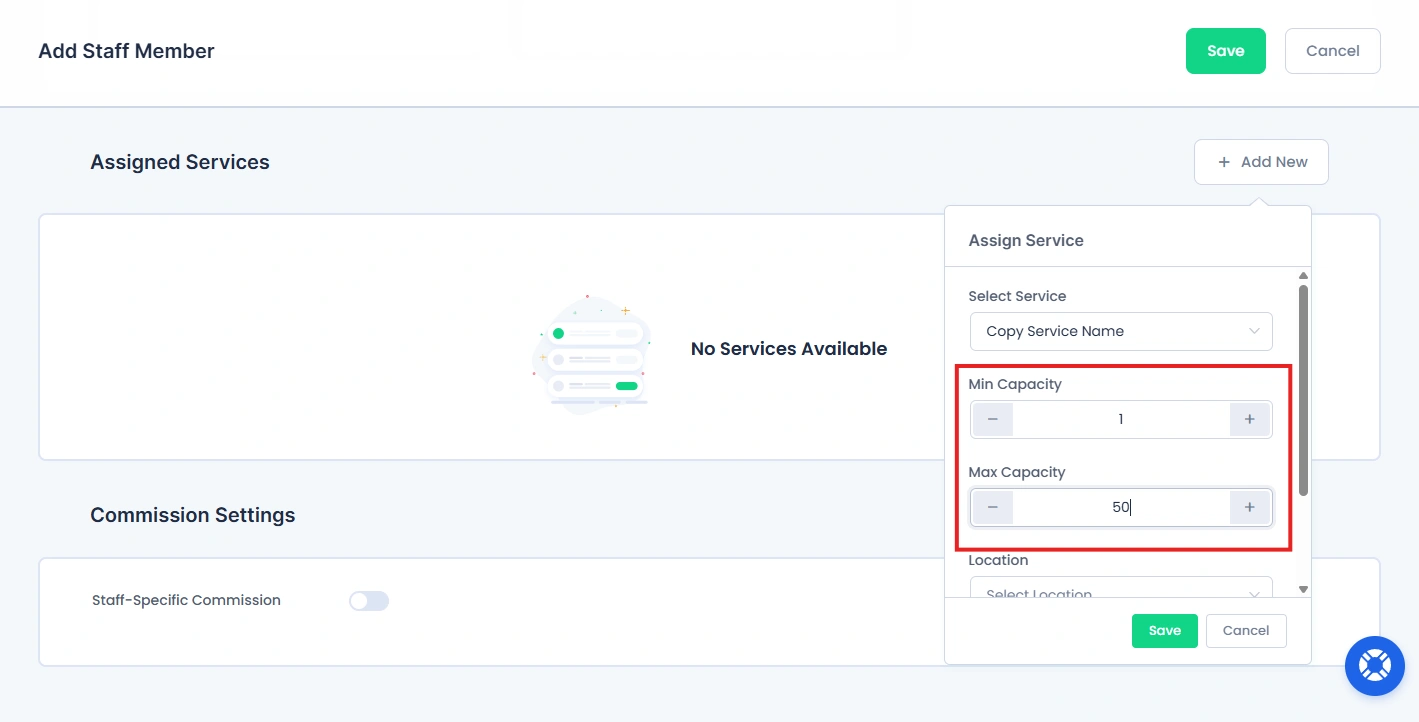
Set minimum and maximum capacity for each service. Remember these fields will only appear if you select individual service rather than a full category.
4. Select the Location. (Appears only if the Location Addon is activated)
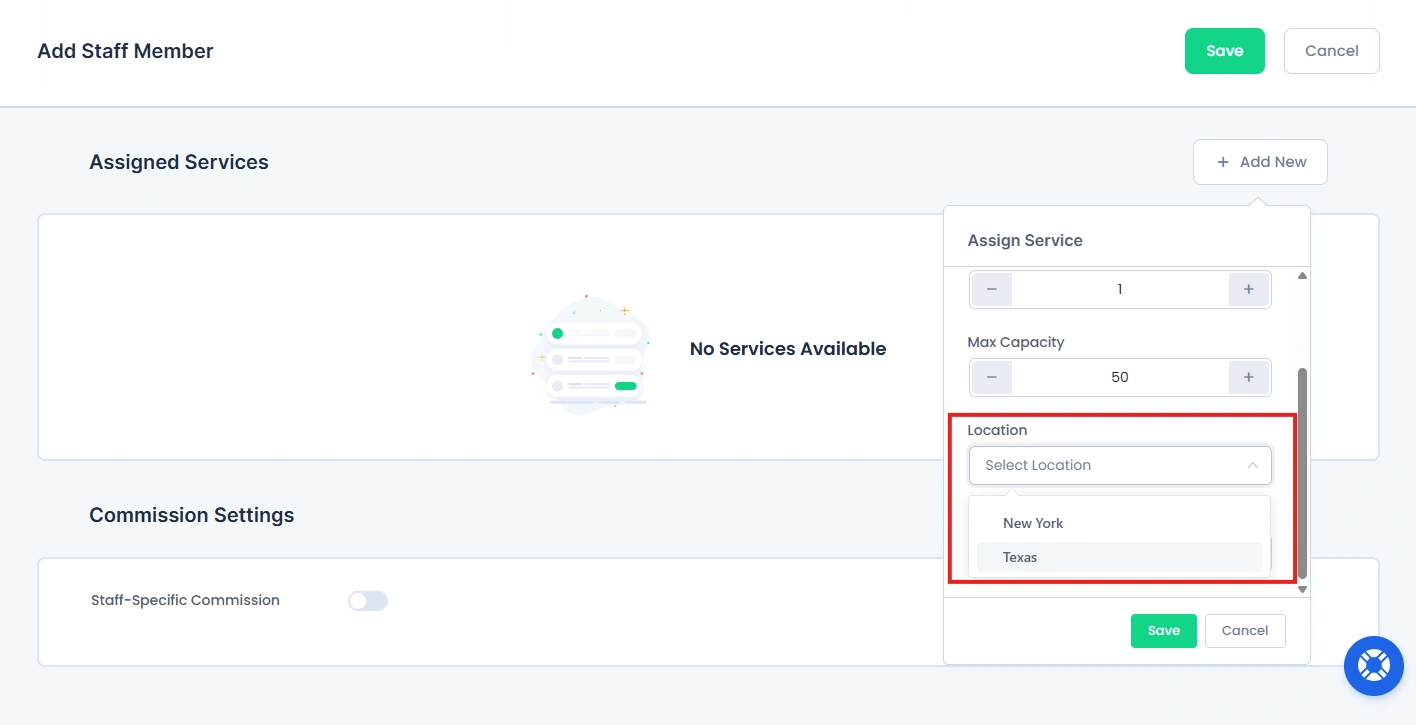
5. Set custom Price
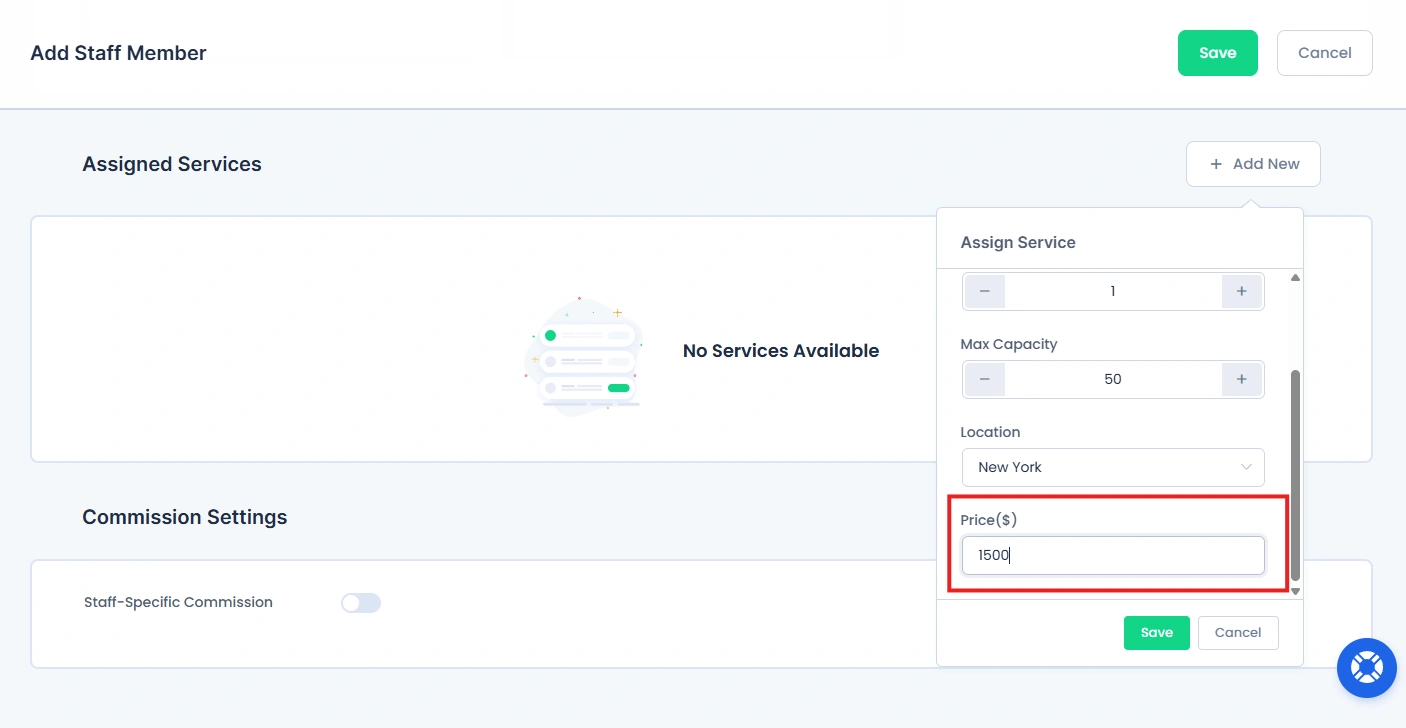
Optionally, you set custom pricing for each staff member, yet again, this field will only appear if you’ve chosen a single service instead of a full category.
At last, hit the “Save” button to assign the service or category. Later, you can also remove any assigned service by clicking on the Delete icon.
Additionally, you can also edit each assigned service by reaching the Edit icon.
Commission Settings
If you have the Staff Commission addon activated, you’ll see the Commission Settings section while adding or editing a staff member.
This lets you set how staff members earn for the services they offer, as per your business model.
For detailed setup instructions, configuration options, and examples, take a look at our user-friendly Staff Commission Addon guide.
How to View and Manage Staff Members (Dashboard Actions)
After you finally added your all staff members, you can view and manage them from BookingPress → Staff Members.
This page gives you a complete overview of your staff, along with tools to quickly search, filter and manage their details.
View all staff members
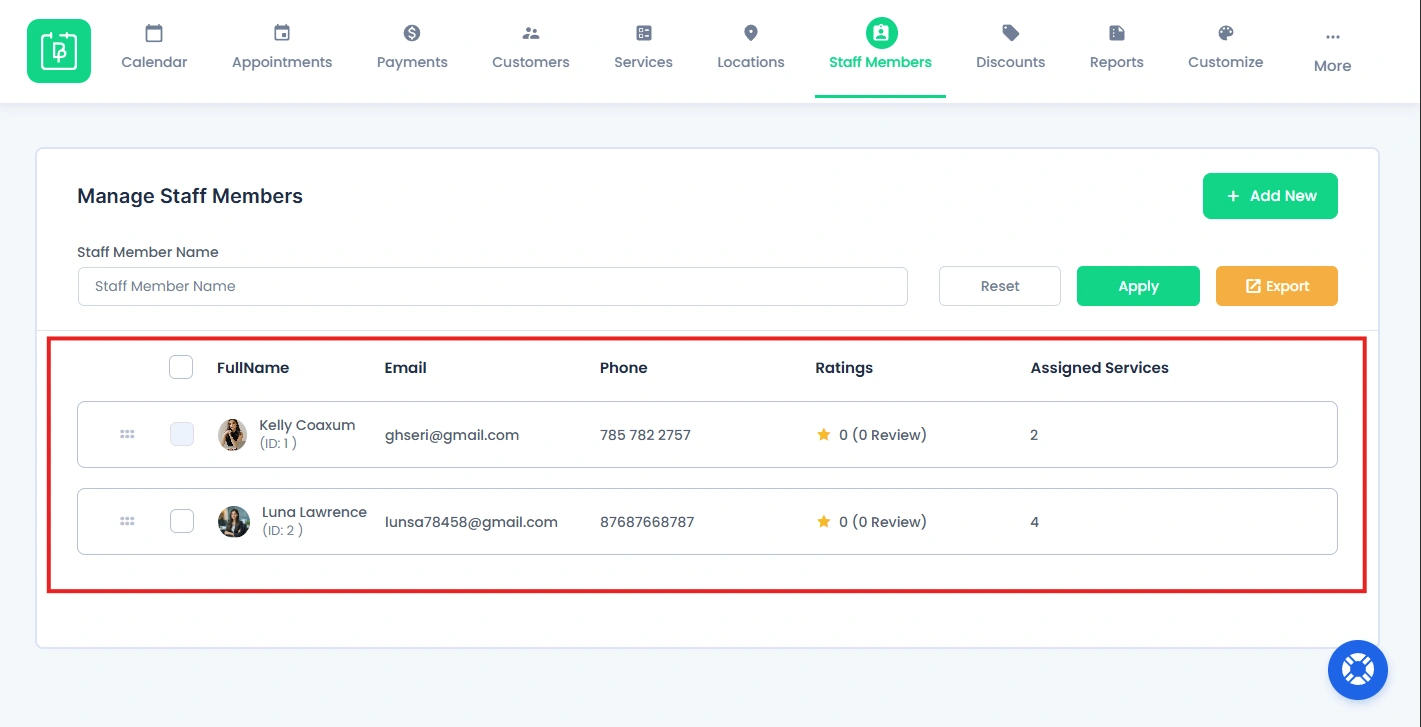
The Staff Members list shows all added staff along with key details such as:
- Staff member full name
- Phone no.
- Ratings (Only if Ratings and Review Addon is activated)
- Number of assigned services
Search and Filter Staff
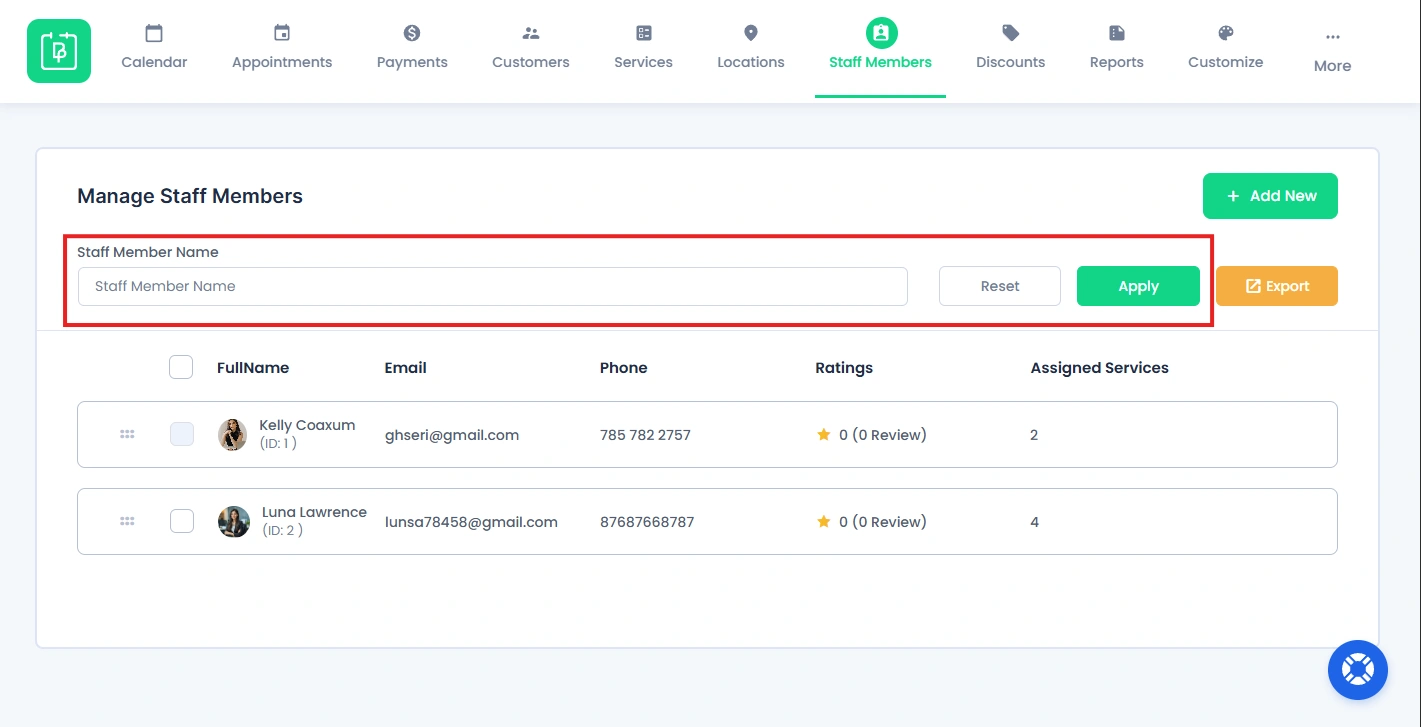
If you want to find a specific staff member and don’t want to waste time scrolling down, use the search bar available on the page,
Inside the search bar, just enter the staff member name, and hit the “Apply” button.
After you find the staff member you were looking for, don’t forget to click the “Reset” button to get back to the original list with all staff members.
This is very useful when managing a large number of staff members or quickly wanting to find a specific profile.
Besides, you can perform the following actions on each staff member by hovering over their row in the list:
Activate or Deactivate a Staff Member
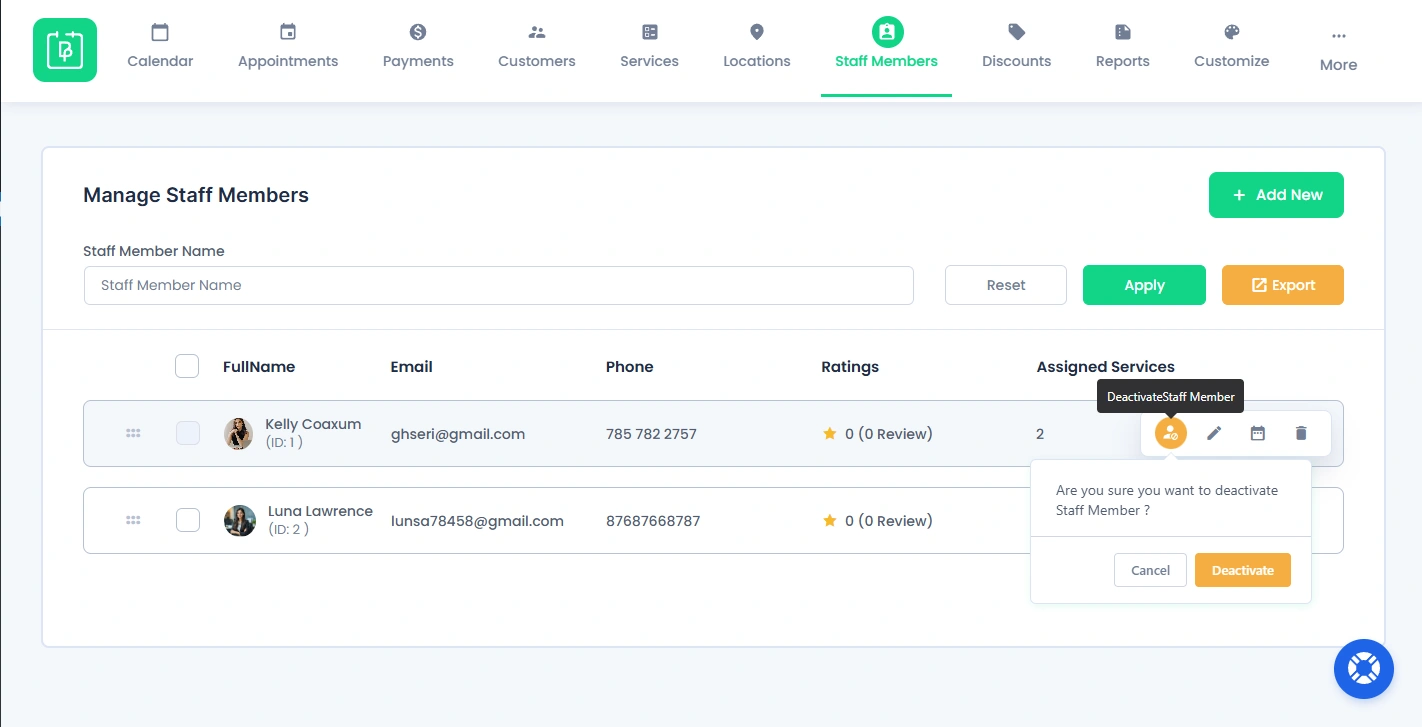
This option lets you quickly change the availability of a staff member.
- Activate: Makes the staff member available accepting bookings.
- Deactivate: Temporarily removes them from active scheduling.
Deactivated staff members won’t be available for new bookings but their existing data remains intact. You can use this feature when a staff member is on leave for the day, or simply unavailable for a few days.
Edit a Staff Member
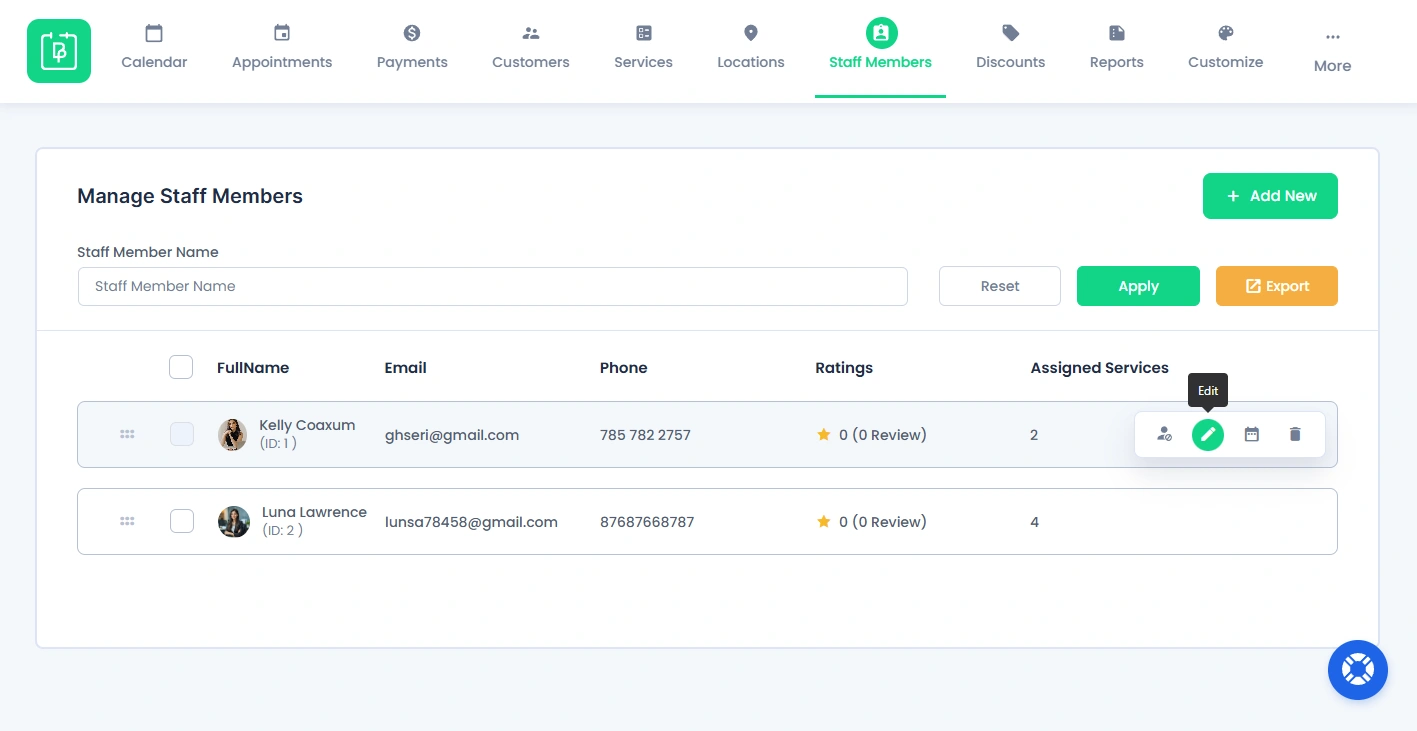
Click the Edit icon to update staff member details. This will open the Edit Staff Member page where all data is already pre-filled. Just edit or update:
- Basic information (name, email, contact details, more…)
- Assigned services
- Visibility.
- Commission settings (if enable)
After making changes, simply hit the “Save” to update the details.
Manage Staff Working Hours (Shift Management)
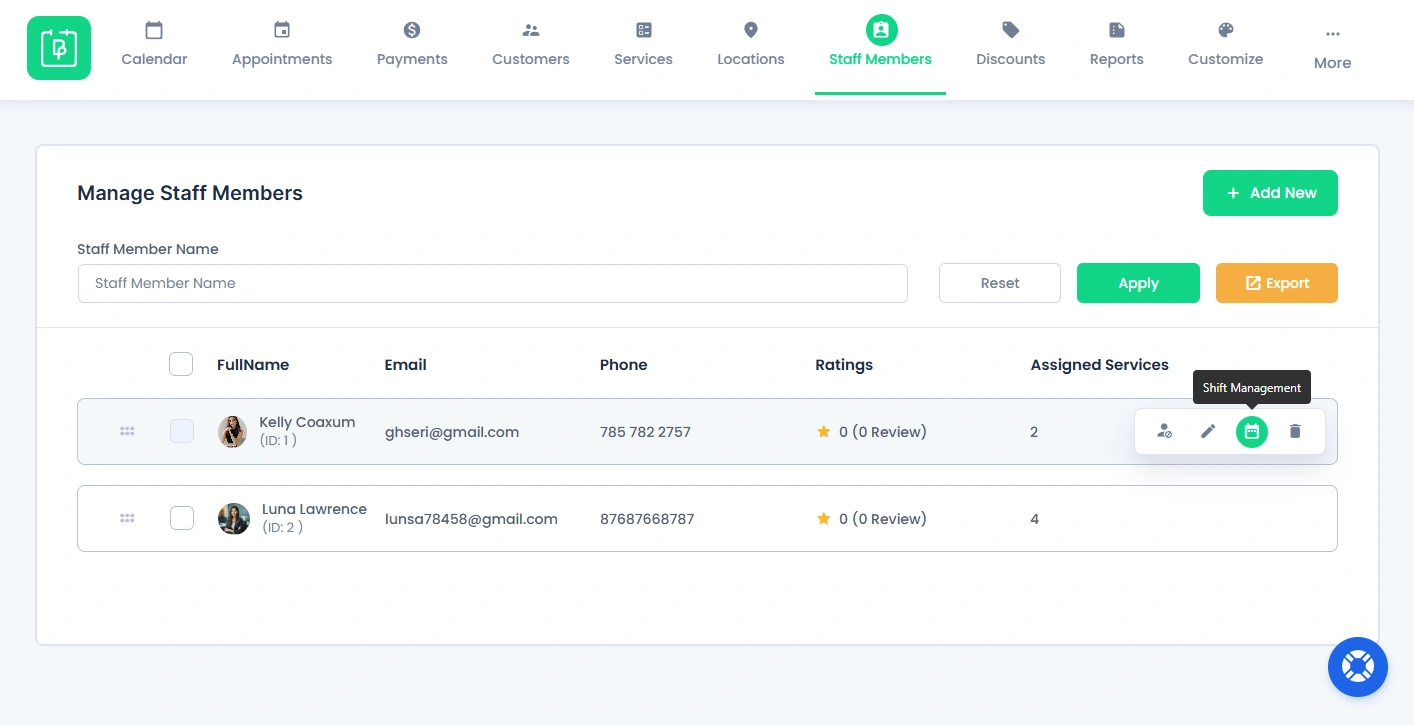
This lets you set or customize working hours for a specific staff member.
By default, staff members follow global working hours set in BookingPress → Settings → Working Hours.
But, you can easily override that. Click on the Shift Management icon, you will open a new page where you can set custom:
Working Hours
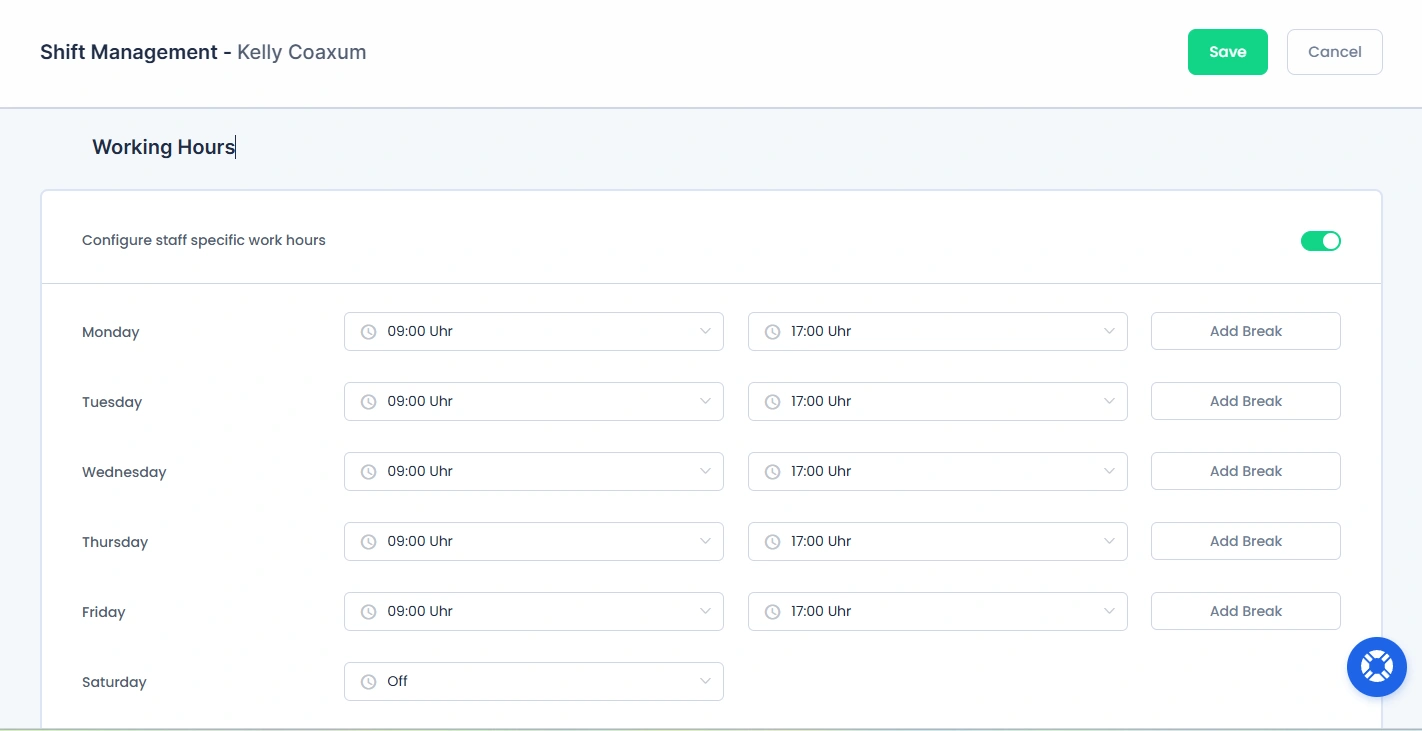
Inside the Shift Management page, you can set custom work days and hours specifically for that staff member.
Simply toggle it on to see the regular default working hours.
Now configure staff specific work hours as you see fit. Also, you will be able to Add Break timings.
If your Saturdays and Sundays are set to “Off” in General Settings for the working hours, you still change it, and set the work hours for those days too as per your need.
Special Days
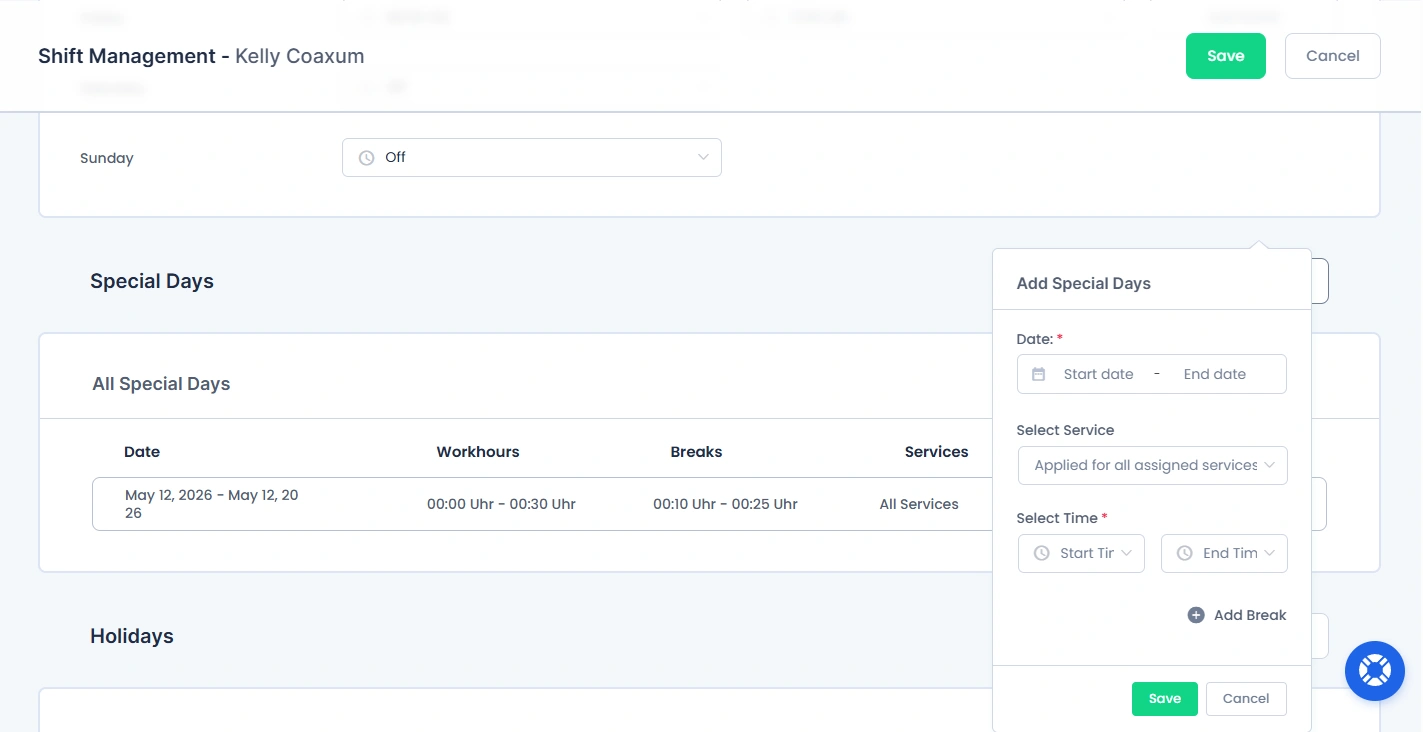
Next, you can add custom special days for the particular staff members by simply clicking on “Add New”.
Here select the date range of the special day. Next, if that particular staff member is assigned with multiple services, you can also select the special days based on the service he is assigned with.
It means that you can add the special days for the staff member for every single service they might be assigned with.
Holidays
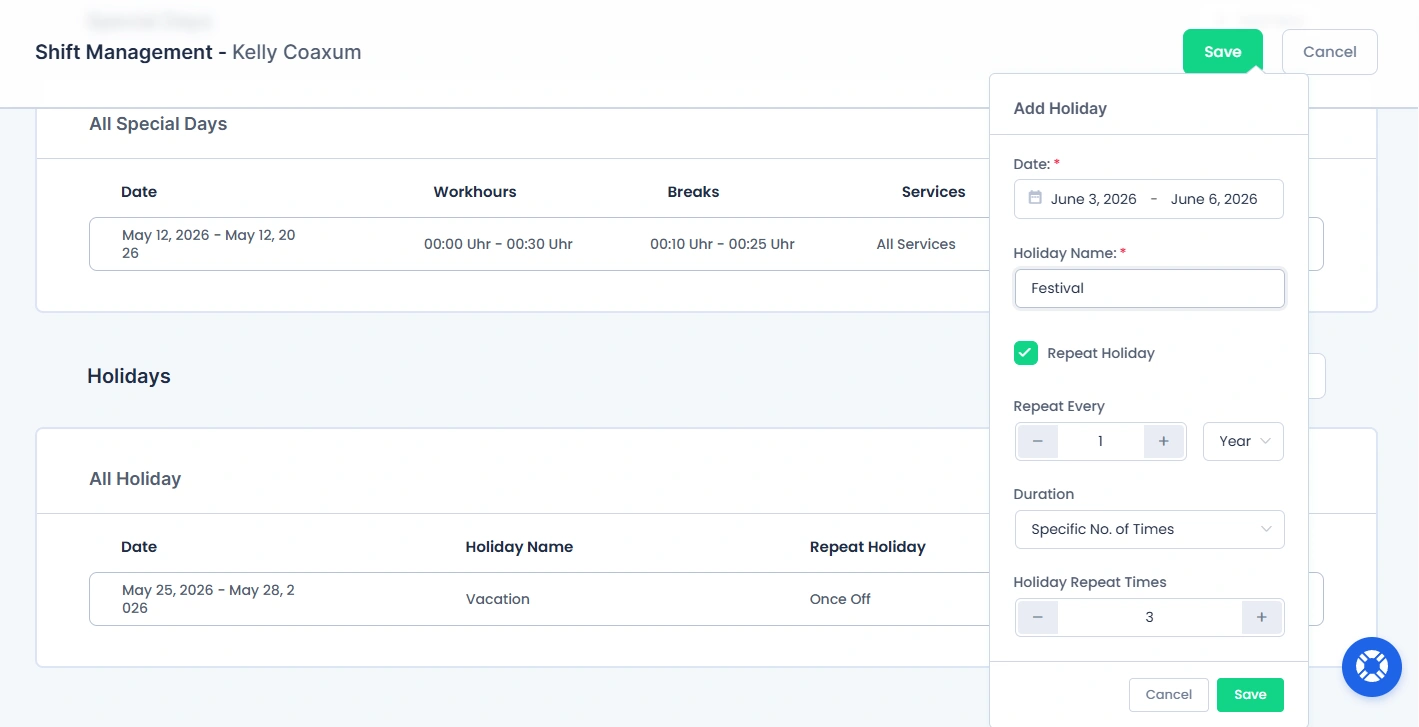
Last but not the least, you can also set holidays for staff members individually.
To set a new holiday, click on “Add New” and a popup box will appear where you can:
- Choose a date from the calendar.
- Enter the name of the holiday.
- Tick the “Repeat Holiday” if you want the same holiday to repeat every year, month, week, or days. (Optional)
If you have ticked the “Repeat Holiday”, you can also set the duration to ‘Forever’, ‘A specific number of times’, or ‘until a certain date’.
After the custom shift is set to go, hit the “Save” button to save the custom shift data and redirect back to the Staff Members page.
Delete a Staff Member
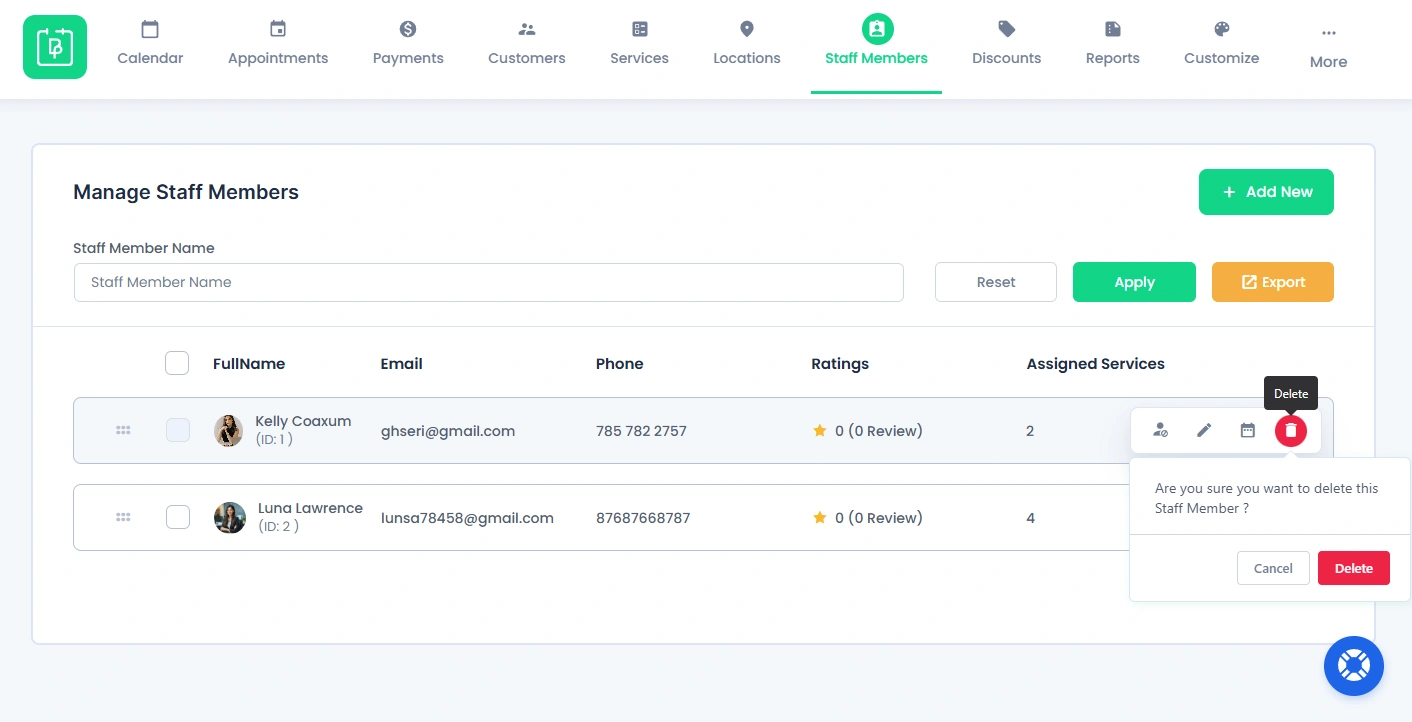
This option will help to delete the existing staff member from the list.
Just click the Delete icon and confirm the action in the popup box.
Please Note: You can’t delete a staff member if one or more appointments are associated with it.
After a staff member is deleted, its data cannot be recovered. Thus, make sure you no longer need their data before deleting.
Export Staff Data
BookingPress allows you to export staff member data for reporting, backup or external use.
You can export all the staff members data by clicking on the “Export” button at the top right corner of the Staff Members page.
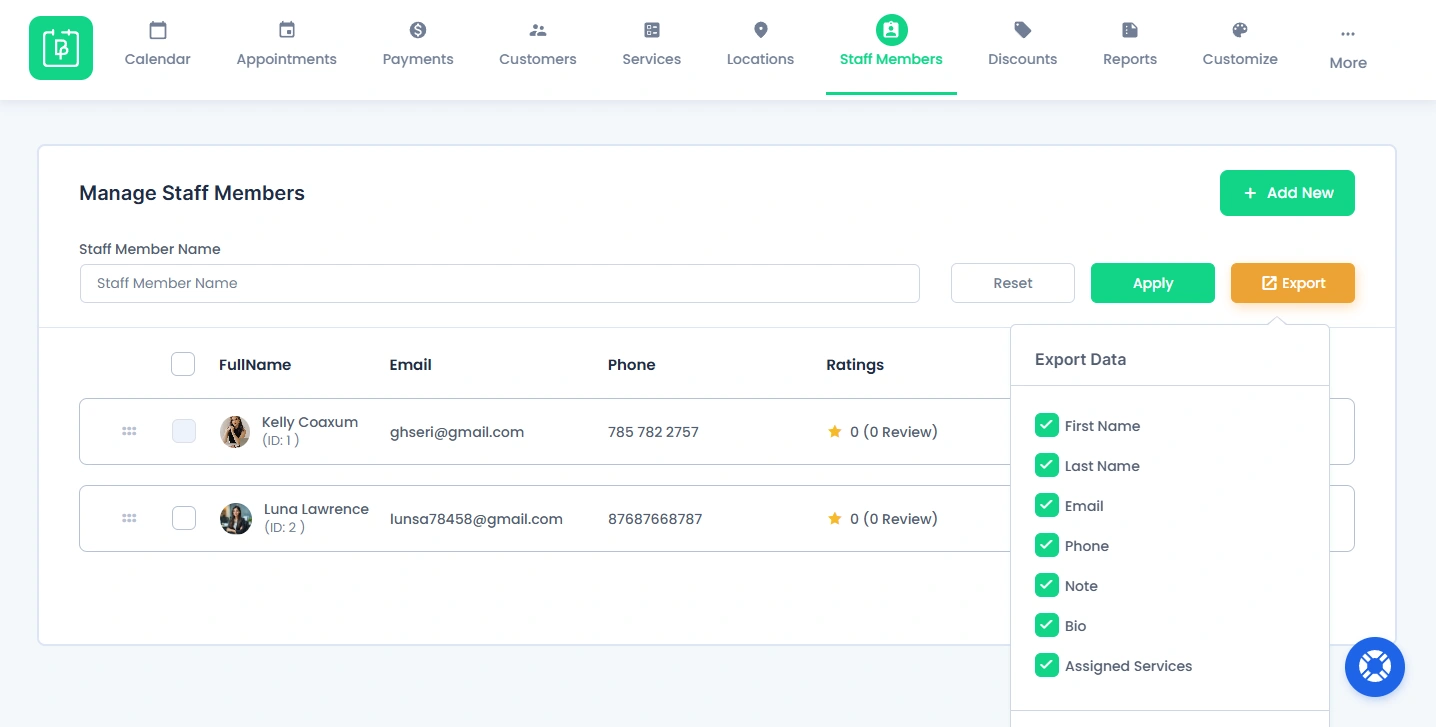
In the Export Data popup, you can choose which data fields to include in your file, such as:
- Staff Member’s Name
- Phone
- Note
- Bio
- Assigned Services
Once you select all the fields data you want, simply hit the “Export” button in the popup. Now, data will be downloaded in .csv file format.
After downloading, you can open the CSV file in Excel or any spreadsheet tool.
This feature is useful for maintaining backups or analyzing staff related data outside of BookingPress.
Need a hand?
Our world-class support team is happy to help. Send us a message and we’ll take it from there.
 14-day money-back guarantee