Customize Custom Fields
BookingPress allows you to add and customize custom fields in your booking form so you can collect extra information from your customers based on your business.
In this guide, you’ll learn how to add fields, control visibility and use advanced features like conditional logic and prefilled data.

How to Manage Custom Fields in BookingPress
To start customizing fields, go to the BookingPress → Customize → Custom Fields.
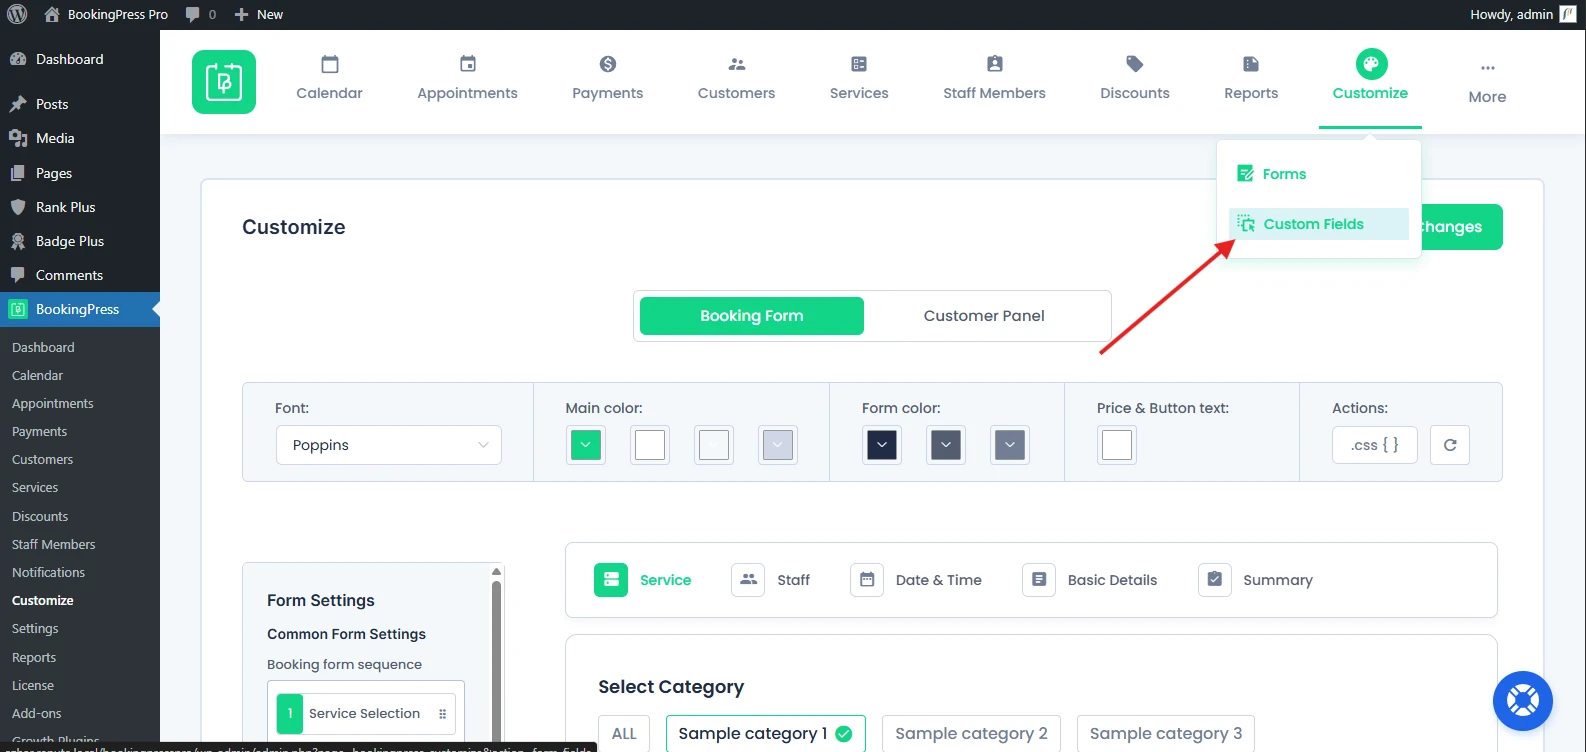
Note: This feature is available only in the Premium version.
The Custom Fields page is like a drag-and-drop form builder where you can easily add or modify form fields.
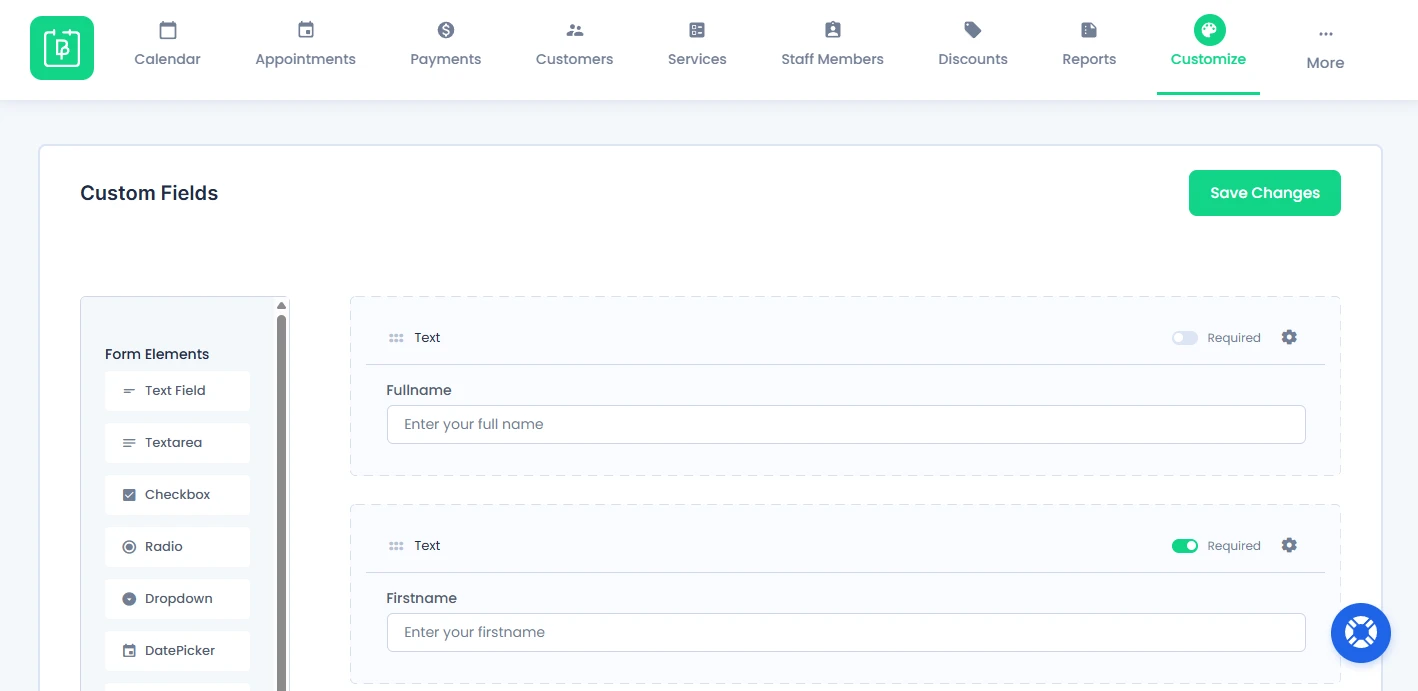
By default, BookingPress comes with default fields that cannot be deleted:
- Full Name
- First Name
- Last Name
- Email Address
- Phone Number
- Note
- Terms and Conditions
- Username
However, you can make them required or optional. Or simply control their visibility.
How to Make Fields Required or Optional
Each form field inside the Custom Fields page comes with a Required toggle.
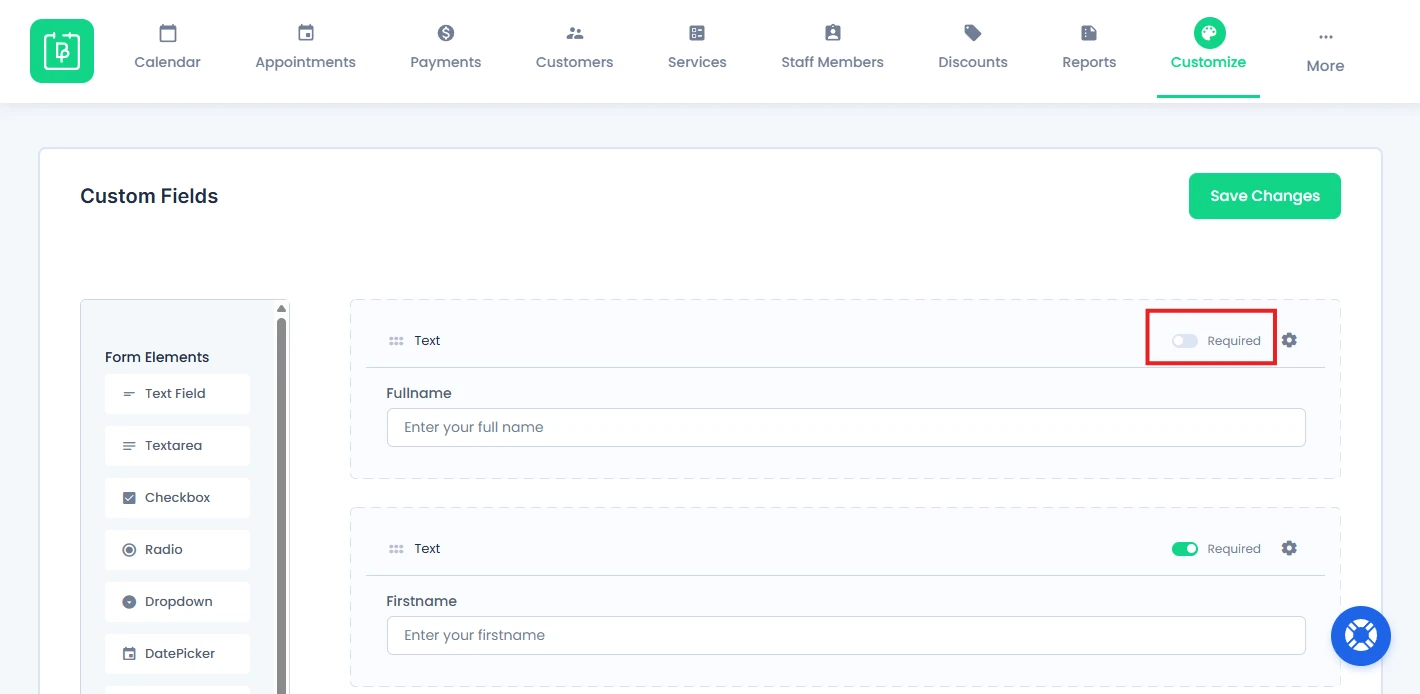
- Enable → Field must be filled before submission.
- Disable → Field becomes optional.
You can even make the email field optional if you don’t want the client’s email. However, remember if Email is not required, no WordPress user will be created during the time of booking.
What Custom Field Types Can You Add?
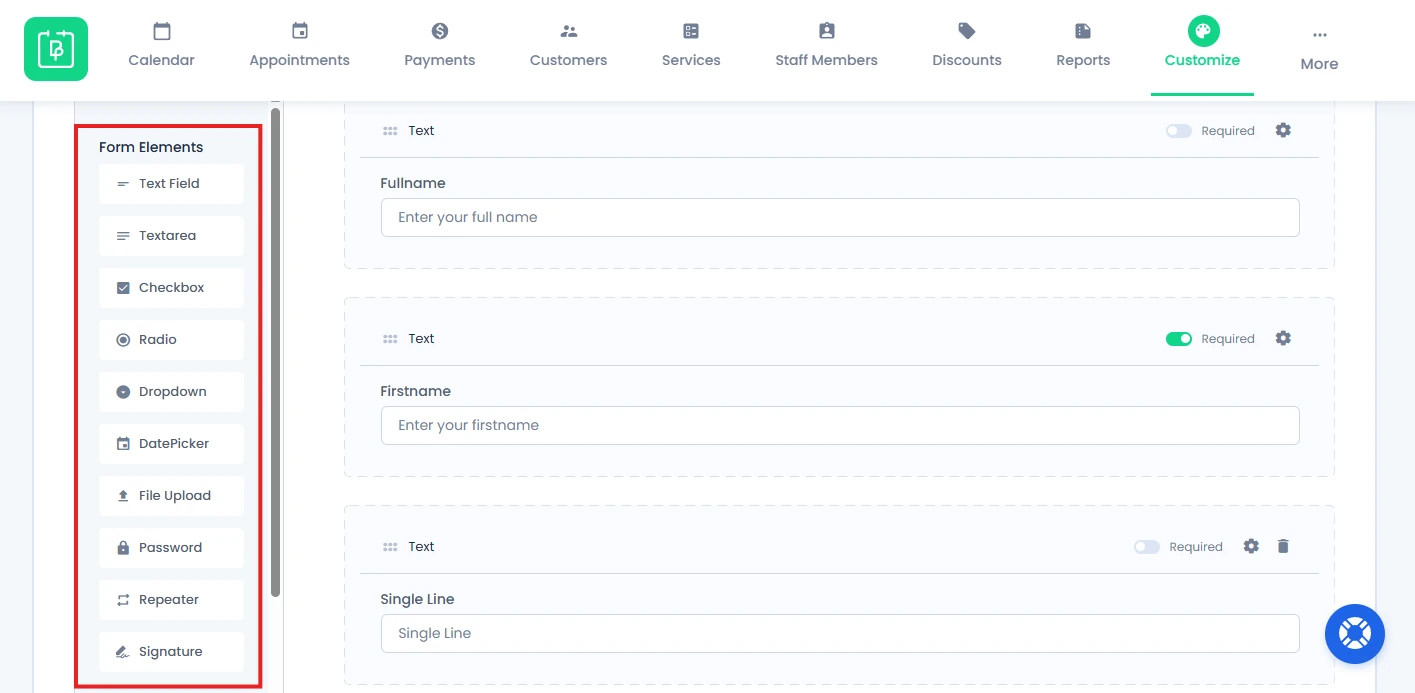
From the “Form Elements” on the right panel, you can add all the custom form field types.
Simply drag and drop these custom booking forms as you see fit, as many times as you want. Or you can also just click on it to add it at the bottom of the booking form.
Here’s the quick overview of all the custom fields available in BookingPress:
| Field Type | Use Case | Example |
| Text | Single-line input | Company name |
| Textarea | Multi-line input | Message or notes |
| Checkbox | Multiple selections | Services, preferences |
| Radio | Single selection | Gender, service type |
| Dropdown | Select one option | Country, category |
| DatePicker | Select a date | DOB, event date |
| File Upload | Upload documents | ID proof, CV |
| Password | Secure input | Account creation |
| Repeater | Multiple entries | Group bookings |
| Signature | Digital signature | Consent/approval |
1. Text Fields
If you want any information in a single line, for example, the firm’s name, then you can drag & drop this custom field, and can ask your clients to add their firm’s name in a single line.
2. Textarea
If you are going to need information that is more than one line or let’s say about a paragraph, then this field will help you to get that. In short, it’s a multiline text area field.
3. Checkbox
This option will help you to provide a list of options from which the user may select any number of choices, including zero, one, or several.
4. Radio
This option will help you to provide a list of options from where the user will be able to select only one option from the number of choices the admin provided.
Furthermore, you can customize the option’s label by clicking on the Field Options icon next to Field Settings icon on Radio field.
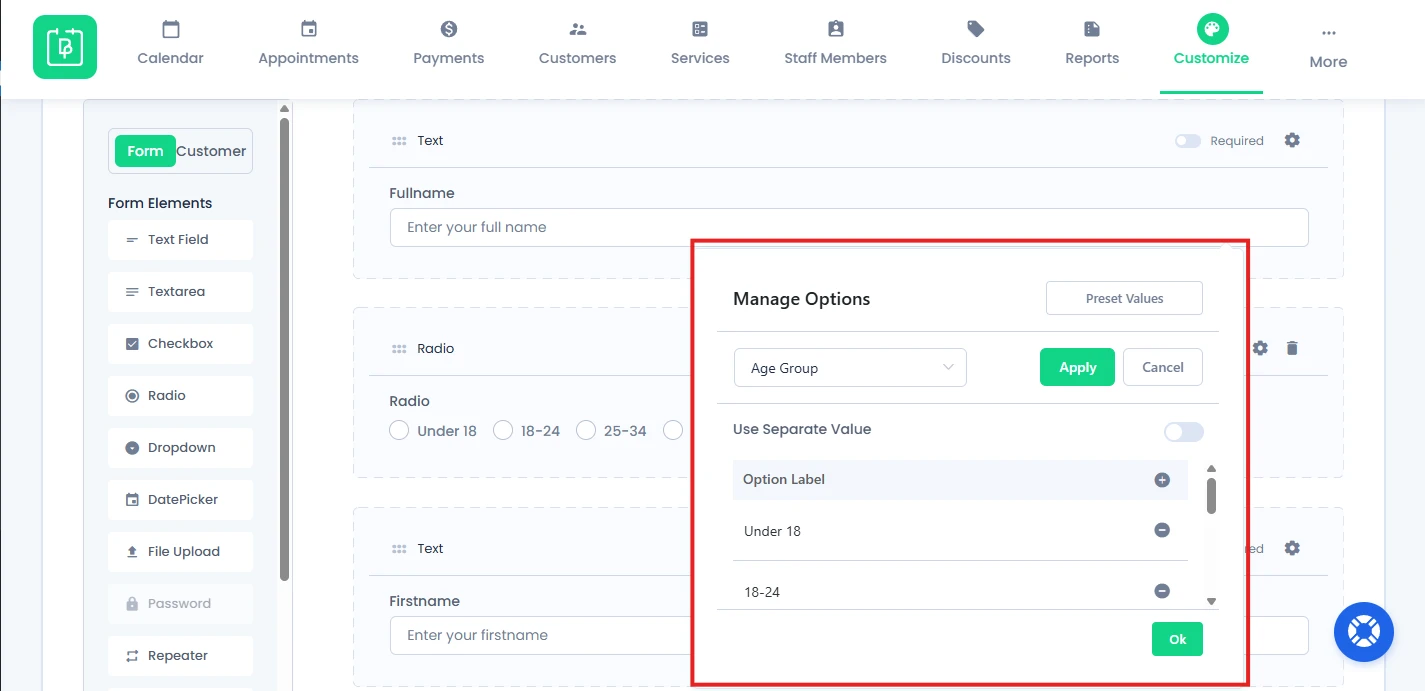
This will option a Manage Options popup box where you can either use the preset values or add your own custom values.
5. Dropdown
The dropdown helps to allow the users to choose one value from a list of options at a time.
6. DatePicker
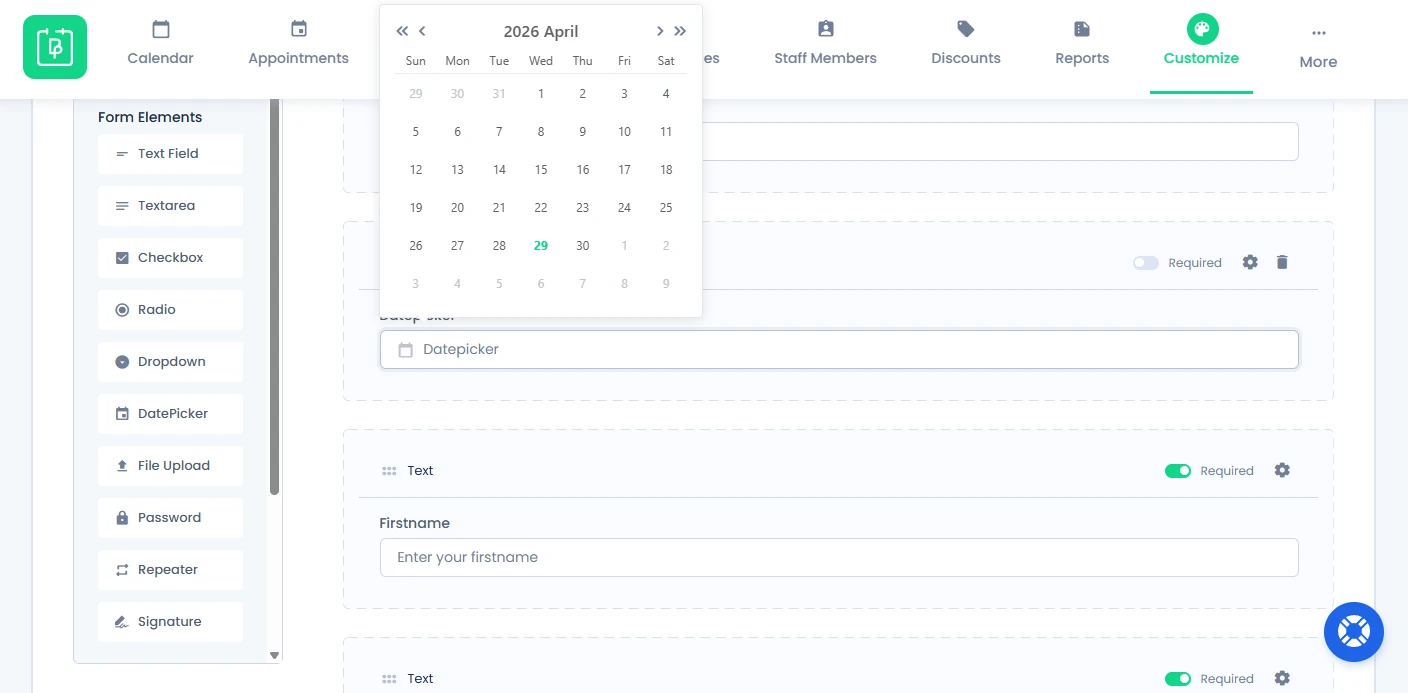
A DatePicker works as a pop-up calendar from which the user can select a date from a calendar from any past event or upcoming event.
7. File Upload
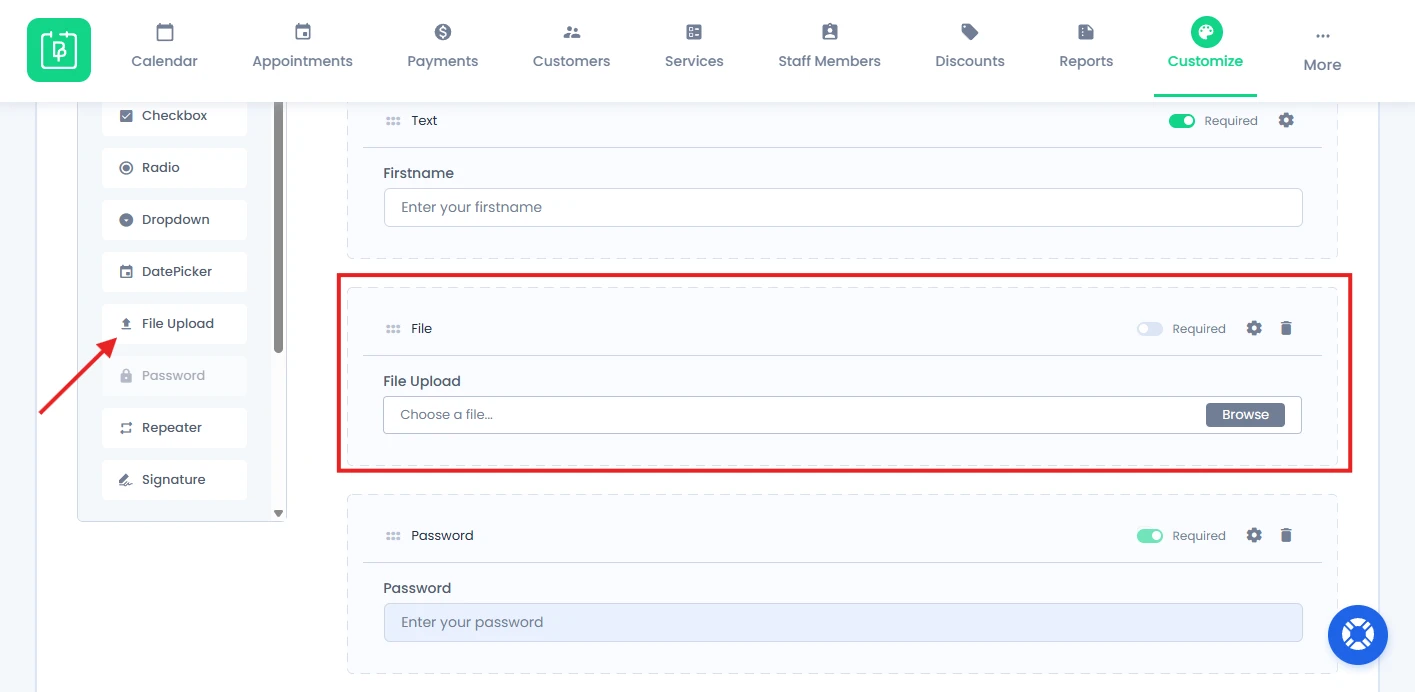
Through the file upload field, the customers will be allowed to upload the required files while booking an appointment. For example, an ID proof, or a CV, etc… Files can be uploaded based on the extensions set by the admin such as .jpg, .png, .gif, .jpeg, .ico, .txt, .doc, .docx, .pdf, .csv, .xls, .xlsx, .ods, .odt, etc… You can set different extensions to upload various files which are supported by WordPress.
With version 5.0, the system now allows multiple file uploads, and a maximum file upload limit can be set. For example, if multiple file uploads are enabled, you can restrict customers to upload up to 4 files per appointment.
Note: If you have allowed .jpg or .jpeg image extensions and multiple file uploads are enabled, uploading even a single invalid file will cause all other files in that upload batch to be removed. Please keep this behavior in mind when configuring allowed file types.
8. Password
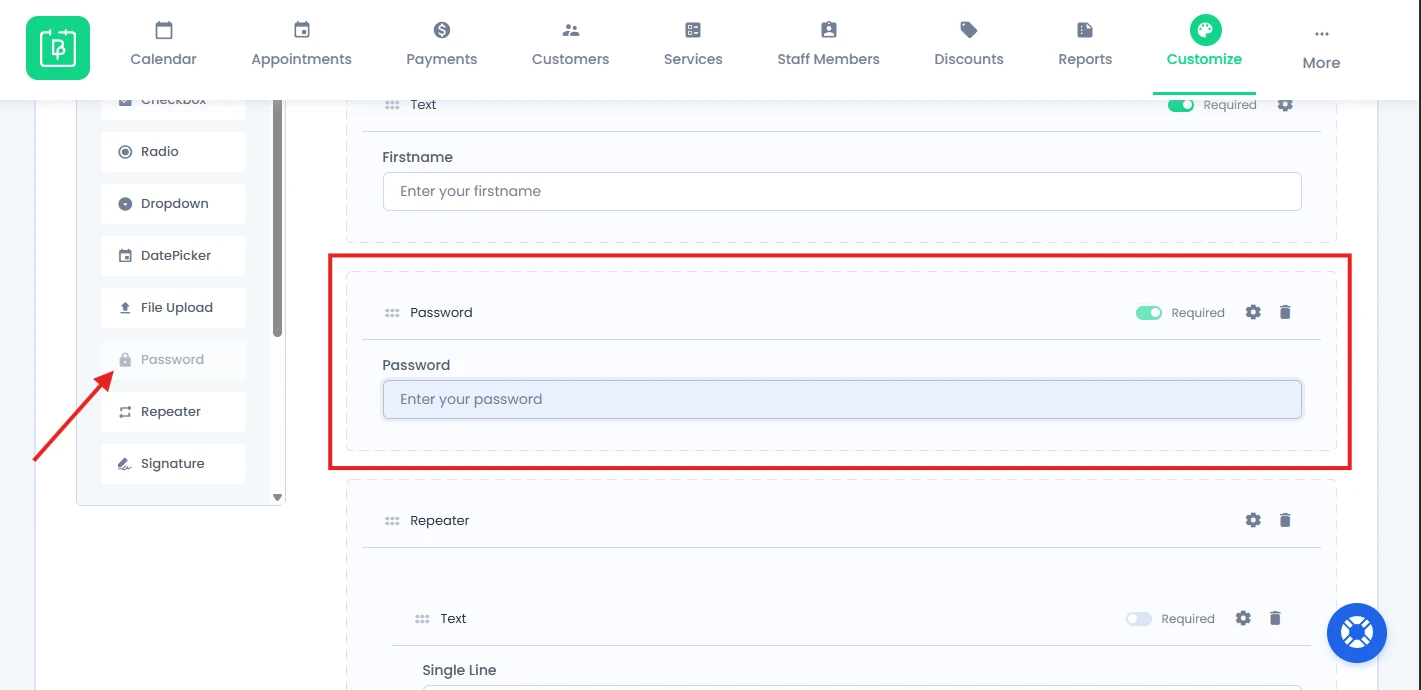
The Password field in Custom Fields lets you add a password field inside the booking form. However remember you can only add this field once.
9. Repeater Field
Repeater fields are used in conjunction with the “Multiple Quantity” module to gather information about more than one member when a single appointment is selected for more than one person.

Setup Repeater field
First, activate the “Multiple Quantity” Addon to use the repeater field. Please follow the below steps.
- Navigate to WordPress Dashboard → BookingPress → Add-ons → Multiple Quantity addon.
- Now Click on the “Activate” button.
- You can see the repeater field on the left side after activating the “Multiple Quantity” module.
You can drag all the fields except the following in the repeater field.
- username
- password
- terms_and_conditions
- multi columns
Client Experience
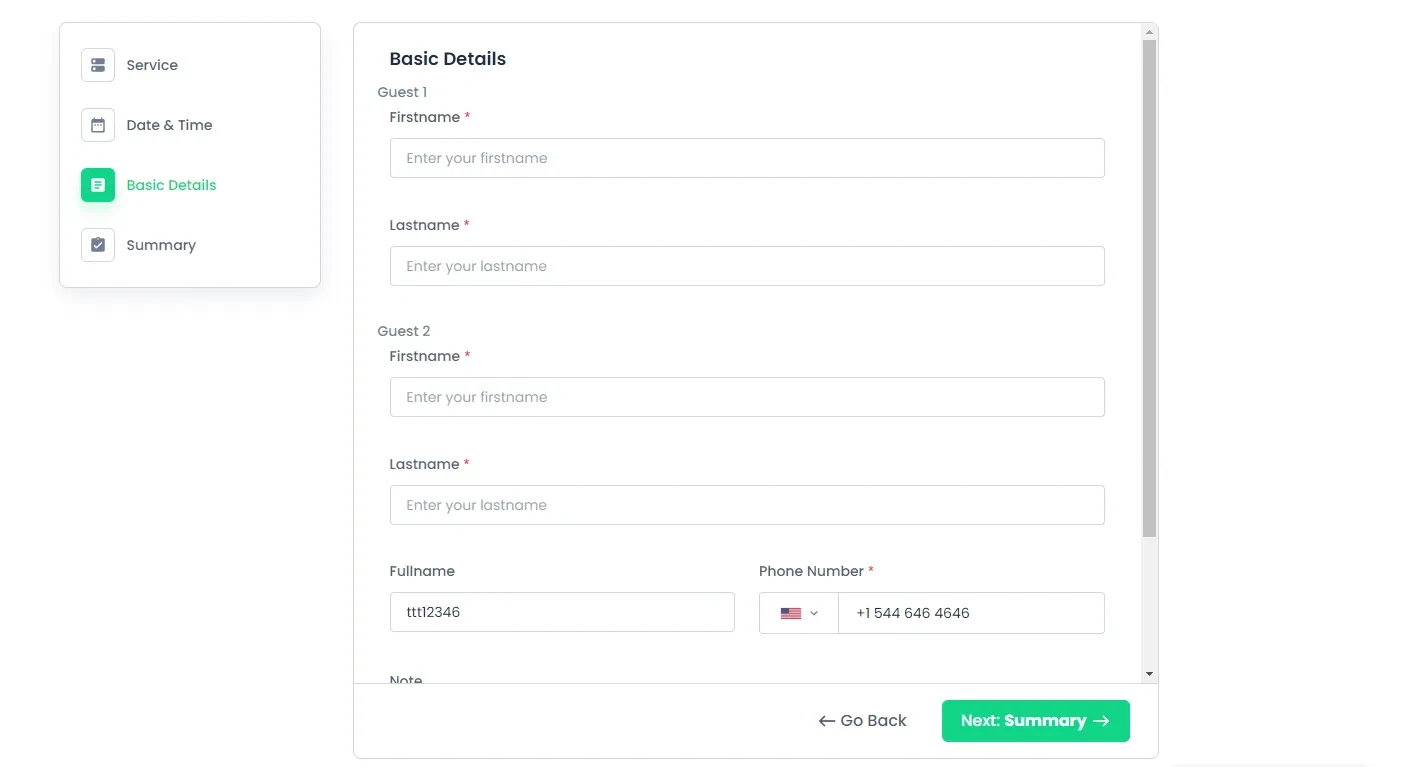
A repeater field will repeat the fields based on the quantity selected with the “No. of persons” option.
Note:
- Repeater fields get removed when “Multiple Quantity” Addon.
- Not compatible with Cart Add-on.
One more thing: If the Email Field is Full Name, First Name, Last Name, and Email Fields are set to “Not Required” and no data is entered while booking, or if all these Fields are set to Hidden with the Username Field, then no Customer details with an appointment will only be displayed with Customer Phone Numbers.
10. Signature
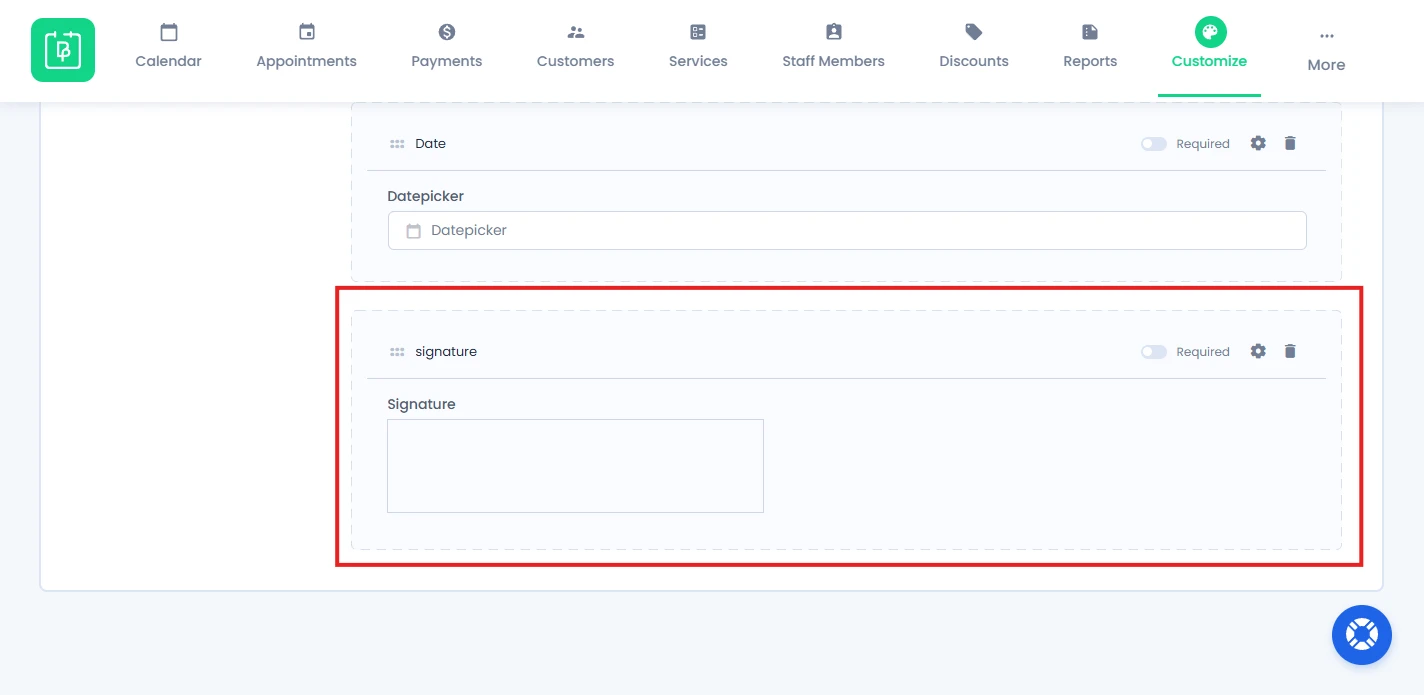
The Signature field type allows you to collect a customer’s handwritten signature directly through the booking form. This can be useful for scenarios where you need customer consent, authorization, or acknowledgment as part of your booking process.
Customer Fields from BookingPress Settings
If you have already created Customer Fields from BookingPress → Settings → Customers, those fields will automatically appear here under the “Customer” section.
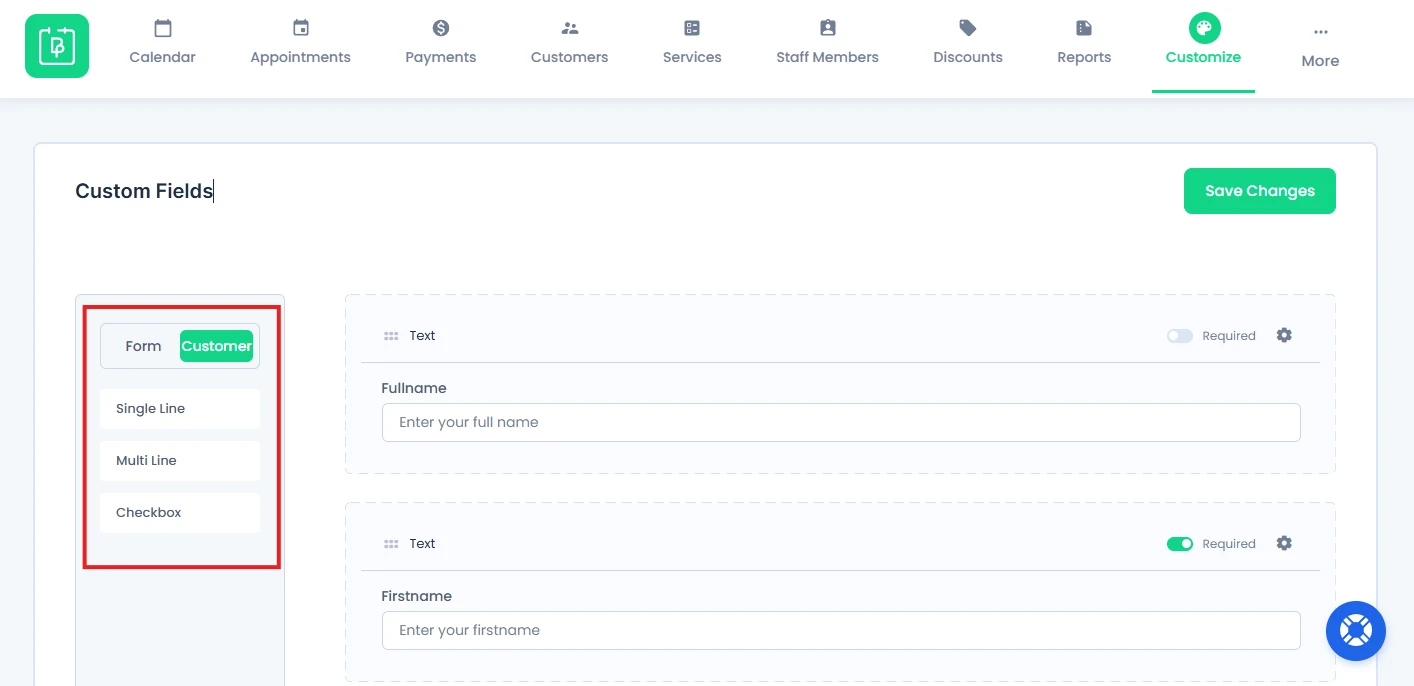
You can directly:
- View all previously created customer fields.
- Add them to your booking form as custom fields.
- Reuse them without creating new fields again.
Here you can add these fields as the Custom Fields.
How to Configure Individual Field Settings (Gear Icon)
Each custom field in BookingPress comes with a settings popup that allows you to fully control how the field behaves and appears.
To access this, simply click on the Field Settings (gear icon) on the field.
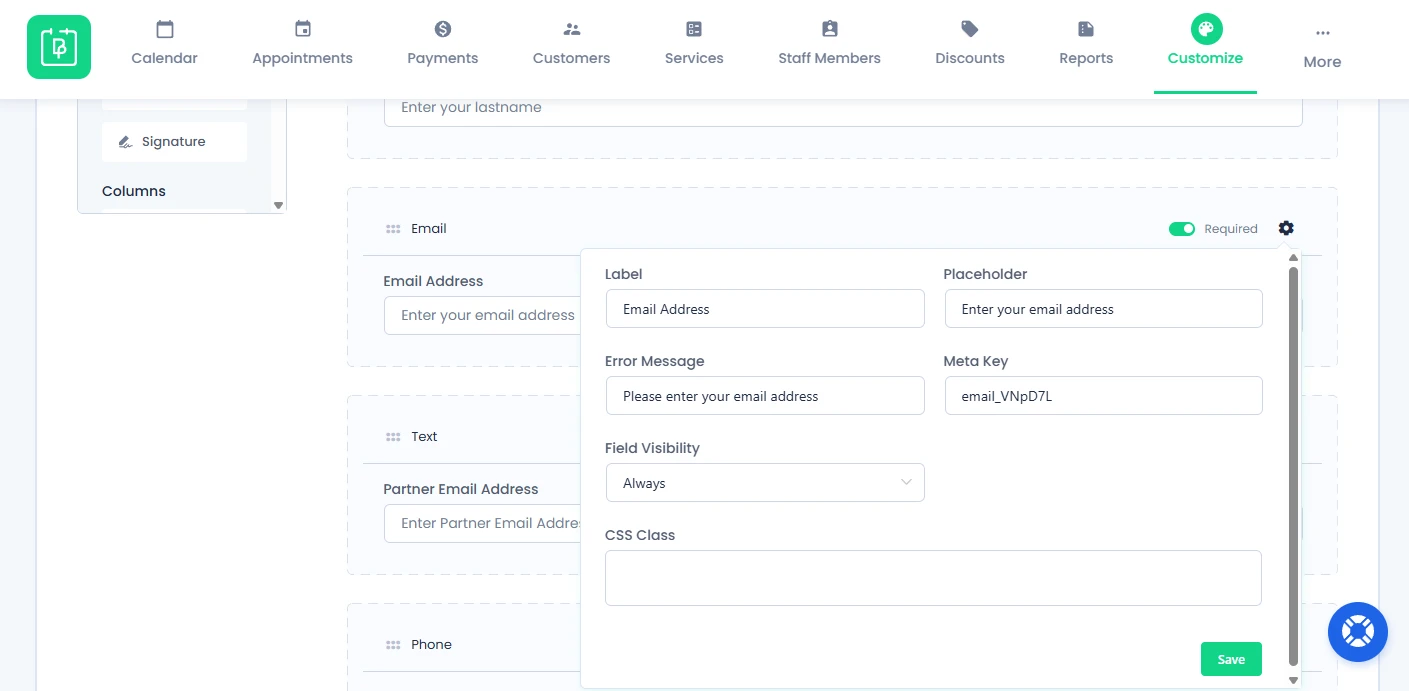
Inside this popup, you will find the following options:
Label
This is the name of the field displayed to users.
Placeholder
Helper text shown inside the field (e.g., Enter your full name).
Minimum / Maximum
Set limits for input values (used in number or text-based fields).
Error Message
Custom message shown if the user enters invalid or missing data.
Meta Key
A unique identifier for the field.
This is important for:
- Prefilling fields via URL
- Advanced integrations
Field Visibility

You can control when a field appears using visibility settings. Click the settings icon on a field and choose:
- Always (default)
- Show based on specific service
- Show based on specific staff
- Show based on specific location
- Show based on another field’s value
- Hidden
For example, if a client selects,“Tutor will travel to client”, then you can show an Address field conditionally.
CSS Class
Add custom CSS classes to style this field using custom design rules.
How to Organize Fields Using Columns
If you scroll down the Form Elements, you’ll see the Columns section.
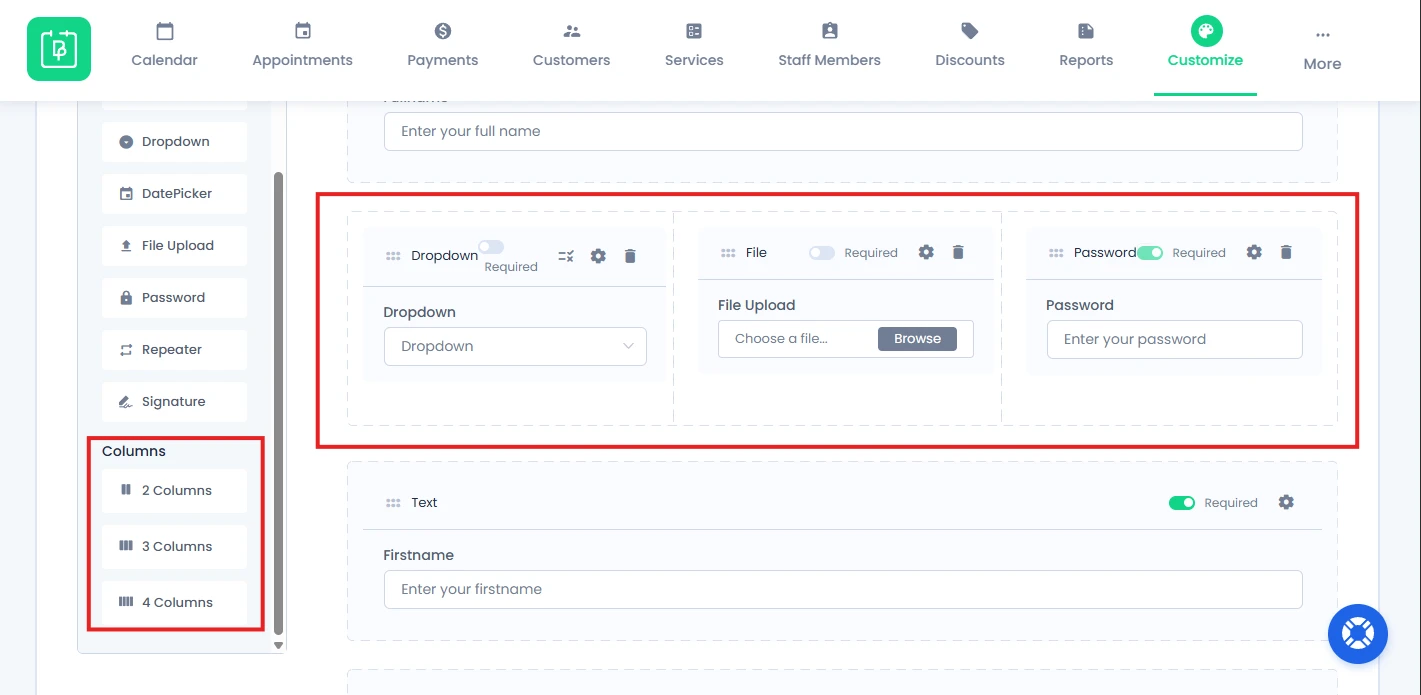
With columns, you can add and divide the fields into different sections, structuring your form layout.
You can divide the section by:
- 2 Columns
- 3 Columns
- 4 Columns
This helps create a more organized and user friendly form layout.
Prefill Custom Fields Using URL Parameters
BookingPress allows you to use URL parameters to send prefilled data into fields.
For this, you need the field’s meta key, which can be found in BookingPress → Customize → Custom Fields.
Now click on the Gear icon on the right side of the field to find the meta key.
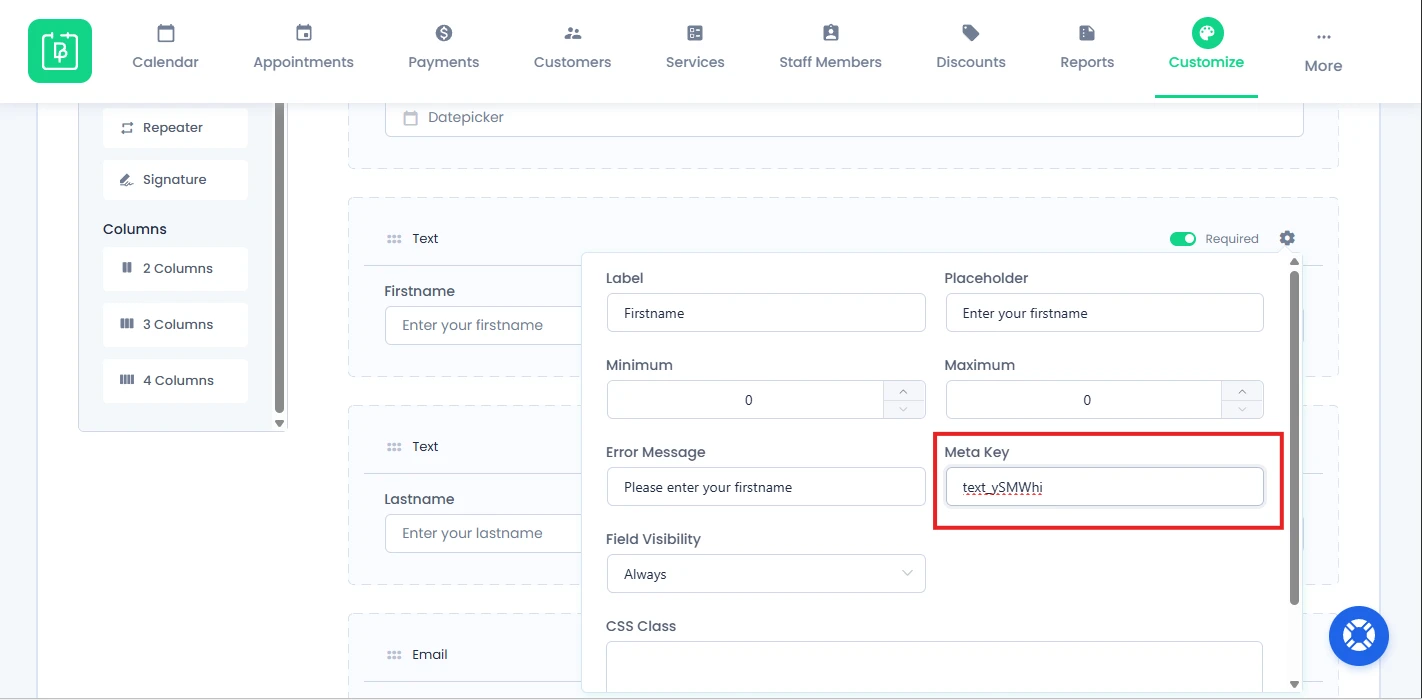
Copy the key and add it to the URL as a placeholder, like this:
www.yoursitename.com/book-appointment/?metakey=Hello (replace yoursitename.com with your actual domain).
When this link is used, it will prefill the data “Hello” in that particular field directly. The above link is for demonstration purposes only.
Note: Only certain fields can the data be passed to. It won’t work with Password and File Upload fields!
Need a hand?
Our world-class support team is happy to help. Send us a message and we’ll take it from there.