Skrill Payment Gateway Addon
Skrill Integration:
Get and Activate Skrill Addon from BookingPress -> Addons .
To get and Activate Skrill Payment Gateway, please follow the below steps.
- First, login to the BookingPress Website, and you will be redirected to the My Account page.
- Now, click on the “Access Passes” link from the left menu panel.
- After going to the Access Passes, click on the “View your downloads” button.
- From the list, please look for the “Skrill” add-on, click on the download button, and it will automatically start downloading the addon. After the download is finished, upload the downloaded zip file to WordPress just link any other WordPress Plugin, then install and activate the addon to use it.
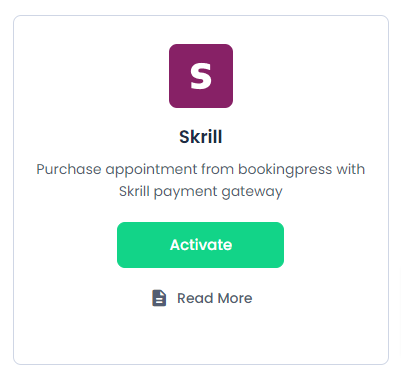
Now, you will be able to insert the Merchant Email & Account Password. For activation click on the active button.
To get the Account password, Log in to your skrill merchant account.
Go to Settings > Developer Settings and set API / MQI Password using the toggle, type, and confirm by clicking save.
Skrill provides a facility to display merchant logos at the checkout page. So, upload the merchant logo and save payment gateway settings.
If you do not have a Skrill account then create one.
To signup for a Skrill account click here.
Where do I get the Merchant Email?
Use your Merchant email or a Skrill Merchant account.
Now, go back to BookingPress -> Settings -> Payments and enable the switch of the Skrill to enable the payment gateway.
Insert the “Merchant Account Email”, and “Merchant Account Password” credentials in the specific textboxes. After that, click on the save button and you are good to go.
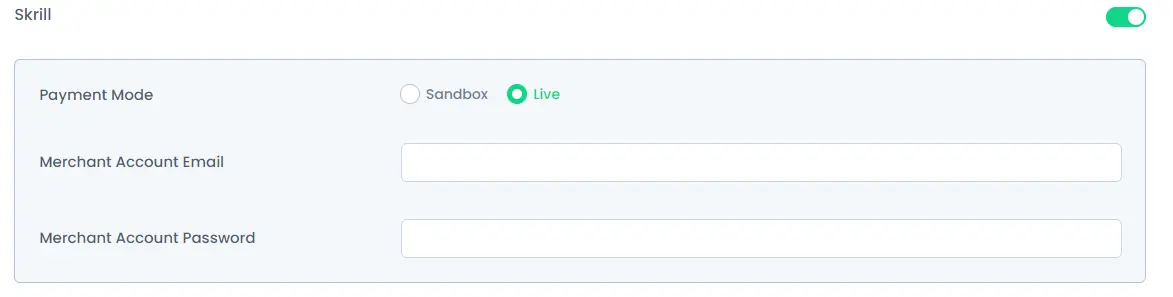
Note: Enter different and valid Credentials for both “Sandbox and Live”.