Omnisend Integration
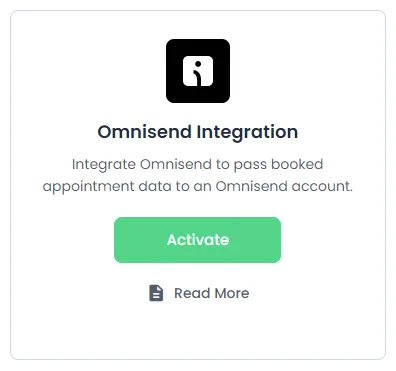
To integrate the Omnisend with the BookingPress, first, you will have to activate the Omnisend Addon from BookingPress > Addons. If you are seeing “get” instead of “activate” please follow the steps below :
- First, login to the BookingPress Website, and you will be redirected to the My Account page.
- Now, click on the “Access Passes” link from the left menu panel.
- After going to the Access Passes, click on the “View your downloads” button.
- From the list, please look for the “Omnisend” add-on, click on the download button, and it will automatically start downloading the addon. After the download is finished, upload the downloaded zip file to WordPress just like any other WordPress Plugin, then install and activate the addon to use it
After this is done you will be able to setup this Opt-in.
Generate an API key for Omnisend
- Login into Omnisend, if you haven’t created an account you can create one here.
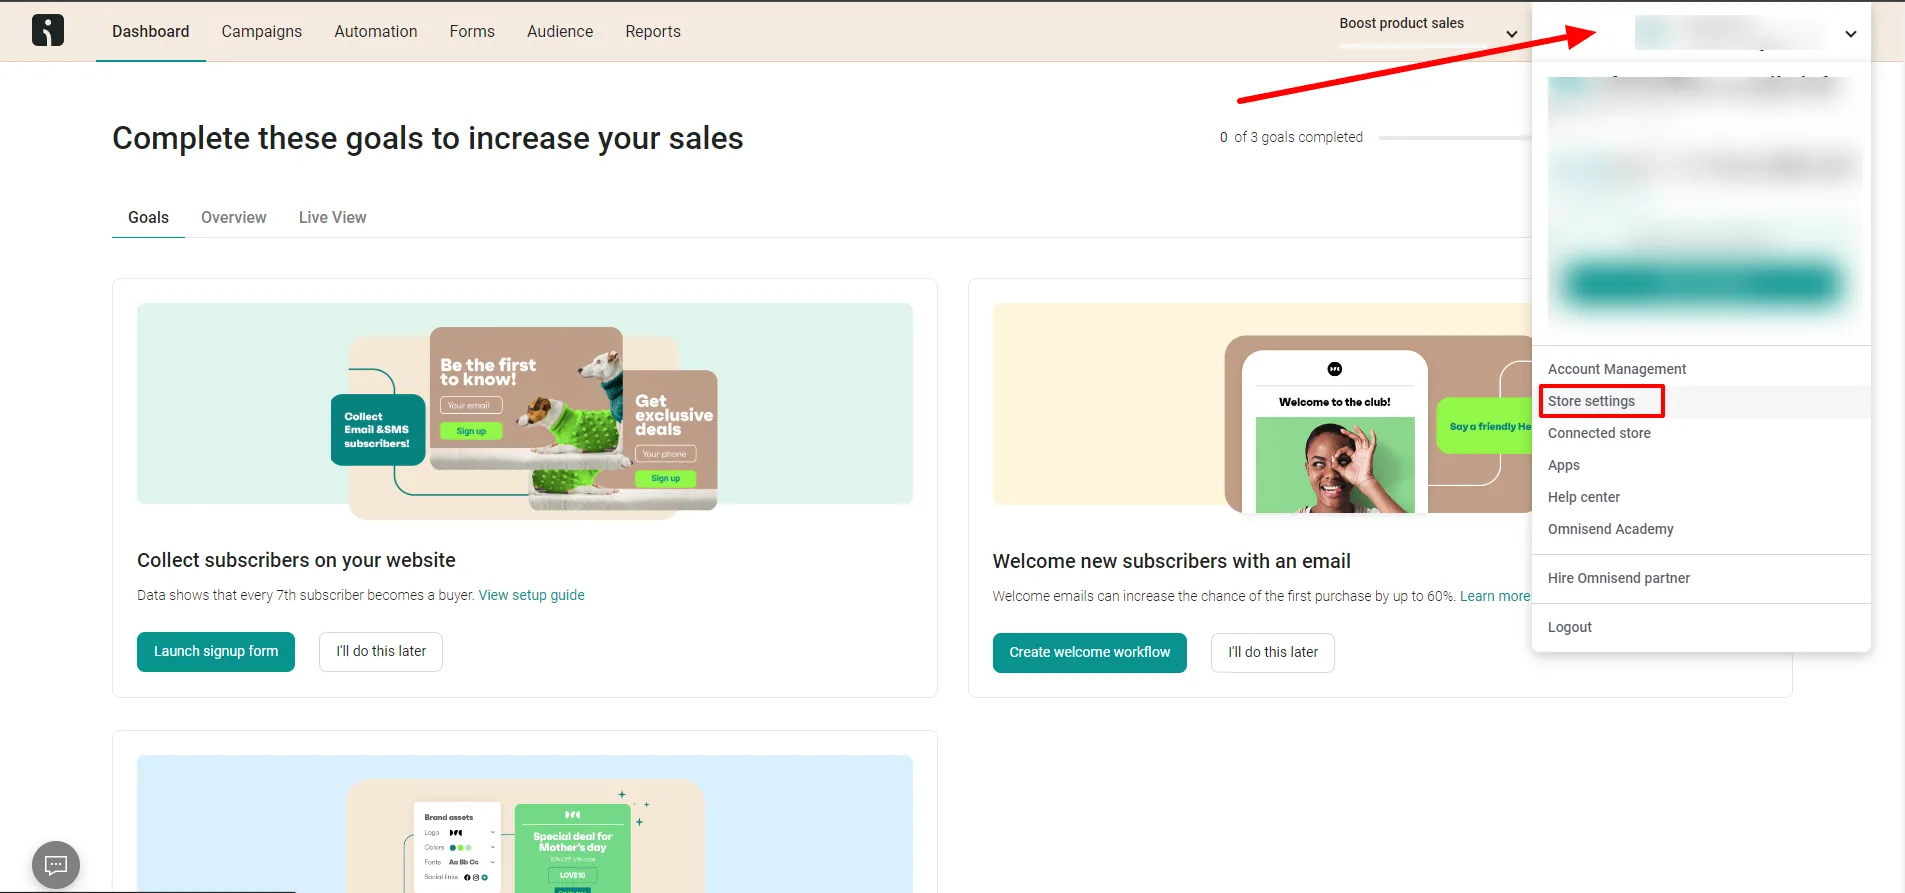
- To generate an API key simply click on your Profile on the top right.
- Select Store settings.
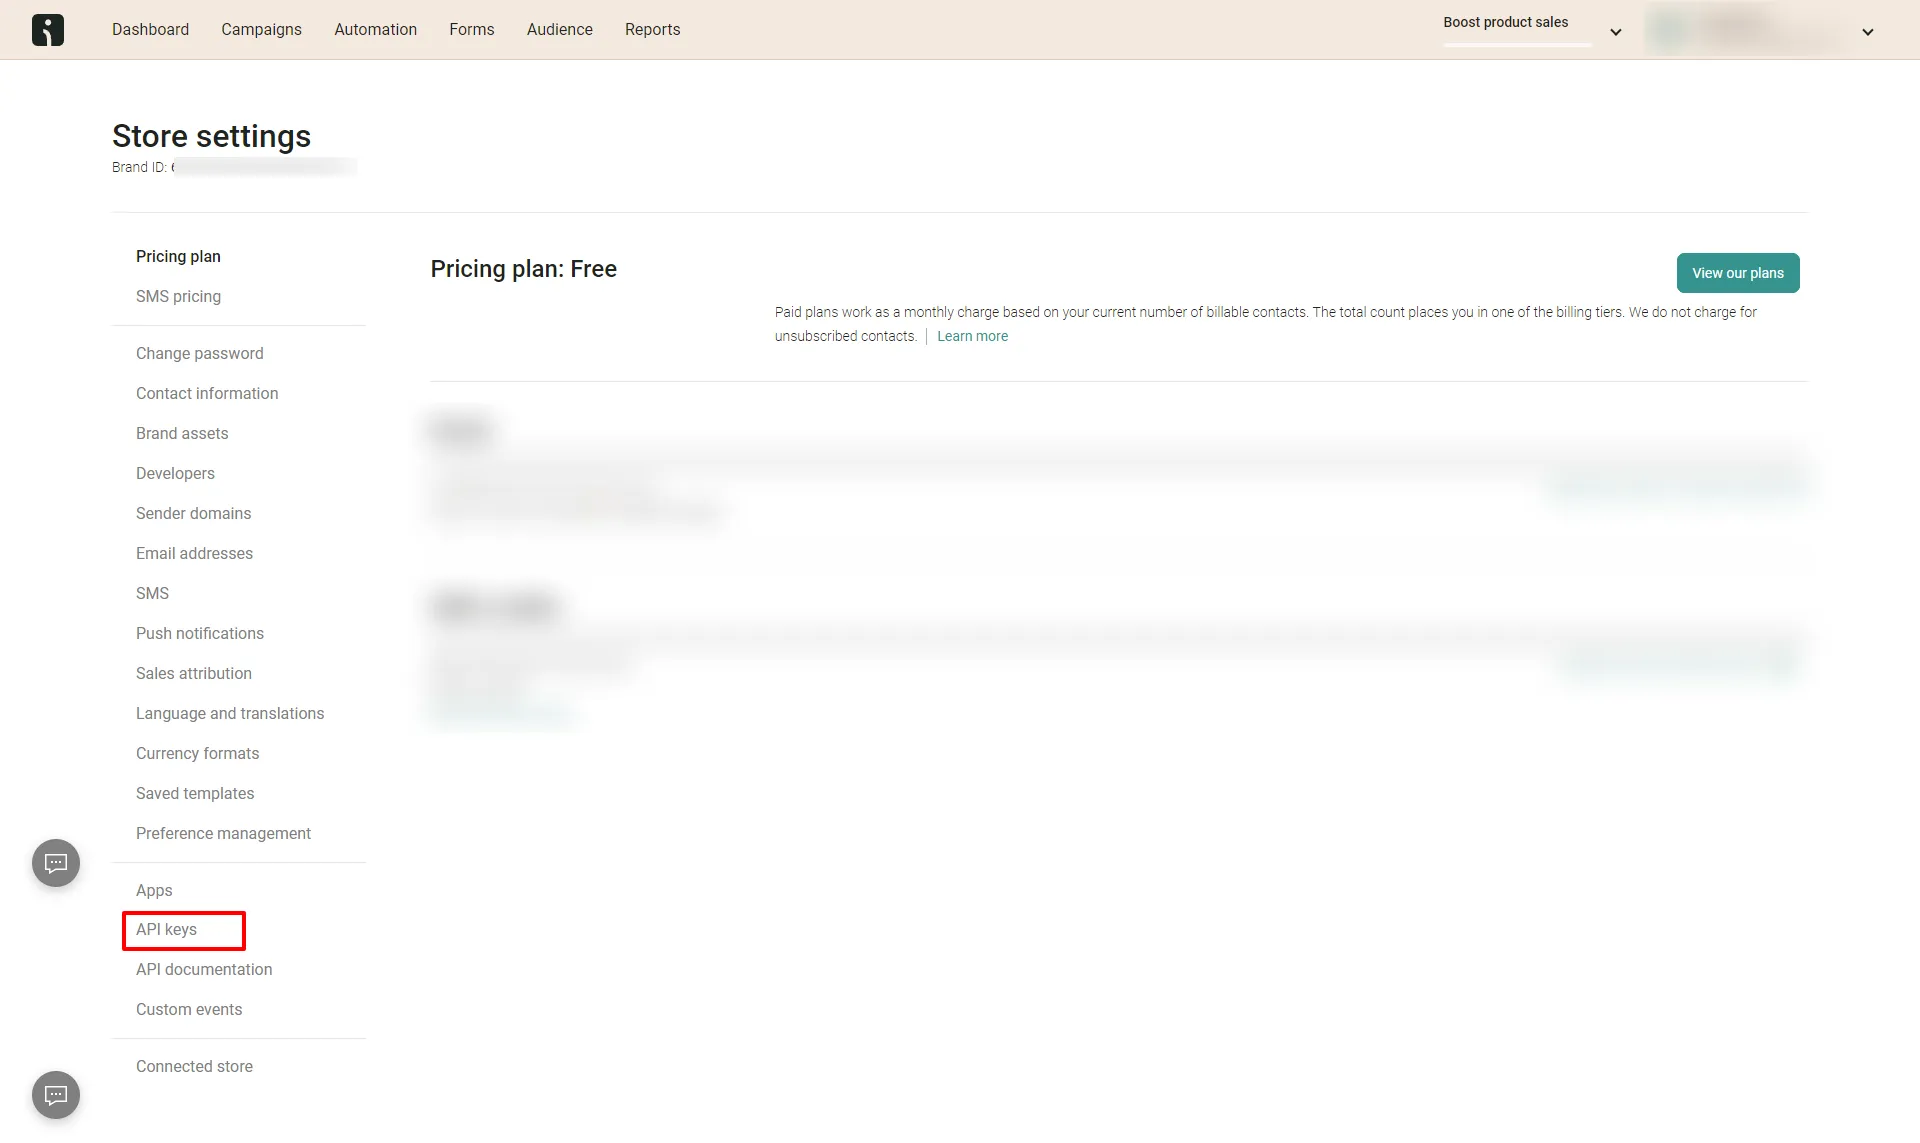
- Here on the left, you can see the Profile menu and click on API keys.
- You will now see your created API keys here. To create a new one simply click on the “+ Create API key” button
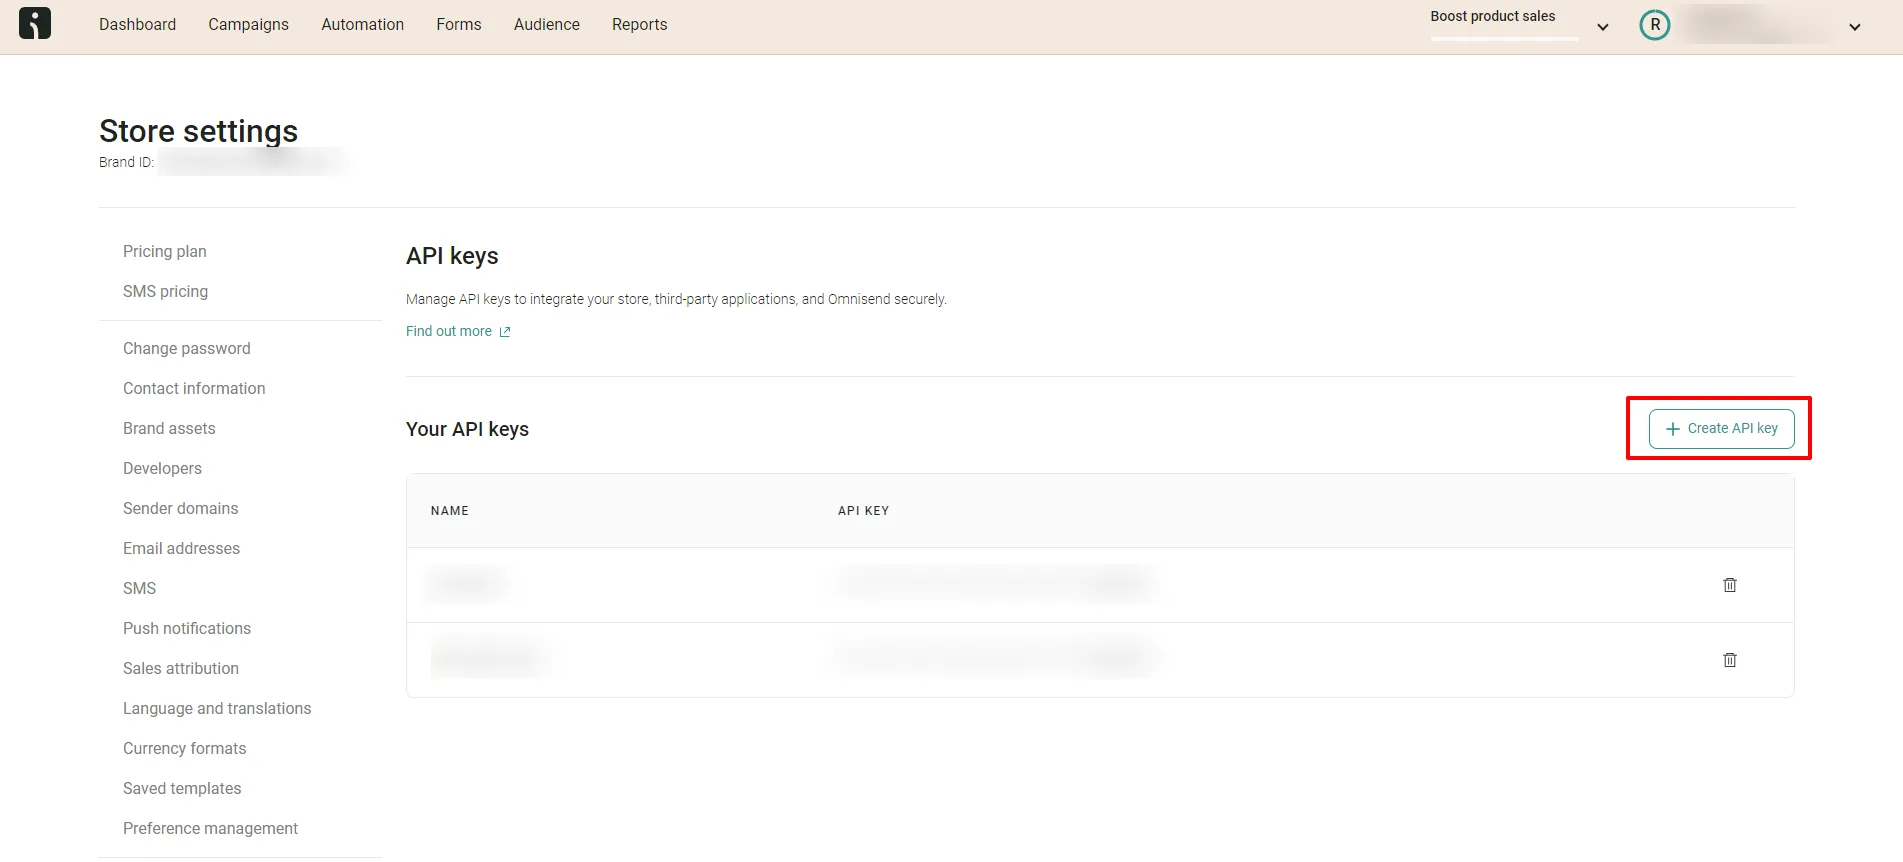
- Here enter your desired name for the key.
- When it comes to key permissions make sure to select only Orders and keep the remaining of them unchecked.

- Once you are done simply click on the Create API key button present on the bottom right.
- You have your API key make sure to copy this key and keep it at some place secure as you won’t be able to view the same key again.

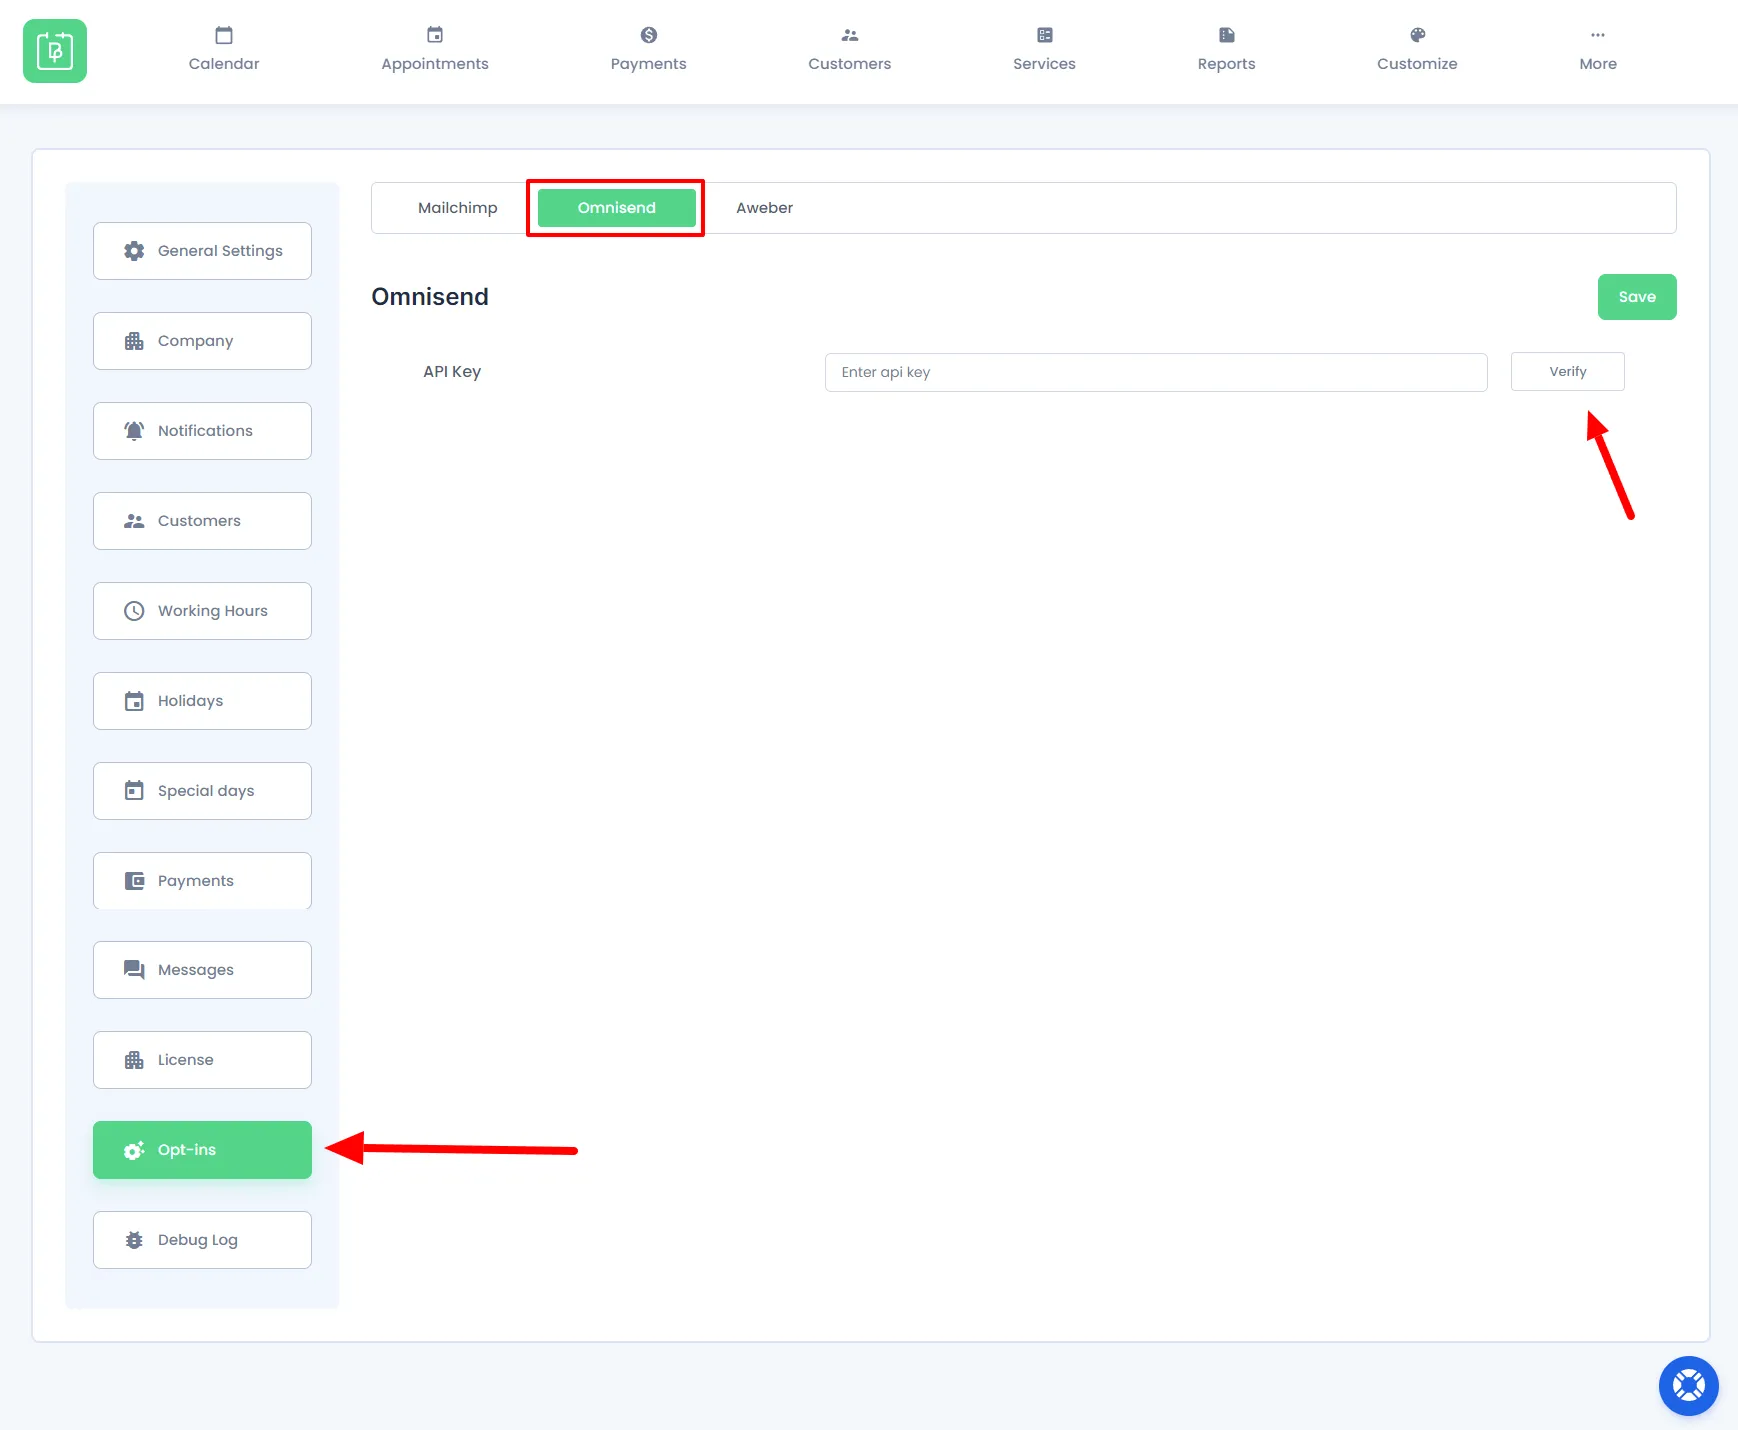
BookingPress Configuration
- Once you have the API key you can head over to
BookingPress>Opt-ins> Here chooseOmnisendfrom the top bar.
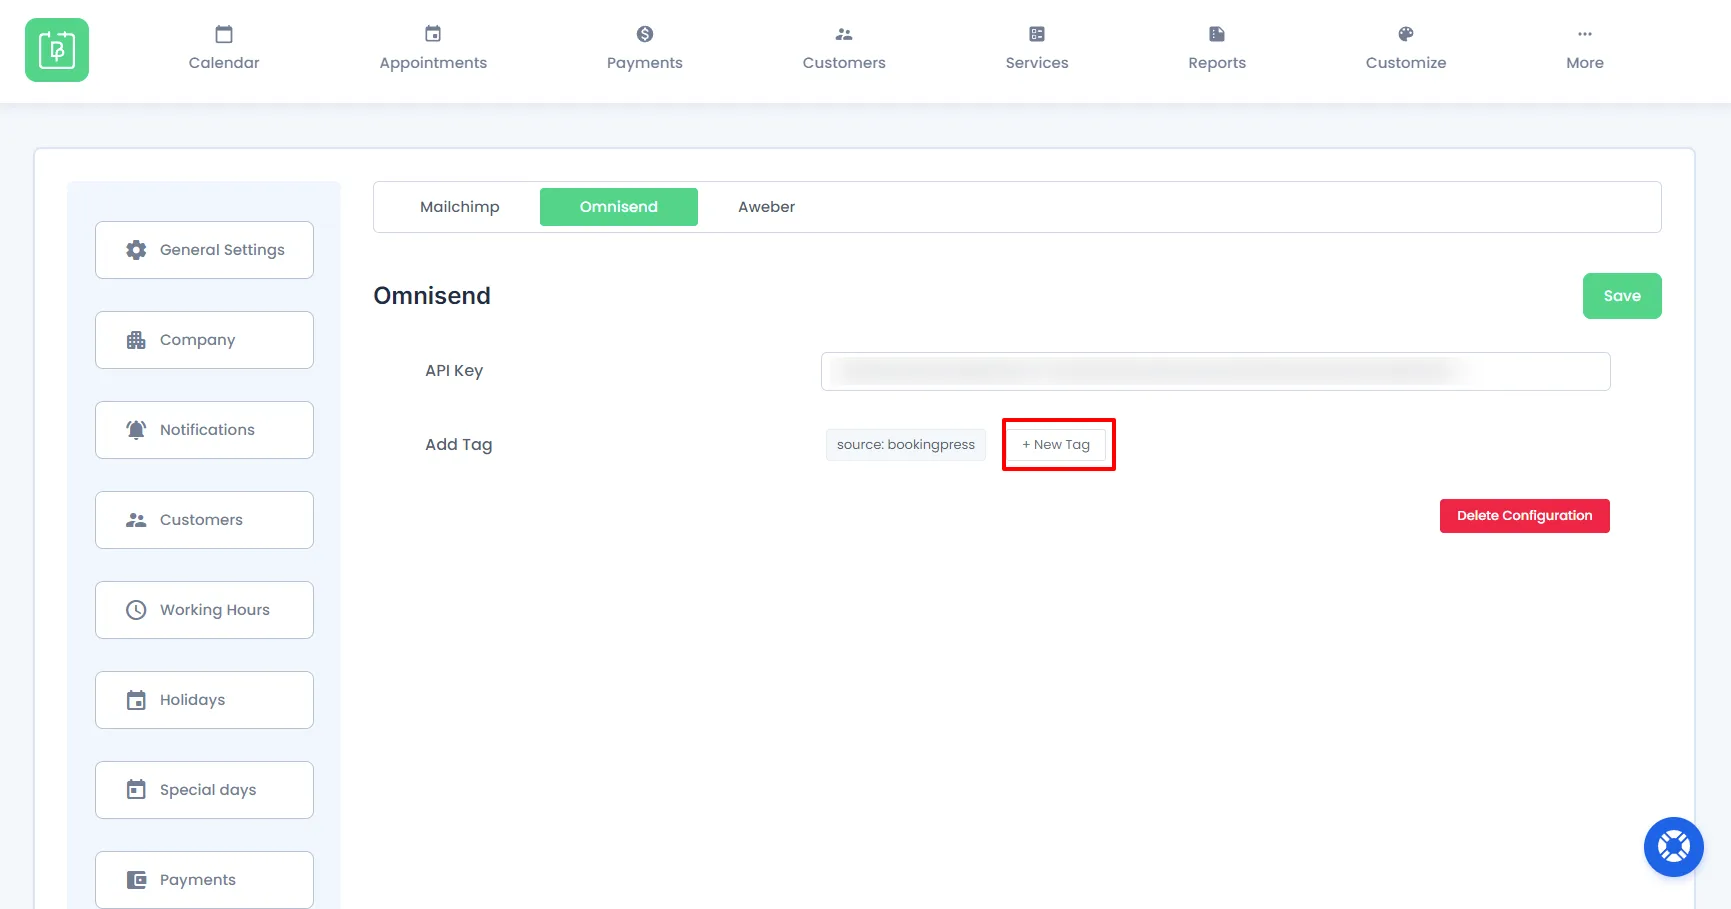
- Simply place your API key inside the field and click on Verify
- As soon as it is verified you can see that you can Create New Tags as well as delete Configuration
Now whenever an appointment is booked the data will be passed to Omnisend
You can find the fetched data in the Omnisend Dashboard by heading over to the Audience Tab. Here all the contact information will be saved including your tags.