Zoom Integration
Zoom Integration:
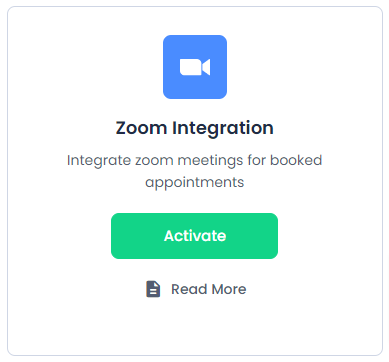
To integrate Zoom with the BookingPress, first, you will have to get and activate the Zoom Integration Addon from BookingPress -> Addons.
After the addon is activated, you will have to enter the “Account ID”, “Client ID” and “Client Secret” to set up the integration.
How to get Account ID, Client ID, and Client Secret?
- Login to Zoom App Marketplace.
- After logging in, hover over the
Developdropdown from the Top Right corner of the page and click onBuild App.
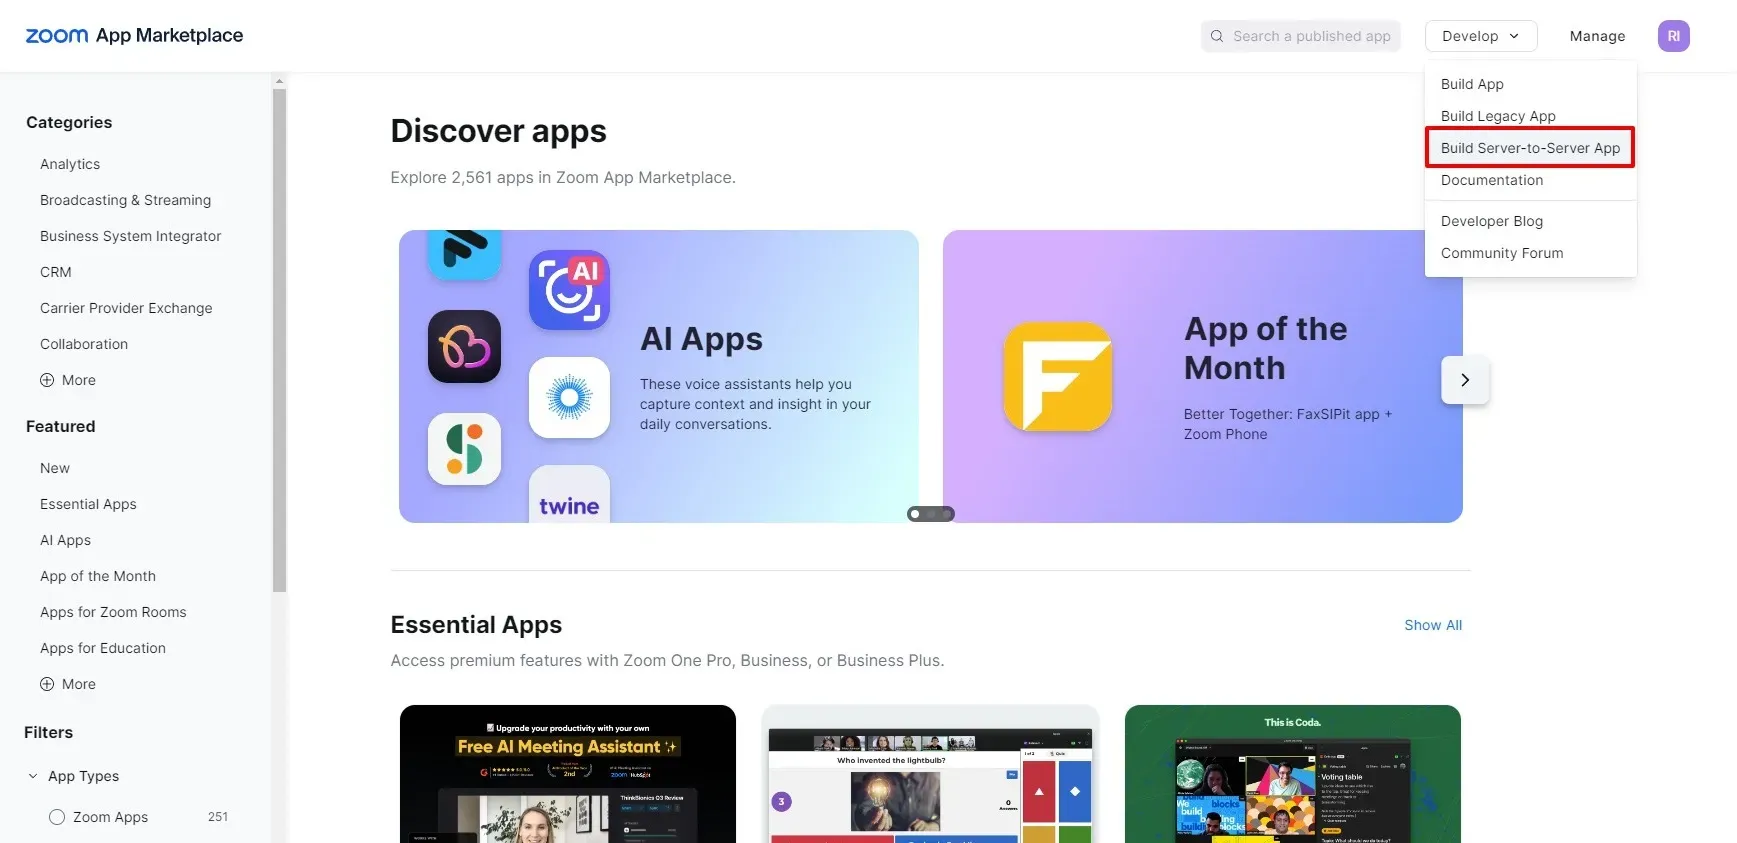
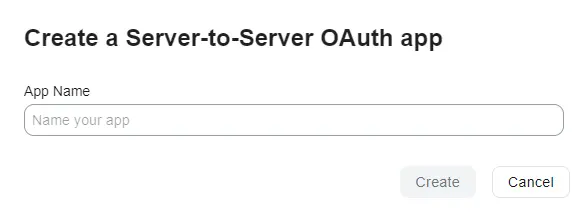
- Set the name for your
Server-to-Server OAuth appand Click on theCreatebutton.
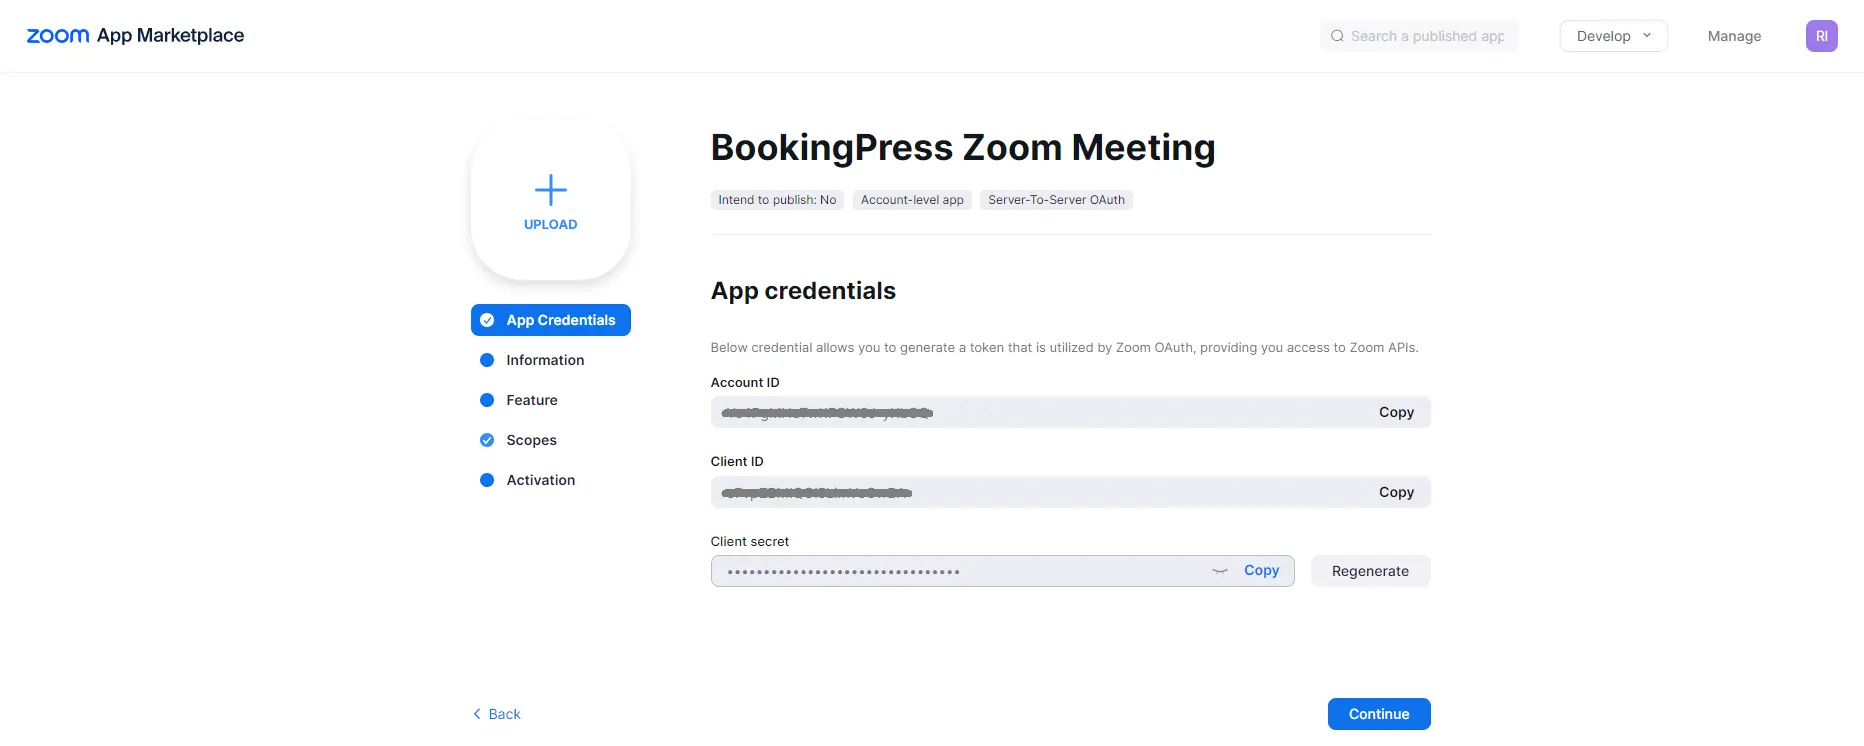
- Now, you can find and copy your Account ID, Client ID, and Client Secret from the Created Application configuration.
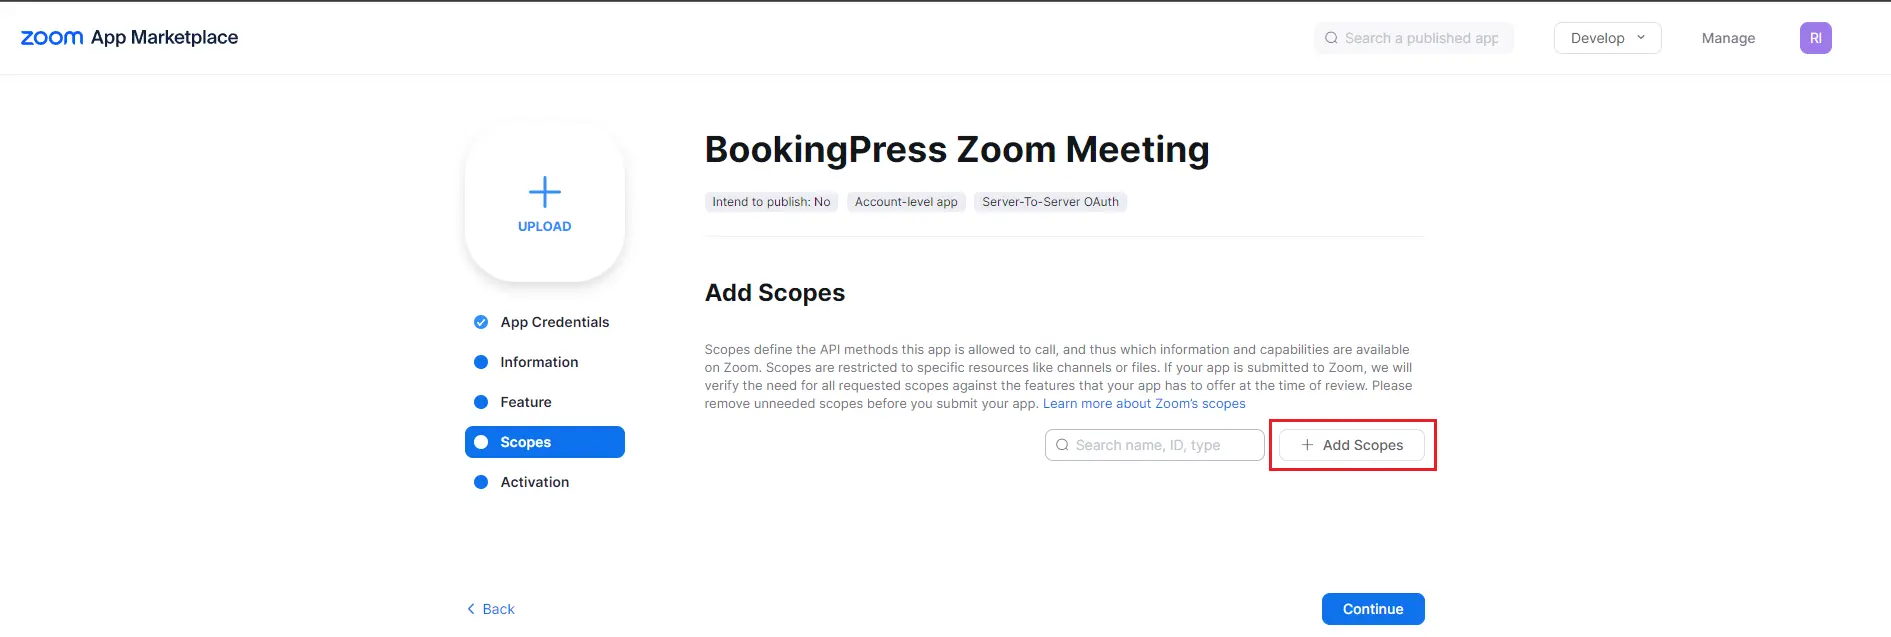
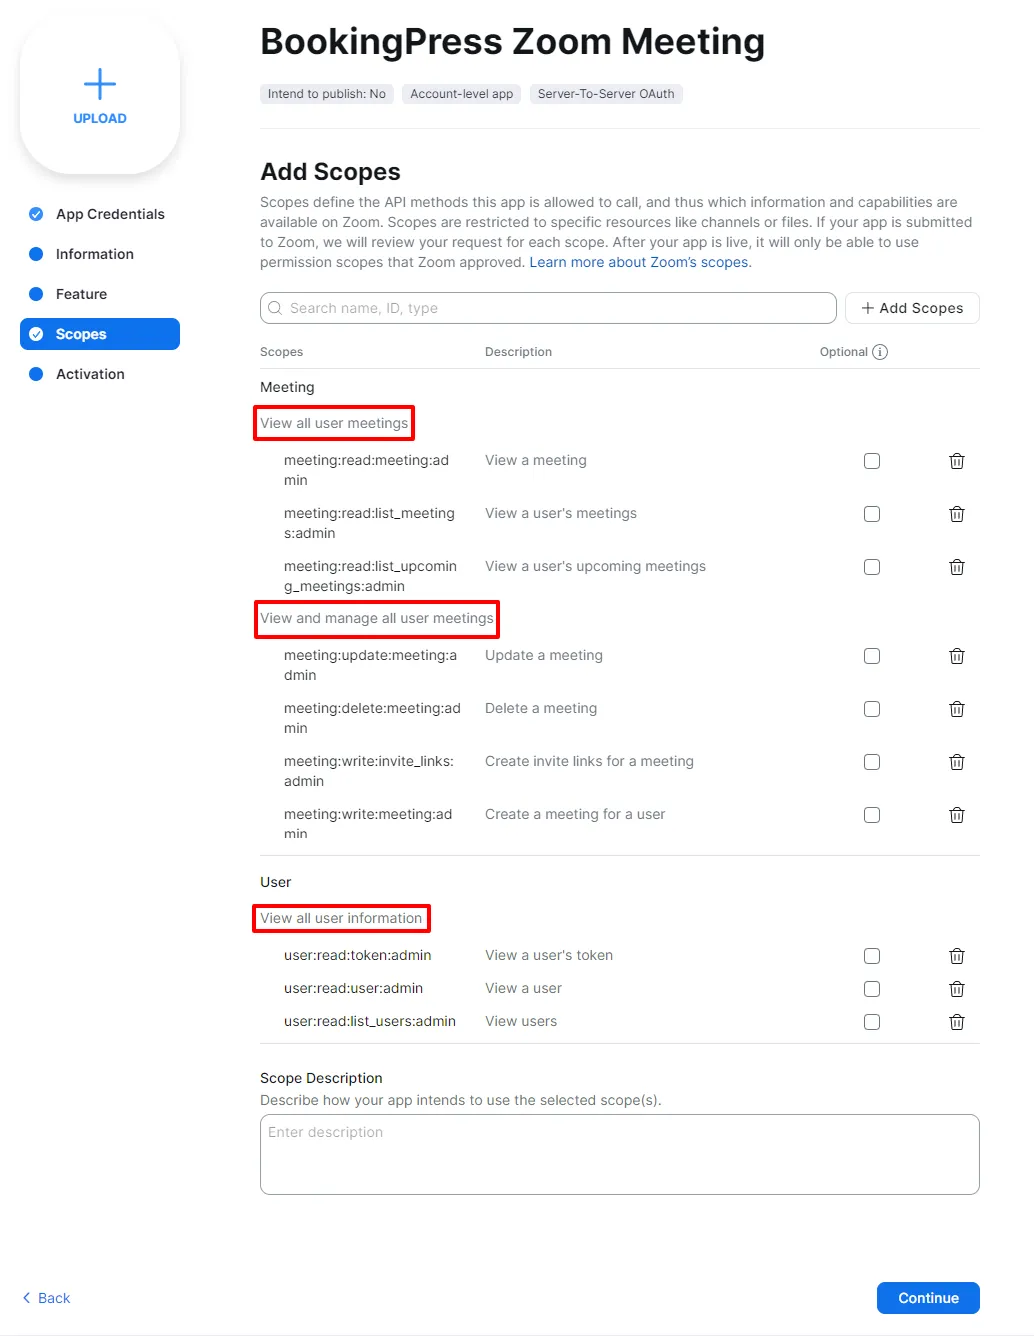
- Now, go to the Scopes Section, and click on the
Add ScopesButton
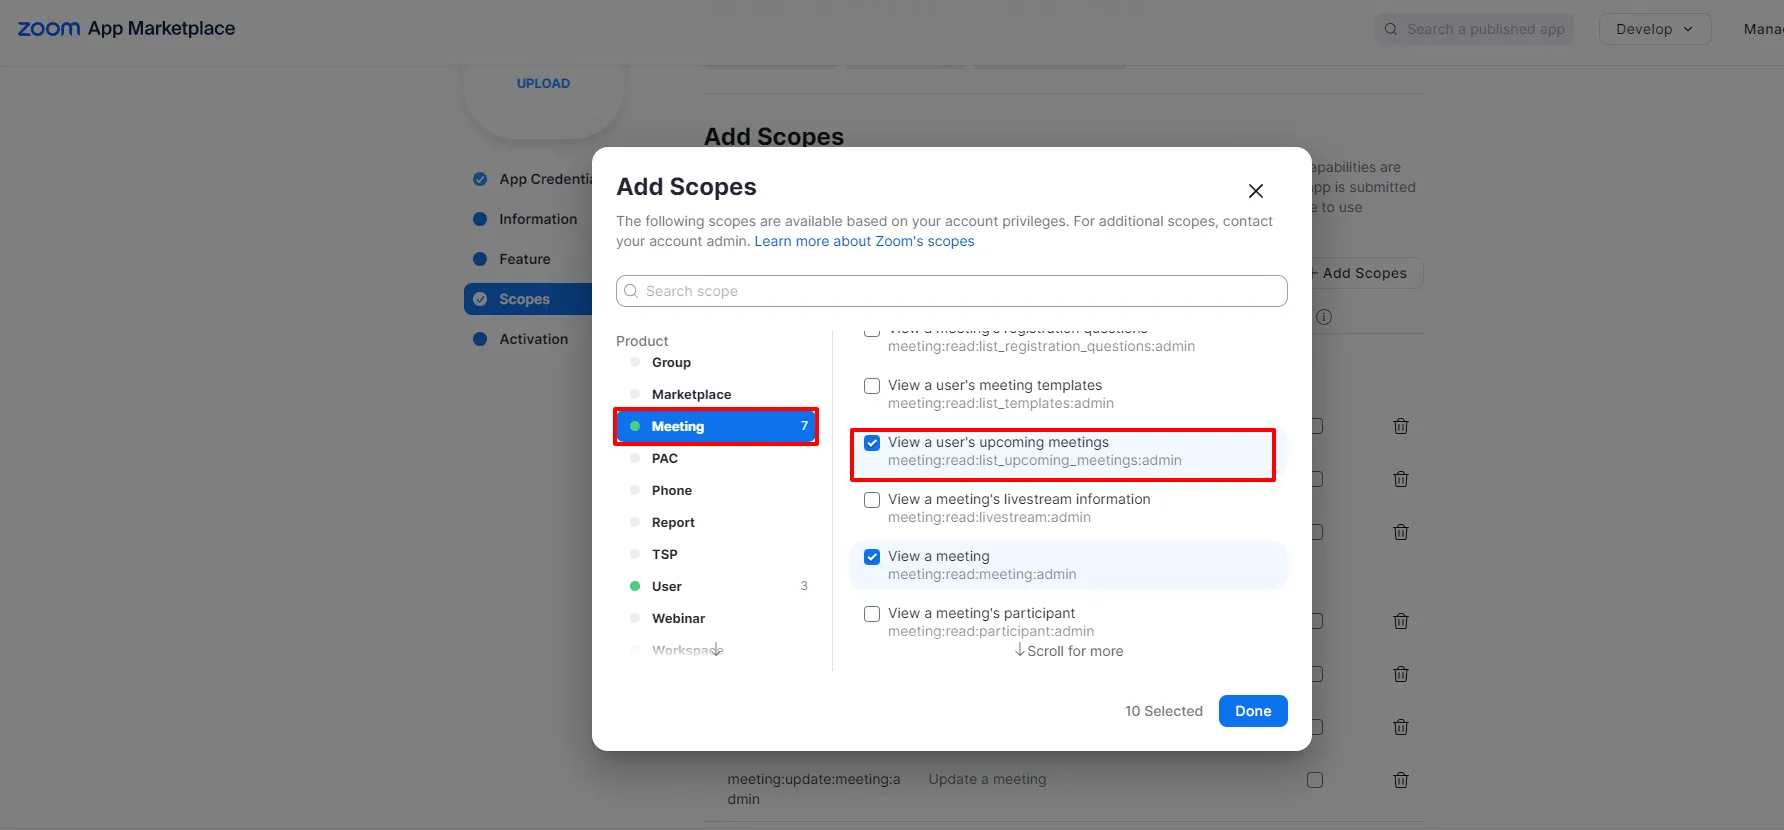
- To add Scopes for Meeting simply Click on
Meeting>View all user meetings> Here select Scopes such asView a meeting,View a user's meetings, andView a user's upcoming meetings. Furthermore, head over toMeeting>View and manage all user meetings> Here selectUpdate a meeting,Delete a meeting,Create invite links for a meetingandCreate a meeting for a user.
- Similarly for User Scopes head over to
Users>View all user information> and select the scopes :View a user's token,View a user, andView users. You can check all the scopes below that are added.
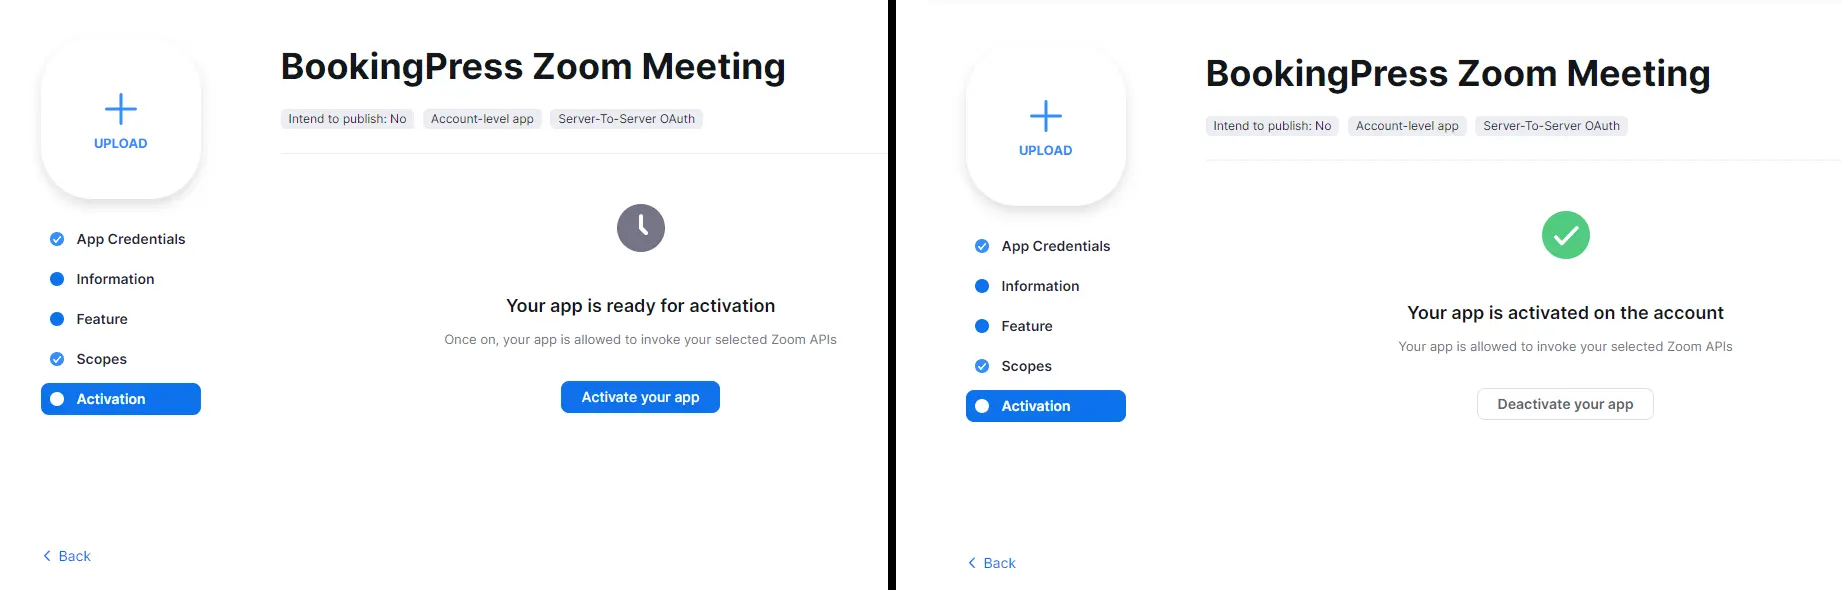
Once the Scopes are added, go to Activation section and click on Activate you app button and your Zoom Application is ready to integrate.
Copy the Zoom application credentials and add them at BookingPress -> Settings -> Integrations ->Zoom
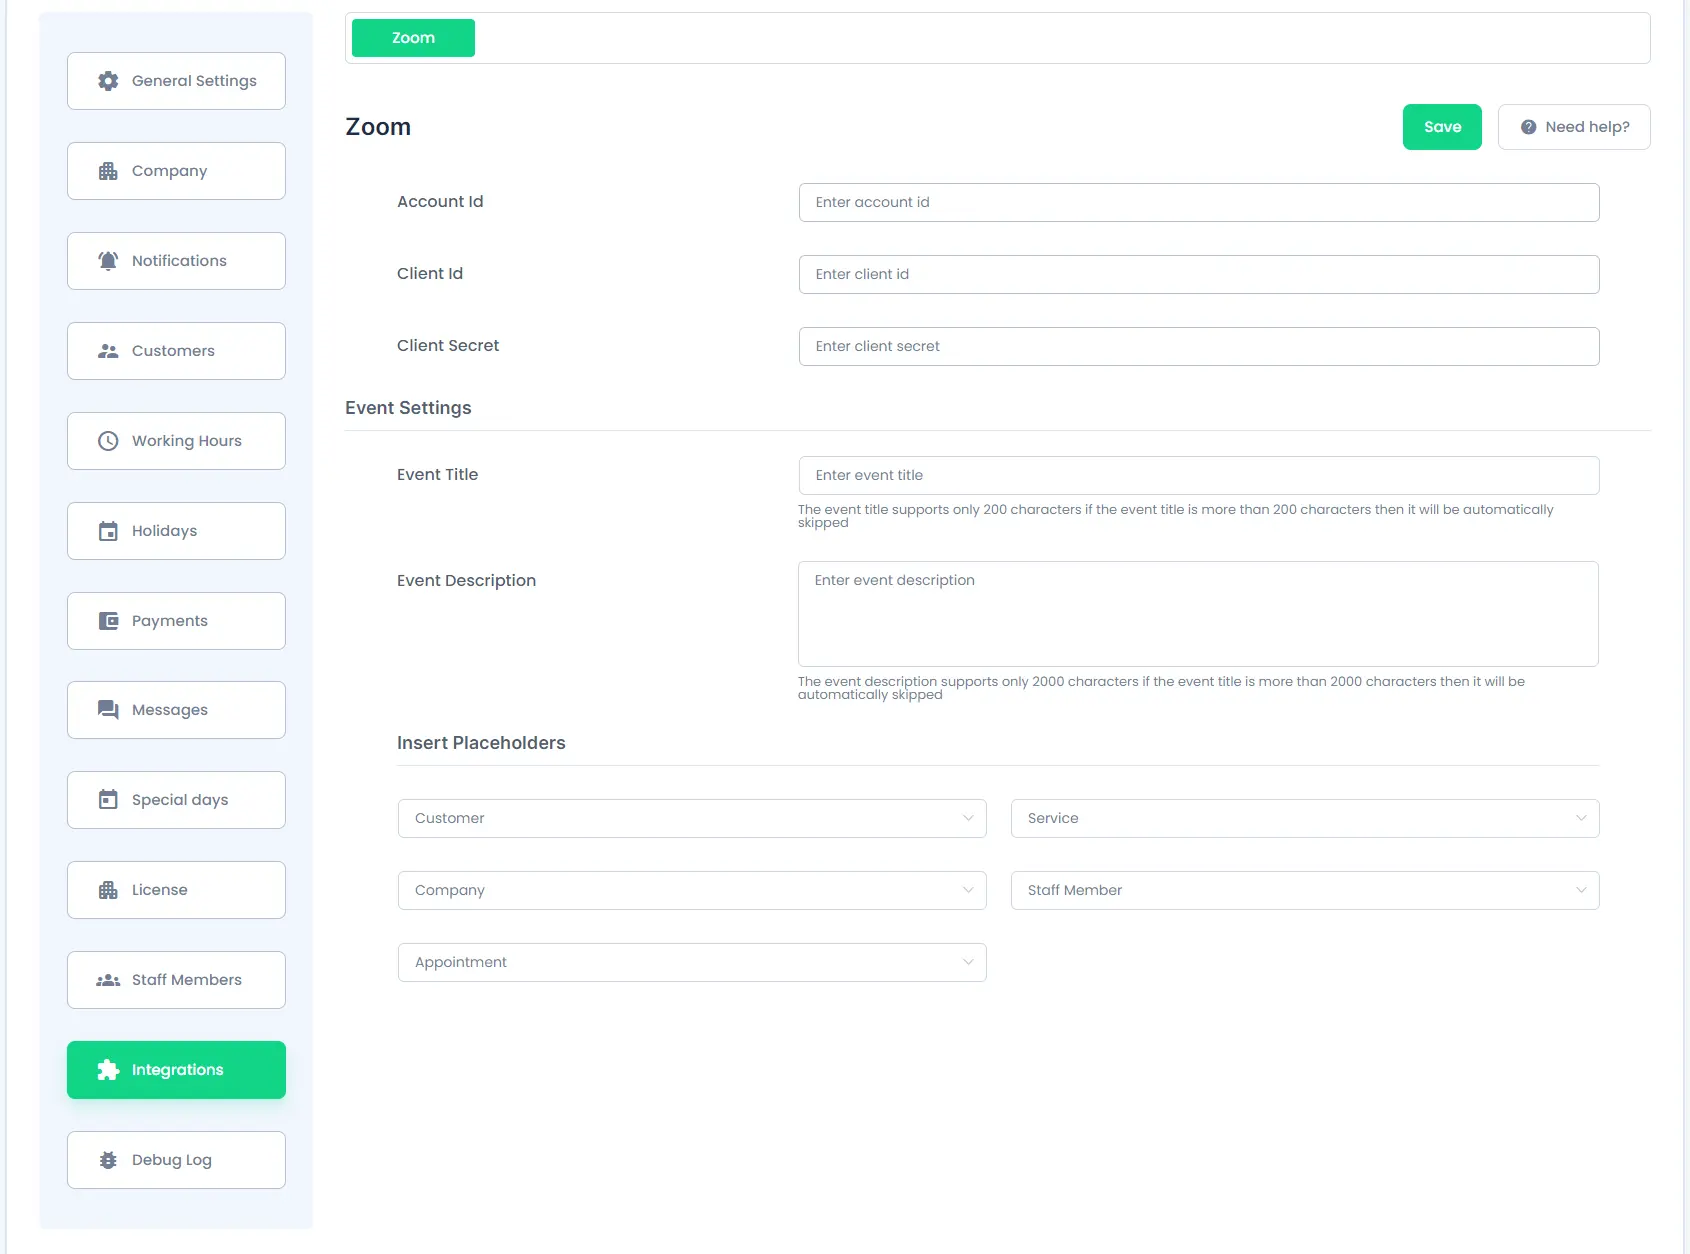
Event Settings:
Copy and Enter the title from placeholders from the “Insert Placeholder” dropdowns to generate the Event Title dynamically according to your requirement.
Event Description:
Same way you will also be able to write a custom description on your own with the help of the placeholders.
Insert Placeholders:
You will be able to select different required placeholders from different sections:
- Customer
- Company
- Service
- Staff Member
- Appointment
1. Customer:
-> Under the customer section you will be able to copy the following Placeholders:
%customer_email%: This placeholder will help to get the customer’s Email%customer_first_name%: This placeholder will help to get the customer’s first name.%customer_full_name%: This placeholder will help to get the customer’s full name.%customer_last_name%: This placeholder will help to get the customer’s last name.%customer_note%: This placeholder will help to get the customer’s note.%customer_phone%: This placeholder will help to get the customer’s phone number.
2. Company:
-> Under the company section you will be able to copy the following Placeholders:
%company_address%: This placeholder will help to get the Company’s address.%company_name%: This placeholder will help to get the Company’s name.%company_phone%: This placeholder will help to get the Company’s contact number.%company_website%: This placeholder will help to get the Company’s website.
3. Service:
-> Under the service section you will be able to copy the following placeholders:
%service_name%: This placeholder will help to get the Service’s name.%service_duration%: This placeholder will help to get the Service’s time duration.
4. Staff Member:
-> Under the Staff Member section you will be able to copy the following placeholders :
%staff_member_email%: This placeholder will help to get the Staff Member’s email address.%staff_member_first_name%: This placeholder will help to get the Staff Member’s First Name.%staff_member_full_name%: This placeholder will help to get the Staff Member’s Full Name.%staff_member_last_name%: This placeholder will help to get the Staff Member’s Last Name.%staff_member_phone%: This placeholder will help to get the Staff Member’s Contact Number.
5. Appointment:
-> Under the Appointment section you will be able to copy the following placeholders :
%appointment_date%: This placeholder will help to get the particular date of the booked appointment.%appointment_date_time%: This placeholder will help to get the particular date and time of the booked appointment.%appointment_duration%: This placeholder will help to get the particular duration of the booked appointment.%appointment_start_time%: This placeholder will help to get the Starting Time of the booked appointment.%appointment_end_time%: This placeholder will help to get the Ending Time of the booked appointment.%appointment_amount%: This placeholder will help to get the particular Amount of the booked appointment.%appointment_status%: This placeholder will help to get the Status(whether approved, pending, rejected, etc…) of the booked appointment.
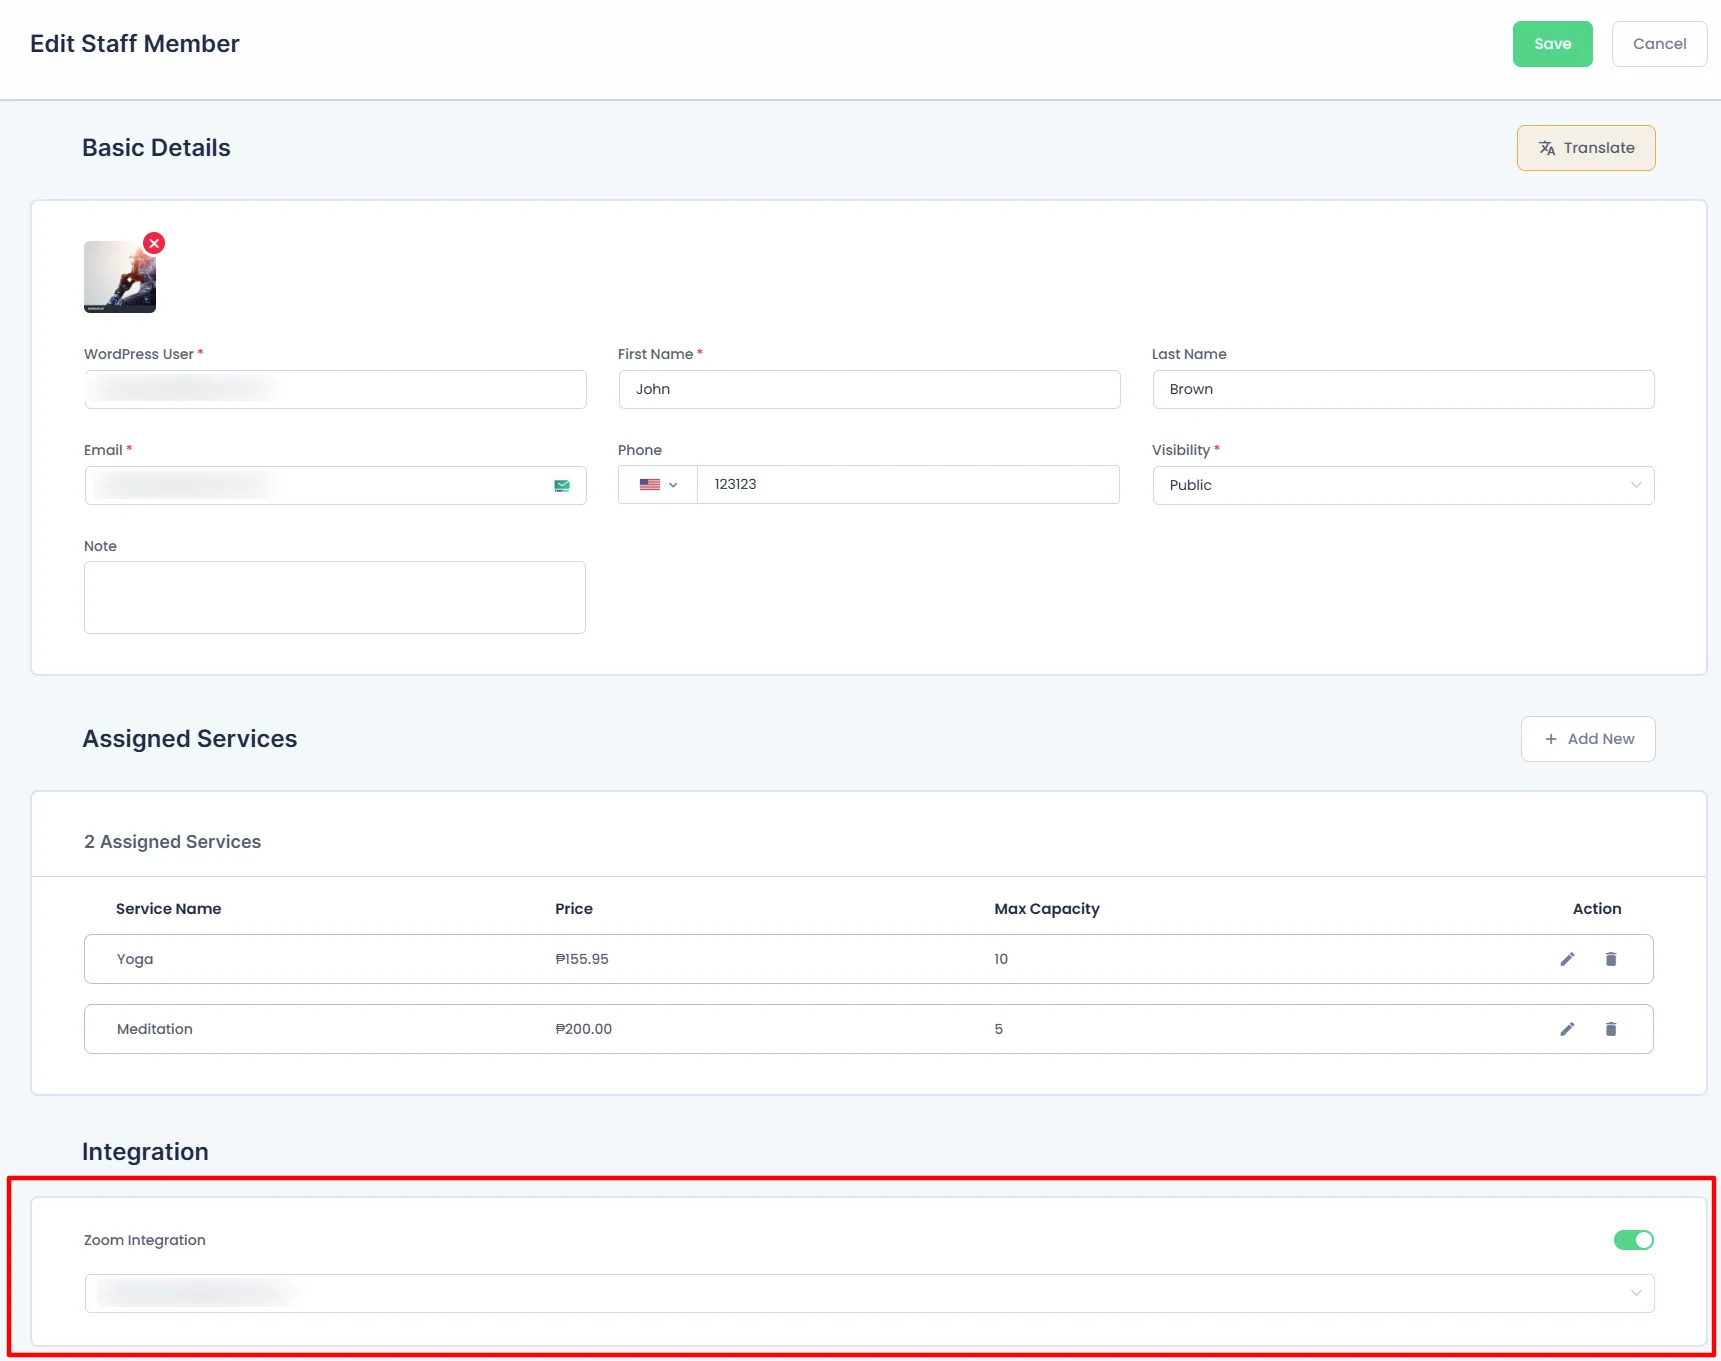
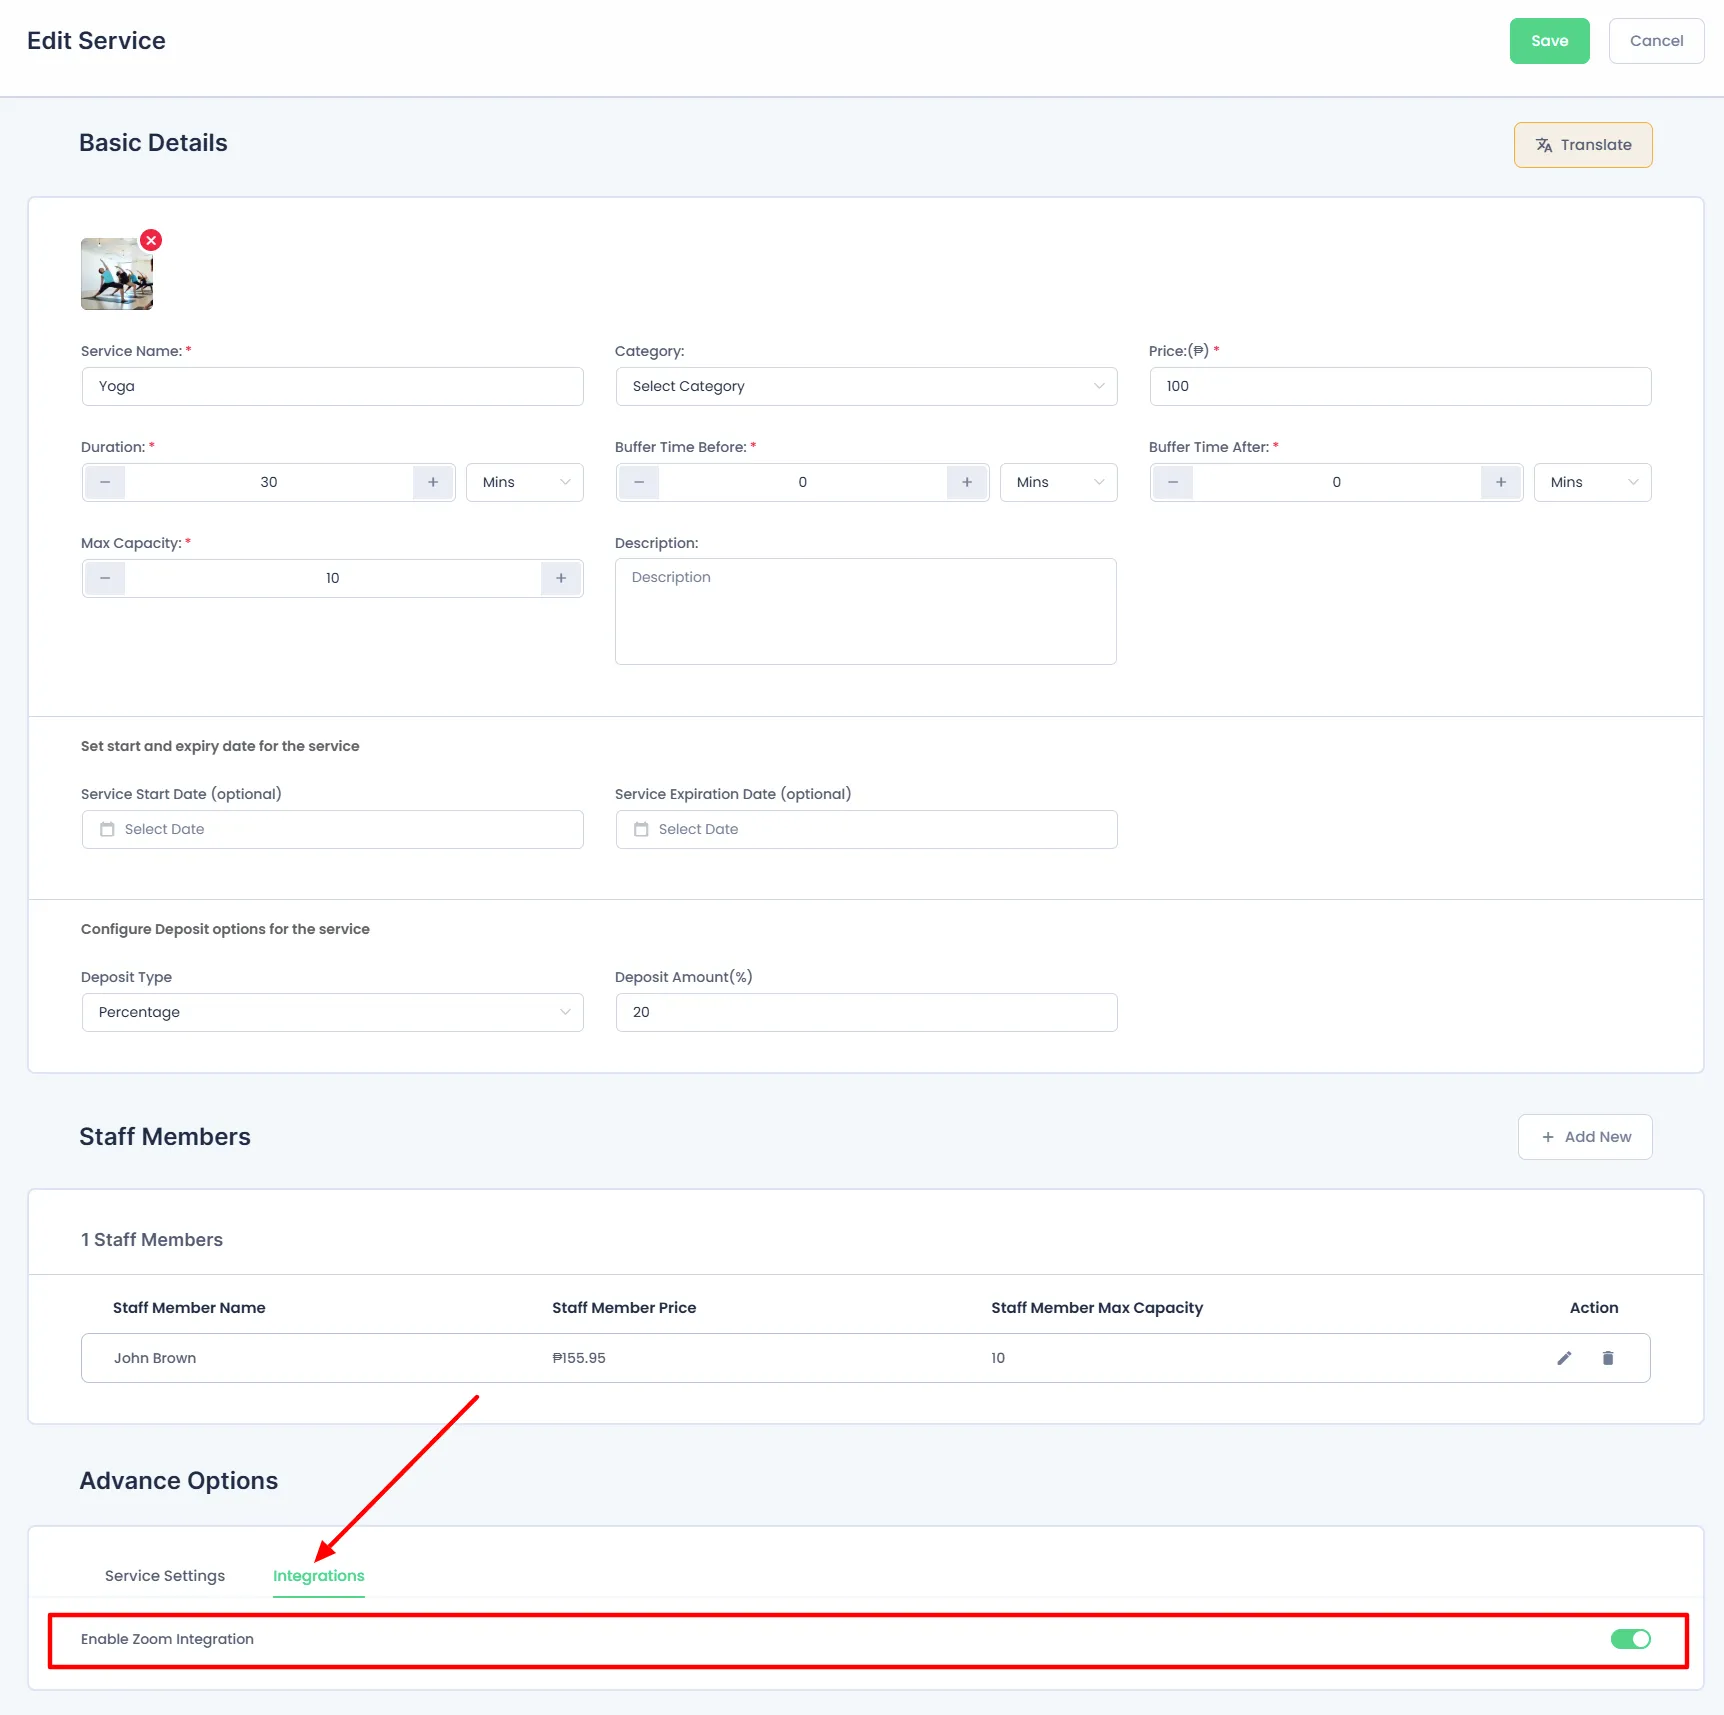
Enabling Zoom Integration for Staff and Services
Once the Zoom credentials are entered properly, navigate to BookingPress > Staff Members. Here, edit the Staff Member for whom you want to enable Zoom integration. Scroll down to the bottom of the page, enable the Zoom Integration, and assign a Zoom User to that particular Staff Member. This step ensures that the staff member is properly linked to a Zoom account for scheduling virtual meetings.
After assigning a Zoom user to a staff member, make sure to enable Zoom integration for the services where virtual meetings are required. To do this, go to BookingPress > Services. Edit the service that requires Zoom meetings, then scroll down to the bottom of the page. Under Advanced Options, click on Integrations and enable the Zoom Integration for that service.
Joining Zoom Meetings from BookingPress
Once Zoom is properly set up:
- When an appointment is booked and approved, a Zoom icon will appear in
BookingPress → Appointments. - Click the icon to launch the meeting directly.
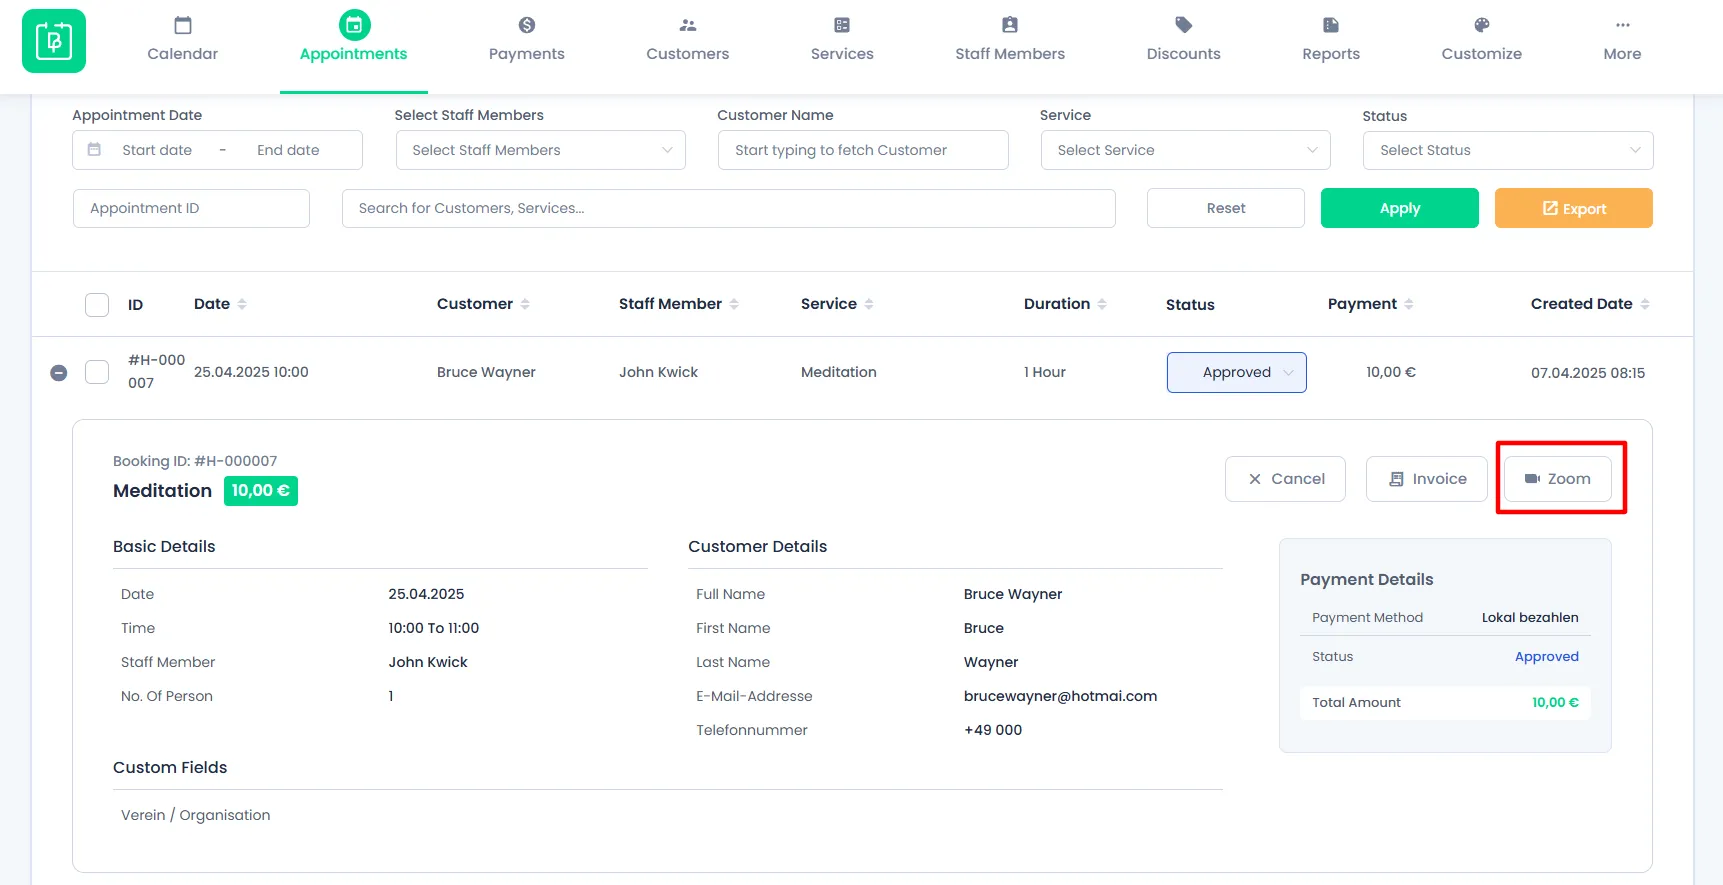
- Zoom meetings will also be shown in the
BookingPress → Calendaron both the Admin and Staff dashboards.

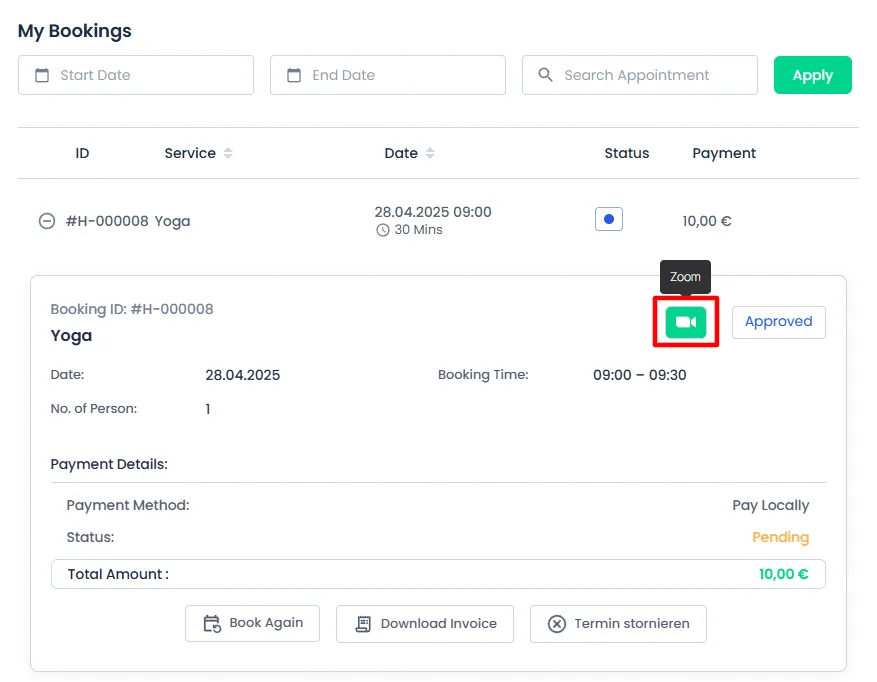
Important: Only for Approved Appointments the Zoom icon will be displayed!
Customer Access to Zoom Meetings
Customers can easily view and join their scheduled Zoom meetings directly from the Customer Panel. Once an appointment is approved and Zoom is enabled for the service, a Join Zoom Meeting button will appear alongside the appointment details, allowing customers to join the meeting with a single click.