WooCommerce Payment Gateway Addon

WooCommerce Integration:
To get and Activate Woocommerce Payment Gateway, please follow the below steps.
- First, login to the BookingPress Website, and you will be redirected to the My Account page.
- Now, click on the “Access Passes” link from the left menu panel.
- After going to the Access Passes, click on the “View your downloads” button.
- From the list, please look for the “Woocommerce” add-on, click on the download button, and it will automatically start downloading the addon. After the download is finished, upload the downloaded zip file to WordPress just link any other WordPress Plugin, then install and activate the addon to use it.
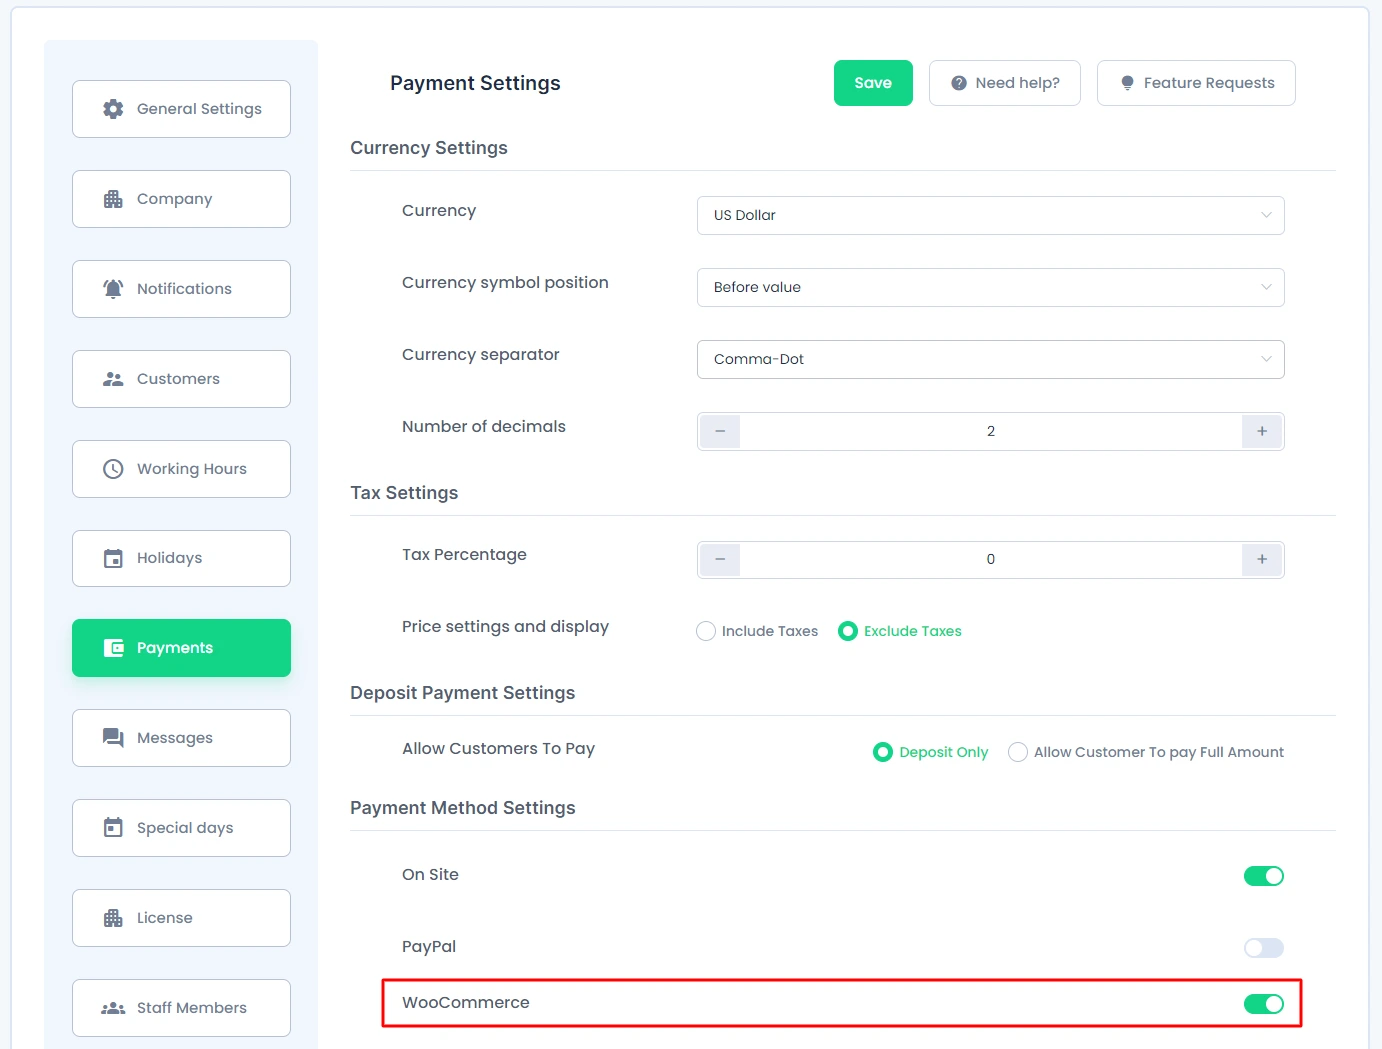
After the addon is activated, go to “BookingPress -> Settings -> Payments”, from here you can enable the “Woocommerce” button to use the WooCommerce payment gateway.
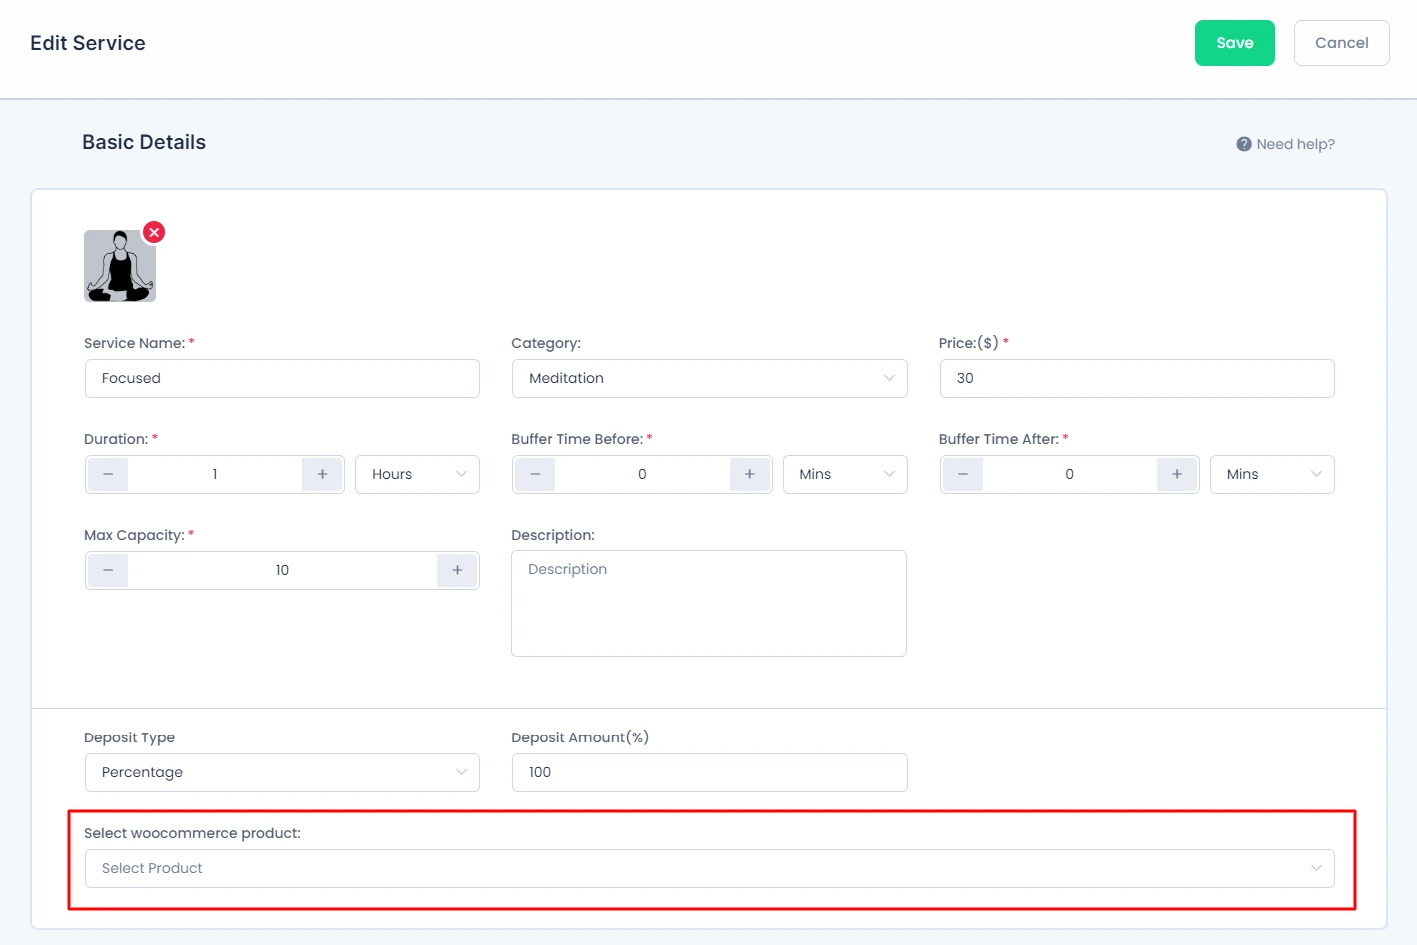
To use the payment gateway for the particular services, you will need to select the WooCommerce Product from “BookingPress -> Add/Edit Services”, you will only be able to use the WooCommerce payment gateway for a service if you have selected the Woocommerce Product from it.
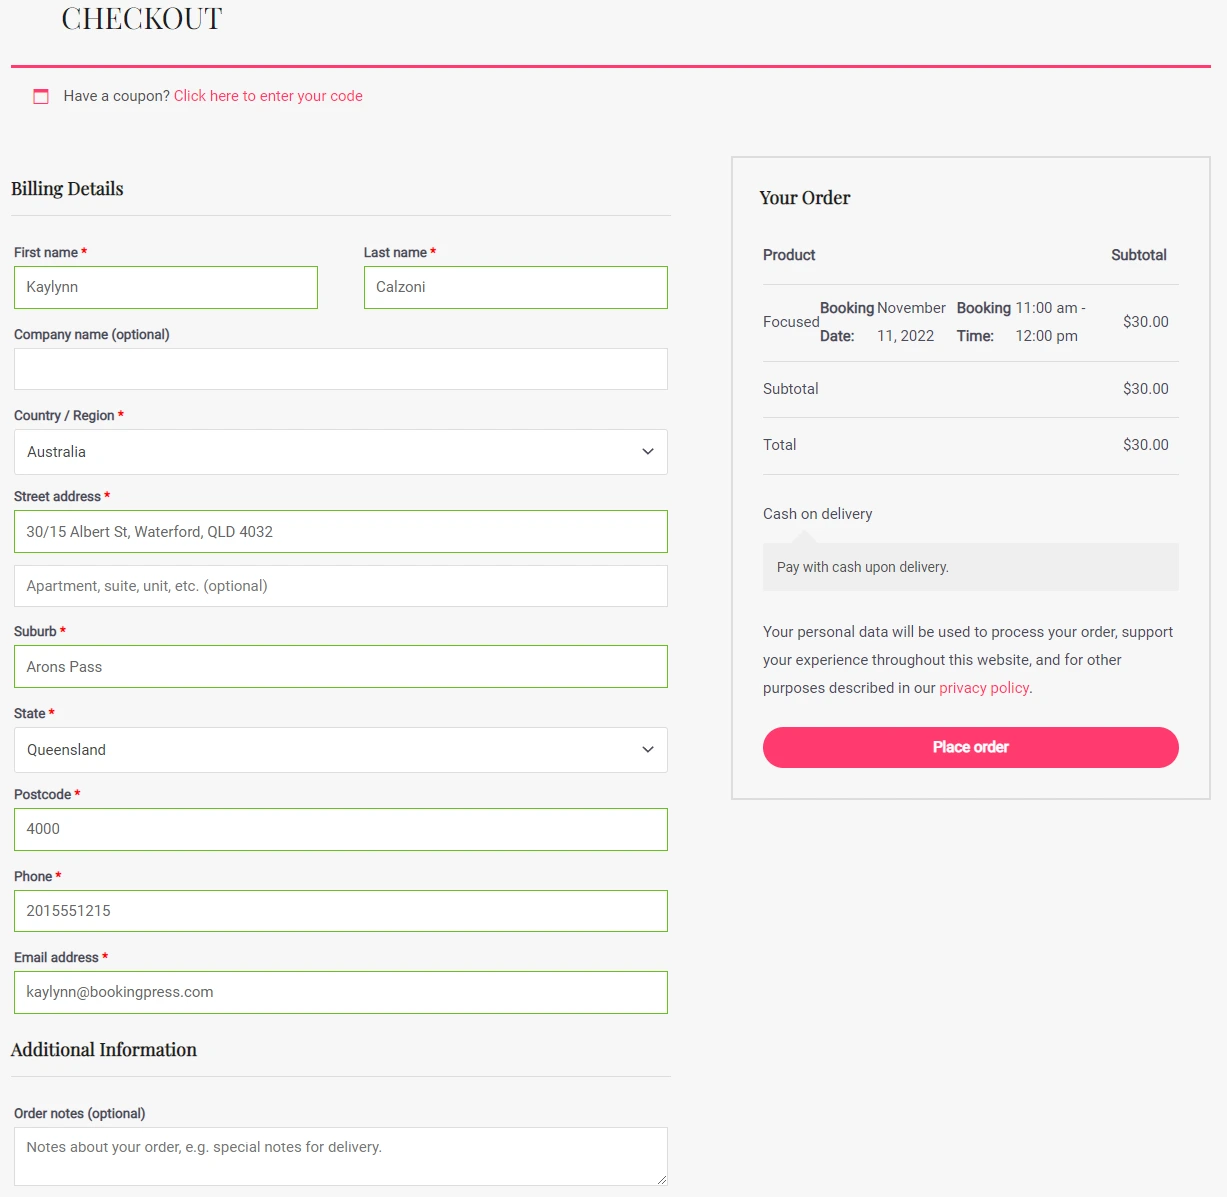
After you have done the configuration for the WooCommerce payment gateway, you will be able to see WooCommerce Payment Gateway at the front end.
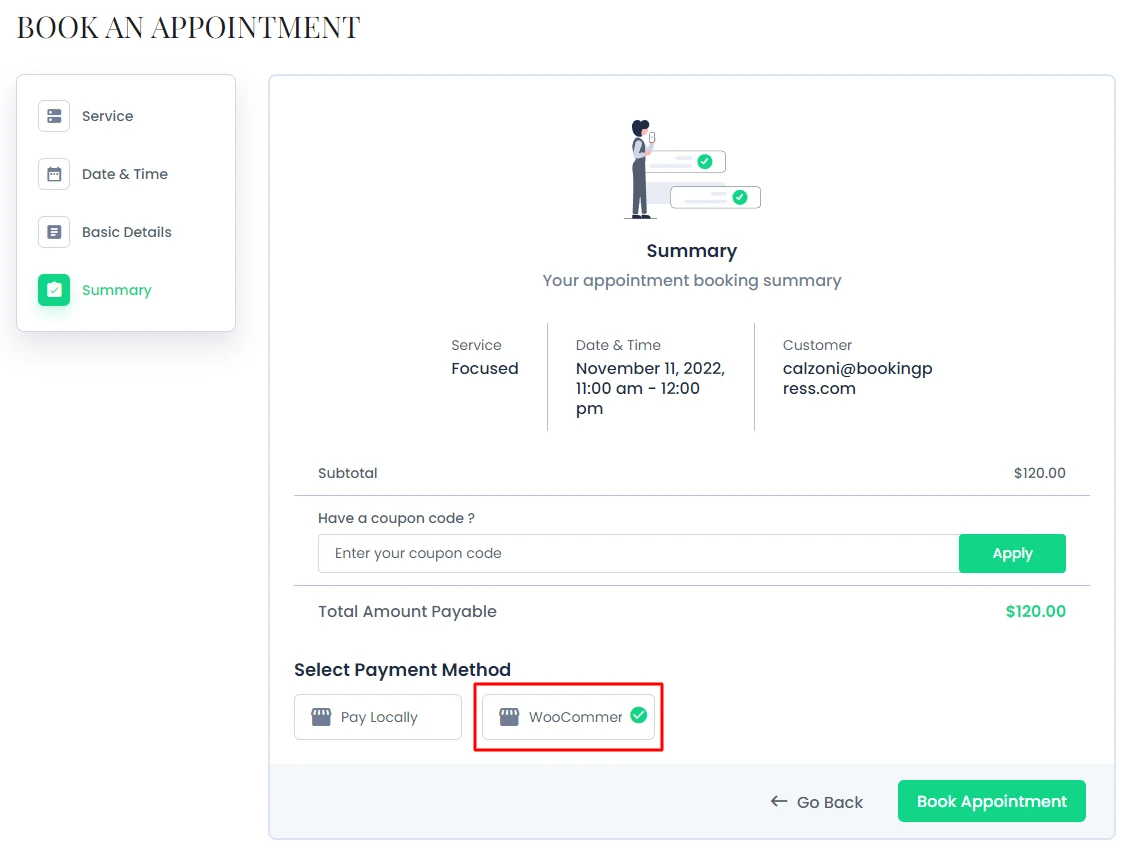
When the user will select the WooCommerce for any of the services, they will be redirected to the WooCommerce checkout page, where they will be needed to enter their details like their name, address, email, mobile no., etc… After filling the checkout form and placing the order, customer’s appointment will get booked.
Note: The WooCommerce order status associated with the booking must be “In Process” or any higher status for the booking to appear in the BookingPress → Appointments section.
Note: If you want to enable shipping method for BookingPress then you need to uncheck Virtual option for the product “BookingPress Appointment Product” in WooCommerce.