Email Notification Settings
Email Notification Settings allow you to control how emails are sent to customers and admins for bookings, payments and updates.
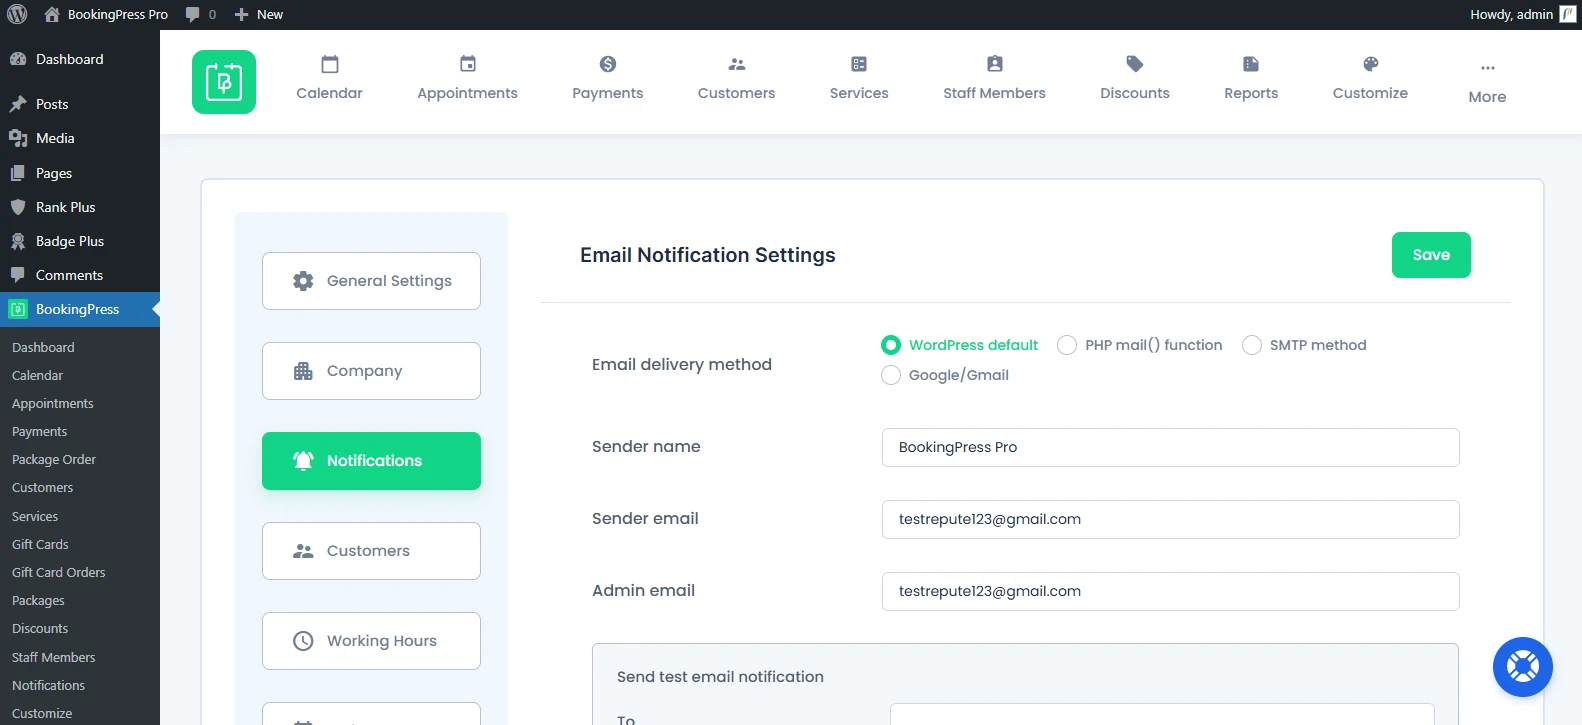
You can set your email notification settings from BookingPress → Settings → Notifications.
This option makes sure your emails are delivered reliably and appear correctly to customers.
Email Delivery Method
Please select one of the email services to send email notifications.
Here are all the options available:
1. WordPress default
- It uses WordPress’s default email function.
- Easy to use, but not very reliable.
2. PHP mail() function
- It uses your server’s email function.
- Not recommended as email mostly goes in spam or fails.
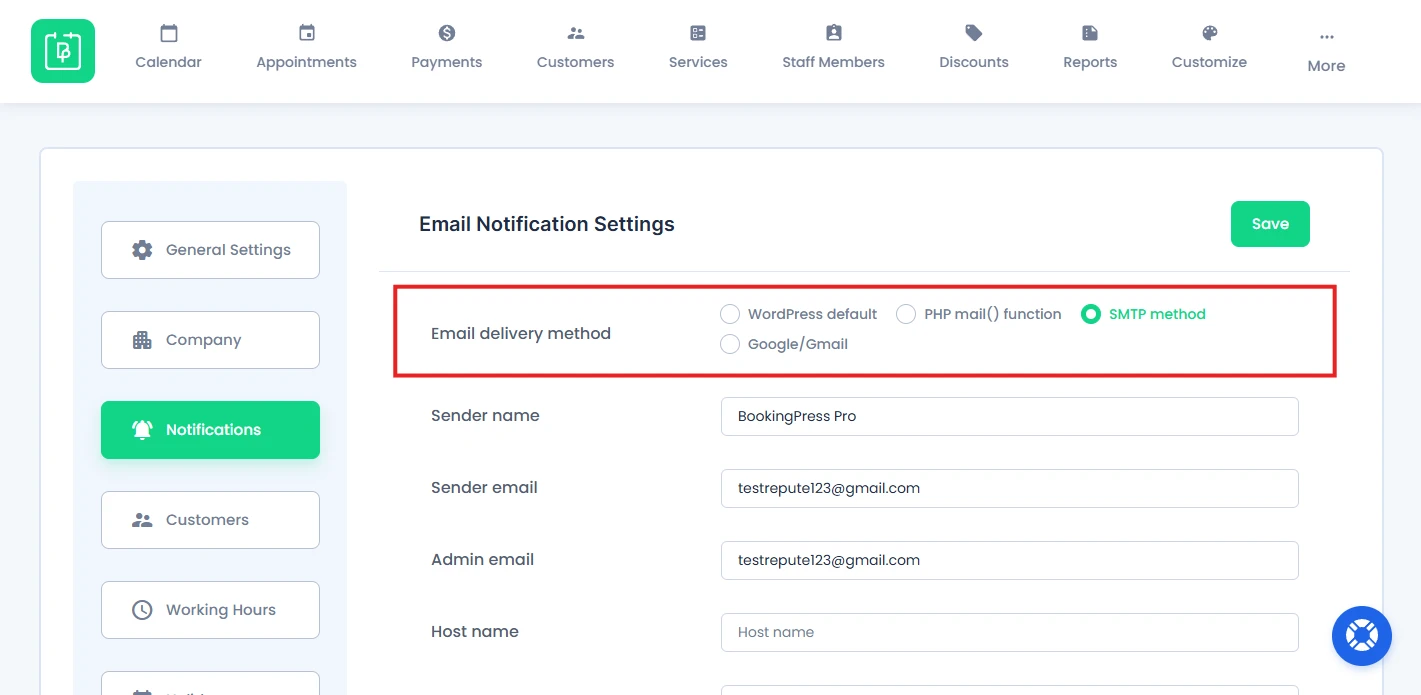
3. SMTP Method (Simple Mail Transfer Protocol)
- It sends emails through a secure mail server.
- This is the recommended option for reliable delivery.
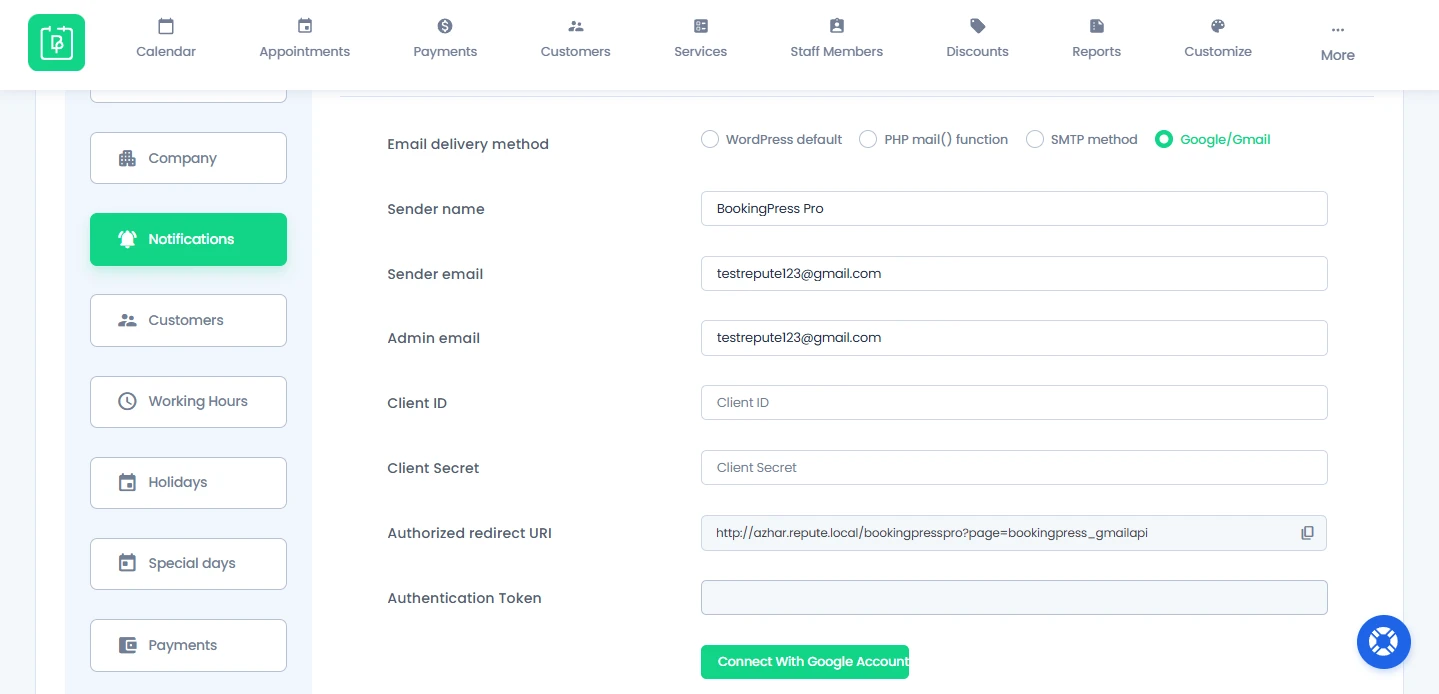
4. Google/Email:
- It sends emails using your Gmail account.
- Useful if you want to use Google’s email service.
Note: We highly recommend using SMTP as your email delivery method because emails sent via PHP Mail are mostly flagged as spam and may not be delivered reliably.
WordPress Default/ PHP Mail Settings
Although we don’t recommend going with these email delivery methods, you can still use it for testing.
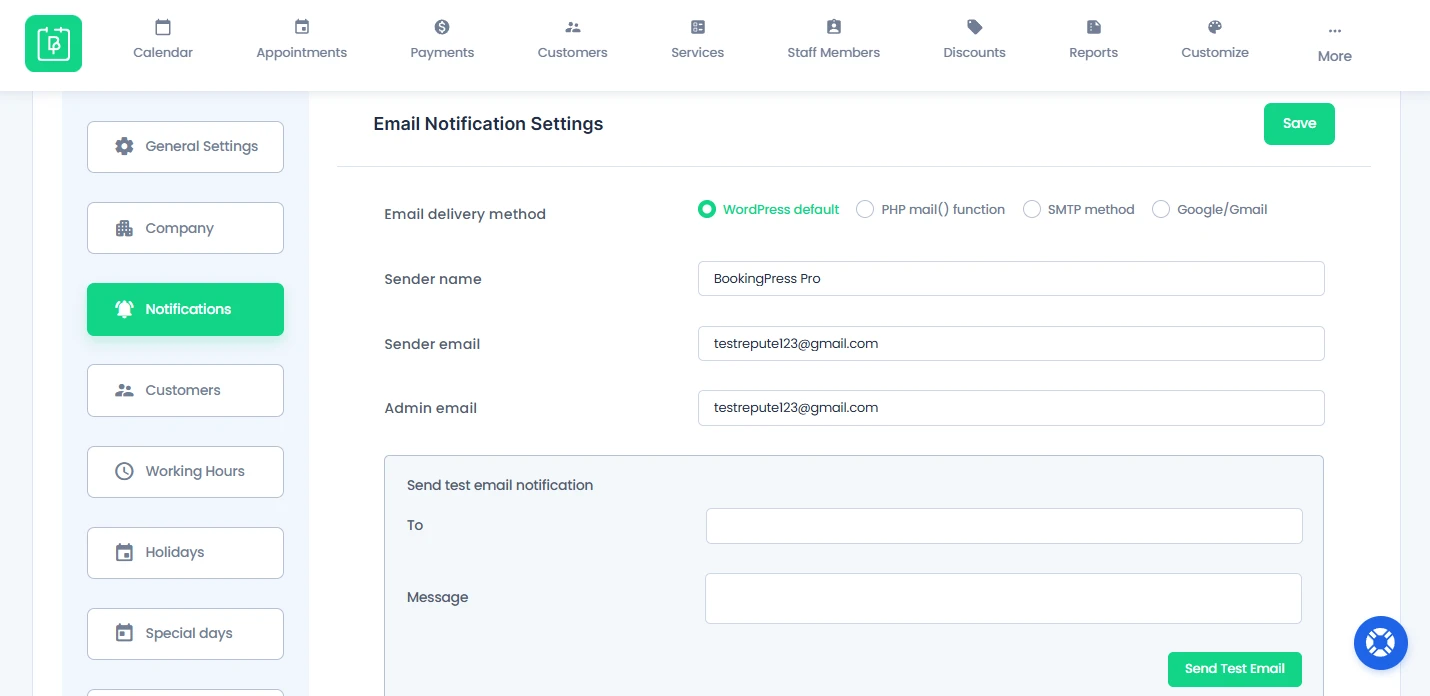
If you select WordPress default or PHP mail() function, you’ll see the following options:
- Sender Name: This option sets the sender name for all outgoing email notifications.
- Sender Email: This option sets the sender email address for all outgoing email notifications.
- Admin Email: This option is used to send email notifications to the admin.
Send Test Email Notification
If you have selected WordPress default, you’ll also see a section for “Send test email notification”.

You can use to send test email notifications by just entering the:
- “To” : Email address to send the test dummy notification.
- Message : Dummy text for testing.
Note: WordPress default can be overwritten by other plugins like WP Mail SMTP, etc and can forward the email notification through that software.
SMTP Settings
To configure SMTP, select “SMTP Method” from the “Email delivery method”.
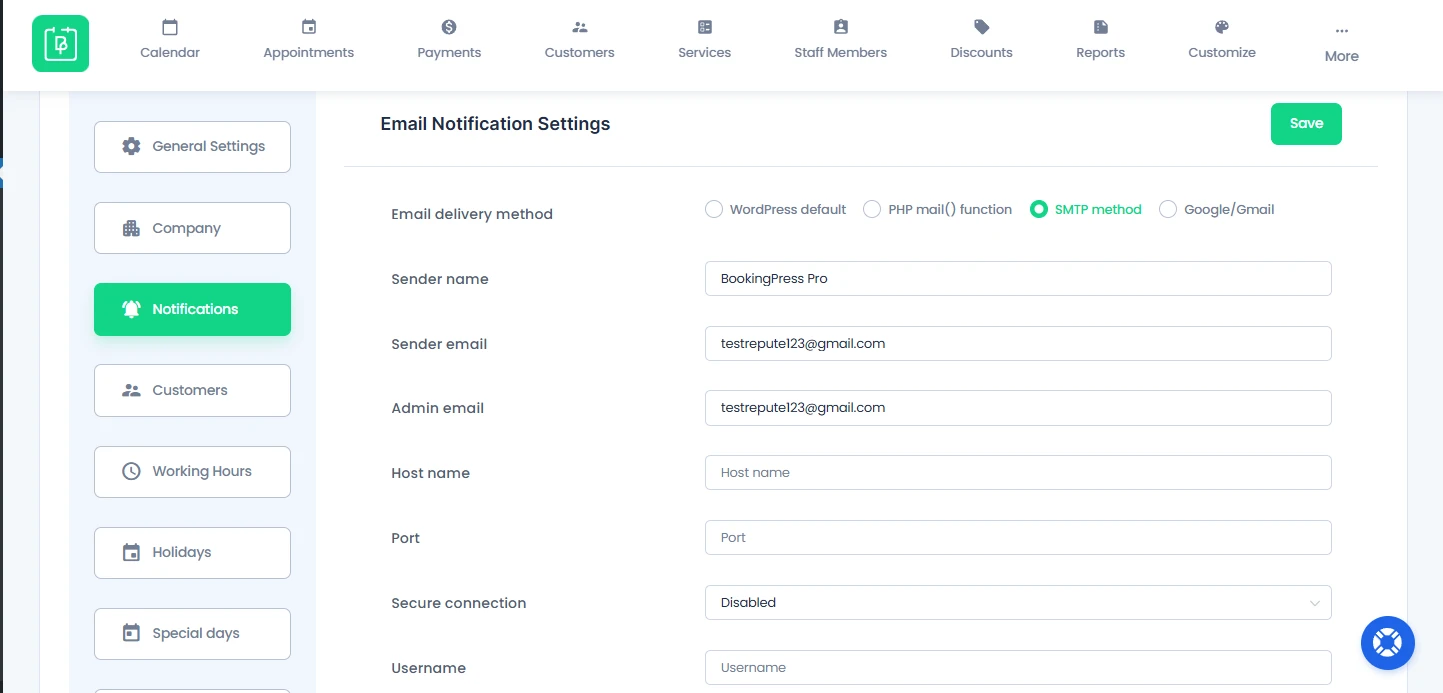
Now apart from common fields including “Sender name”, “Sender email” and “Admin email”, you’ll see additional fields such as:
- Host name
- Port
- Secure connection
- Username
- Password
You can configure SMTP using any provider that supports it.
Example (Outlook SMTP configuration):
- Host Name: smtp-mail.outlook.com
- Port: 587
- Secure Connection: TLS
- Username: Your Outlook email address
- Password: Your Outlook email password
Note: SMTP configuration details will be different for each SMTP provider. Kindly confirm the details with your SMTP provider.
After you set the above options, you can test your SMTP connection by sending a test email from the Send Test Email Notification section. If the email is received successfully, your SMTP configuration is working correctly.
Setup Google / Gmail
To configure the Email delivery via Google/Gmail, select the Google/Gmail option.
Important:
- The Gmail mailer works well for sites that send low numbers of emails.
- However, Gmail’s API has rate limitations and a number of additional restrictions that can lead to challenges during setup. If you expect to send a high volume of emails, or if you find that your web host is not compatible with the Gmail API restrictions, we recommend considering a different mailer option.
Now apart from “Sender name” “Send email” and “Admin email”, there are new fields for configuring Google/Gmail as email delivery method. Fields such as:
- Client ID
- Client Secret
- Authorized redirect URI
- Authentication Token
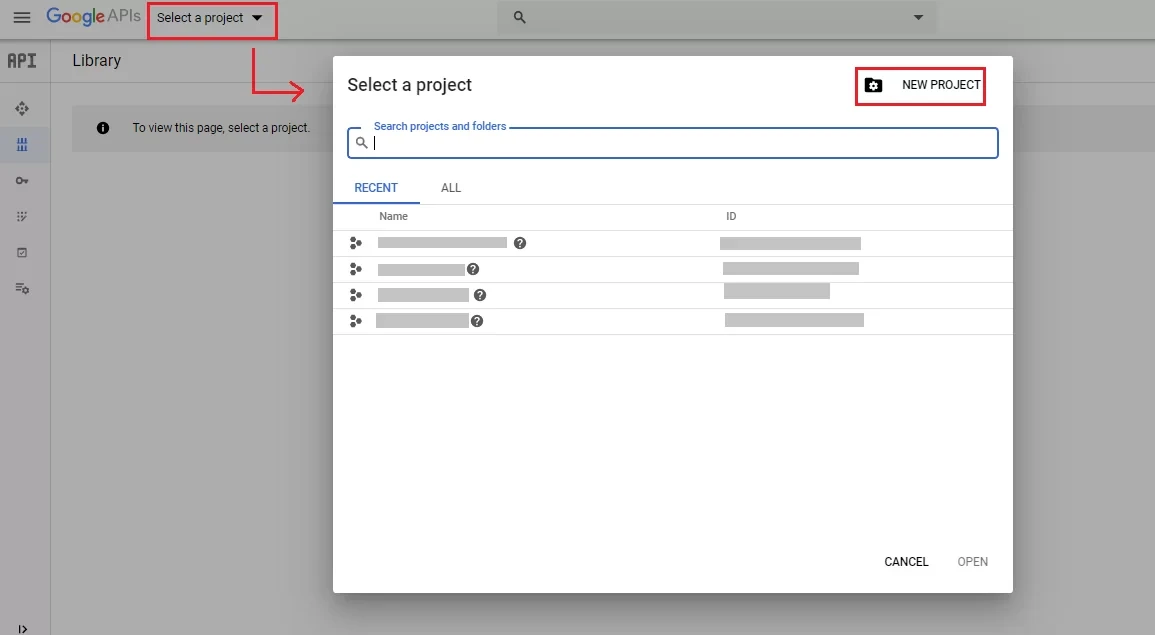
First of all, let’s start by generating Client ID and Client Secret. Simply follow these steps:
1. Go to the Google API Console
2. From the project drop-down, select an existing project or create a new one.
3. Next, click on “Library” option from the left sidebar and search for “Gmail API“
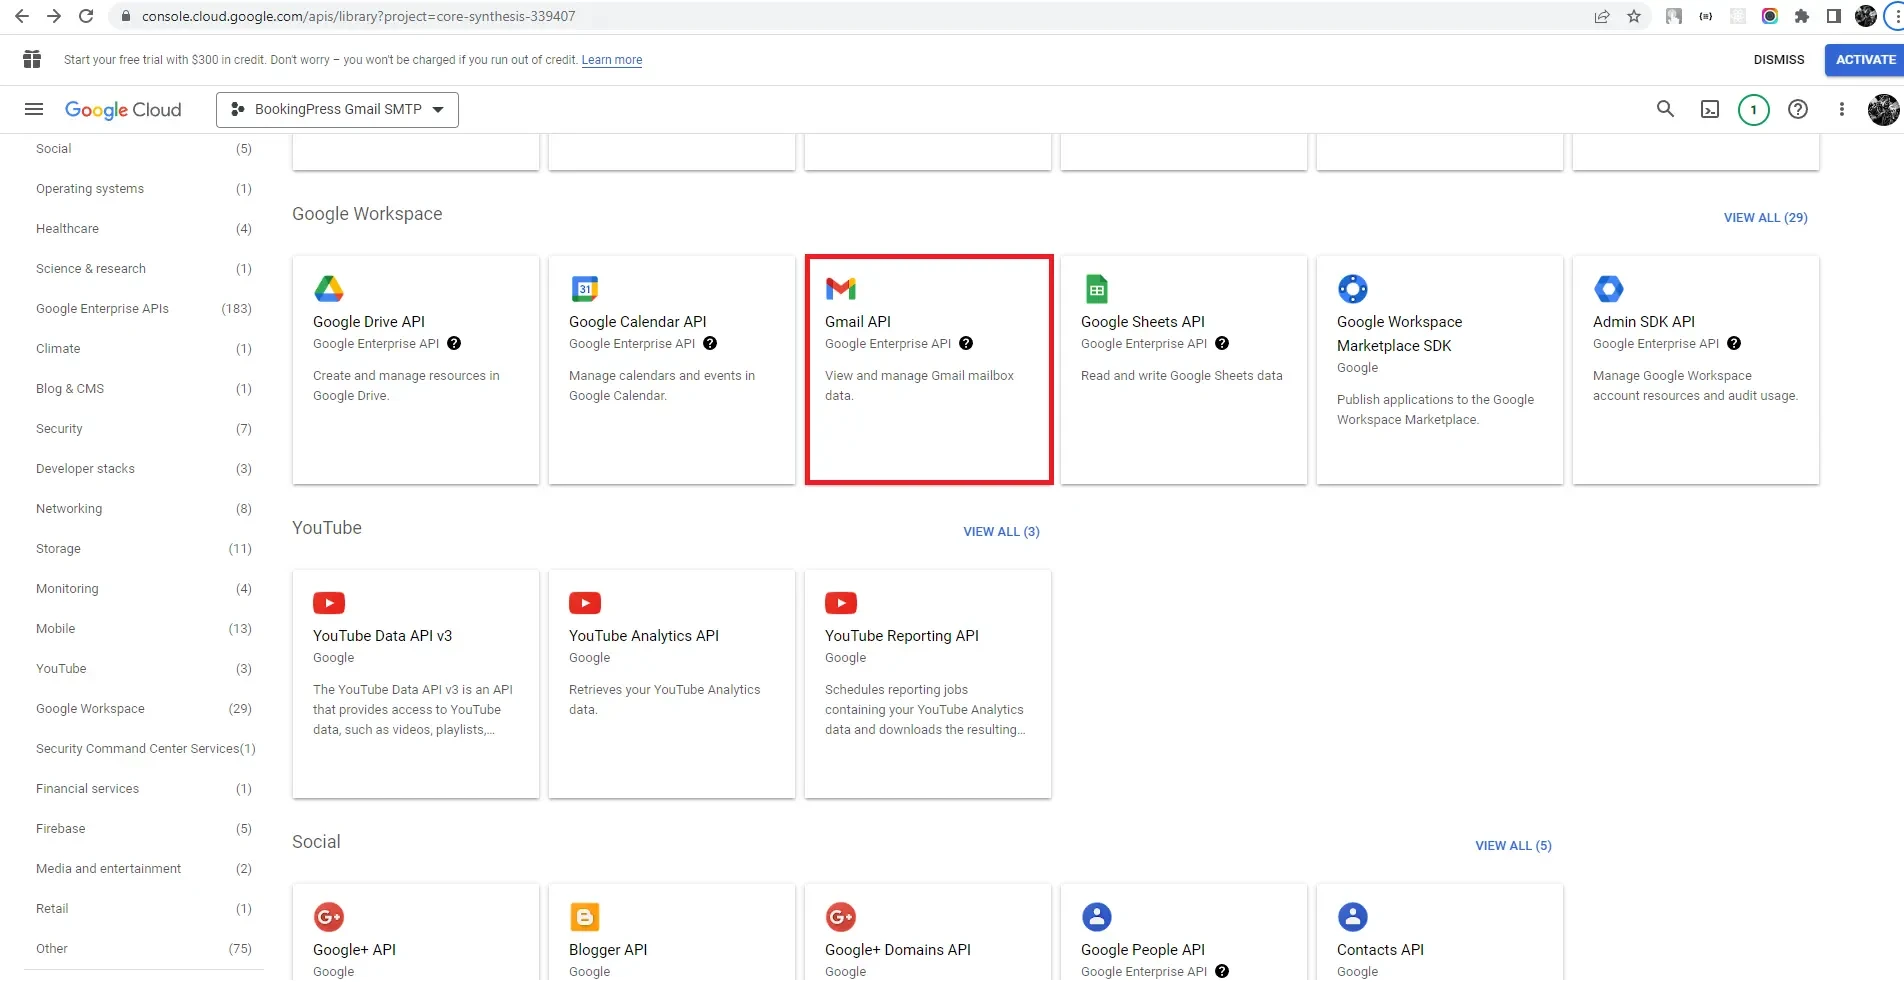
4. Click on Gmail API and enable it.
5. Go to API & Services → Credentials.
6. Open the OAuth consent screen, enter required details, and hit the “Save” button.
7. After that, click Create Credentials → OAuth Client ID.
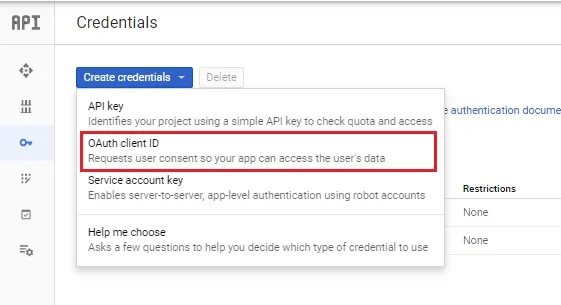
8. Select Web Application as the application type.
You simply have to register the origins from which your app is allowed to access the Google APIs, as follows, and set redirect URIs. An origin is a unique combination of protocol, hostname, and port.
9. Set the Authorised Redirect URI
You will find the Authorized Gmail Redirect URI in BookingPress → Settings → Notifications.
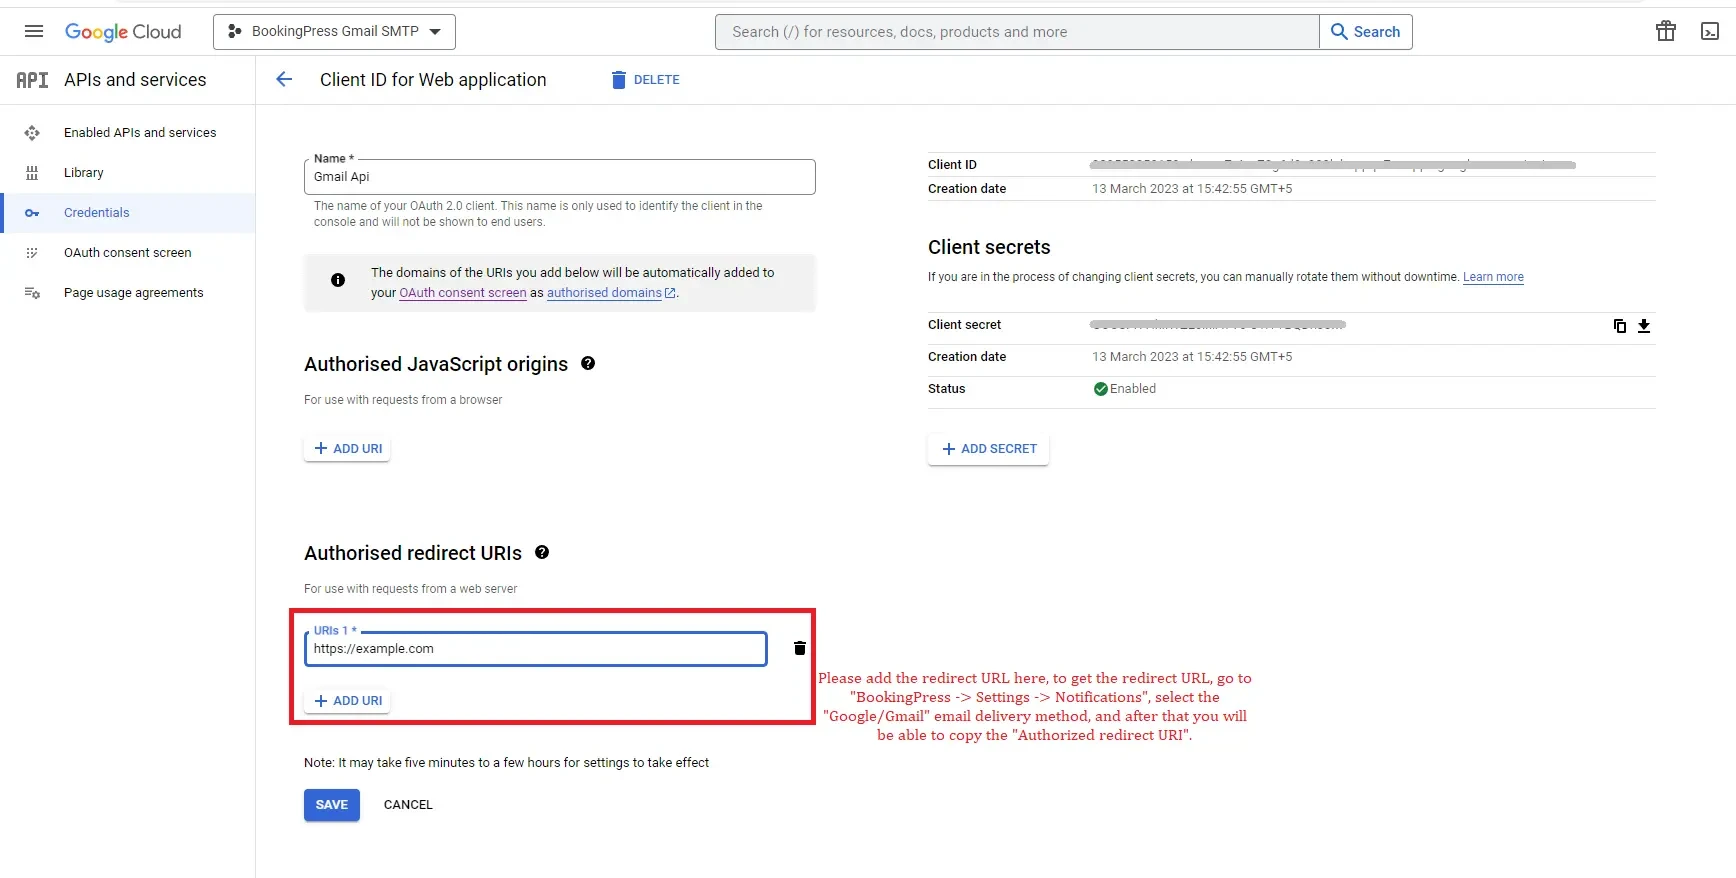
Add this URL to your Google Console configuration.
Now you’ll get the Client ID and Secret from the right panel.
10. Final Steps
- Copy the Client ID and Client Secret from Google Console.
- Paste them into BookingPress → Settings → Notifications under the Google/Gmail section.
- Save settings in both Google Console and BookingPress.
- Click Connect with Google Account.
After login and permission approval, the access token will be generated automatically.
Save the settings to complete the setup, and that’s it!
Need a hand?
Our world-class support team is happy to help. Send us a message and we’ll take it from there.