Service Package Addon Setup and configuration
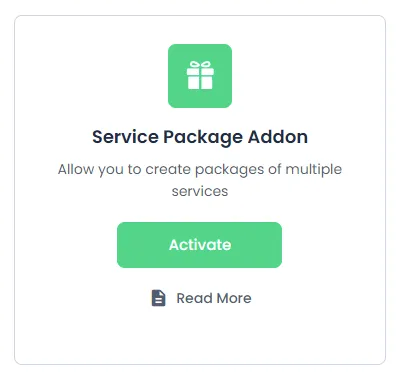
Activate Service Package Addon
First, activate the addon following below mentioned steps:
- First, login to the BookingPress Website, and you will be redirected to the My Account page.
- Now, click on the “Access Passes” link from the left menu panel.
- After going to the Access Passes, click on the “View your downloads” button.
- From the list, please look for the “Service Package” add-on, click on the download button, and it will automatically start downloading the addon. After the download is finished, upload the downloaded zip file to WordPress just link any other WordPress Plugin, then install and activate the addon to use it.
Creating your first package
Once you activate this addon, you can create packages by heading over to WordPress Dashboard > BookingPress > Package. Here, click on the “Add New” Button.
Make sure you have created at least one service before you can create a package – packages are created from existing services.
Add/Edit Package:
To create a new package from the backend, click on the “Add New” button from the top right corner of the page, or if there is any existing package, click on the edit button, which will open a modal with all the necessary details.
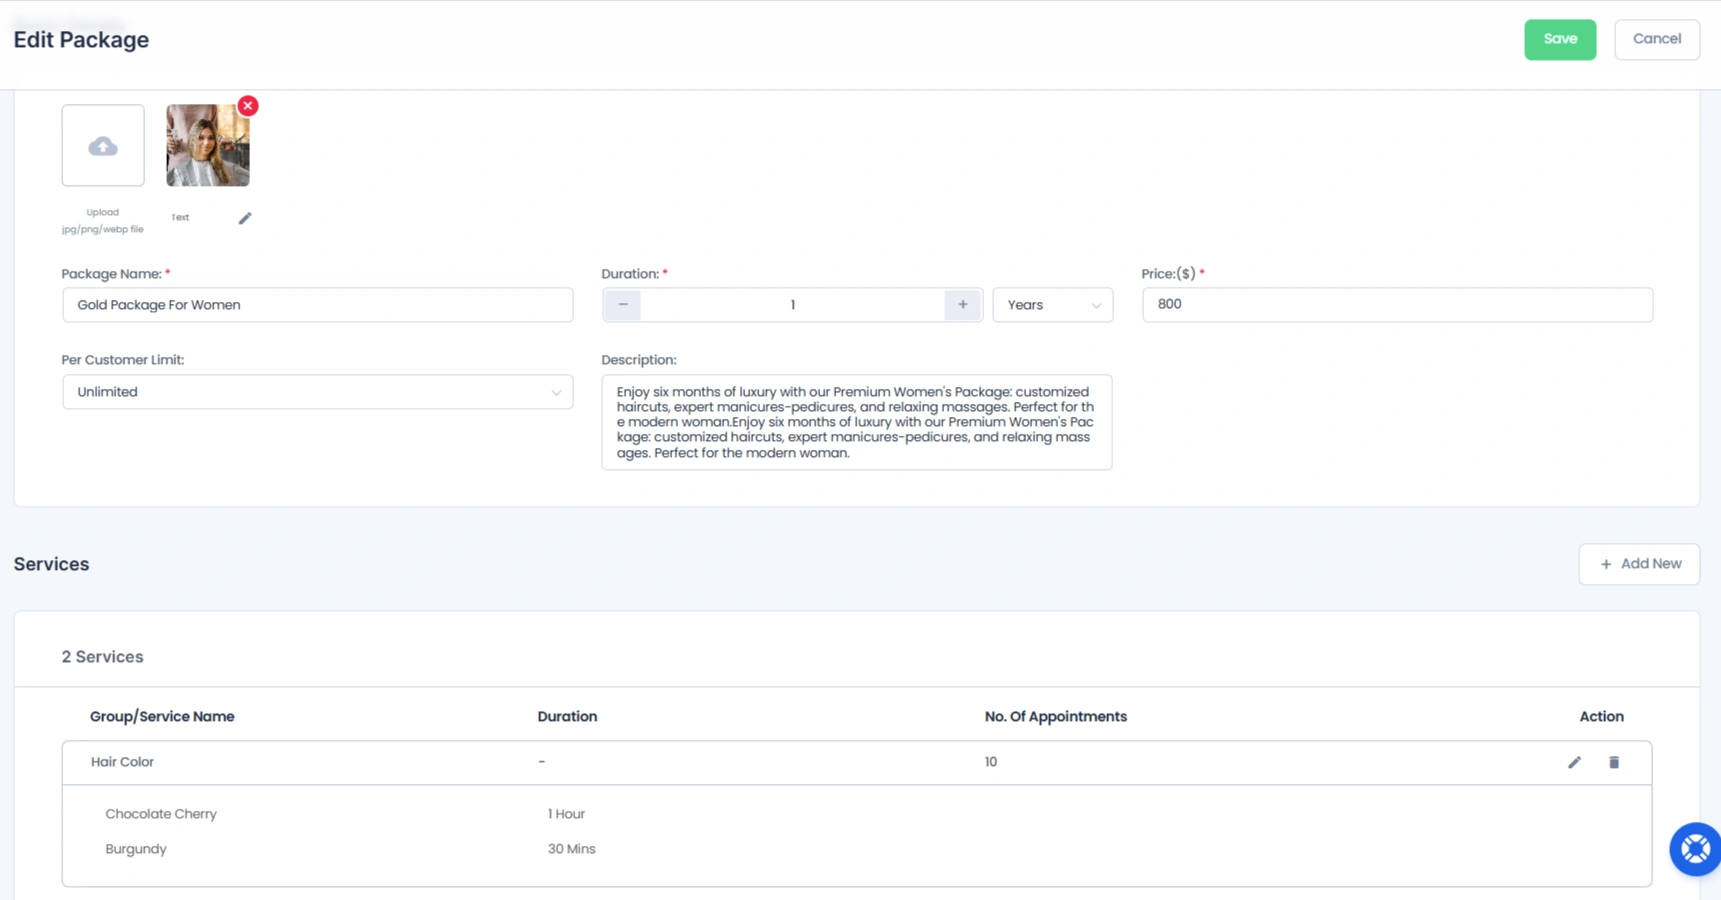
- Images: You can upload a picture that will be shown for your package on the front-end booking forms.
- Name: This is the mandatory field on this tab because a package cannot exist without a name.
- Duration: Here, you can choose whether your package will expire.
- Price: Here, you can set the package price.
- Description: Here, you can set a package description.
- Per-Customer Limit: You can set a limit on how many times customers can book a package.
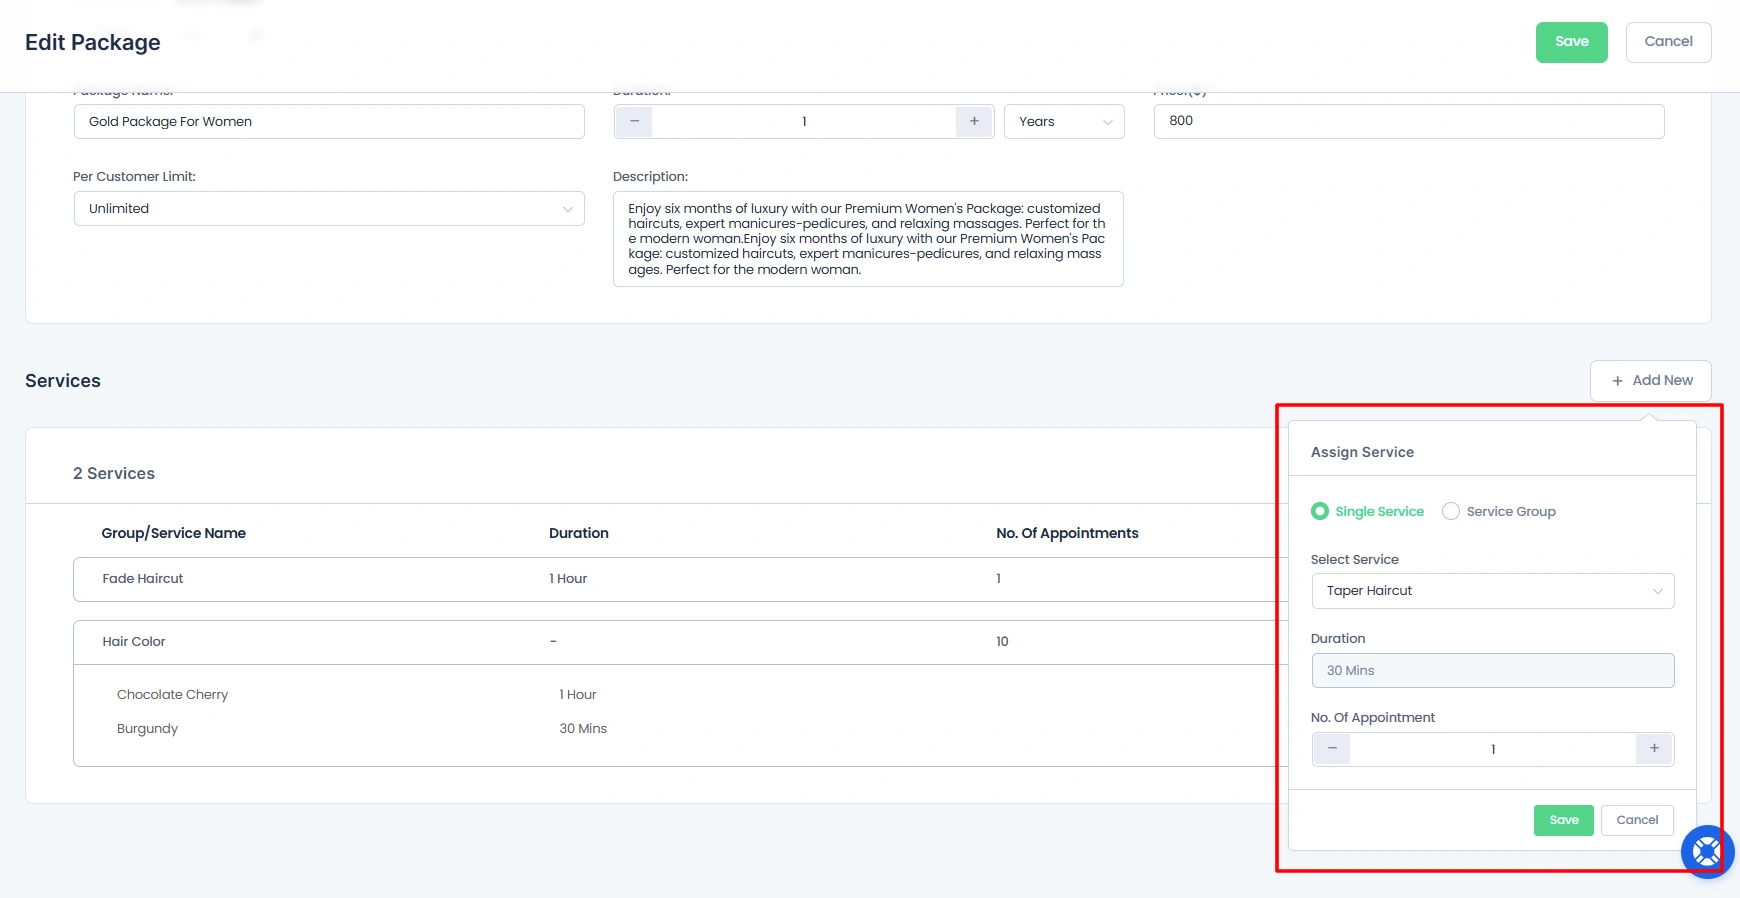
- Add Services/Group to a Package: Navigate to the Services section while creating/editing a package Use the dropdown to select either Single Service or Group Service.
1. Single Services
When you add a single service:
- The package is limited to that specific service only
- The number of appointments applies only to that service
Usage:
- Customers can redeem appointments only for the selected service
- Example:
- If “Haircut” is added with 5 appointments, only that service can be booked 5 times
2. Group Services
When you add a service group:
- All services within that group are included in the package
- You can define the number of appointments for the group
Usage:
- Customers can redeem the total number of appointments using any service within that group
- Example:
- If you set 10 appointments, users can:
- Book one service 10 times, OR
- Book multiple services (e.g., 5 times one service + 5 times another)
- If you set 10 appointments, users can:
Along with that, you can also manage the list of packages on this page. You will get the following options when you hover over a particular service from the list:
- Enable or disable the package
- Edit Package
- Duplicate Package
- Delete Package
Enable / Disable the package:
With this option, you can enable/disable any of the packages from the list according to your requirements. Please note that if you have disabled any particular package, then that package will not be visible at the front end unless the package is enabled.
Edit Package:
This option will redirect you to the edit page of the package to edit the package.
Duplicate Package:
When you click on this option by hovering on any of the packages, you will get an option to add a duplicate package of the existing package.
Delete Package:
This option will delete the package from the list.
The retail price in the package list
If you choose this option this will mean the price of the package will be calculated as the total price of all appointments and services added to the package.
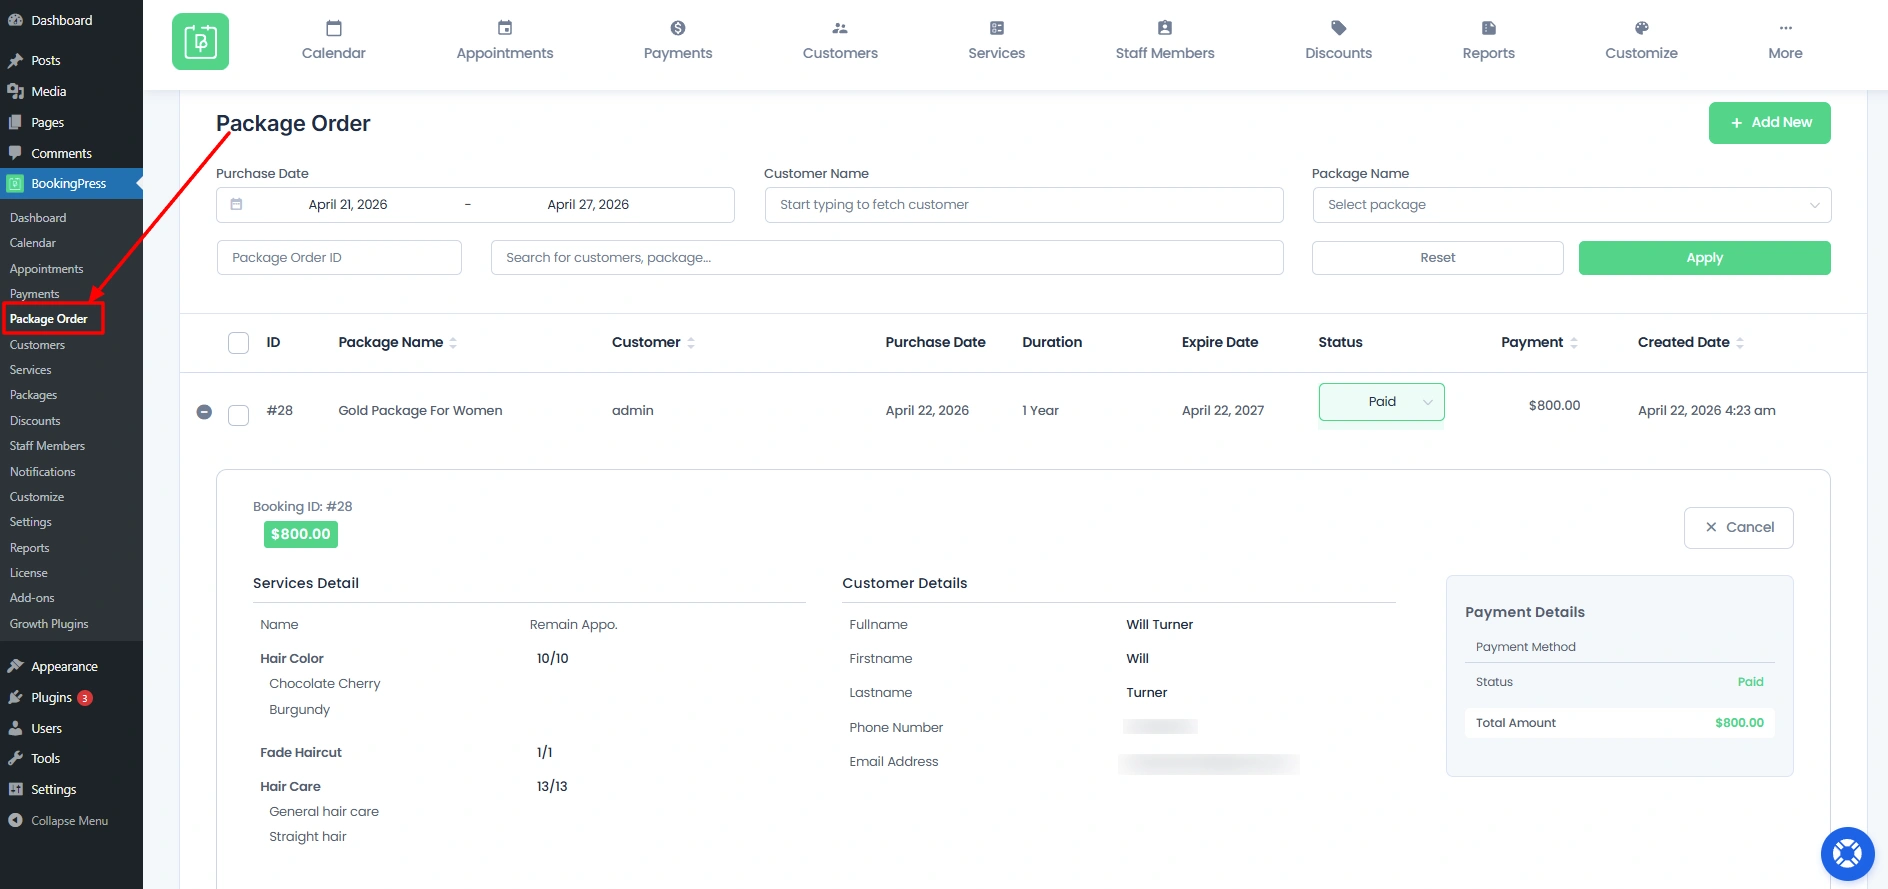
Manage Package Order
On this page, you will be able to see all the purchase packages listed.
You can also filter package orders by setting the date range you require and selecting the customer name and package name from the drop-down menu at the top of the page.
You can change the individual package order status by selecting the appropriate status from the drop-down displayed for each package order.
You can also view the details of the package order by just clicking on the specific package order.
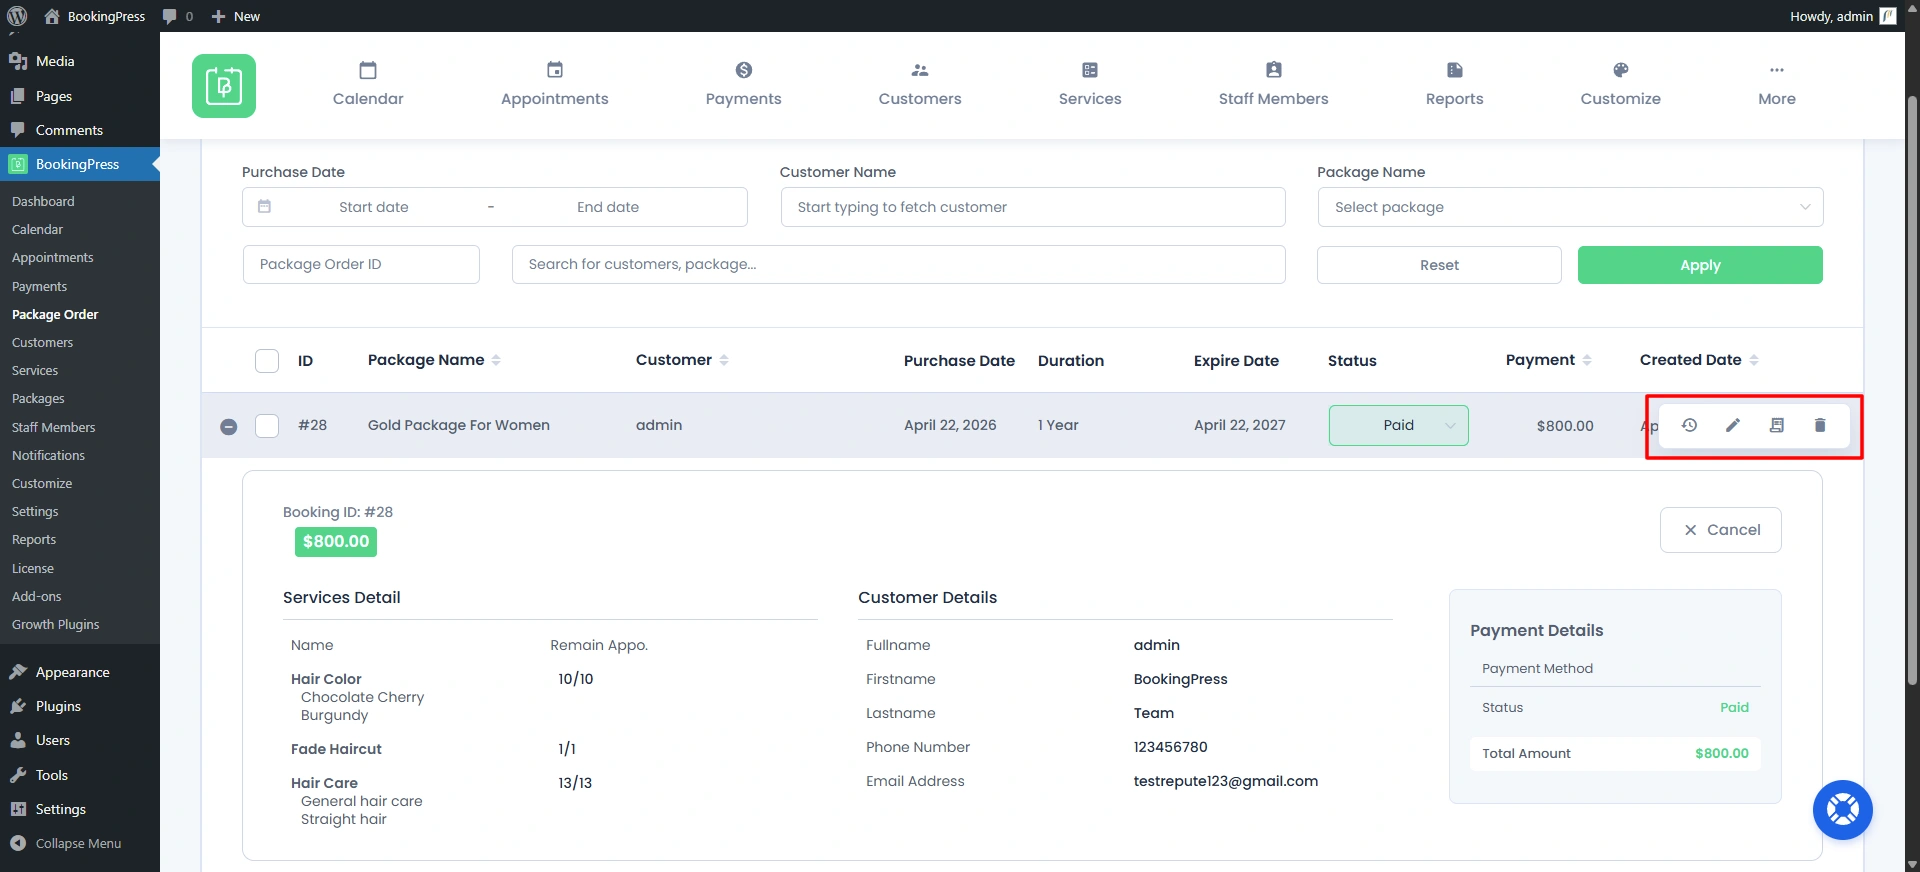
When you hover over the same you also will be able to change the Package Expiration, Edit the existing package and more. If you have the Invoice addon enabled then you will also be able to view the Invoice for the purchased Package.
Add Package Order:
To assign a new package to a customer, click the “Add New” button in the top right corner of the page, which will open a modal with all the necessary details. Select “customer” from the dropdown, and then “package.” If you would like to add any notes, please do so.

Colors & Labels Customization
Now navigate to WordPress Dashboard > BookingPress > Customize and select “Package Booking”. Here, you can customize the Appearance of the package form as per your liking.
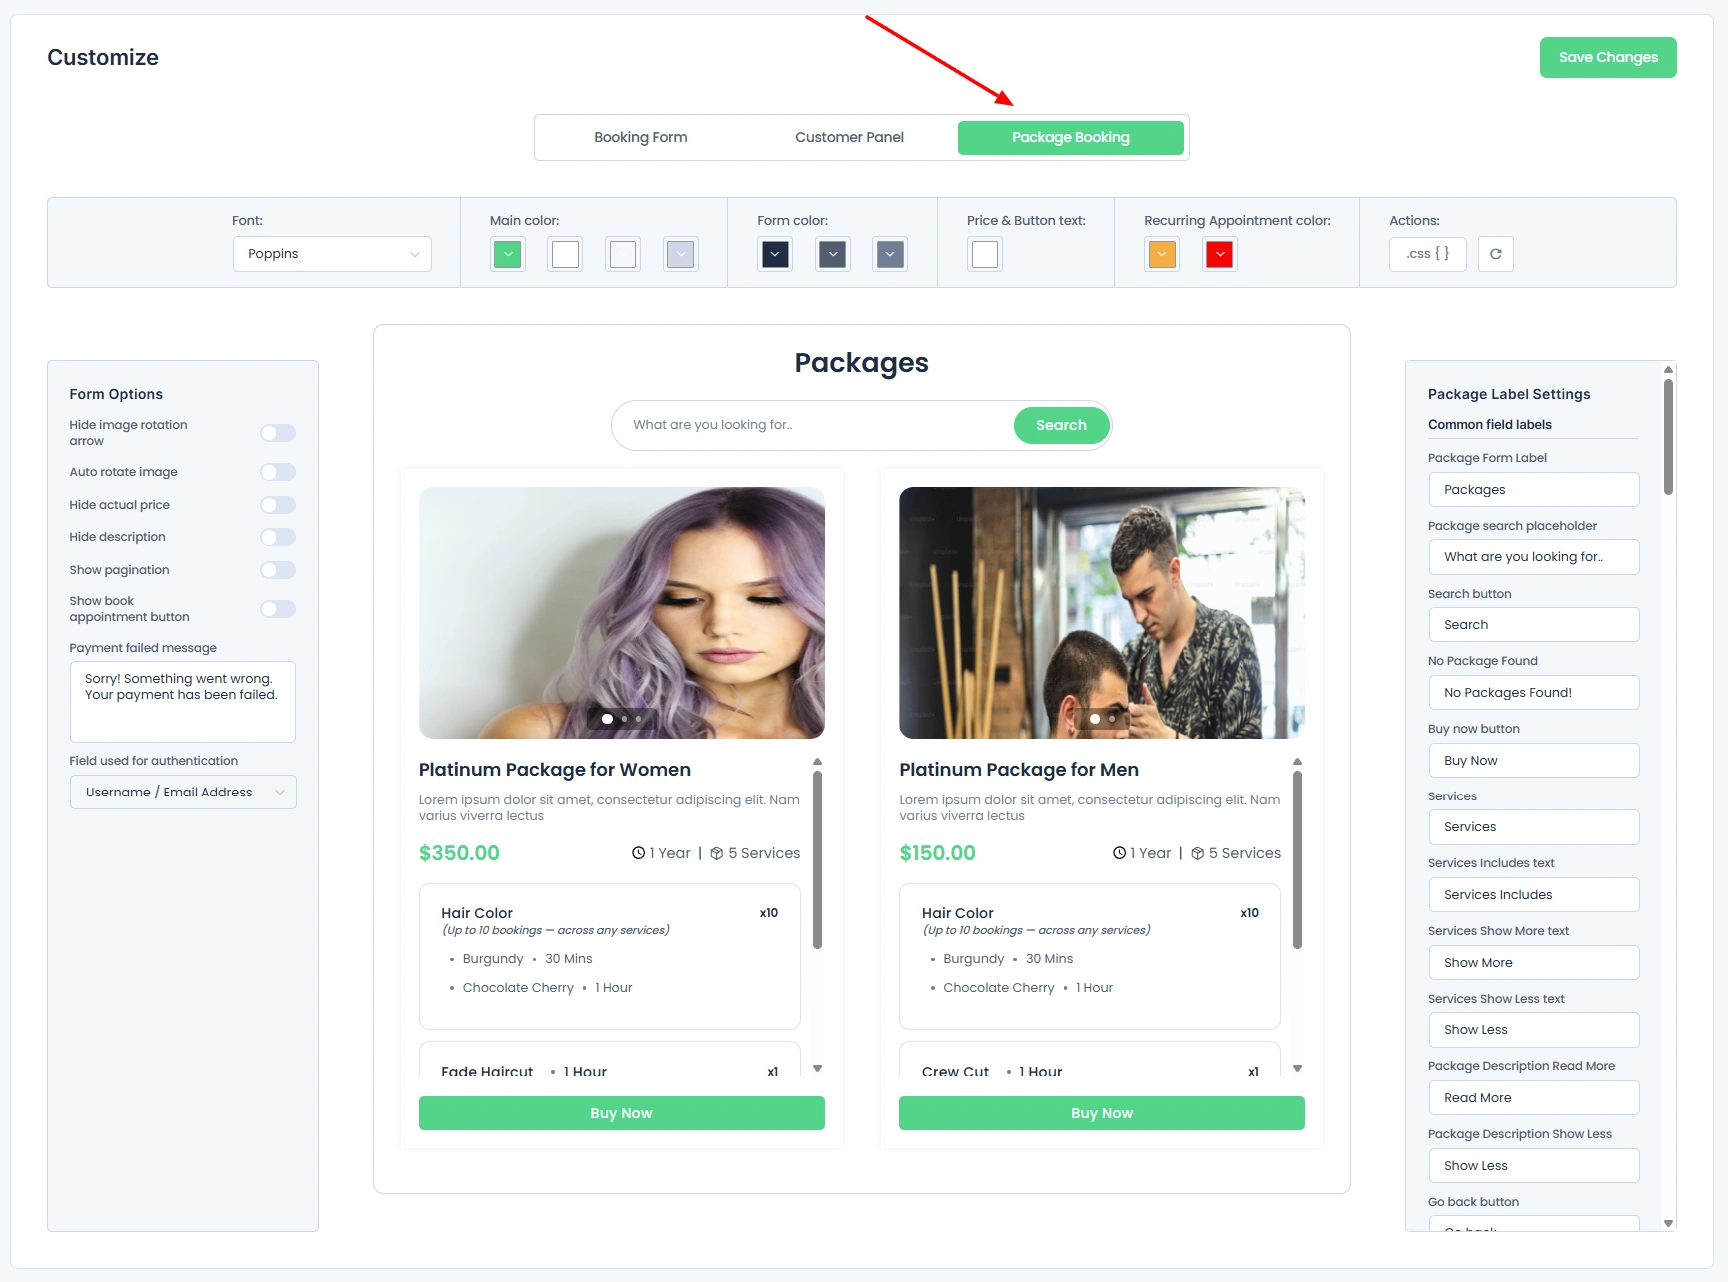
You can customize your form style with the following options:
- Fonts
- Main Color
- Form Colors
- Price and Button Text
- Action
1. Fonts: From this option, you can style your forms by selecting the most suitable fonts from the list of numbers of fonts.
2. Main Colors: With this option, you can select the background colors of the booking form
3. Form Colors: With this option, you can change the font colors of the booking form in various ways like color before selecting an option, after selecting an option, and the fonts of the provided options.
4. Price & Button Text: This option will help you select the font color for the price and the submit button.
5. Action: With this option, you can add Custom CSS and you can reset the form settings back to the default style of the form.
You will find a list to customize various form options from BookingPress -> Customize -> Form at the left side panel of the page.
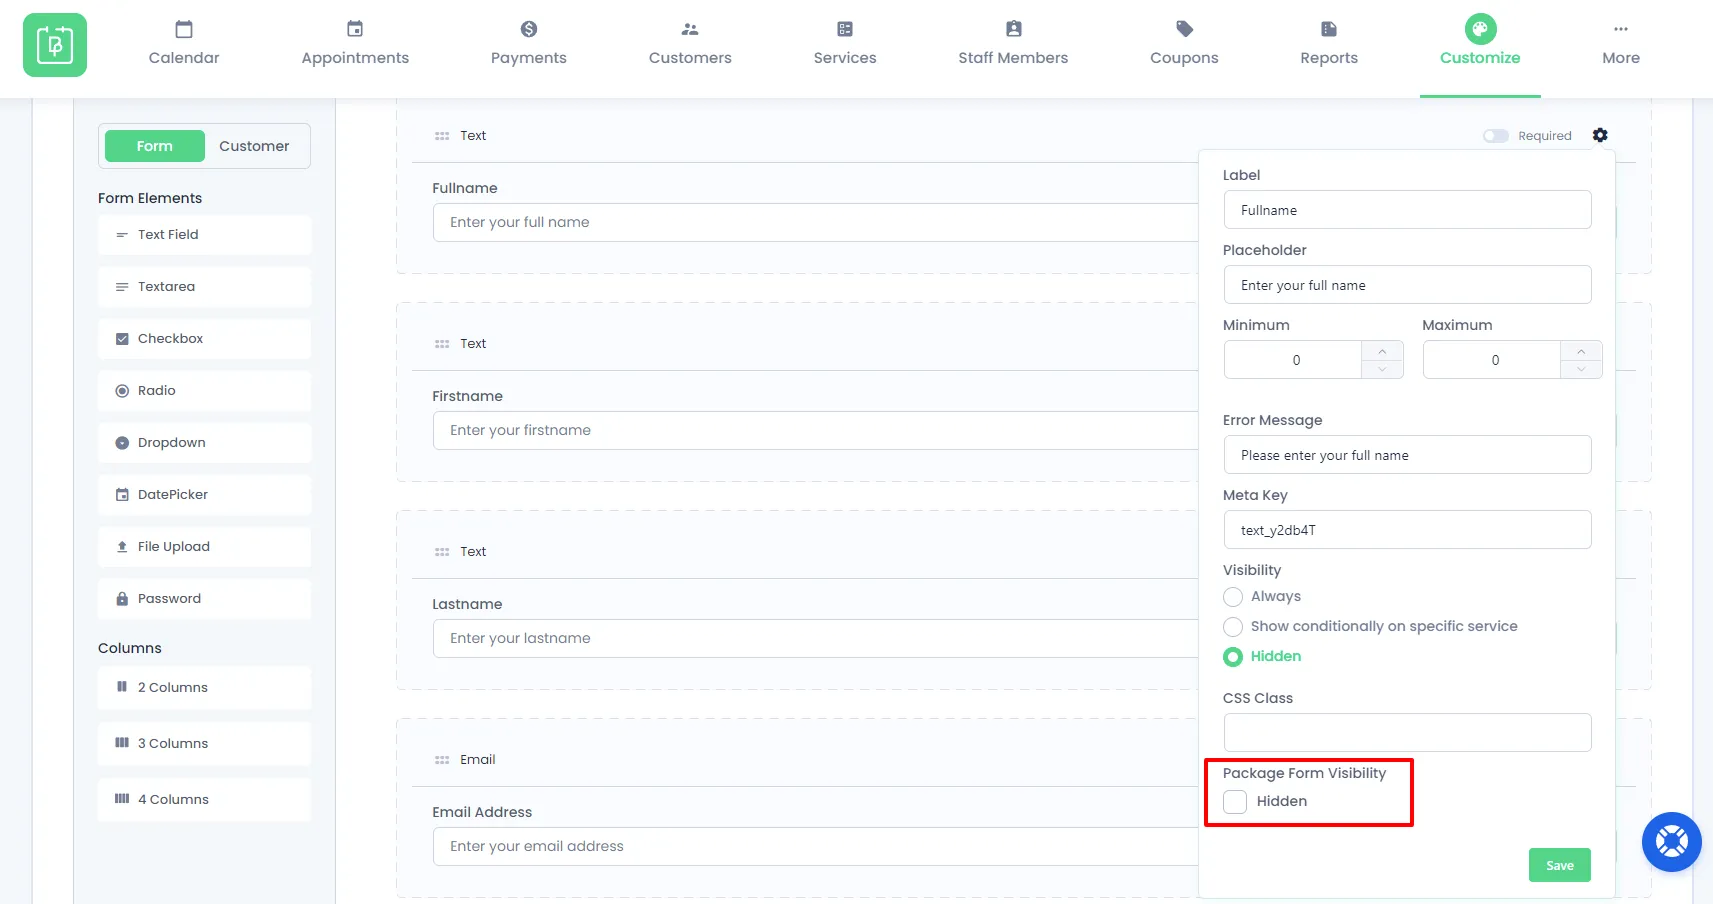
Package Custom Fields
To remove package custom fields, go to BookingPress > Customize> Custom Fields. Add click-on fields and setting icons. You can see the Package Form Visibility option to manage package custom fields.
Package Order Notification
To manage package order notifications, go to BookingPress > Notification > Package Order.
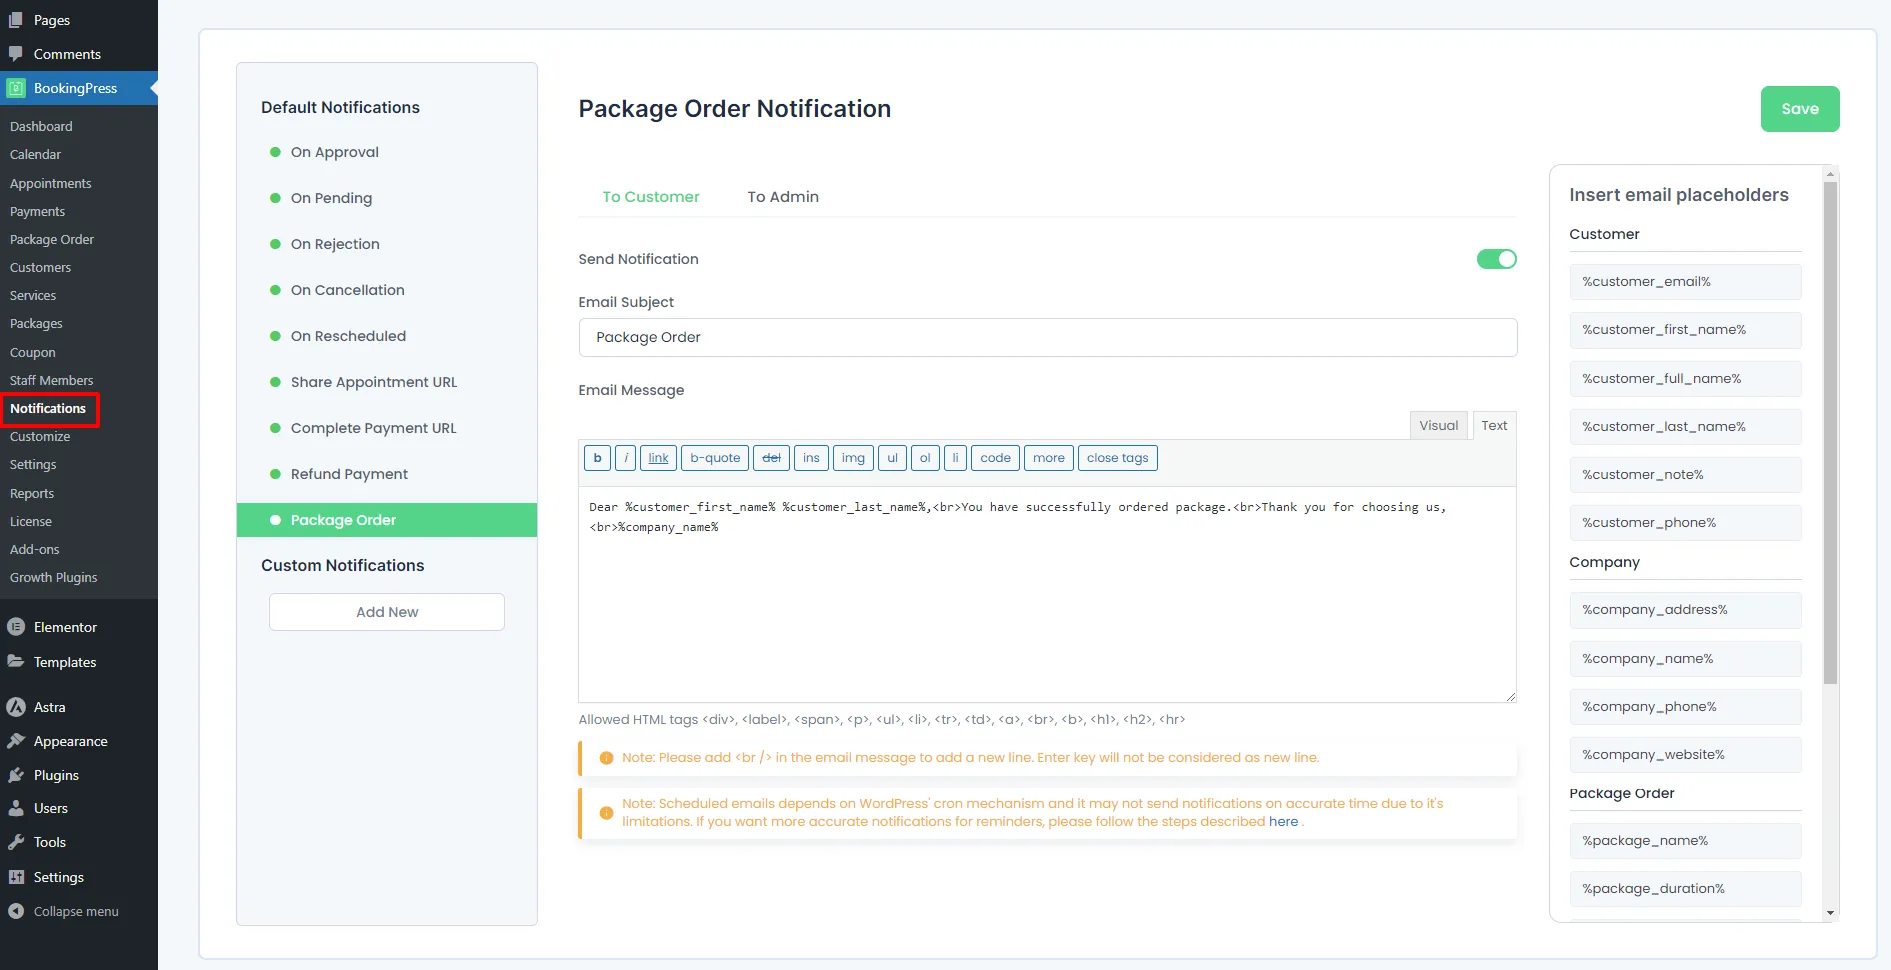
Package Order
This email notification will be sent immediately after a package is booked from the front-end or back-end.
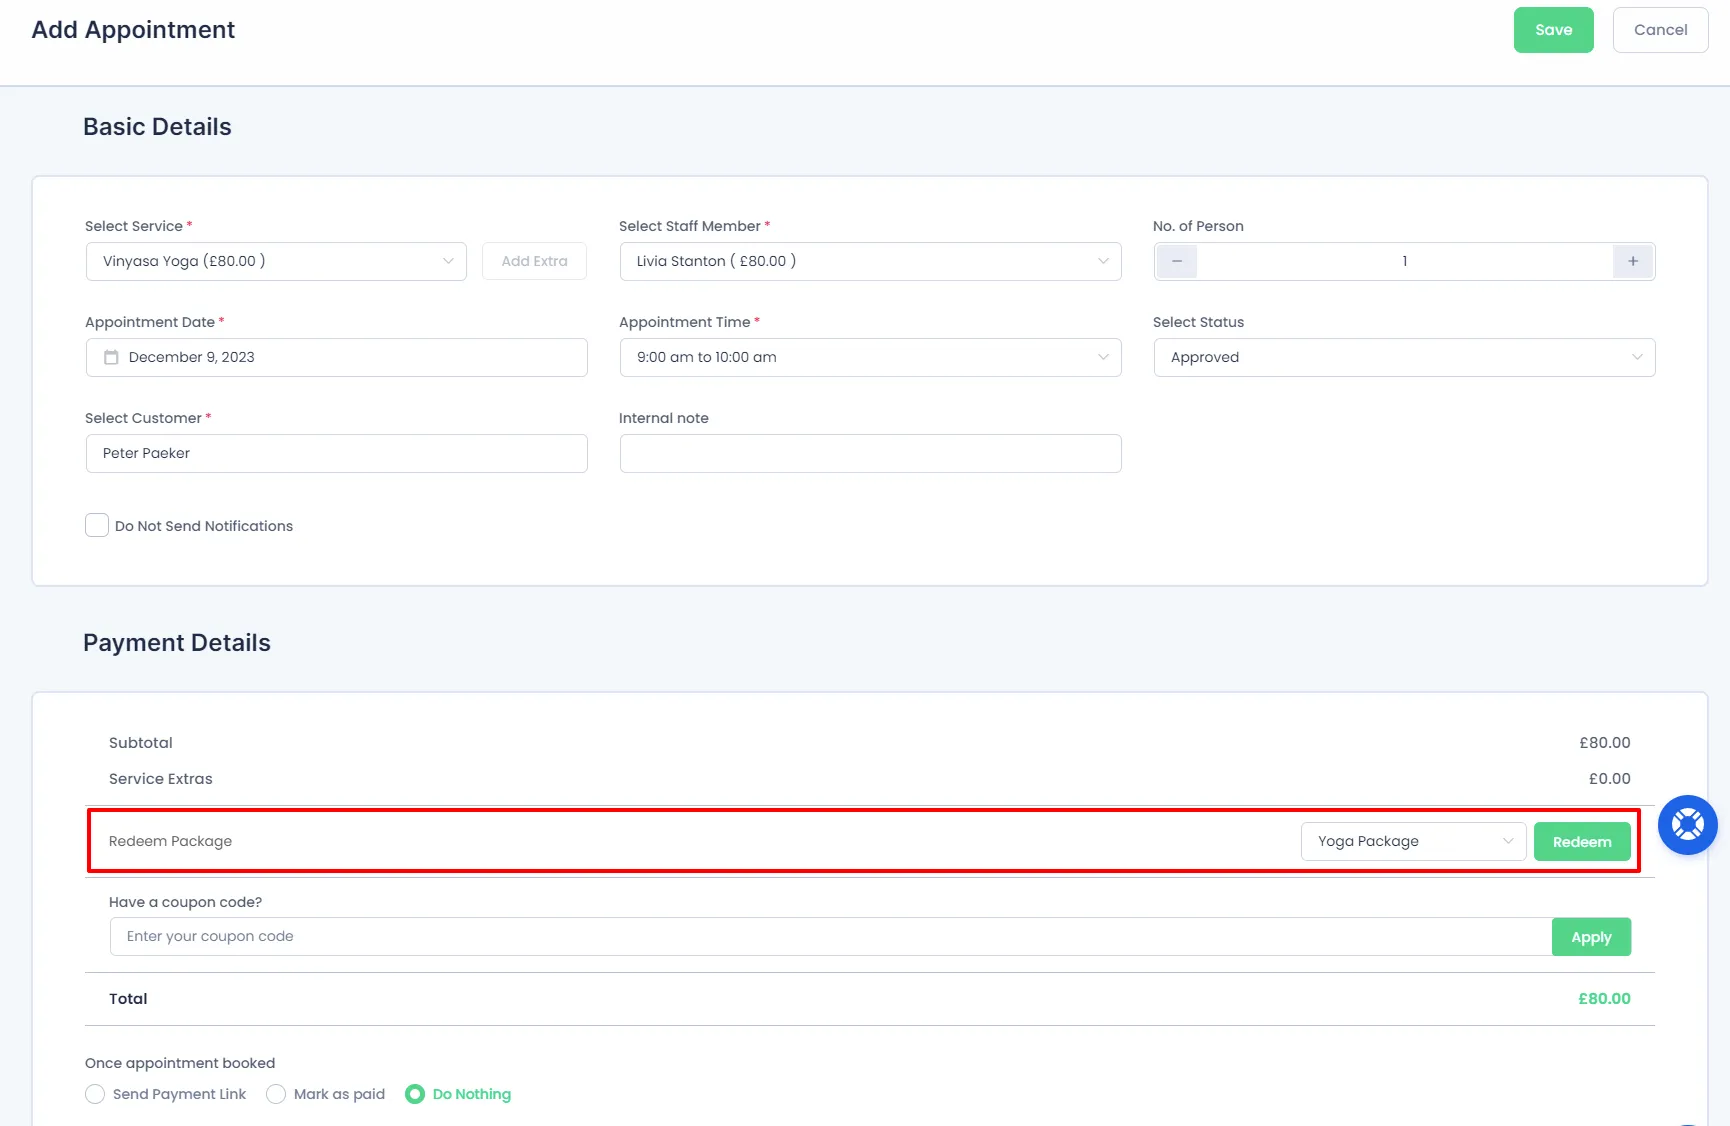
Package Appointment Add-In Backend
To add new appointments or manage the existing ones, navigate to WordPress Dashboard > Appointments. After selecting service and customer, you will see a customer purchase package list in the Dropdown, and you can select and apply a package for an appointment.
Adding the Package Booking Form to Your WordPress Site’s Front-end
After the service package addon is active by default, our packages page is automatically created on this page, with a package booking shortcode added. So you can add this page to the WordPress menu to start booking packages. If this page has not been created, then you need to add the package booking shortcode manually using the following steps.
you need to add a package booking form to the site’s front end. For that, you must first create a WordPress post or page. To create a page, go to Pages > Add New, and give a name to the page:
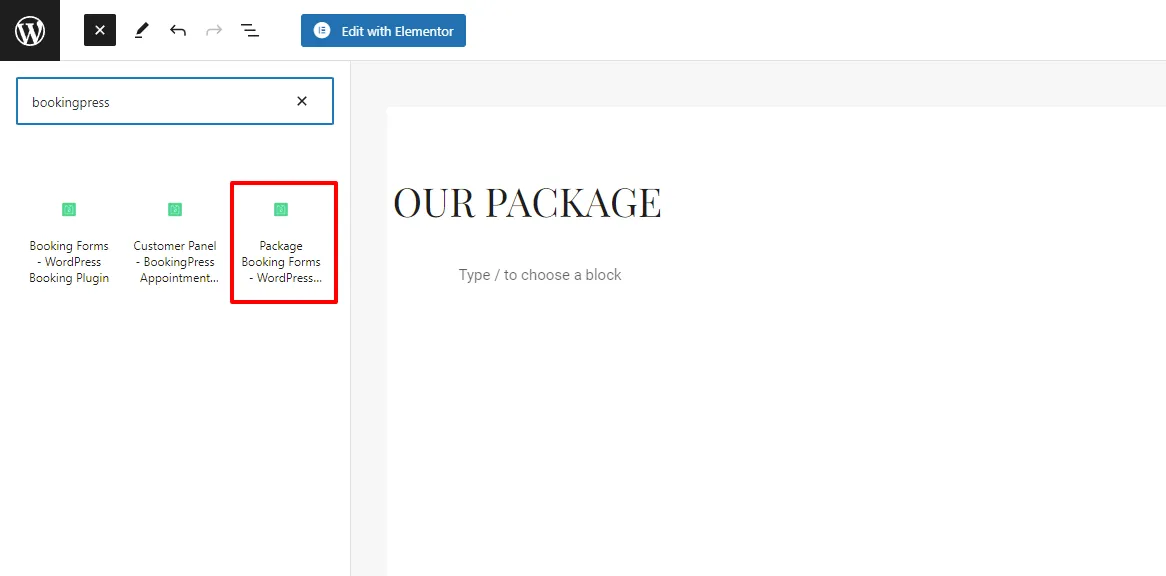
Then you’ll need to add the step-by-step booking form to the page. To add it, click the BookingPress button in the editor.

Choose “BookingPress Package Booking” in the dropdown and click “OK.” The shortcode will appear in the text:
Alternatively, you can manually type in the shortcode [bookingpress_package_form]. And that’s it!
Additionally, to showcase a particular service package on the front-end, utilize the shortcode: [bookingpress_package_form package=your_package_id]. Simply replace “your_package_id” with the actual ID of the package you intend to display.
Client Experience
Front Package Booking
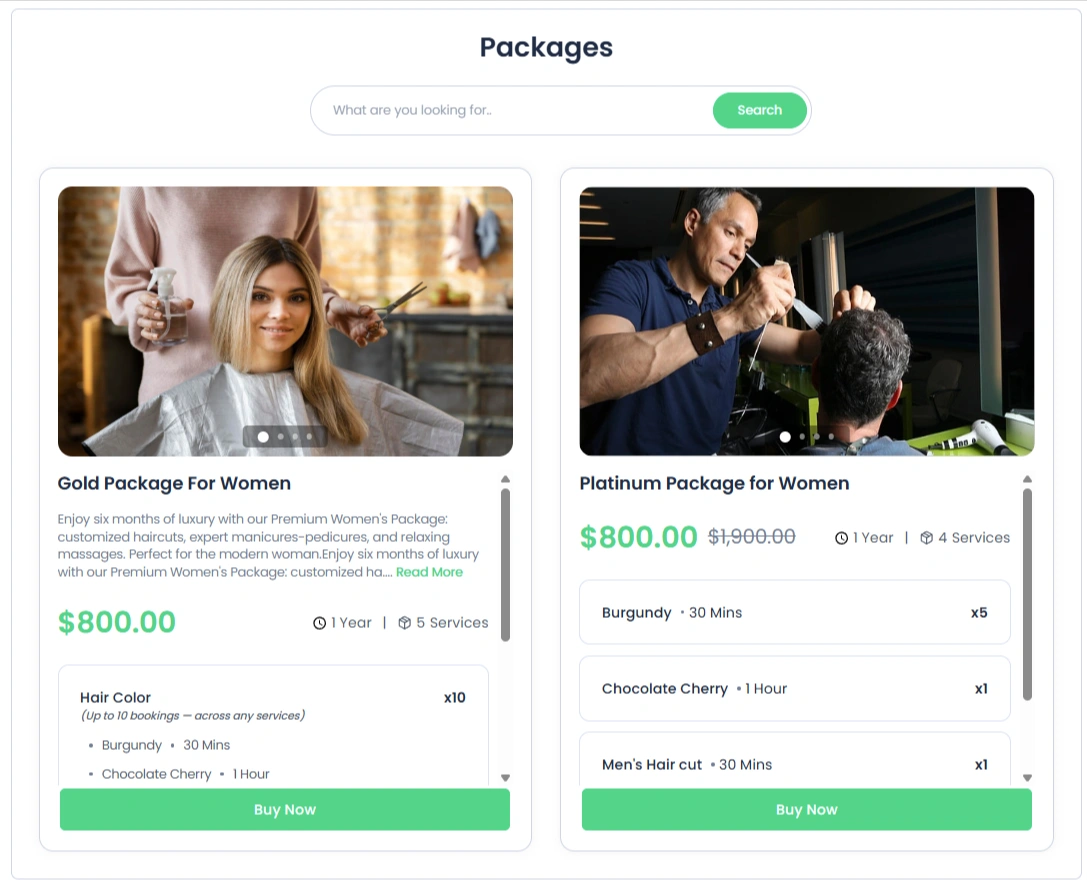
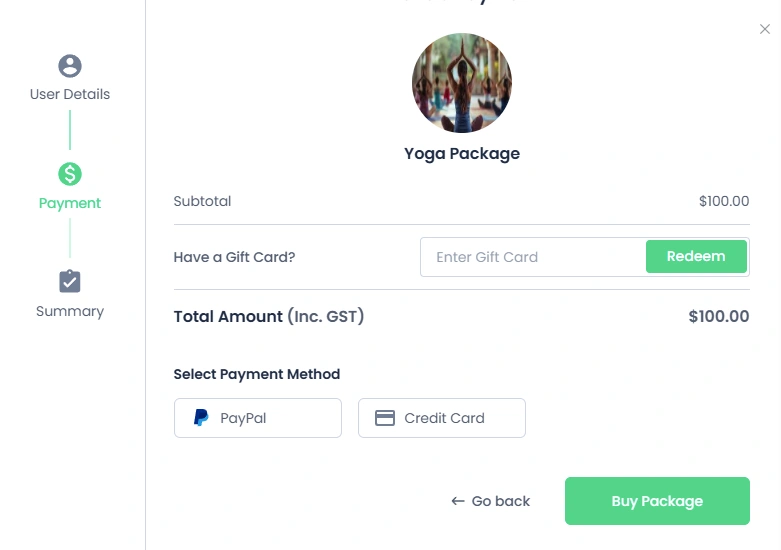
The user can purchase packages after logging in. If the user doesn’t have an account, then the package booking form provides the functionality to register the user.
The user can purchase a package using the package booking form shortcode on our package page and book their appointment using the BookingPress appointment booking page.
Gift Card Redemption: Customers can conveniently redeem their gift cards at the time of purchasing a package when the Gift Card Addon is enabled, ensuring a seamless and flexible payment experience.
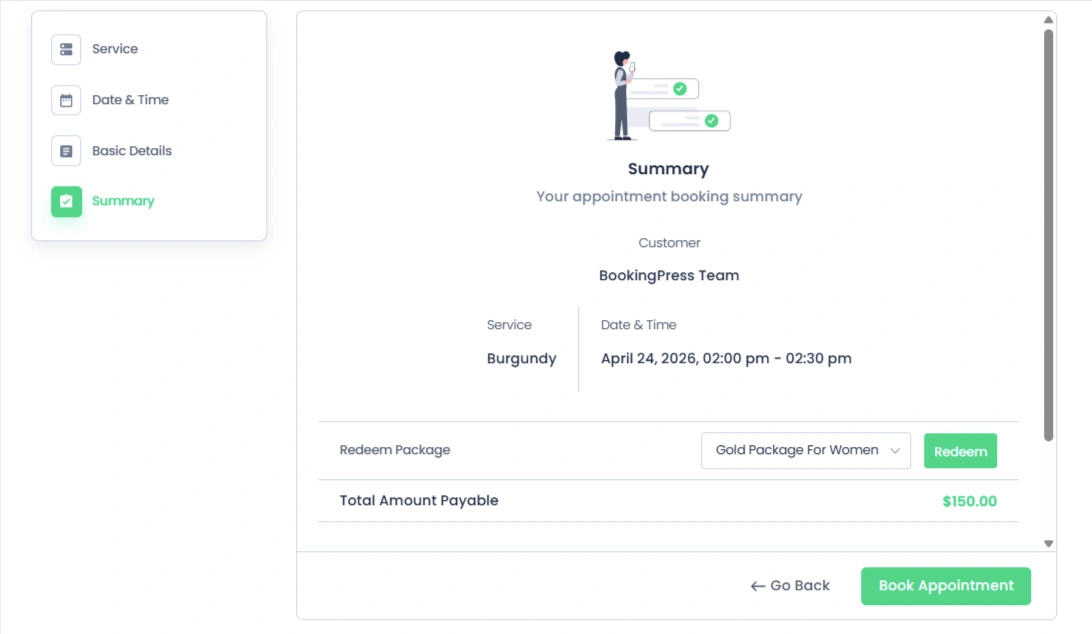
Front Package Appointment Booking
When the user selects the service for which he has purchased the package, he can see the summary tab of his purchase package list, and he can redeem the package for a book package appointment.
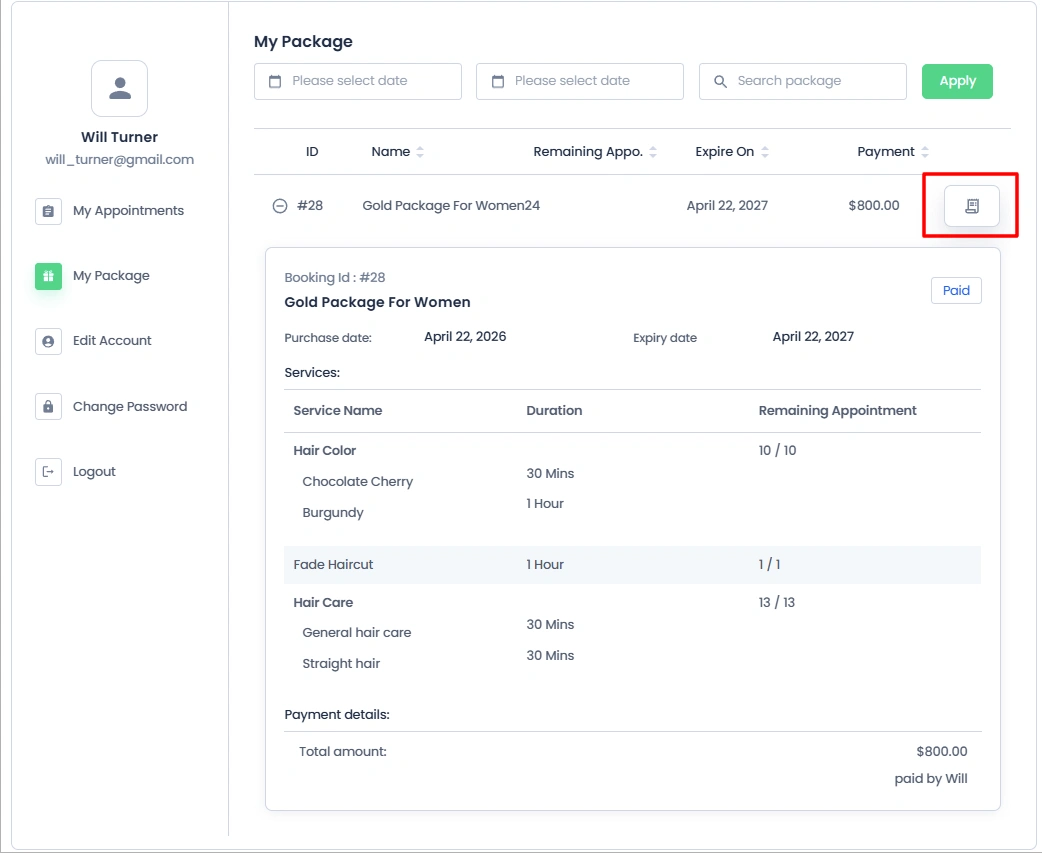
You can see your purchased package list in my booking.
Service Package Addon Doesn’t Work:
#1. This addon will not work with the Custom Duration Service.
#2. Package appointments will not be booked under the waiting slot.
#3. Deposit Not be applied to package appointments.
#4. Package appointments will not be booked with recurring appointments.
#5. On-site payment gateways do not work for buying packages.