Reschedule Appointment
Sometimes customers need to change their appointment time rather than canceling it.
With BookingPress, your customers can reschedule appointments in just a few clicks from the My Bookings page or using a reschedule link shared via email. Further, you even get access to reschedule an appointment from the backend by editing appointments.

Configure Appointment Rescheduling Settings
First of all, we have to allow appointment rescheduling from the backend because then only customers will be able to see the front-end options.
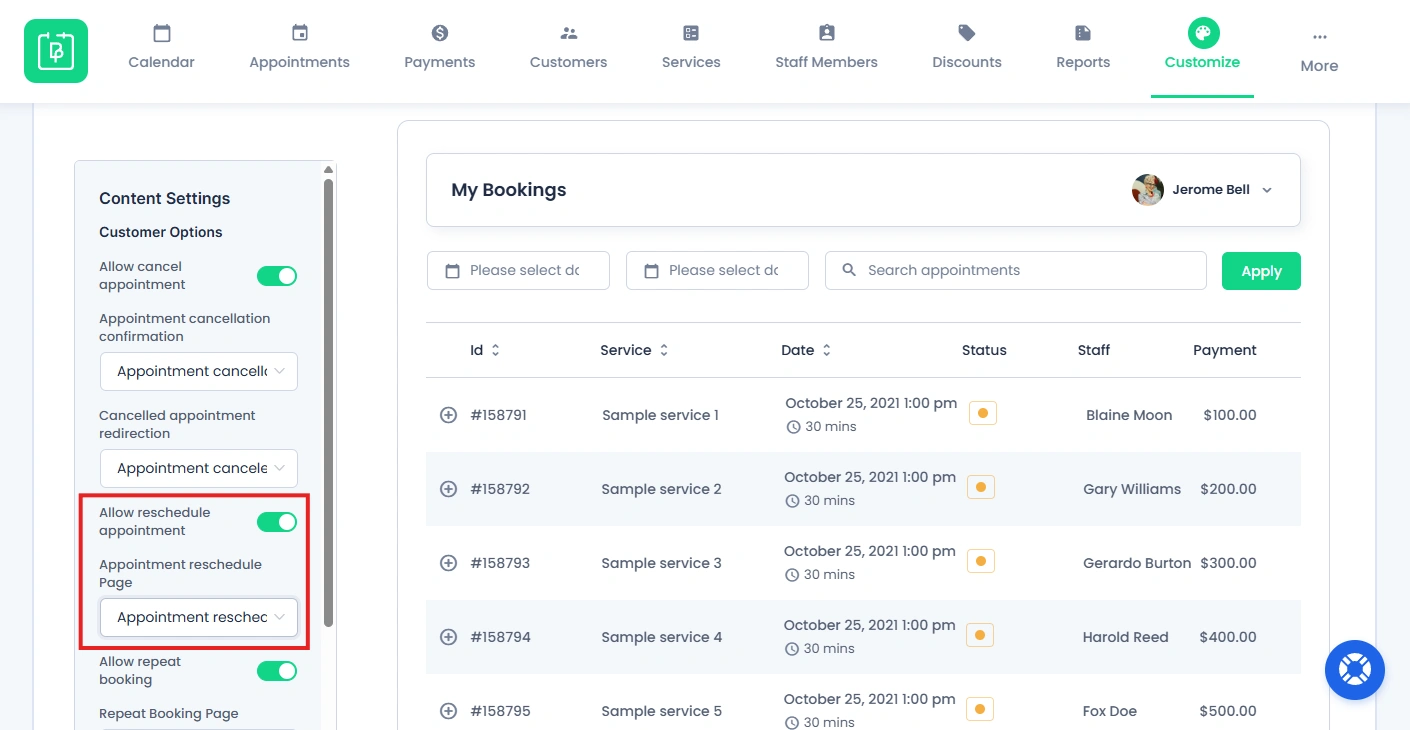
You can control how rescheduling works and customize the experience right from the BookingPress → Customize → Forms
Here, go to the Customer Panel.

Now inside the Content Settings, toggle on the Allow reschedule appointment for allowing customers to reschedule their appointments. Plus, don’t forget to select your preferred Appointment Reschedule Page.
If you don’t want to use BookingPress default reschedule page, you can make your own by simply using this shortcode on any page:
[bookingpress_appointment_reschedule]
This shortcode displays the reschedule form on the selected page.
Customize Form Labels
You can update the text shown on the reschedule form from Label Settings.
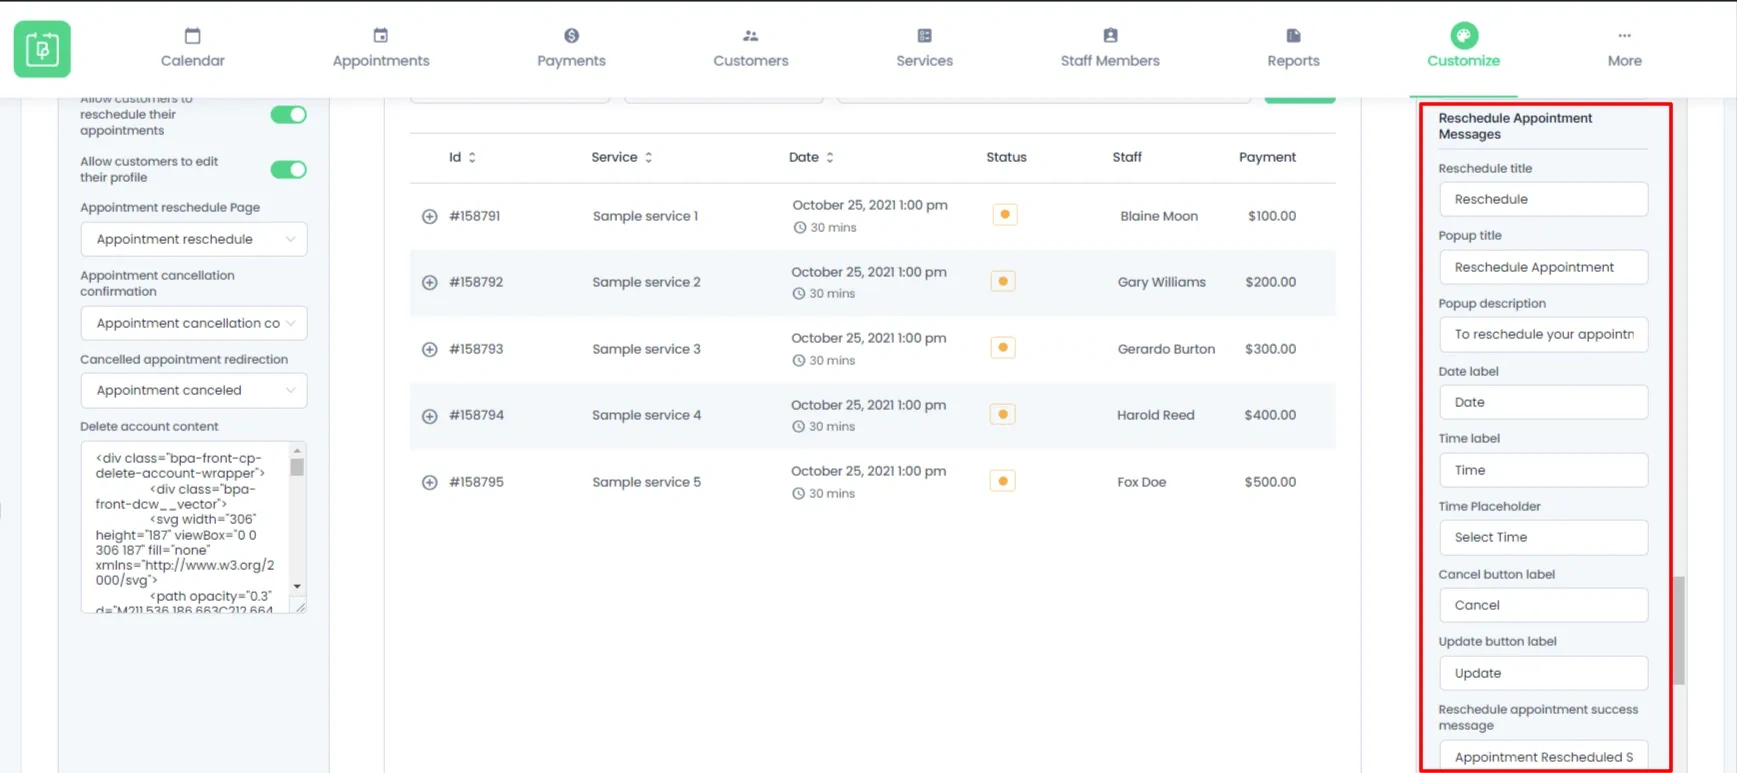
Available options include:
- Reschedule title – Title of the form
- Popup title – Title shown in the popup
- Popup description – Description inside the popup
- Date label – Label for the date field
- Time label – Label for the time field
- Time placeholder – Default text (e.g., “Select Time”)
- Cancel button label – Text for cancel button
- Update button label – Text for update button
- Success message – Message shown after rescheduling
Frontend Experience
Customers can reschedule appointments in two ways:
- From My Bookings Page
- From Reschedule Page (via Email Link)
Option #1 – Reschedule from “My Bookings” Page
BookingPress allows your customers and clients to reschedule their appointments directly from your service website.
How Customers Reschedule an Appointment?
- First of all, log in to your customer account.
- Next, reach to the My Bookings pages and select the appointment you want to reschedule.
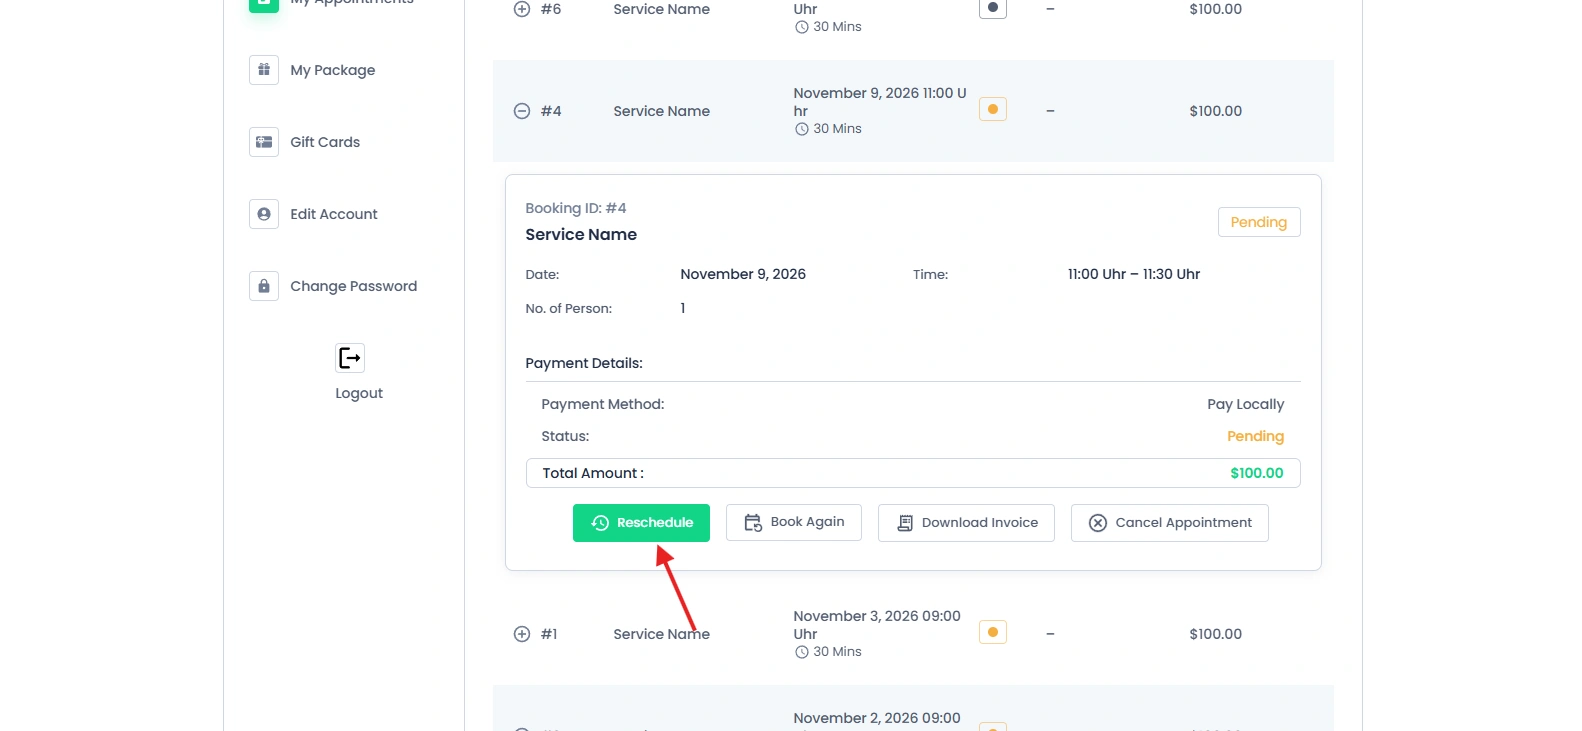
- Now, click the Reschedule button to choose a new date and time.
- Lastly, make sure to confirm the update.
The appointment will be updated right away in your BookingPress admin dashboard and staff member dashboard.
Option #2 – Reschedule via Email Link
You can allow customers to reschedule appointments using a link sent in email notifications.
How to Enable Rescheduling via Email Notification
- Go to BookingPress → Notifications
- Open the email template
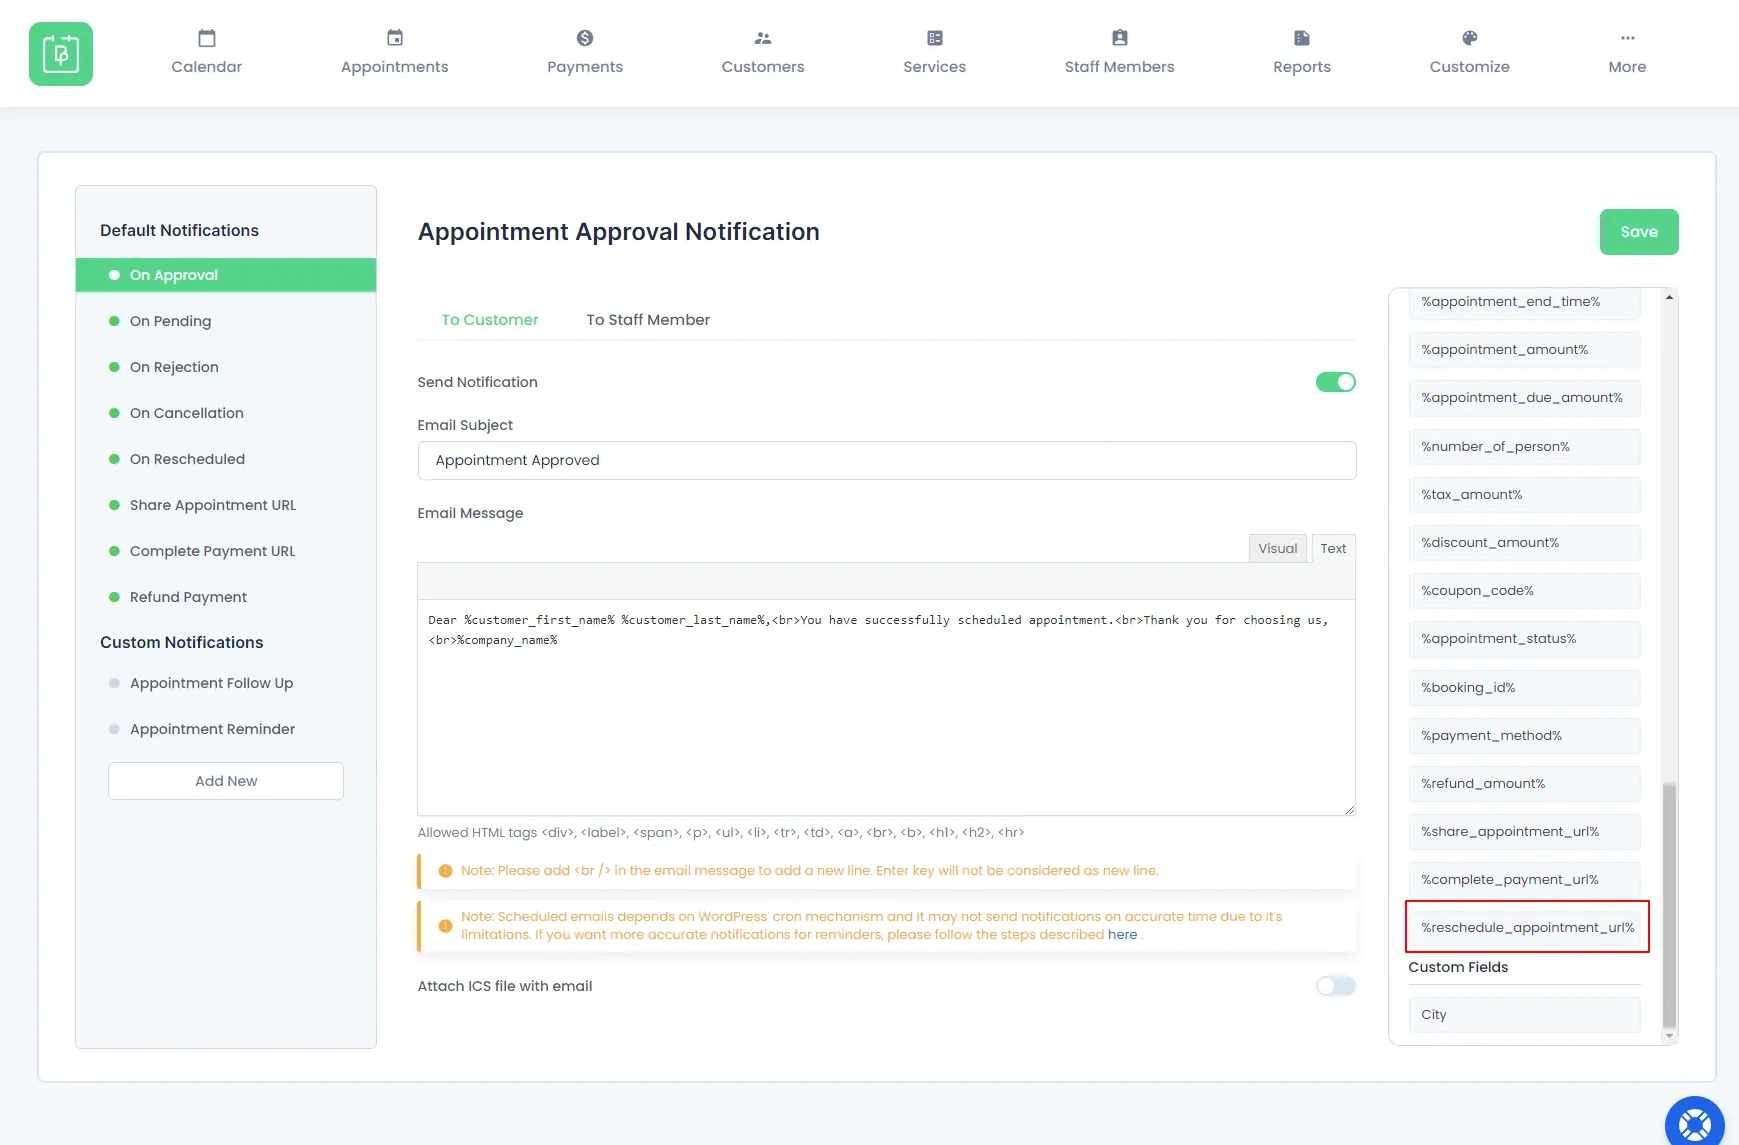
- Add the following placeholder:
%reschedule_appointment_url%
Now a unique reschedule link is generated for each appointment. So, for rescheduling an appointment, customers simply have to click the link in the email message, and they will be redirected to the reschedule page.
From there on, the appointment can be rescheduled in one click. (As discussed in the Option #1)
Best Practices
- Add reschedule links in email notifications.
- Use clear labels like “Select Date” and “Select Time”.
- Keep the reschedule page simple and easy to use.
- Allow enough time before appointments for rescheduling.
- Offer both reschedule and cancel options for flexibility.
Need a hand?
Our world-class support team is happy to help. Send us a message and we’ll take it from there.