Outlook Calendar Integration

Outlook Calendar Integration:
First of all, you will need to get the “Client ID” and “Client Secret” for the outlook. You will be able to get the “Application (Client) Id” and “Client Secret” from Azure.
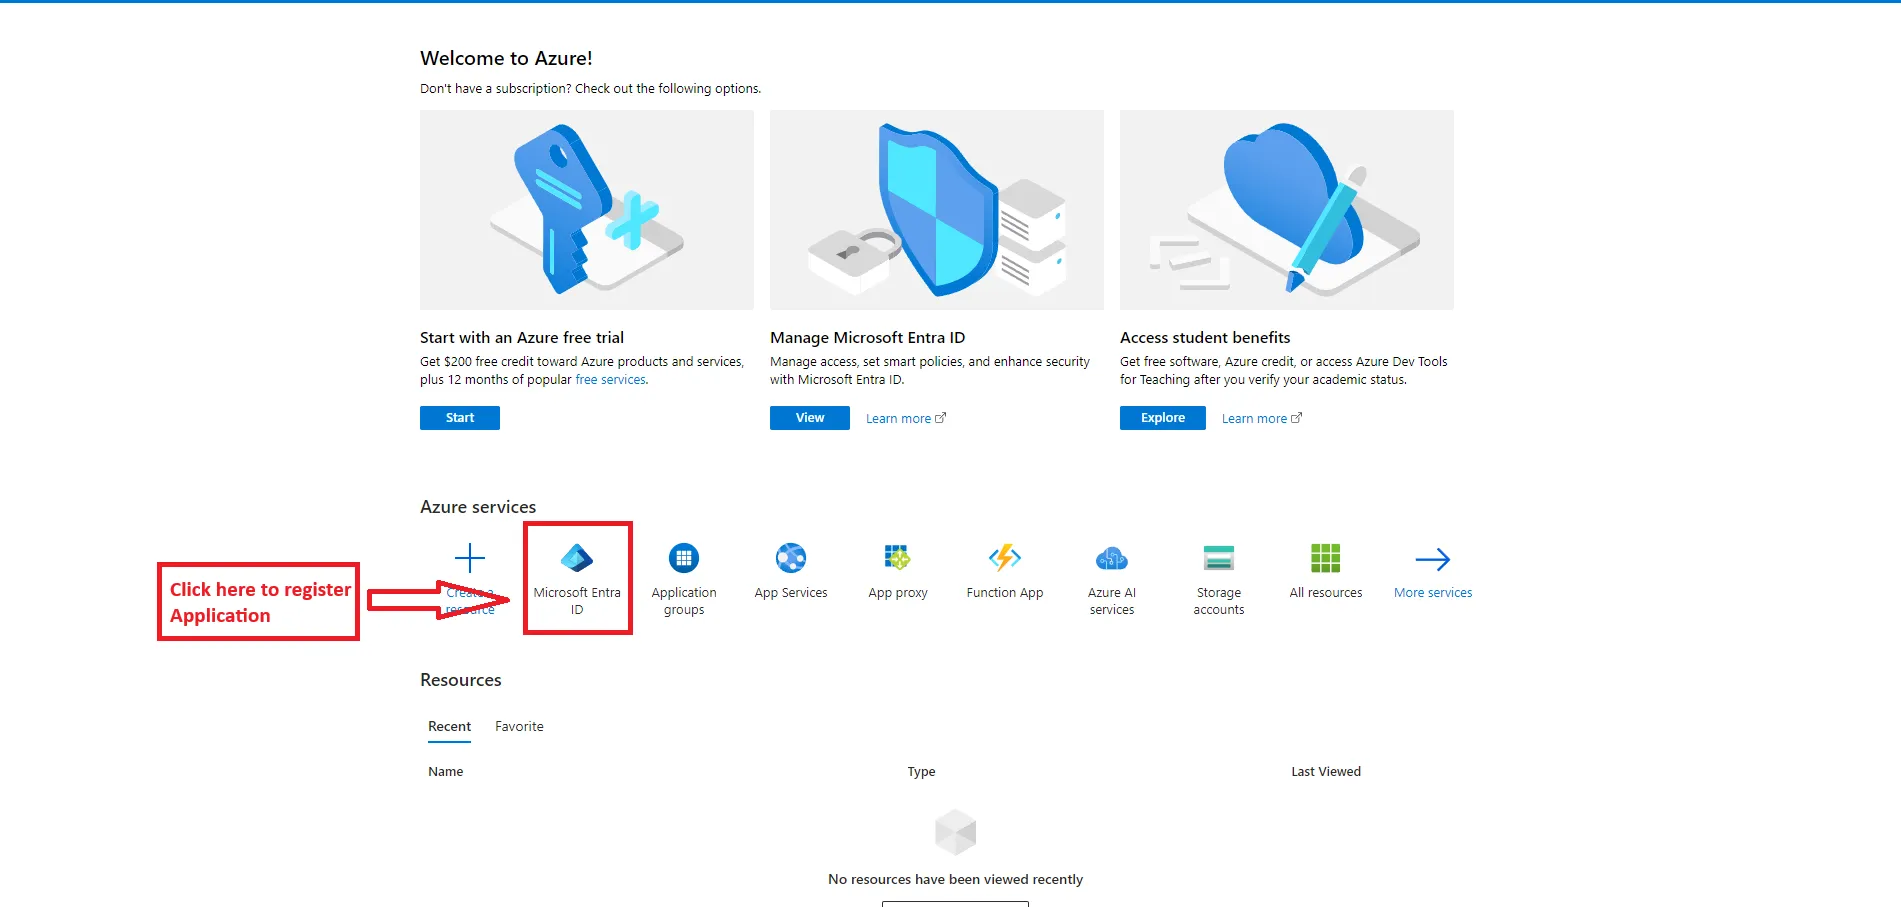
Register Application:
Go to the Register page and Register the application shown as below image :
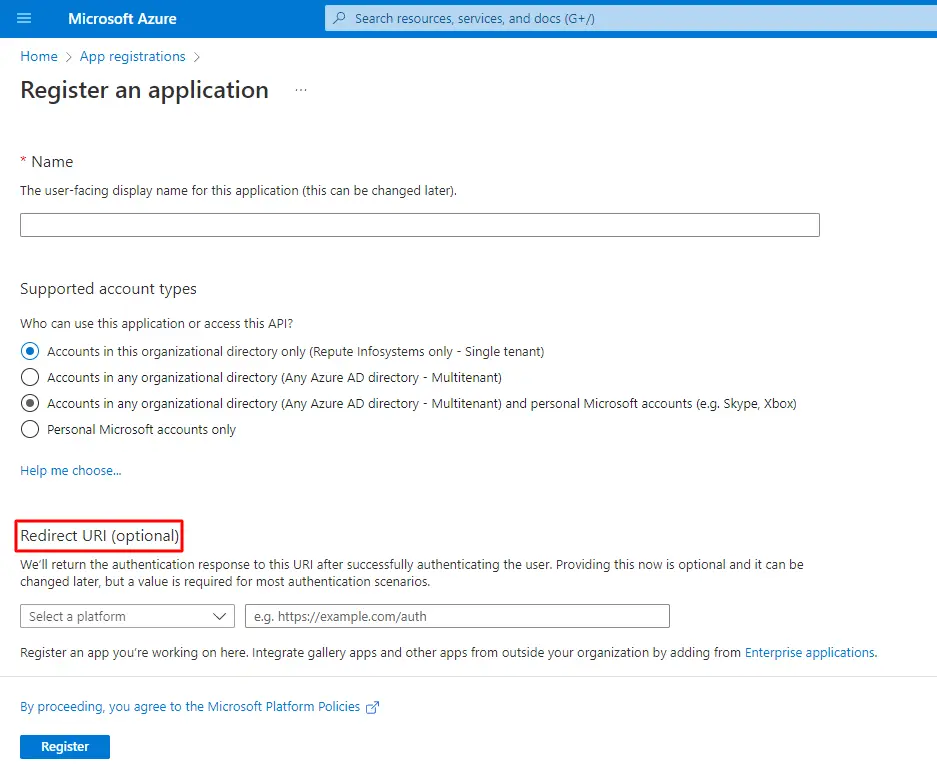
Add the Name field (required) and Redirect URL (optional) after then click on the register button shown as below image.
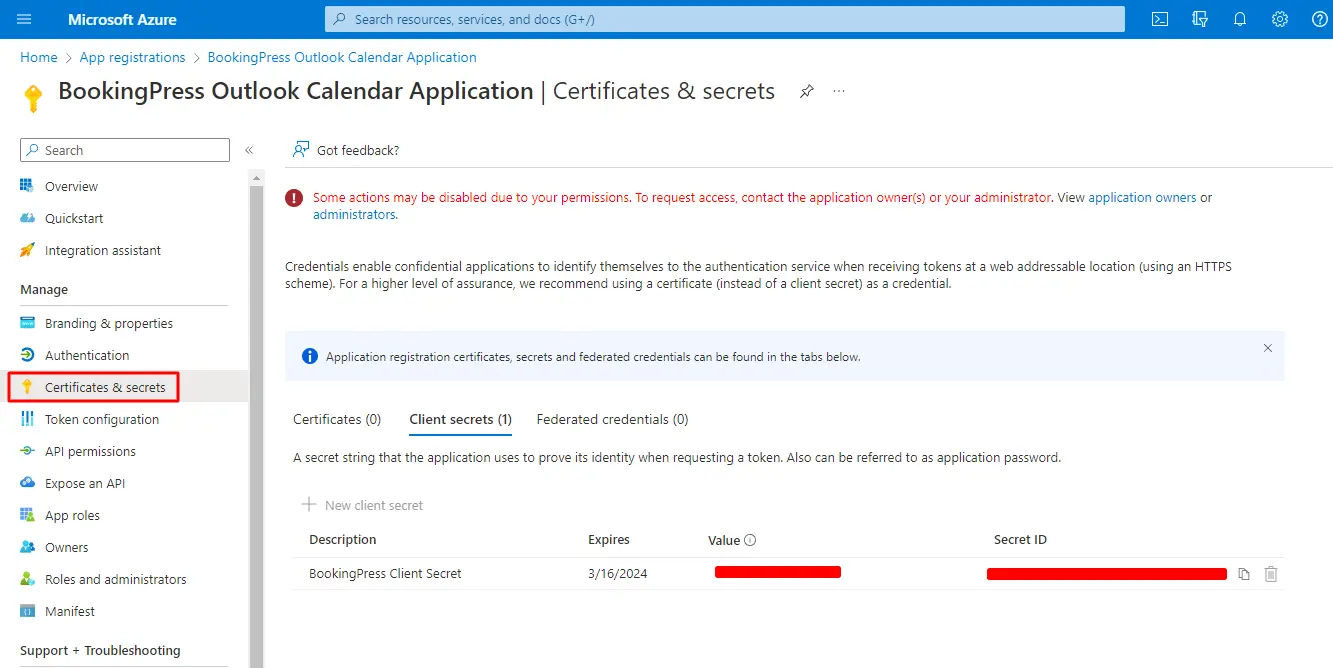
Client Secret Value:
After then go to Application Dashboard -> Certificates & secrets and Get Secret Value shown as below image :
Note : Secret Value will be displayed only one time.
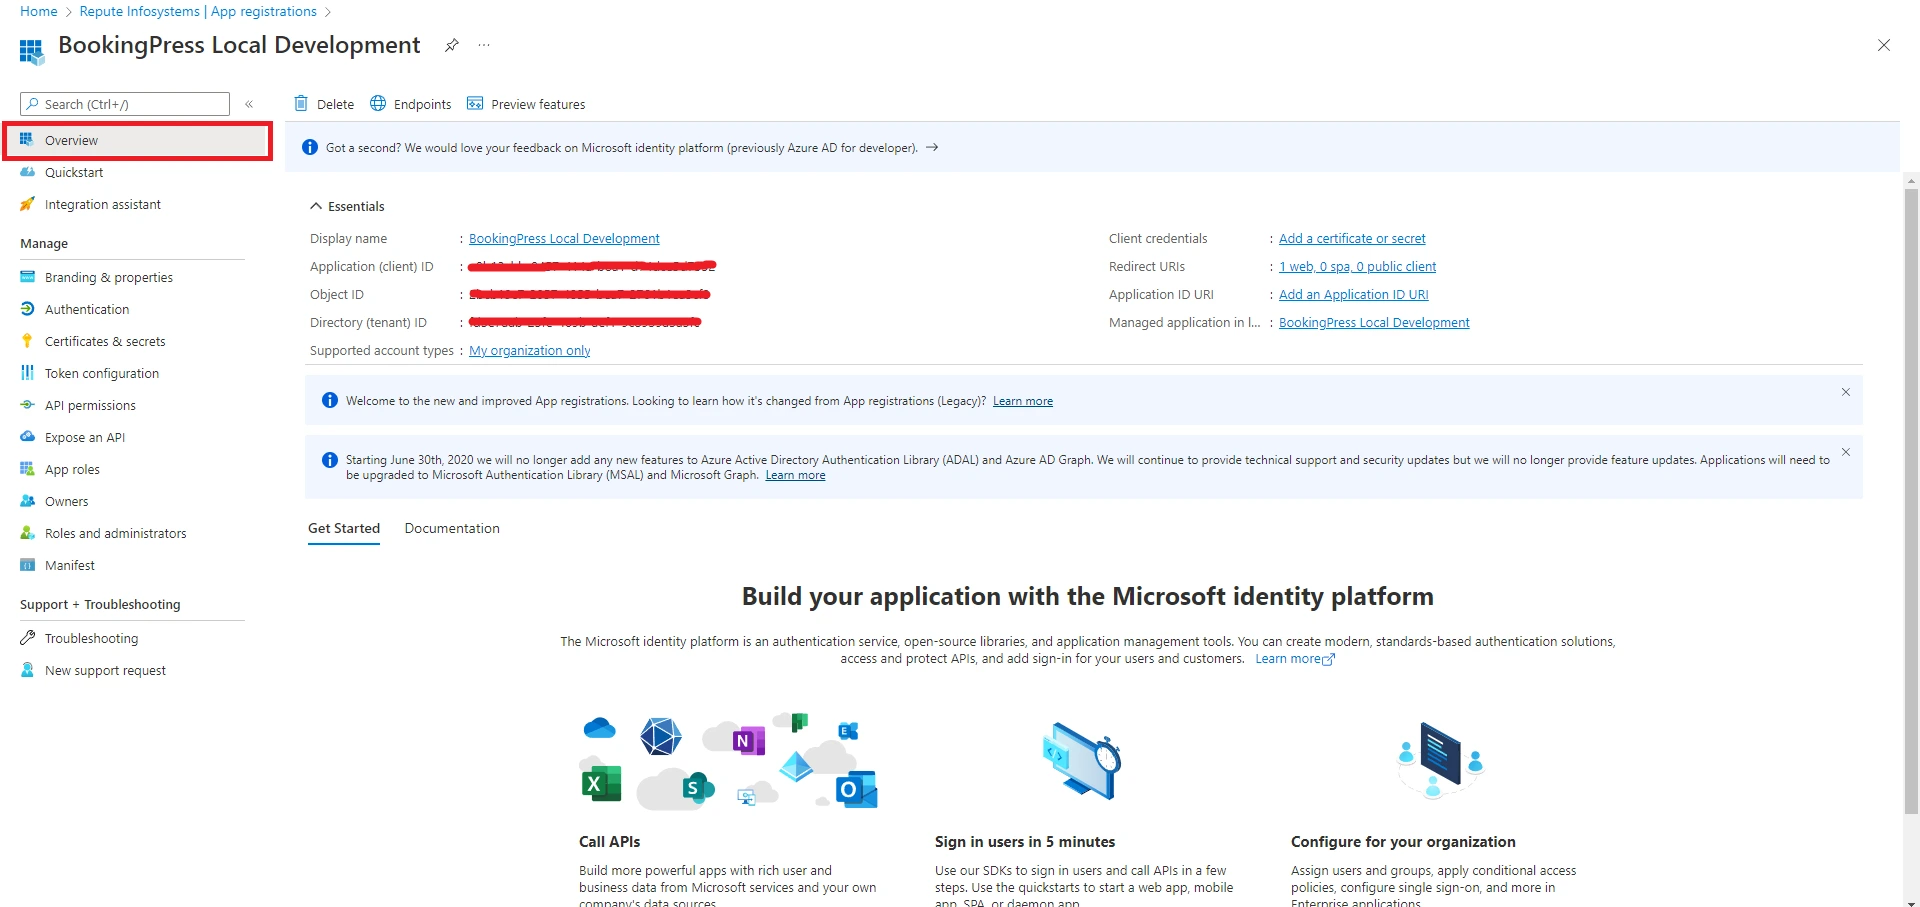
Application id (Client id):
After then go to the application overview menu and then get the Client id (application id) and other details of the application shown below image:
Now go to manage -> App registrations and check all application names with the application ID shown below image:

Now, activate the Outlook Calendar Addon from BookingPress -> Addons.
After the addon is activated, you can configure the plugin by going to BookingPress -> Settings -> Integrations -> Outlook Calendar.
Enter the “Client ID” and “Client Secret”. You will be able to get the “Application (Client) Id” and “Client Secret” from Azure.
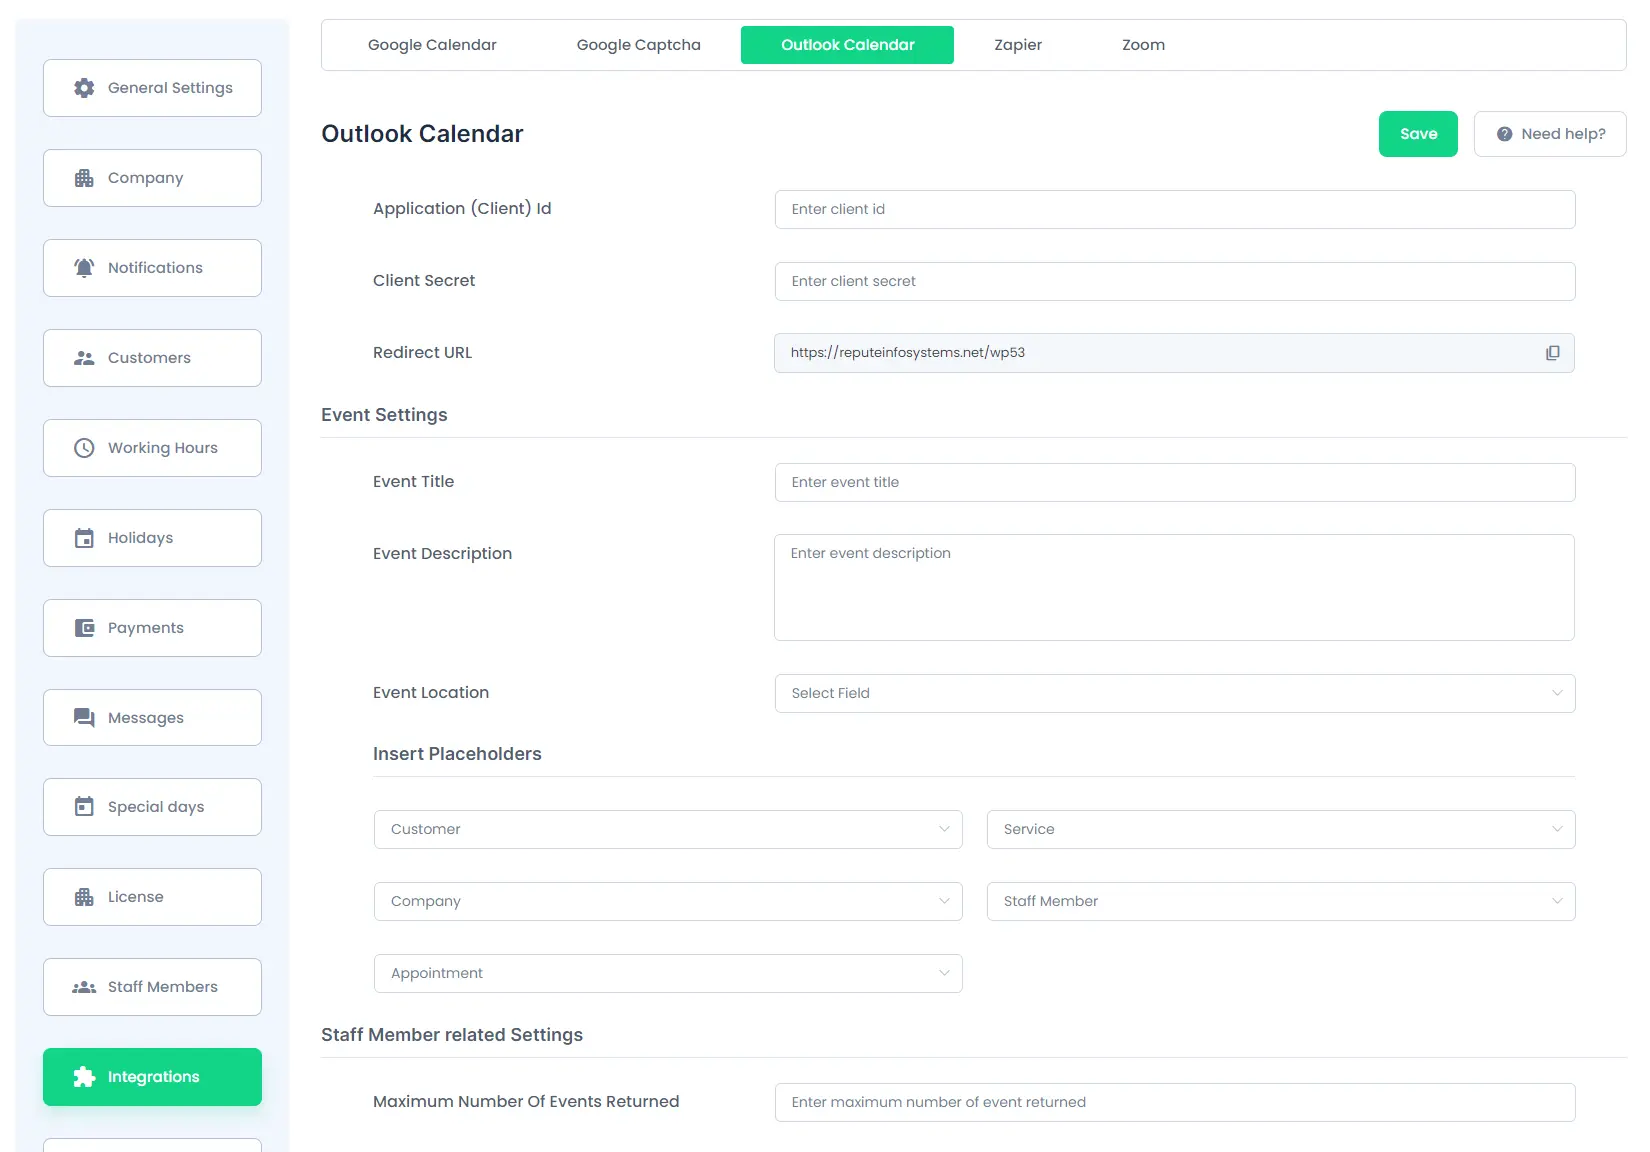
Event Settings:
Copy and Enter the title from placeholders from “Insert Placeholder” dropdowns to generate the Event Title dynamically according to your requirement.
Event Description:
Same way you will also be able to write a custom description on your own with the help of the placeholders.
Event Location:
Here you will be able to choose a field from the list of fields that are present in the “Customize Custom Fields” section. After selecting a field from the list, when the user will submit the form and the data will be mapped as a location in the Outlook Calendar event configured with the respective Staff Member.

The details in the Outlook Calendar Event will be displayed in the location field
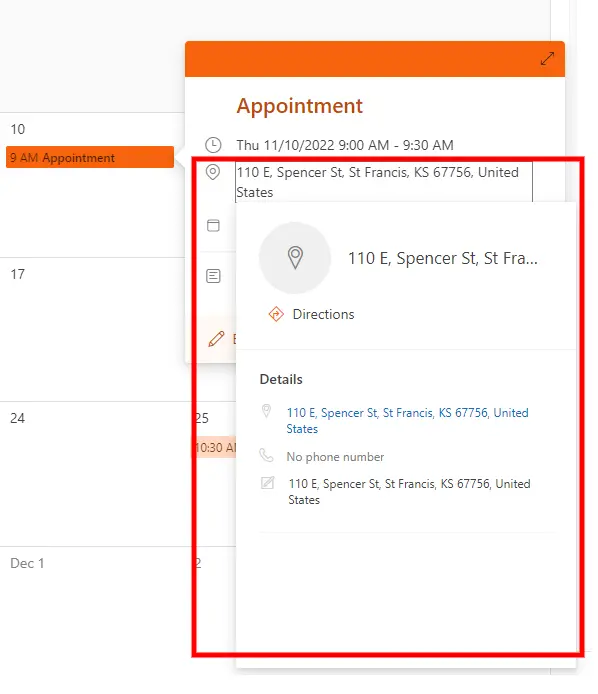
Note: If the service capacity is more than one then only the last booked/rescheduled/updated appointment location data will be stored in the Outlook Calendar event.
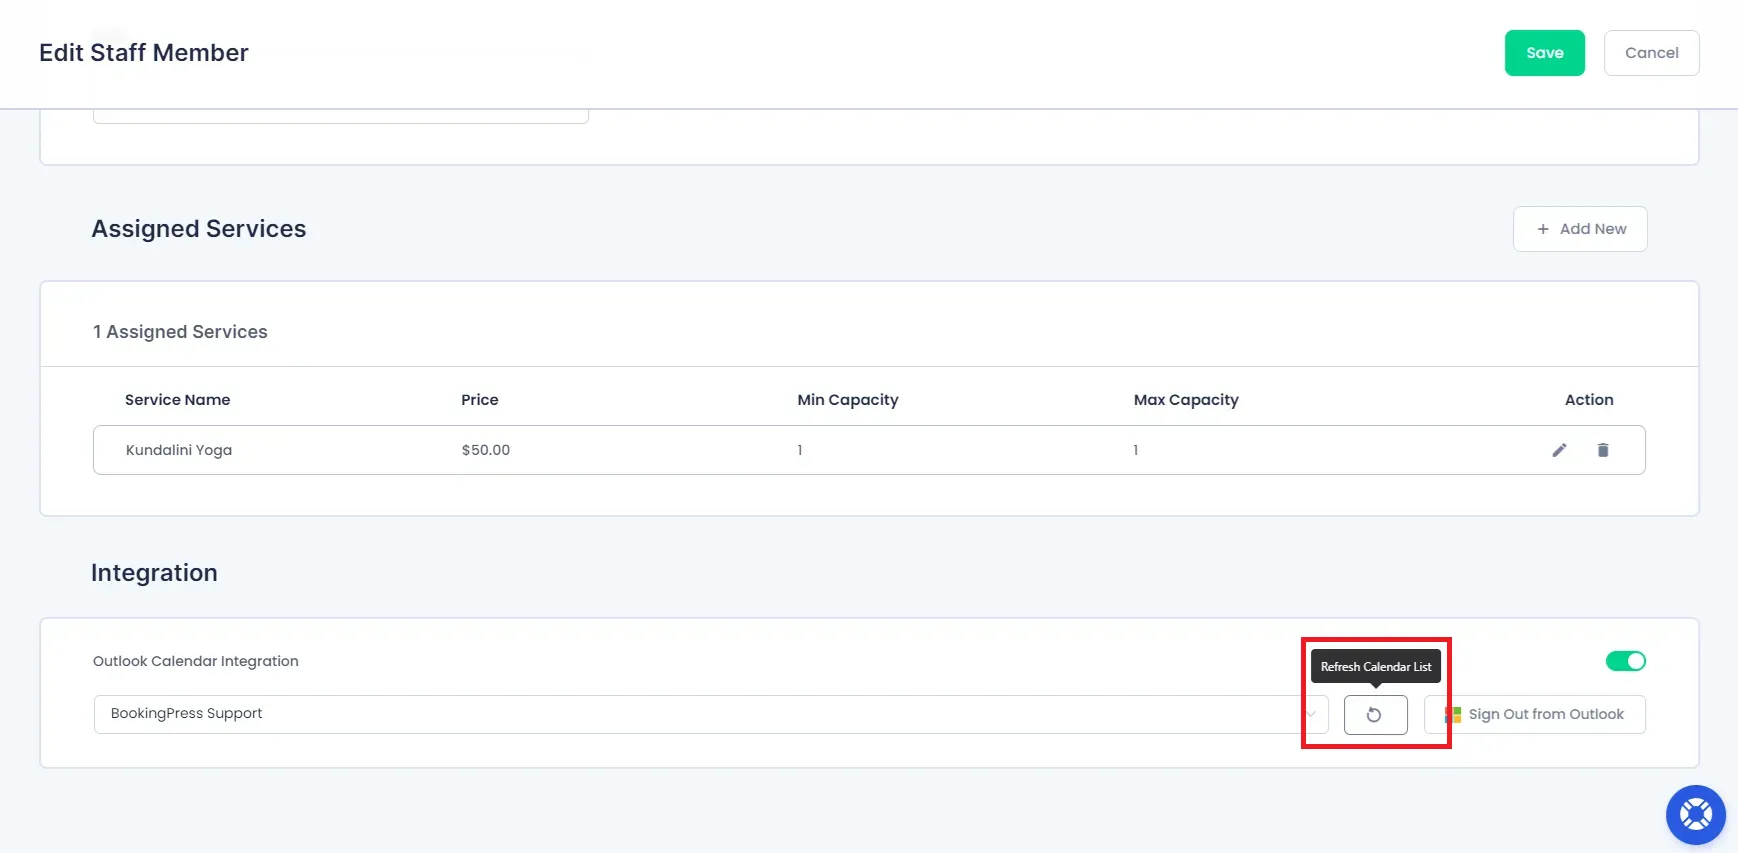
Integrating with the Staff Member
To connect with a staff member, go to BookingPress > Staff Members > Integration > toggle on the Outlook Calendar Integration and Sign In With Outlook options.
Once signed in, you will see all your calendar options in the Select Outlook Calendar dropdown menu. Choose the calendar where you want to add appointments.
Refresh Outlook Calendar List
To refresh the list of calendars from Outlook Calendar, simply click on the “Refresh Calendar List” button. This will update the list as shown in the screenshot.
Insert Placeholders:
You will be able to select different required placeholder from different sections:
- Customer
- Company
- Service
- Staff Member
- Appointment
1. Customer:
-> Under customer section, you will be able to copy the following Placeholders:
%customer_email%: This placeholder will help to get the customer’s Email%customer_first_name%: This placeholder will help to get the customer’s first name.%customer_full_name%: This placeholder will help to get the customer’s full name.%customer_last_name%: This placeholder will help to get the customer’s last name.%customer_note%: This placeholder will help to get the customer’s note.%customer_phone%: This placeholder will help to get the customer’s phone number.
2. Company:
-> Under company section, you will be able to copy the following Placeholders:
%company_address%: This placeholder will help to get the Company’s address.%company_name%: This placeholder will help to get the Company’s name.%company_phone%: This placeholder will help to get the Company’s contact number.%company_website%: This placeholder will help to get the Company’s website.
3. Service:
-> Under service section, you will be able to copy the following placeholders:
%service_name%: This placeholder will help to get the Service’s name.%service_duration%: This placeholder will help to get the Service’s time duration.
4. Staff Member:
-> Under Staff Member section you will be able to copy the following placeholders :
%staff_member_email%: This placeholder will help to get the Staff Member’s email address.%staff_member_first_name%: This placeholder will help to get the Staff Member’s First Name.%staff_member_full_name%: This placeholder will help to get the Staff Member’s Full Name.%staff_member_last_name%: This placeholder will help to get the Staff Member’s Last Name.%staff_member_phone%: This placeholder will help to get the Staff Member’s Contact Number.
5. Appointment:
-> Under Appointment section, you will be able to copy the following placeholders :
%appointment_date%: This placeholder will help to get the particular date of the booked appointment.%appointment_date_time%: This placeholder will help to get the particular date and time of the booked appointment.%appointment_duration%: This placeholder will help to get the particular duration of the booked appointment.%appointment_start_time%: This placeholder will help to get the Starting Time of the booked appointment.%appointment_end_time%: This placeholder will help to get the Ending Time of the booked appointment.%appointment_amount%: This placeholder will help to get the particular Amount of the booked appointment.%appointment_status%: This placeholder will help to get the Status(whether approved, pending, rejected, etc…) of the booked appointment.
Staff Member Related Settings:
Under this section, you will get an option “Maximum Number Of Events Returned” from the Staff Member’s Outlook Calendar.
From this option, you can set the maximum number of events which will be returned from the Staff Member’s Outlook Calendar into the BookingPress calendar. These events will not be reflected anywhere except to the available time slots in your BookingPress website Calendar.
FAQ’s
➤ The appointment date and time do not match in Outlook Calendar.
Ensure that the timezone settings in Outlook Calendar match those of your WordPress site. To do this:
1. Check your Outlook Calendar Timezone and then head over to WordPress settings.
2. Locate the timezone settings by heading over to WordPress –> Settings –> General –> Scroll down to Timezone and set it to match the timezone of your Calendar.
3. Save the changes, and the appointment date and time should synchronize correctly.