ECPay Payment Gateway

To integrate the ECPay with the BookingPress, first, you will have to activate the ECPay Addon from BookingPress > Addons. If you are seeing “get” instead of “activate” please follow the steps below :
- First, login to the BookingPress Website, and you will be redirected to the My Account page.
- Now, click on the “Access Passes” link from the left menu panel.
- After going to the Access Passes, click on the “View your downloads” button.
- From the list, please look for the “ECPay” add-on, click on the download button, and it will automatically start downloading the addon. After the download is finished, upload the downloaded zip file to WordPress just like any other WordPress Plugin, then install and activate the addon to use it
To use ECPay you will need Merchant ID, Hashkey, HashIV.
Live Credentials
- To get MerchantID, HashKey, and HashIV, please log into ECPay’s dashboard.
- From there head over to System Development Management → System interface setting.
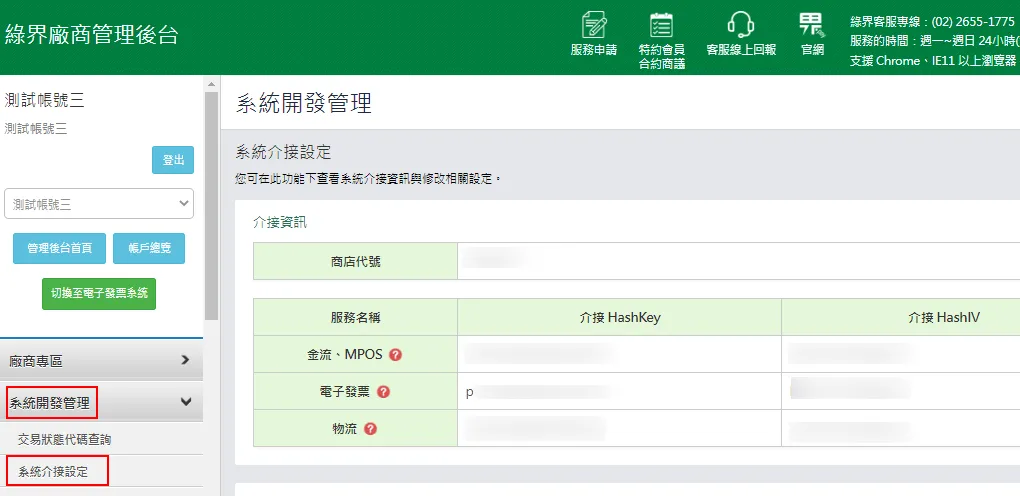
Here you can find your Live Merchant ID, Haskey, and Hash IV.
Configuring in BookingPress
- After activating the add-on you can find the payment gateway in BookingPress > Settings > Payments.
- Here simply enable the ECPay payment gateway.
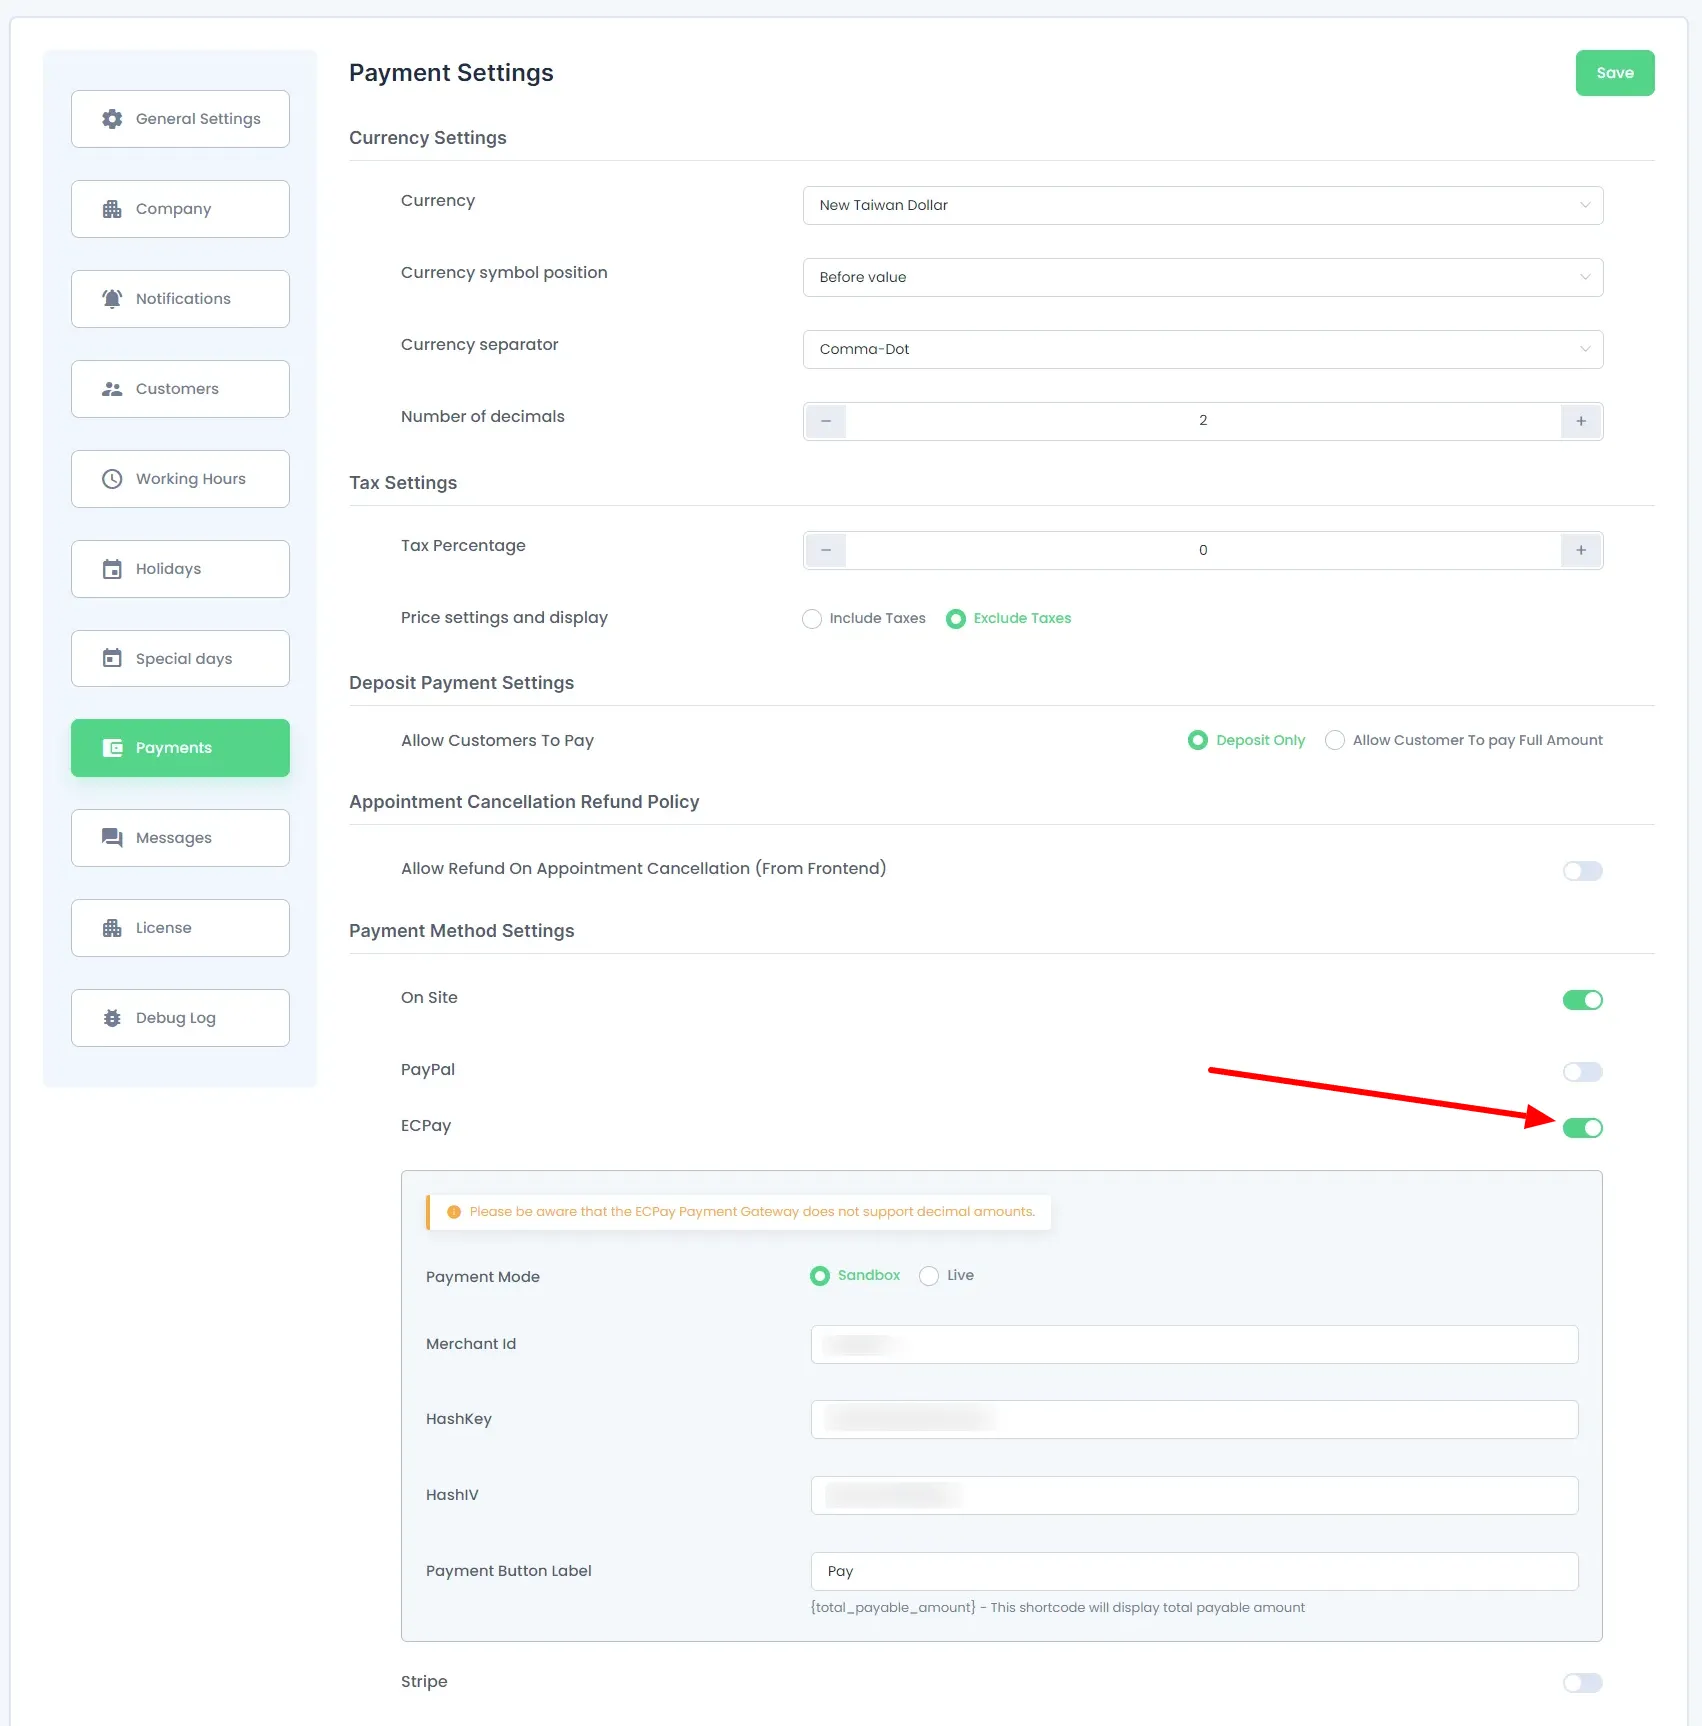
There are two Payment modes Live and Sandbox. Please place the appropriate credentials for it to work properly.
Important: ECPay Payment Gateway does not support decimal amounts. It accepts New Taiwan Dollar only and there is a limit amount for each payment. Please click here to learn more about the same.