Multi-Language Configuration
To get and Activate the Multi Language Addon, please follow the below steps.
- First, login to the BookingPress Website, and you will be redirected to the My Account page.
- Now, click on the “Access Passes” link from the left menu panel.
- After going to the Access Passes, click on the “View your downloads” button.
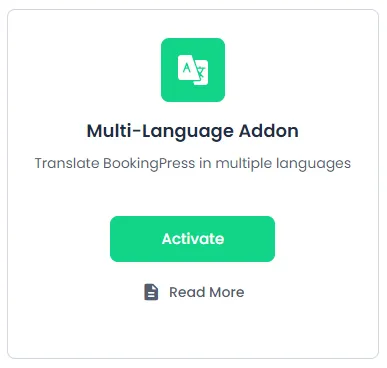
- From the list, please look for the “Multi Language” addon, click on the download button, and it will automatically start downloading the addon. After the download is finished, upload the downloaded zip file to WordPress just link any other WordPress Plugin, then install and activate the addon to use it.
Once the addon is activated, to start with the Configuration, go to BookingPress -> Settings. Here, scroll down to Language Settings section, and select the Languages from the Select dropdown to which you want to translate your BookingPress Booking Form on the Front-end.
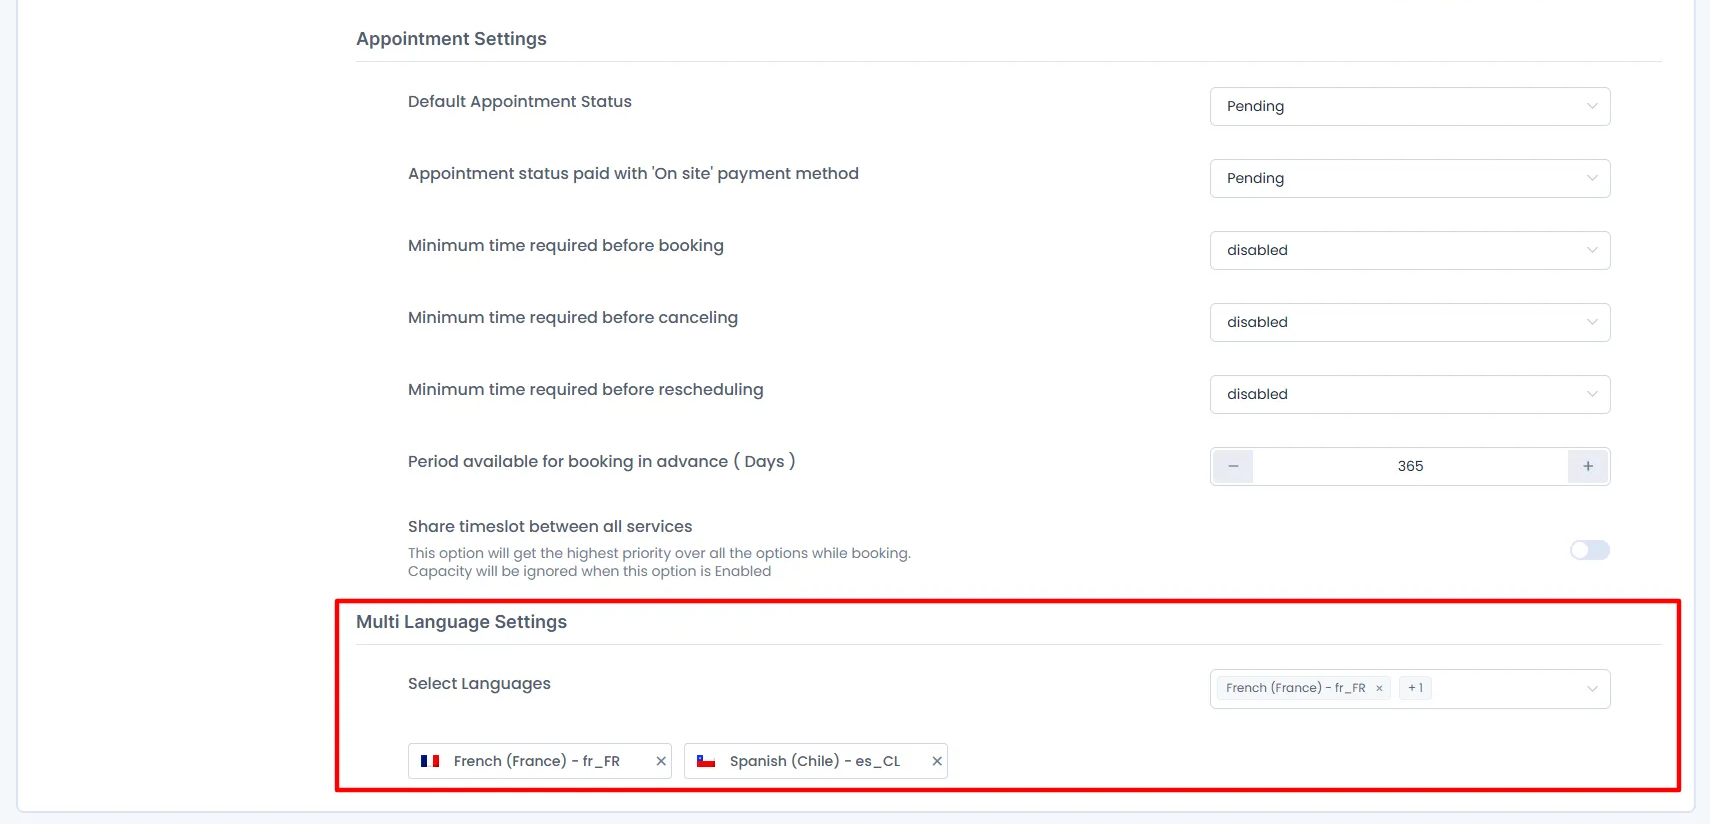
Note: Please select all the languages apart from your Default WordPress Language here as you can alter the labels for the Default Language directly. Your WordPress Default Language won’t show up here.
Once the Languages are selected, Save the settings.
Integration with Translating Plugins
The BookingPress Multi-language add-on is designed to seamlessly integrate with various translating plugins, allowing you to create a multilingual experience for your website visitors. Whether you’re managing bookings for your desired services, these translating plugins enhance the user experience by providing content in multiple languages.
Here’s few of the popular translating plugins that the Multi-Language Add-on is compatible with:
- WPML (WordPress Multilingual)
- TranslatePress
- Polylang
- WPGlobus – Multilingual Everything!
Please keep in mind that BookingPress is compatible with all of those Translating Plugins which follow the Standard WordPress rules regarding the same.
Use WPML With Multi-Language Add-on
- Begin by installing and activating the WPML plugin on your WordPress site.
- From there Navigate to
WPML->Languagesin your WordPress dashboard.
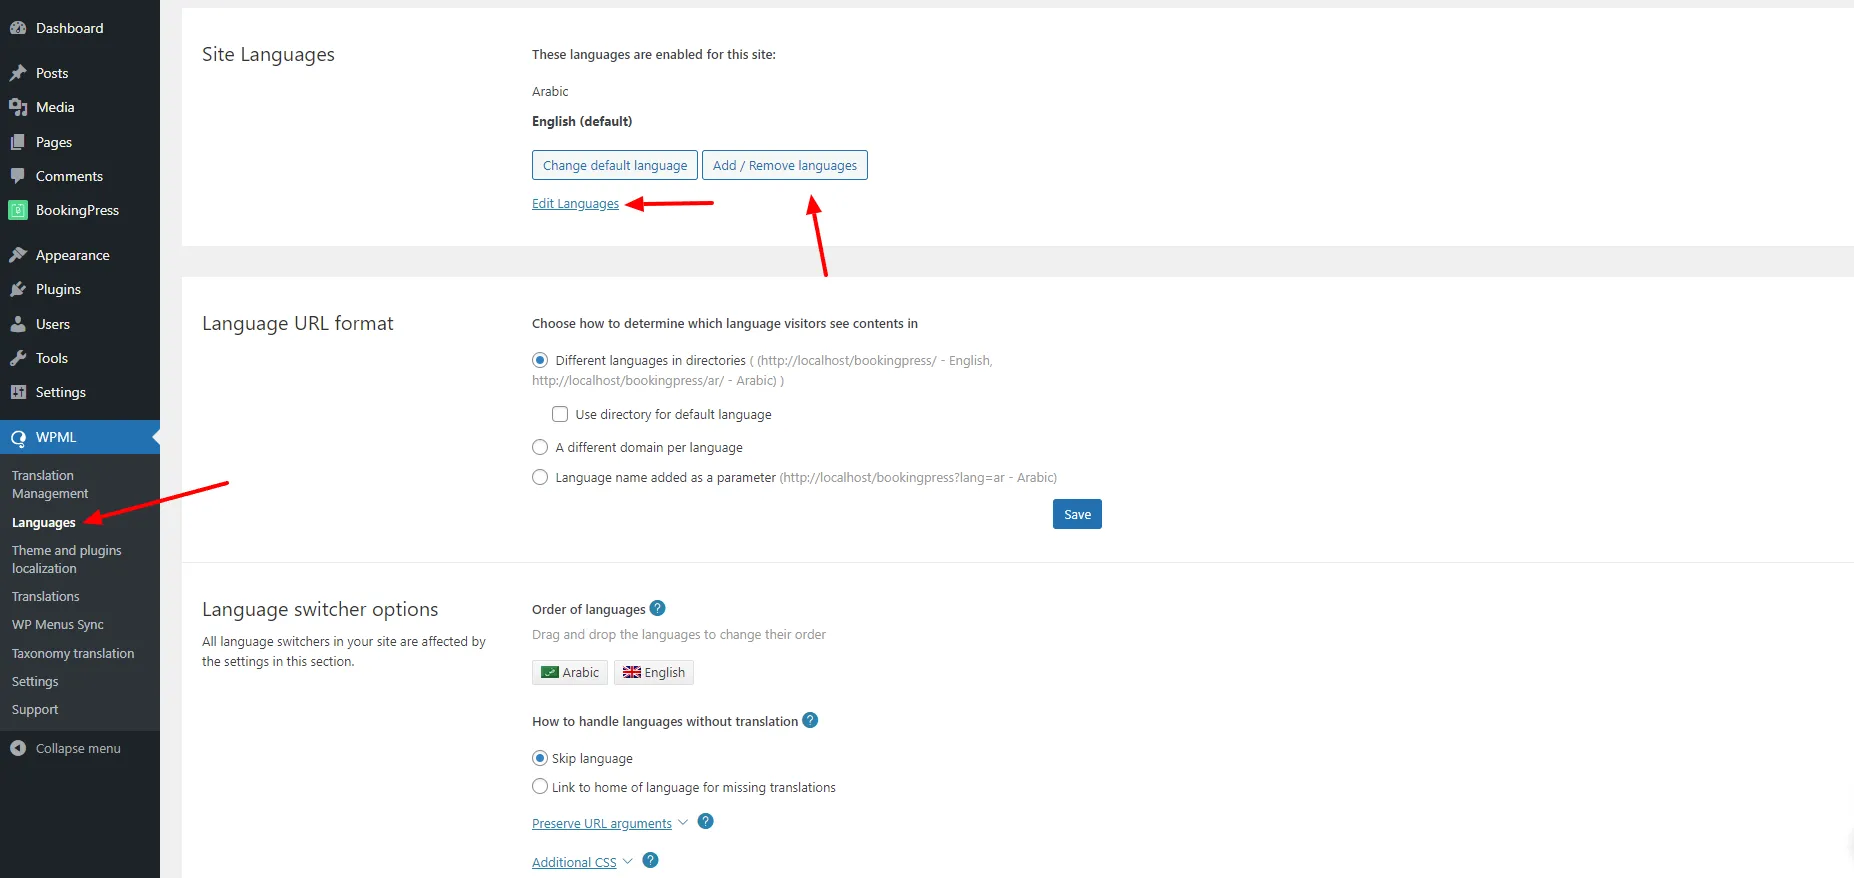
- Here, you can add a new language or configure existing ones. Set your default language and add any additional languages you will be translating your content into. You can also arrange the order of the languages as they will appear on your site. Save your settings to apply the changes.
- Now you can go to
BookingPress->Settings. Here, scroll down toLanguage Settingssection, and select the Languages from theSelectdropdown to which you want to translate your BookingPress Booking Form on the Front-end apart from your default WPML Language as you can already alter the Labels for your default Language by heading over toBookingPress->Customize->Forms. Here in the Label Settings on the right you can alter the labels directly for your default language.
Configuring Multi-Language Add-on with TranslatePress :
- Firstly, Install and activate the Translate Multilingual sites – TranslatePress Plugin on your WordPress site.
- After activation, head over to
Settings->TranslatePress
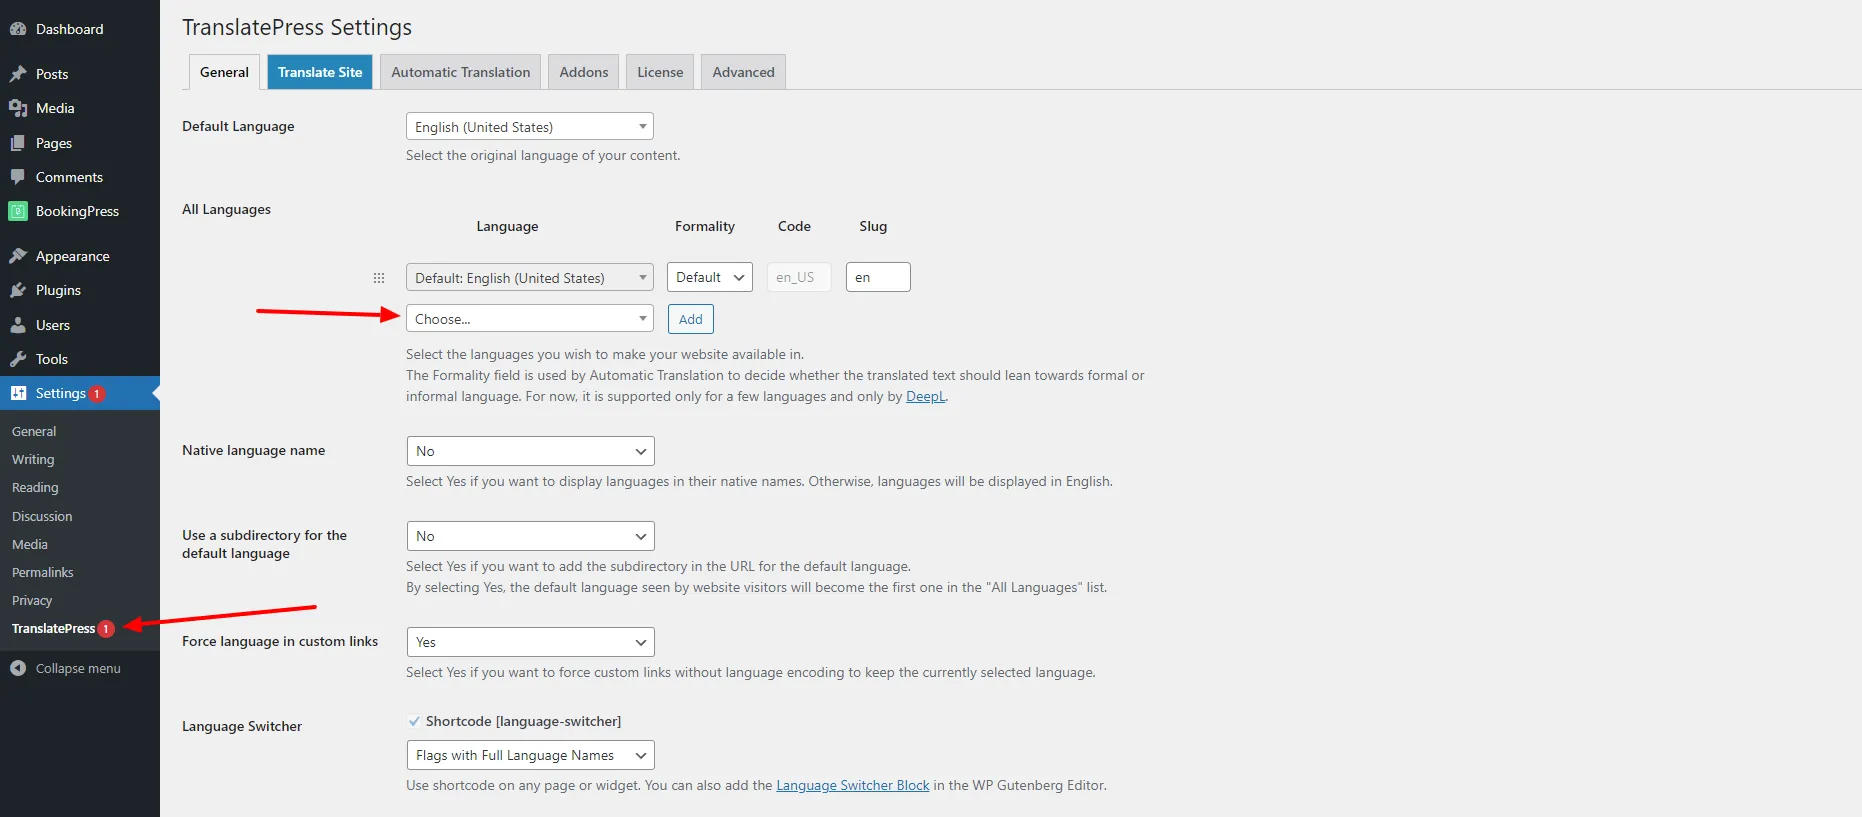
- From here you have the option to include additional languages on your website, such as Arabic, Spanish, or French. Choose one language to be the default, typically the language your website is already in. Once selected, save the settings.
- Now you can go to
BookingPress->Settings. Here, scroll down toLanguage Settingssection, and select the Languages from theSelectdropdown to which you want to translate your BookingPress Booking Form on the Front-end apart from your default WordPress Language as you can already alter the Labels for your default Language by heading over toBookingPress->Customize->Forms. Here in the Label Settings on the right you can alter the labels directly for your default language.
Integrate Polylang with BookingPress Multi-language Add-on:
- Firstly, Install and activate the Polylang Plugin on your WordPress site.
- After activation, you will be greeted with a setup Wizard that can help you set your languages and Polylang in general you can either opt for that or simply choose
Not Right Nowand then head over toLanguages->Languages
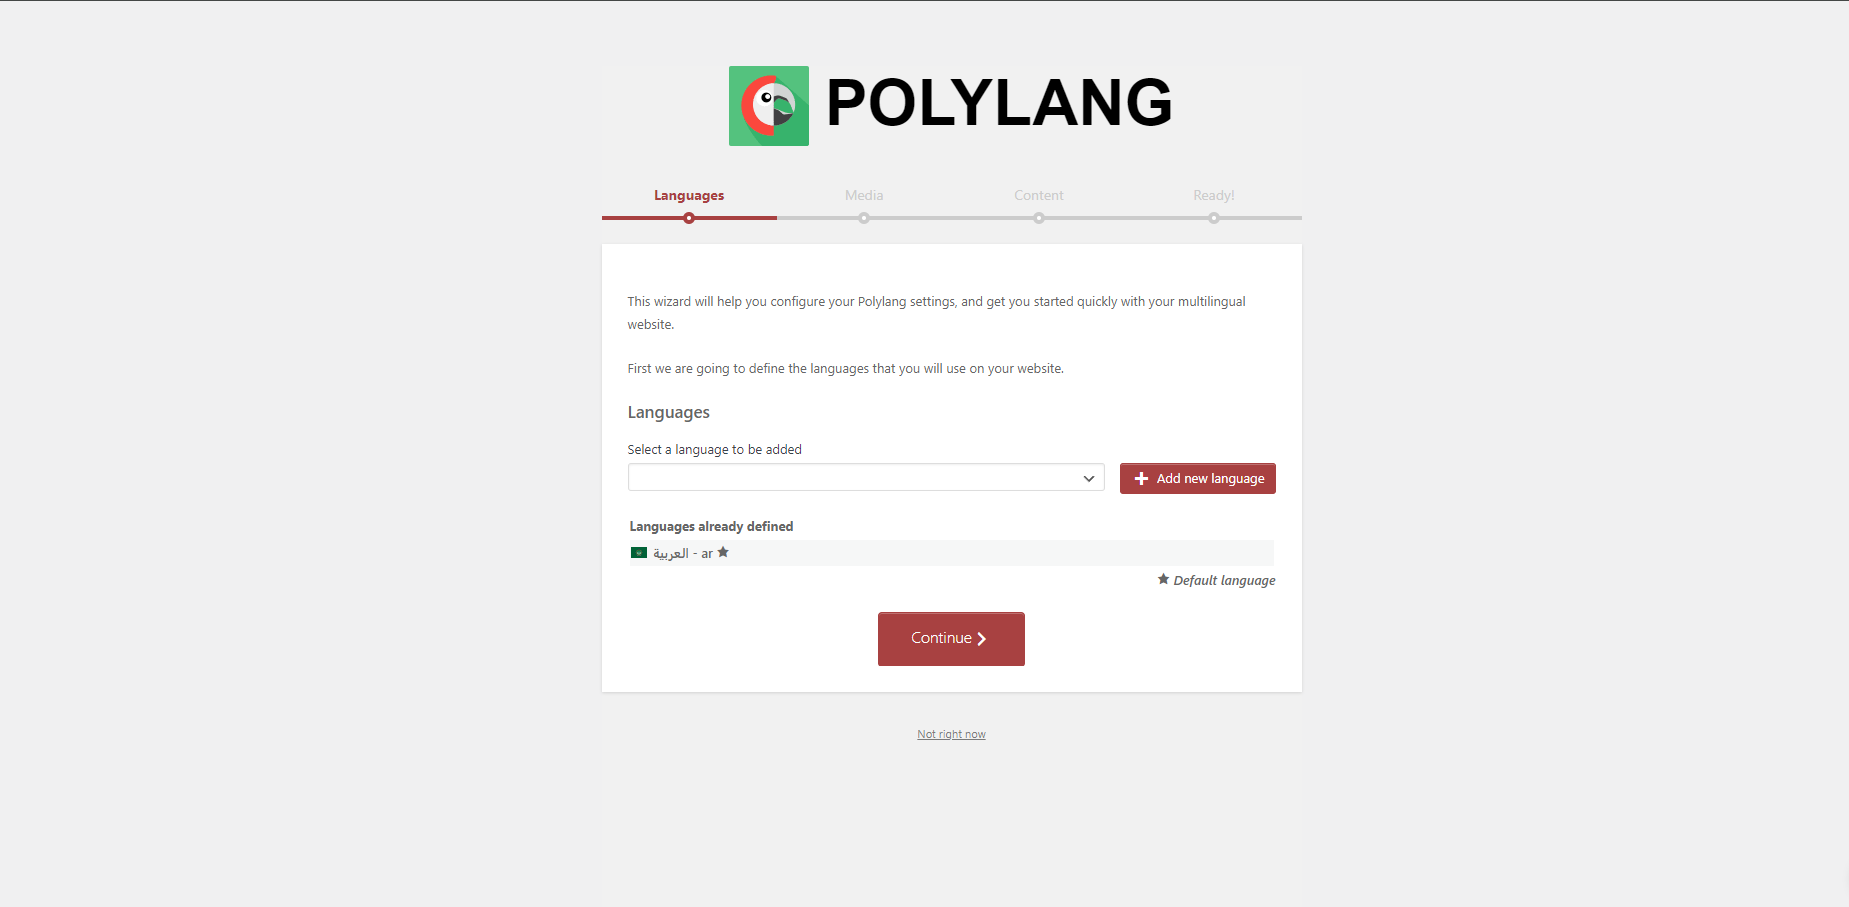
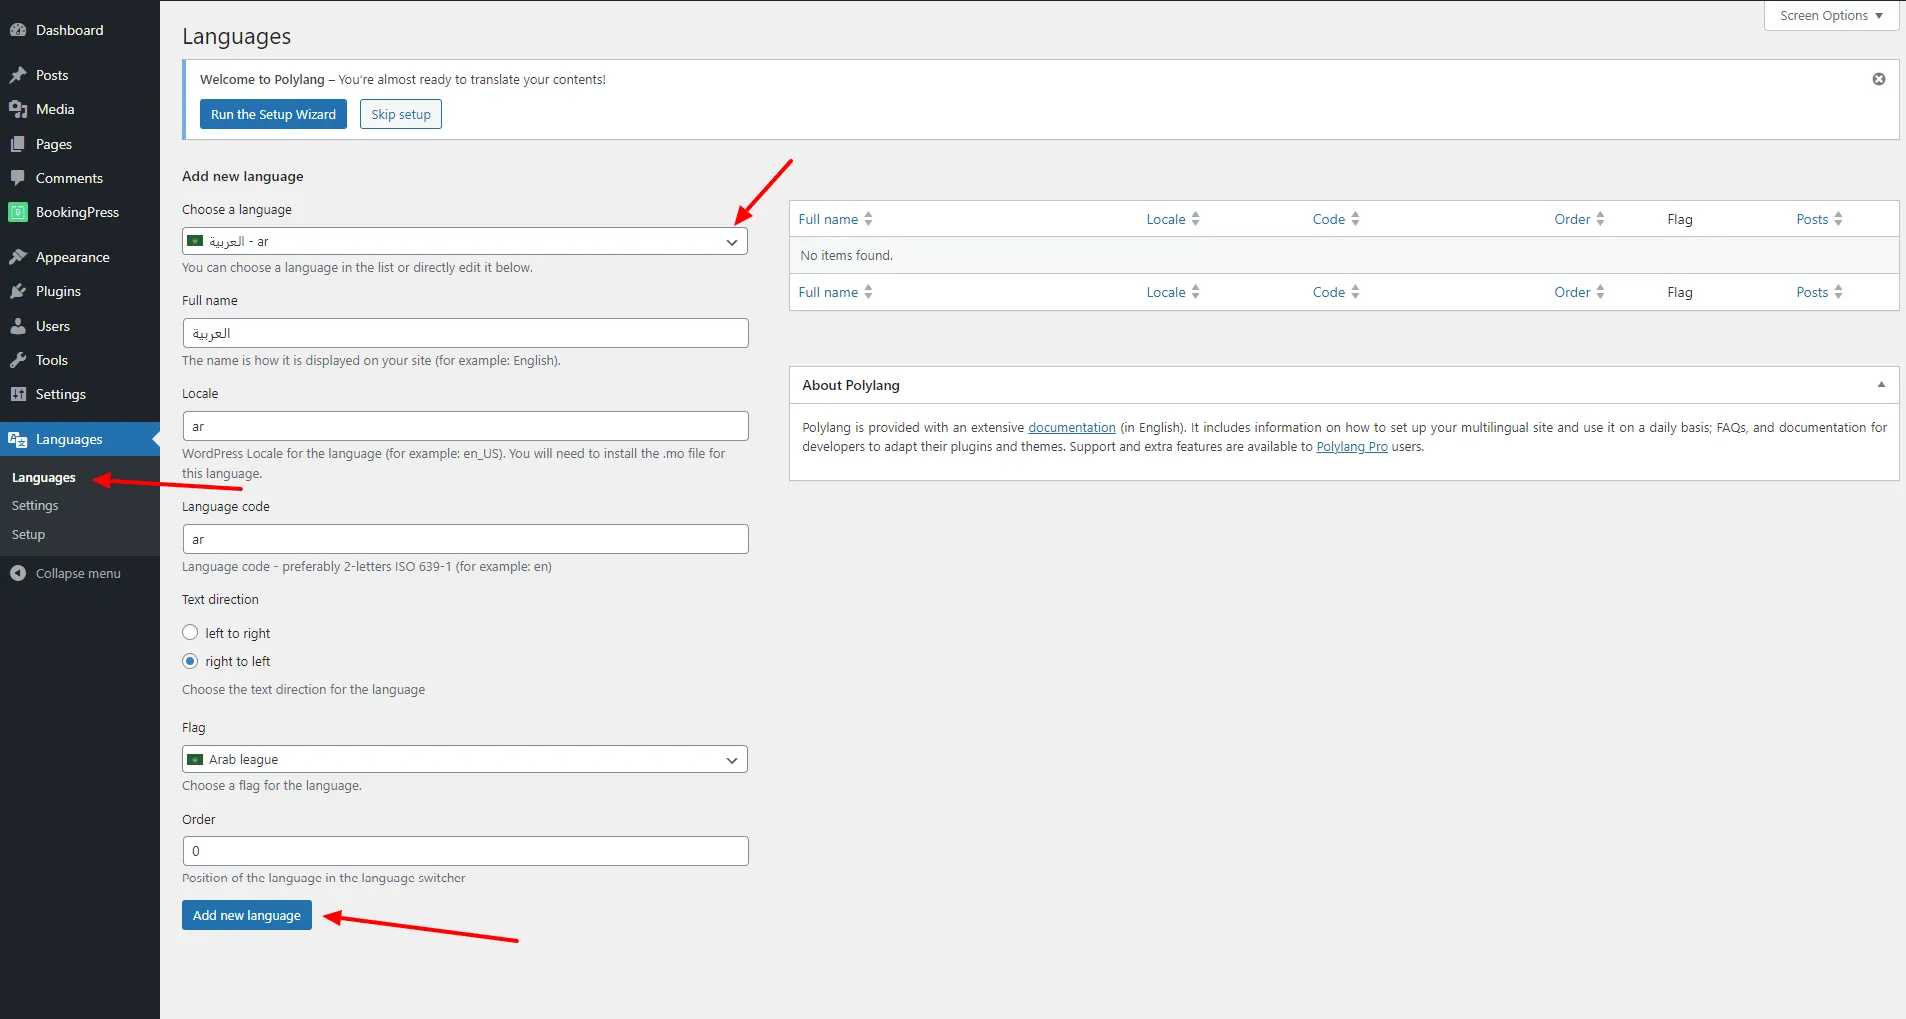
- From here you have the option to include additional languages on your website, such as Arabic, Dutch, or French. Choose one language to be the default, typically the language your website is already in. Once selected, save the settings.
- Now you can go to
BookingPress->Settings. Here, scroll down toLanguage Settingssection, and select the Languages from theSelectdropdown to which you want to translate your BookingPress Booking Form on the Front-end apart from your default WordPress Language as you can already alter the Labels for your default Language by heading over toBookingPress->Customize->Forms. Here in the Label Settings on the right you can alter the labels directly for your default language.
Note: Polylang is not supported with the BookingPress external thank-you page.
Utilize WPGlobus with BookingPress Multi-language Add-on:
- Firstly, Install and activate the WPGlobus Plugin on your WordPress site from the WordPress Repository
- After activation, you can head over to
WPGlobus->Languages
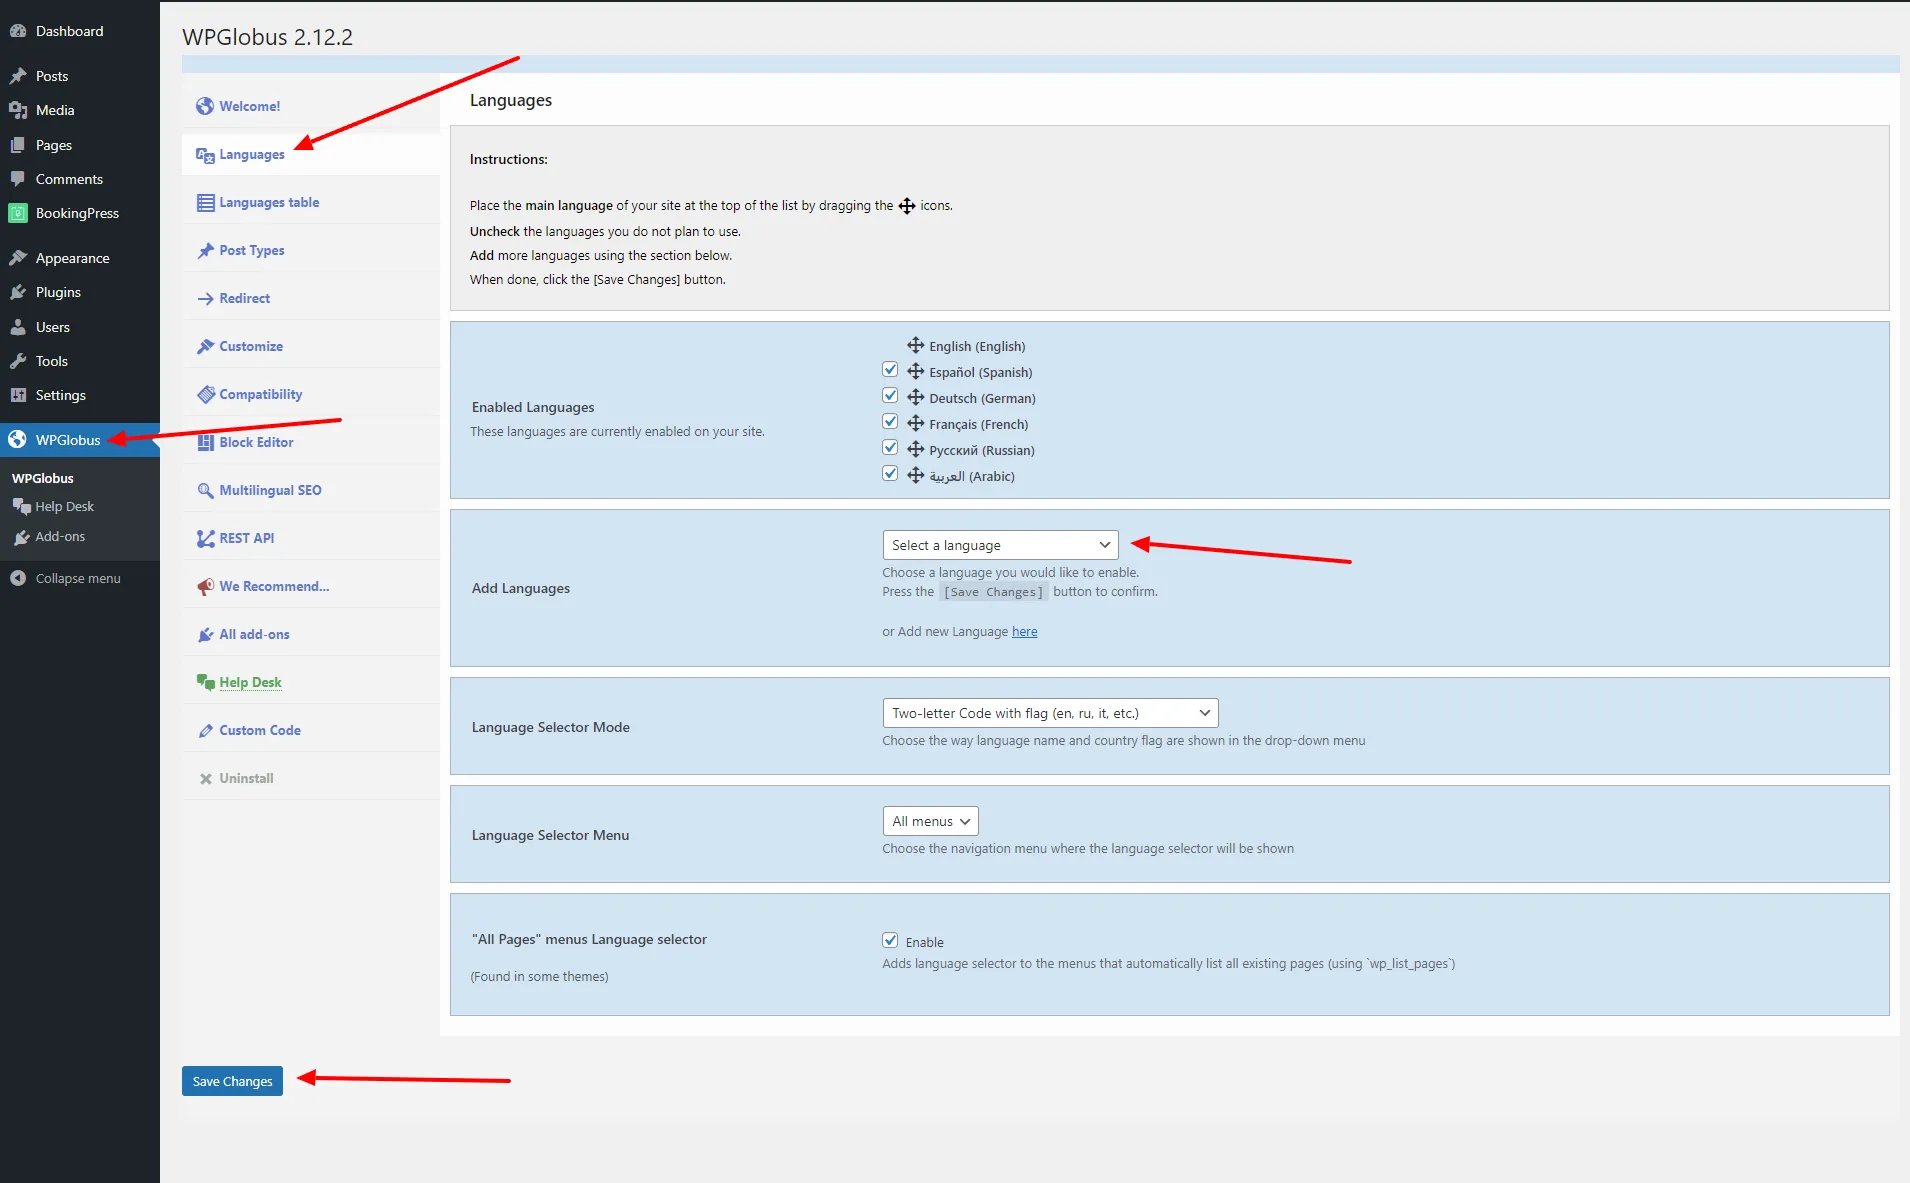
- From here onwards you can configure the Languages you would like to include such as Spanish, German, French and so on. You can also set Default Language which is usually the one on the top typically the language your site is already in.
- Now you can go to
BookingPress->Settings. Here, scroll down toLanguage Settingssection, and select the Languages from theSelectdropdown to which you want to translate your BookingPress Booking Form on the Front-end apart from your default WordPress Language as you can already alter the Labels for your default Language by heading over toBookingPress->Customize->Forms. Here in the Label Settings on the right you can alter the labels directly for your default language.
Configure Services In Multiple Languages
Now, to configure the services in Multiple Languages, go to BookingPress -> Services -> Add/Edit Services. Here, click on the Translate button from the top right corner of the page, and you will be able to see a slide of Translation options on the right side of the screen.
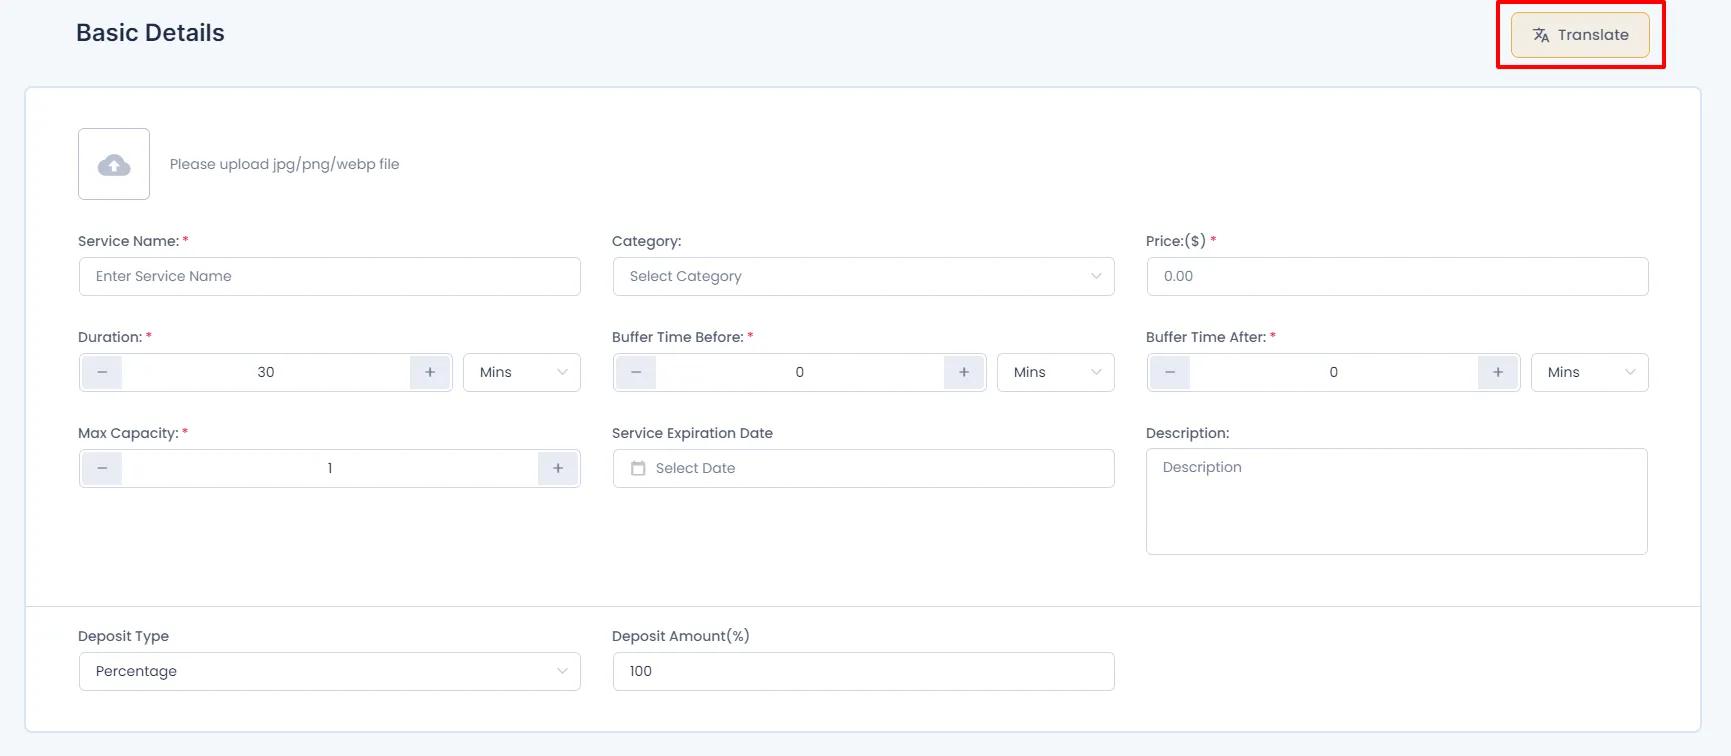
Here, select the Language, and configure the information of the services to be Translated. For example Service Name & Service Description. You can select the language one by one and set the Service Name & Service Description in those languages. Once the service is configured in multiple languages, save the service. And these strings will display the Service Name & Service Description as per the website’s language.
Configure Common Field Labels & Custom Fields In Multiple Languages
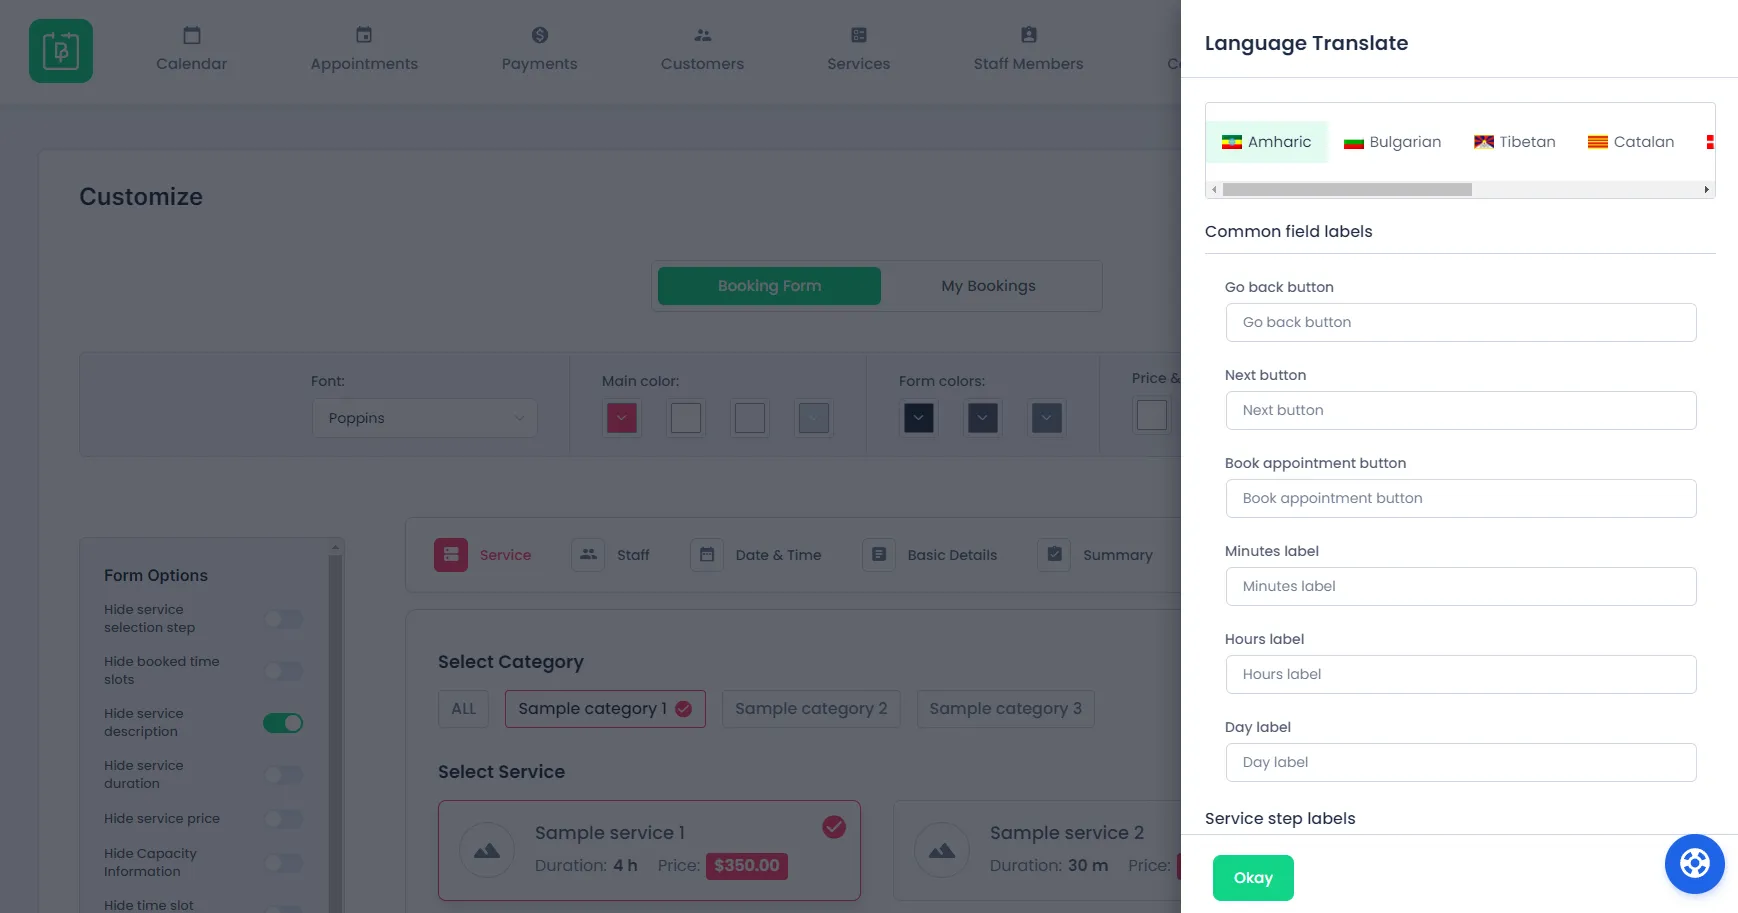
To configure the Common Field Labels, go to BookingPress -> Customize -> Forms. Here, click on the Translate button from the top right corner of the page, and you will be able to see a slide of Translation options on the right side of the screen.
Here, select the Language, and configure Common Field Labels and save the settings and those Field Labels will be translated at the Front-end of the Booking Form.
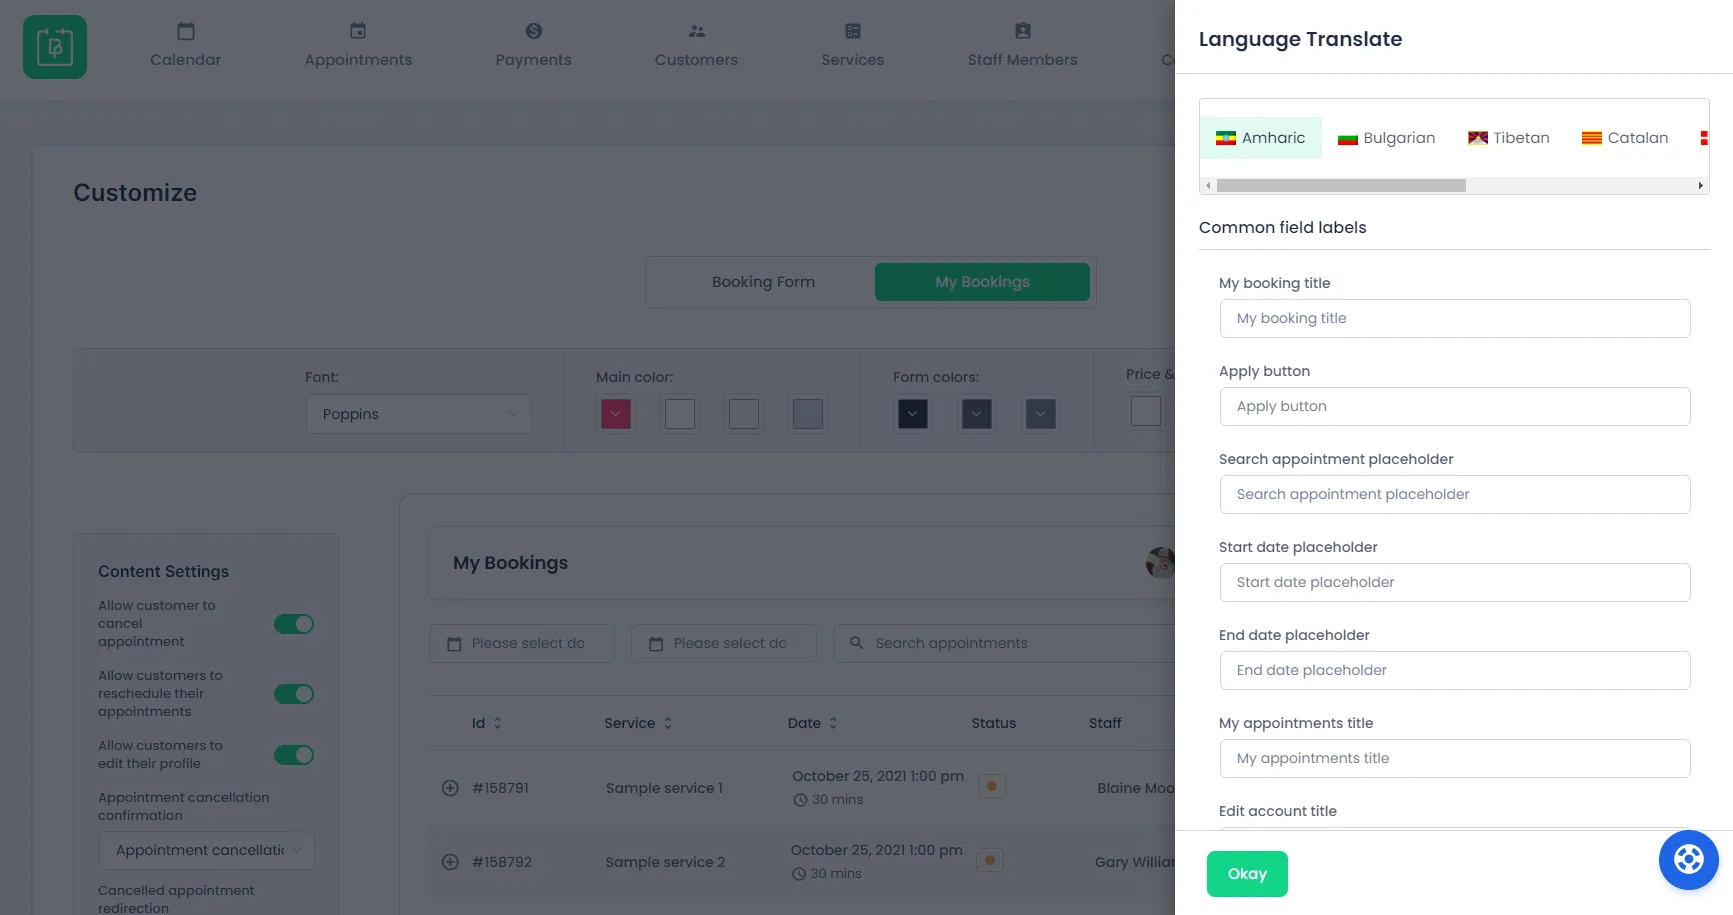
Now, go to BookingPress -> Customize -> Custom Fields -> My Bookings, here click on the Translate button from the top right corner of the page, and you will be able to see a slide of Translation options on the right side of the screen.
Select the Language, and configure the Common Field Labels of the My Bookings form and save the settings and those Field Labels will be translated at the Front-end of the My Bookings Form.
Now, go to BookingPress -> Customize -> Custom Fields, here click on the Translate button from the top right corner of the page, and you will be able to see a slide of Translation options on the right side of the screen.
Select the Language, and configure the Field Labels Error Message and Placeholders and save the settings and those Fields will be translated at the Front-end of the Booking Form.
Configure Staff Members in Multiple Languages
BookingPress allows you to provide translation for your Staff Members First Name and Last Name. To do so please head over to BookingPress > Staff Members. Here while editing or creating a new Staff Member you can click on the Translate button from the top right corner of the page, and you will be able to see a slide of Translation Options on the right side of the screen.
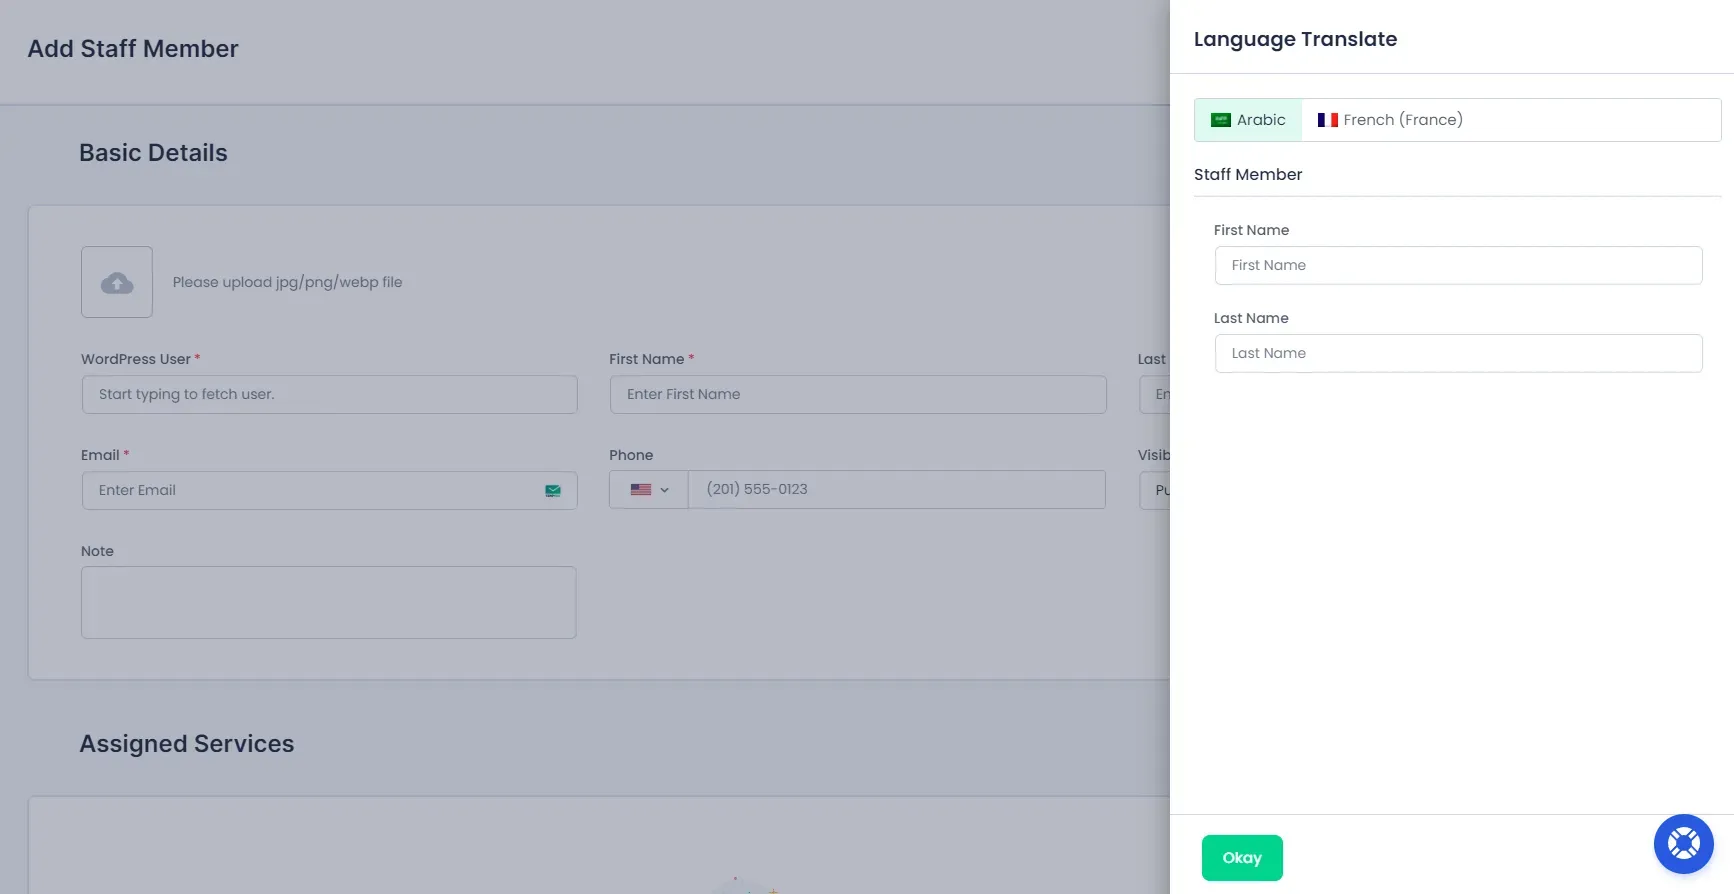
Now Based on the language selected the Staff Members name will be updated accordingly.
Configure Notifications In Multiple Languages
Go to BookingPress -> Notifications, here, select the notification that you want to translate, and click on the Translate button from the top right corner of the page, and you will be able to see a slide of Translation Options on the right side of the screen.
From here, select the Language, and configure the Email Notification Subject and Message in the selected Language and save the notification.
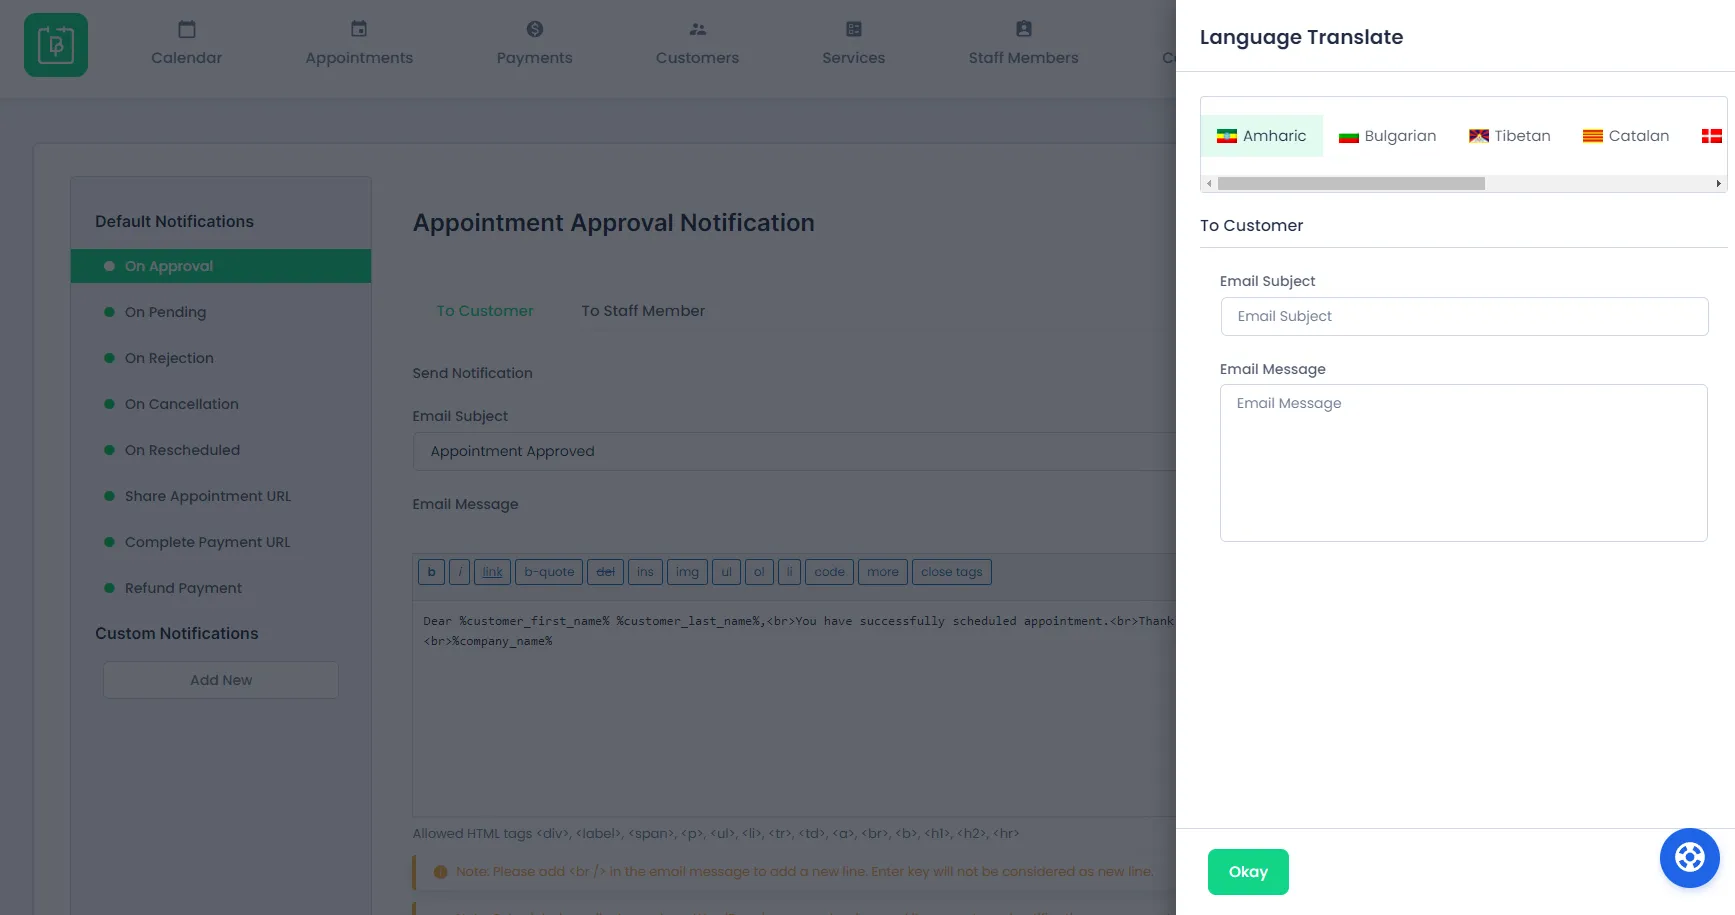
Now, whenever there is a new Appointment is created, the Customers will receive an Email as per the Appointment Booked in the Booking Form’s language. Suppose, if the website’s language was French and the Customer has booked an appointment from the French Language Booking Form, then the Customer will receive the Email Notification too in the French Language.
And if you have Configured WhatsApp and SMS notification addons, then you will also be able to configure the Message for each Notification to be sent via WhatsApp and SMS.
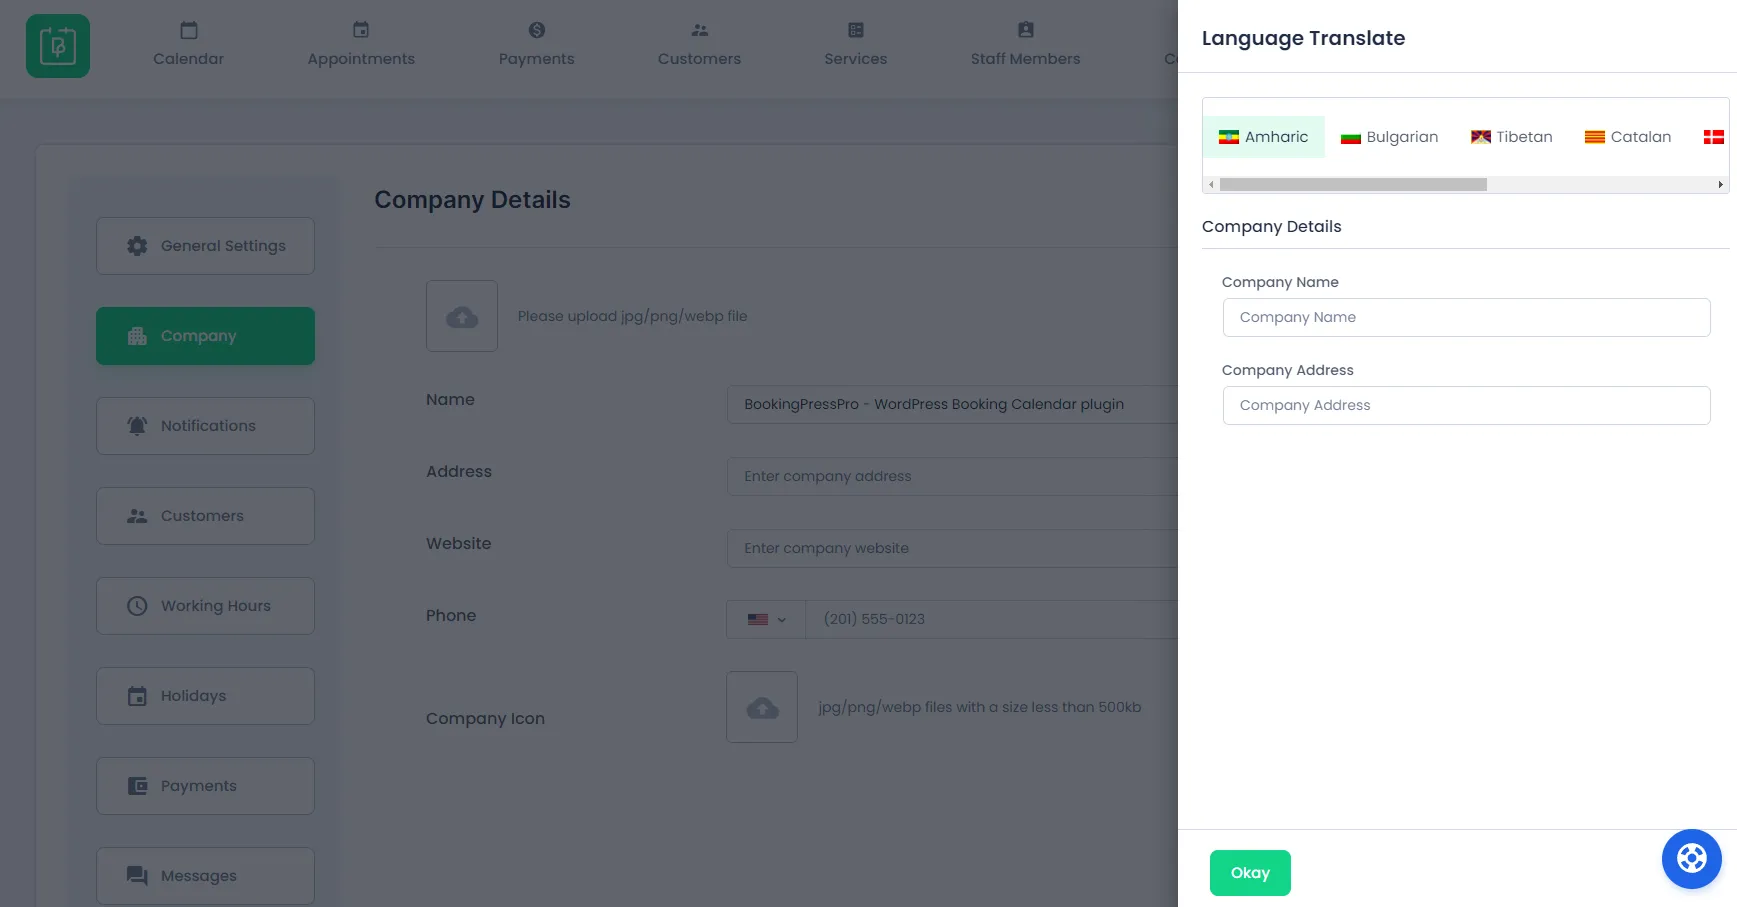
Configure Company Information In Multiple Languages
Go to BookingPress -> Settings -> Company, here, select the notification that you want to translate and click on the Translate button from the top right corner of the page, and you will be able to see a slide of Translation Options on the right side of the screen.
Now, select the Language, and set the Company Name & Company Address and it will display the Name and Address of the company as per the selected language of the website.
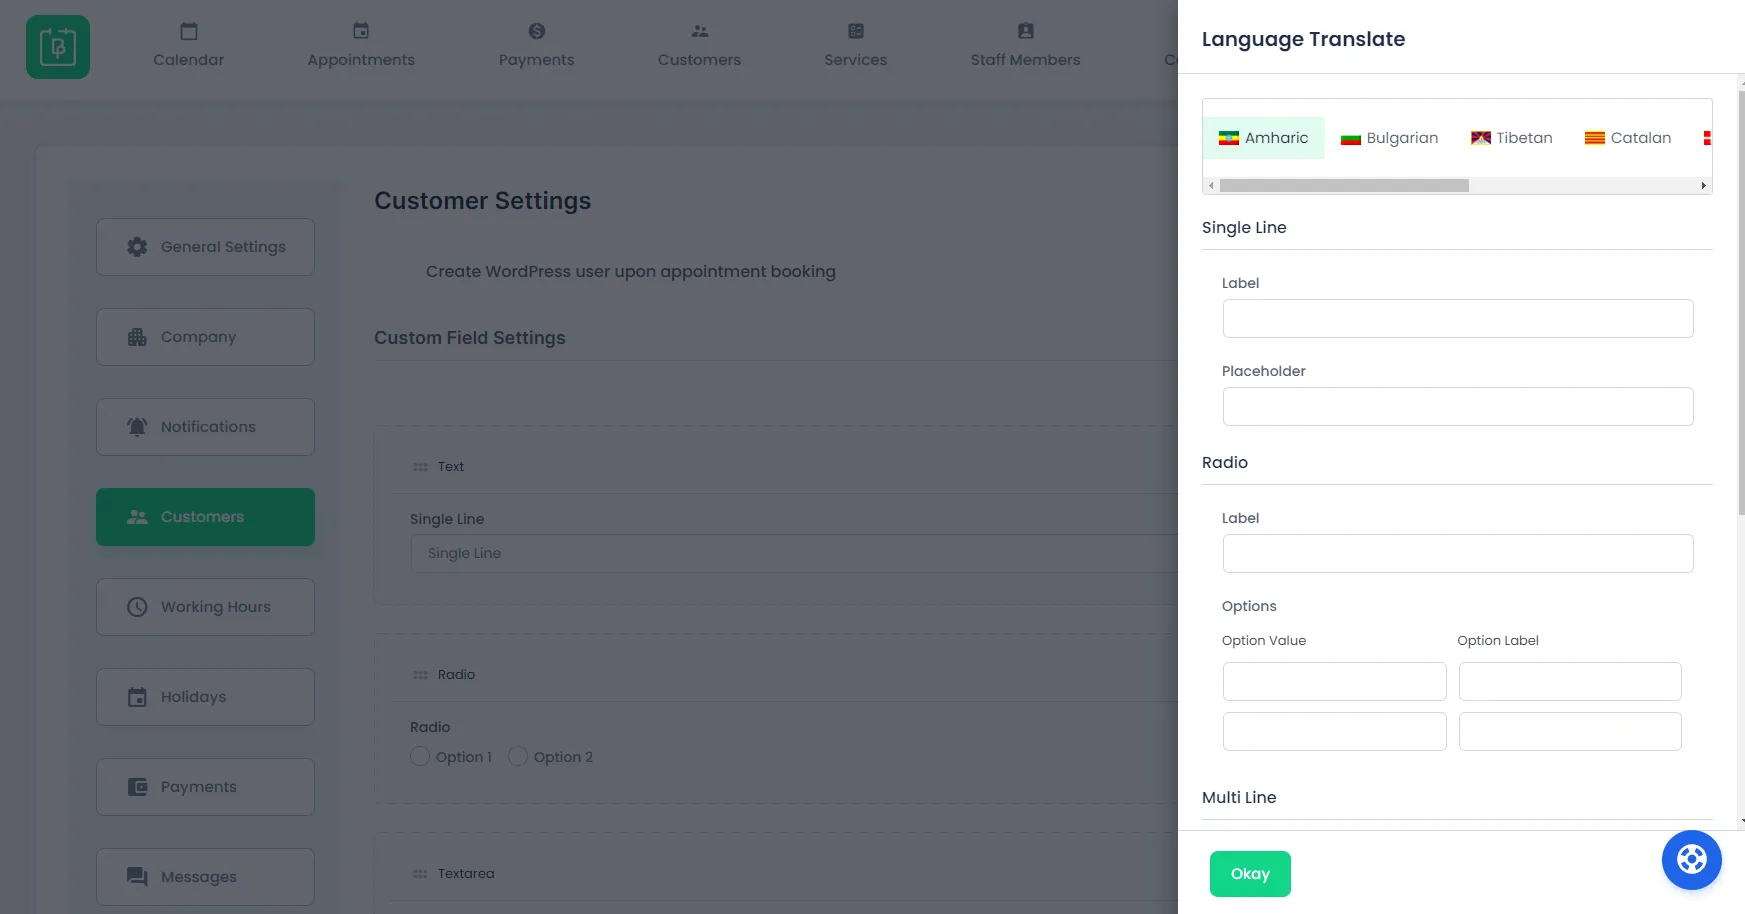
Configure Customer Settings In Multiple Languages
Go to BookingPress -> Settings -> Customers, here, select the notification that you want to translate and click on the Translate button from the top right corner of the page, and you will be able to see a slide of Translation Options on the right side of the screen.
Now, select the Language and configure the Labels of the Fields in multiple languages as per your requirement.
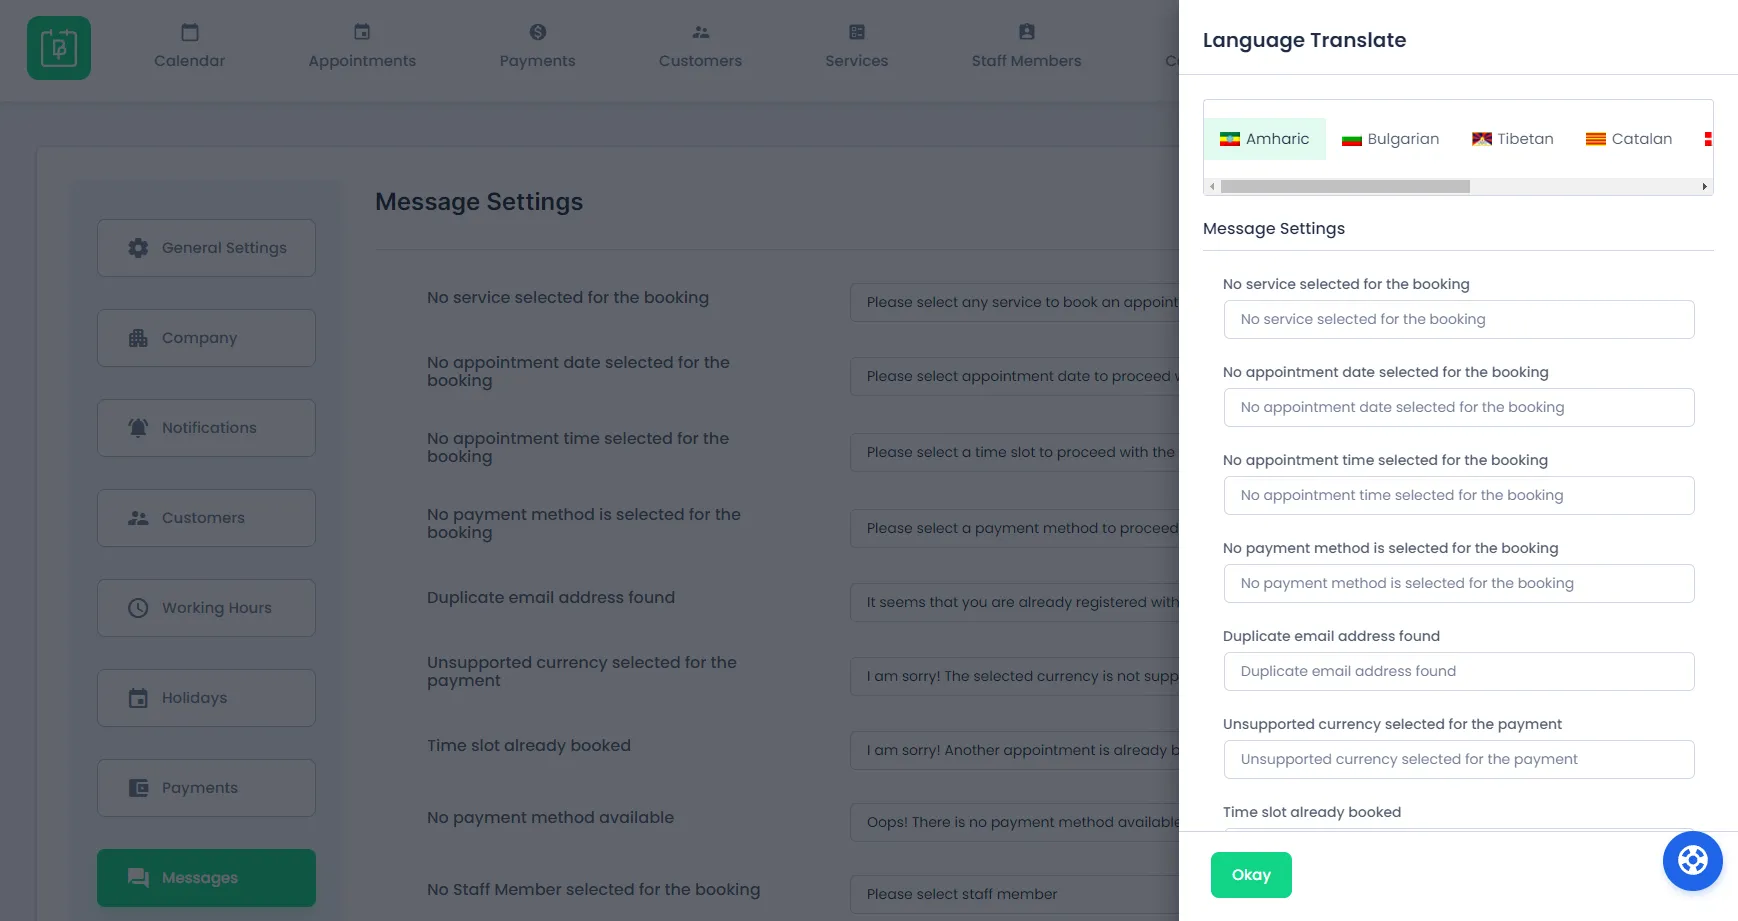
Configure Common Messages In Multiple Languages
Go to BookingPress -> Settings -> Messages, here, select the notification that you want to translate and click on the Translate button from the top right corner of the page, and you will be able to see a slide of Translation Options on the right side of the screen.
Now, select the Language and configure all the Common Messages in multiple languages as per your requirement and these messages will be displayed as per the languages of the website.
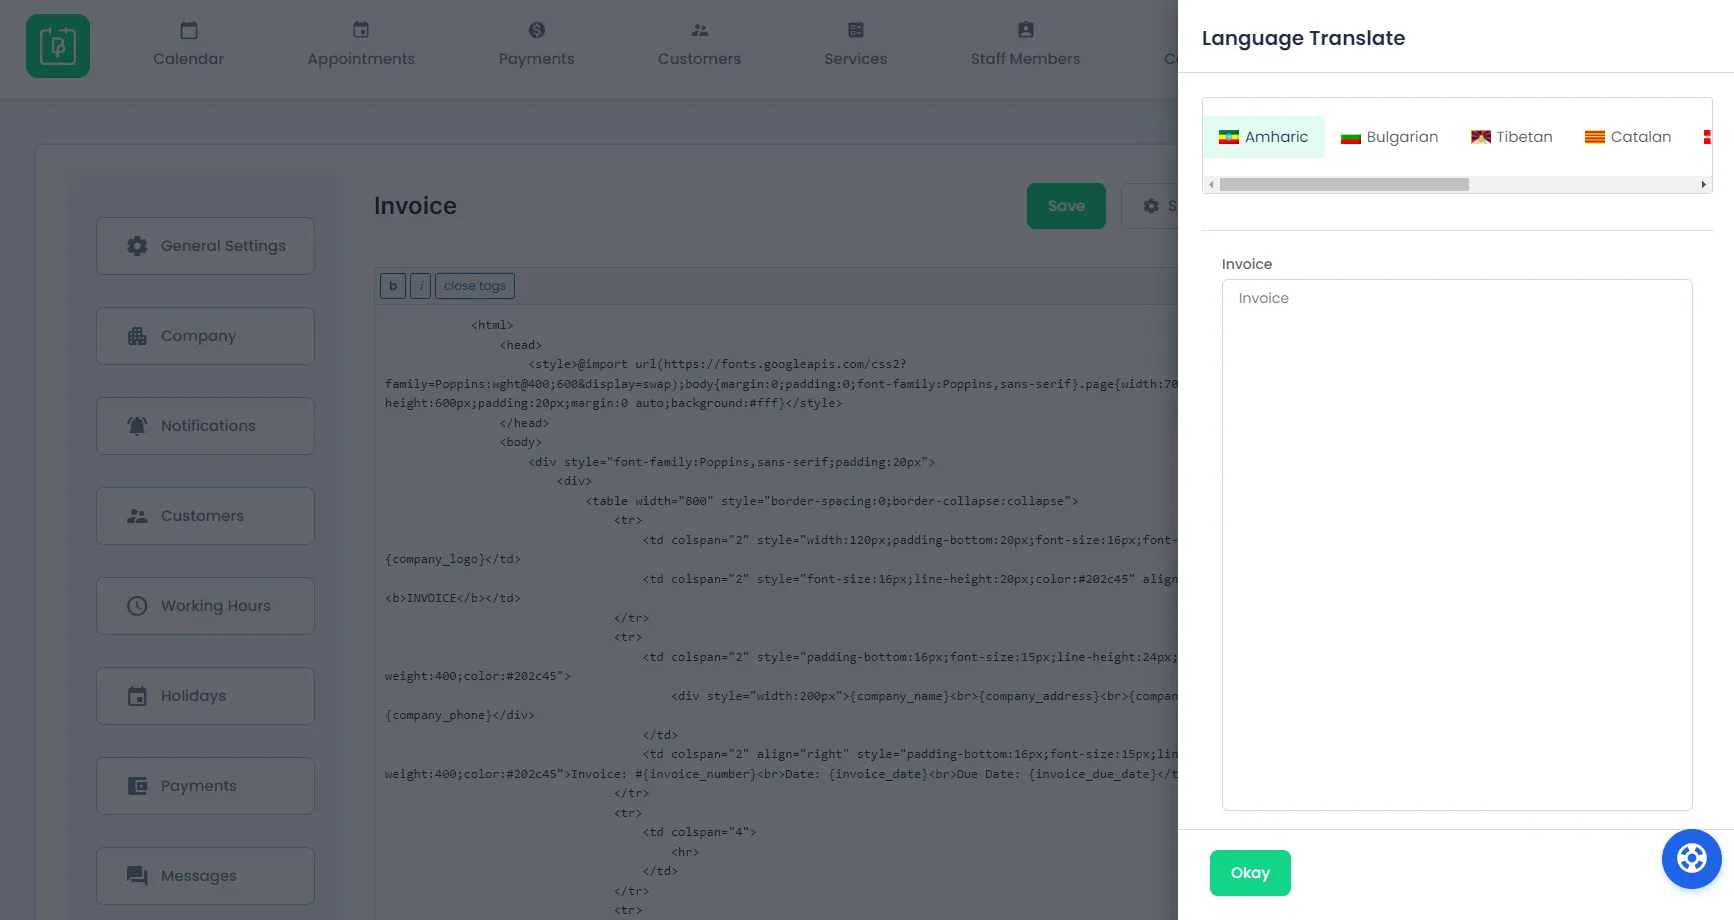
Configure Invoice In Multiple Languages
Go to BookingPress -> Settings -> Invoice, here, select the notification that you want to translate and click on the Translate button from the top right corner of the page, and you will be able to see a slide of Translation Options on the right side of the screen.
Now, select the Language and configure all the Invoice in multiple languages with Custom HTML as per your requirement the Invoice will be displayed to the customers as per the language of the Booking Form at the of Booking an appointment.