PayPal
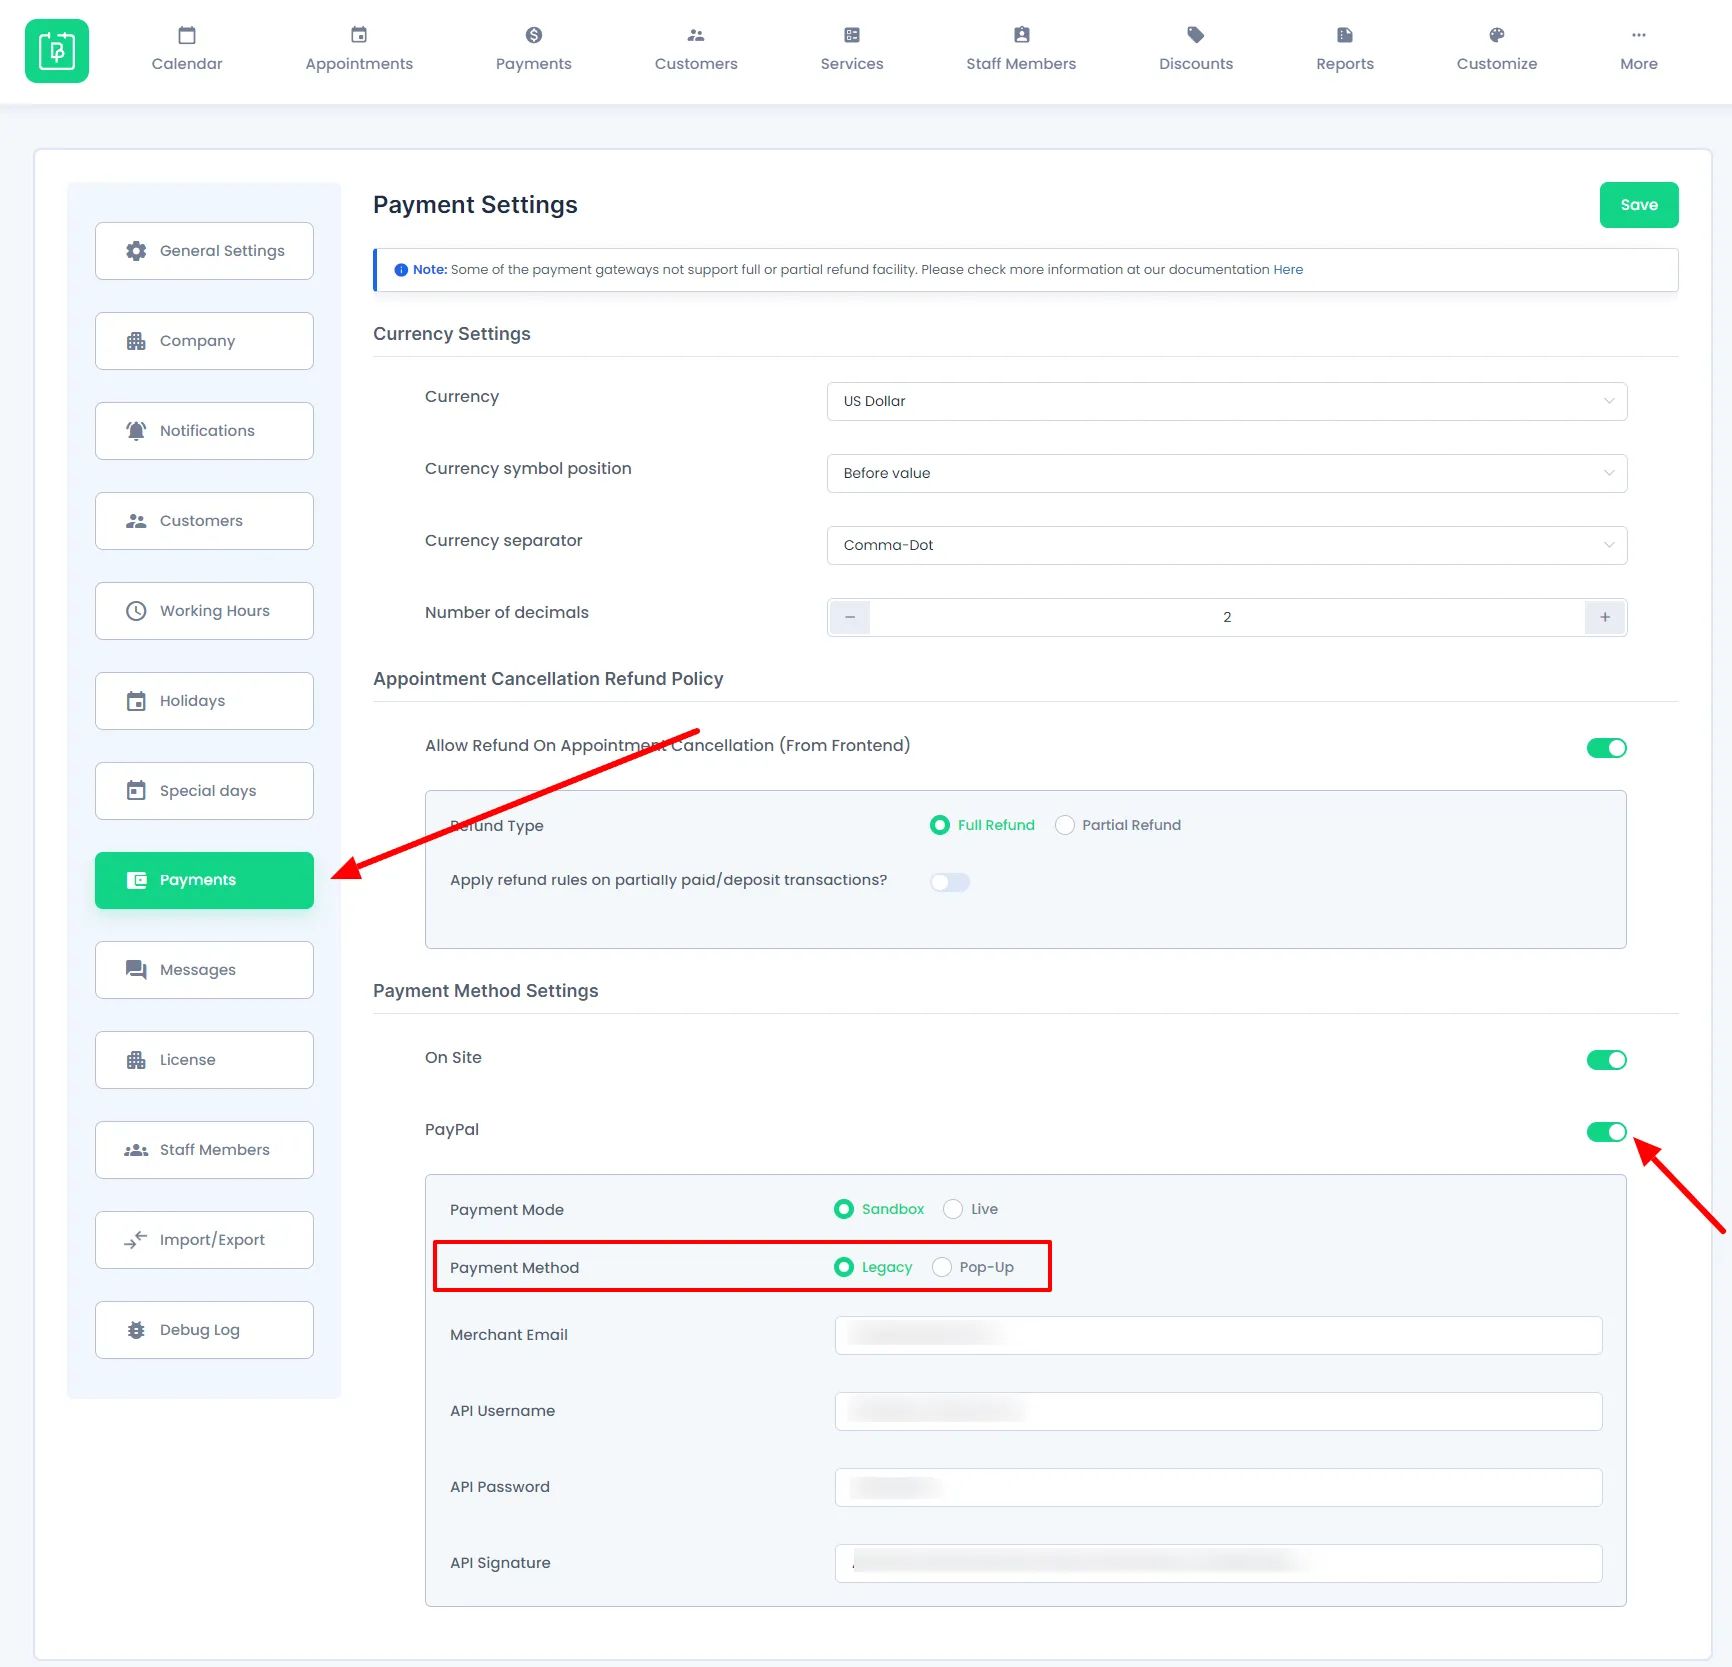
This option will allow your customer to pay with PayPal for the booked appointments. You need to turn ON the switch to make this payment option enabled at the front end.
To start with, you need to select the “Payment mode” which is sandbox mode or Live mode.
“Sandbox Mode” is a testing environment that will be used for testing purposes.
“Live Mode” is for the actual PayPal production environment and it accepts real payments. To use the Live mode, you need to add “API Username”, “API Password” and “API Signature” assigned to Live and not Sandbox from your PayPal account as they are different for each case.
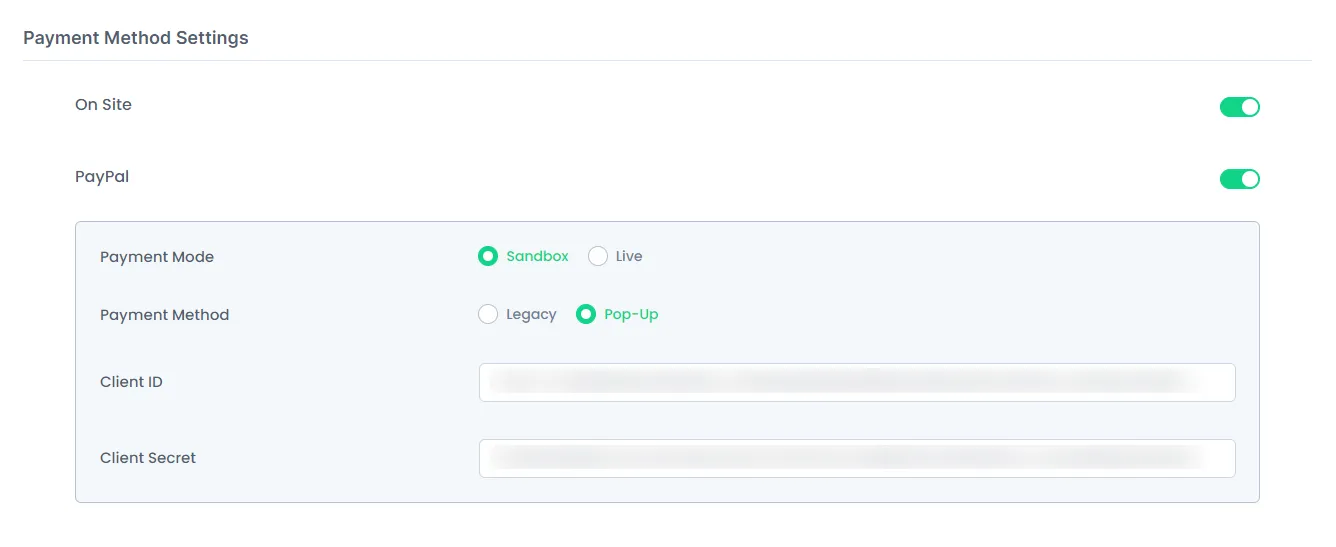
BookingPress offers two methods for PayPal payments: the updated Pop-Up Method and the traditional Legacy (NVP/SOAP) Method. Users can choose either payment method to enhance their payment experience.
Important: It is advised to use the Pop-up method rather than the legacy method although both work fine but as PayPal believes it is better to use the Pop-up method.
Configuring the PayPal Pop-Up Method
To configure the PayPal Pop-Up Method, you will need two additional credentials: Client ID and Client Secret. Follow these steps to obtain them:
- Go to PayPal Developer.
- Click on Create App if you haven’t created one yet. Choose either Sandbox or Live based on your requirements.
- Enter your App Name.
- Set your App Type as Merchant.
- Select your Business Account.
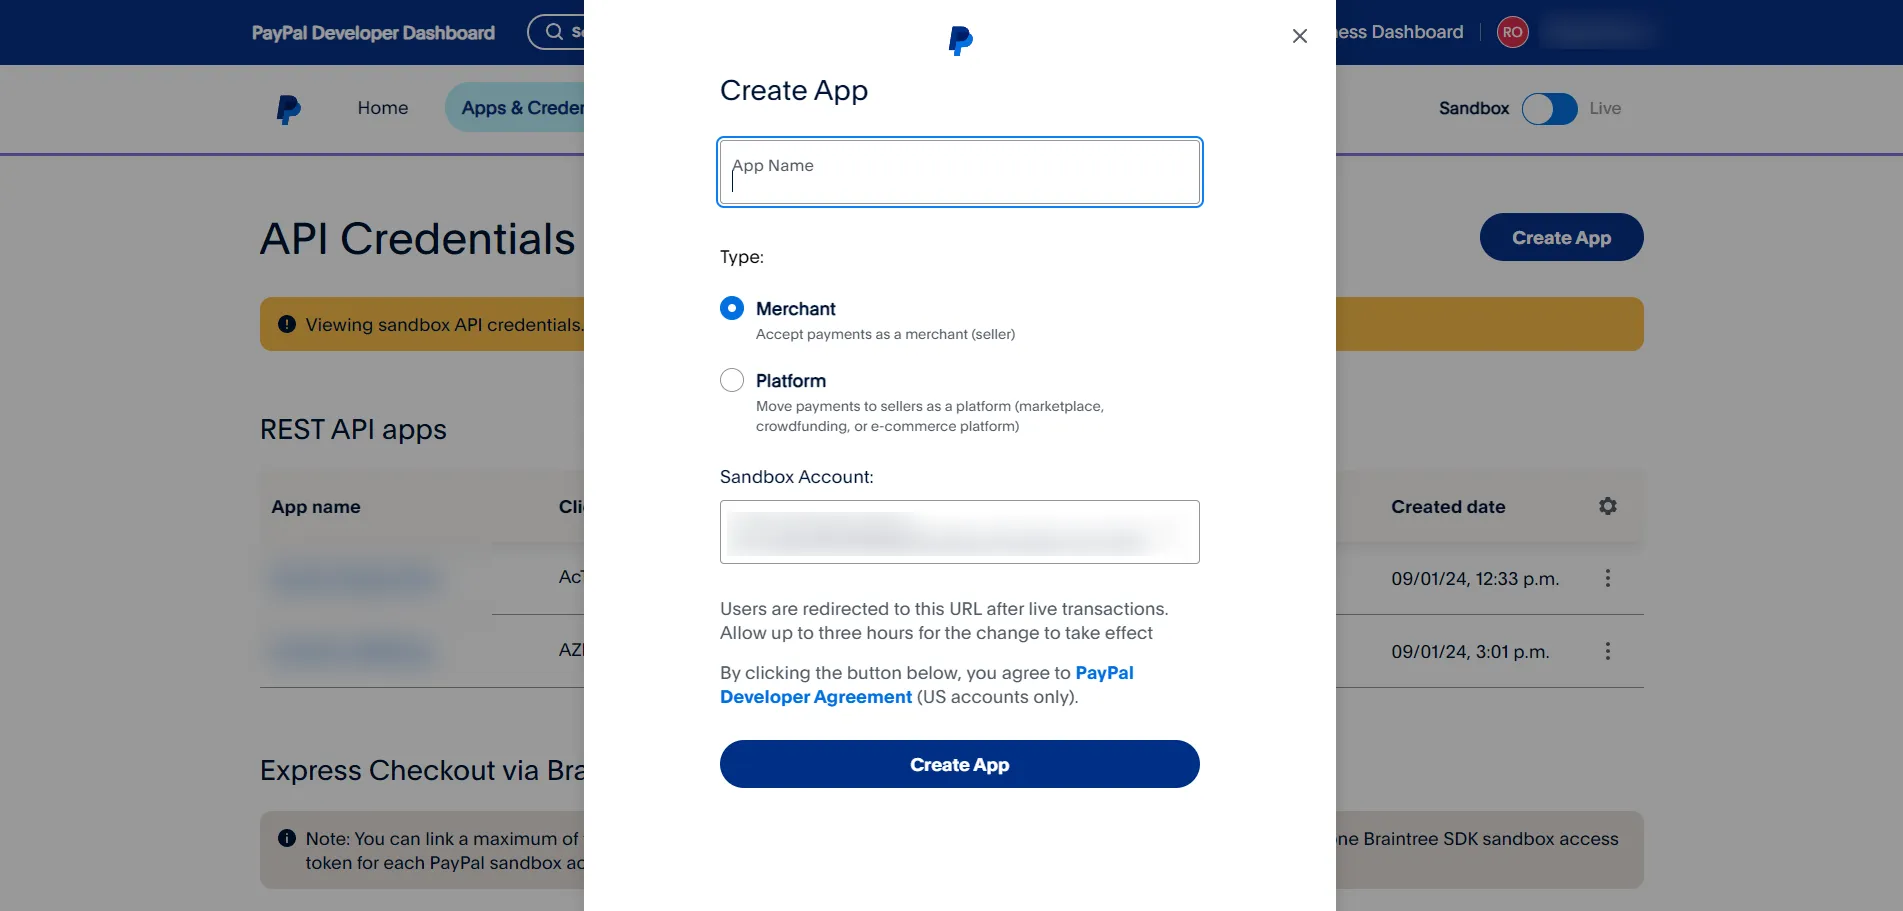
- Click on Create App.
- View your Client ID and click on Show to reveal your Client Secret.
- Ensure you select all app features to avoid any conflicts.
- Copy and paste the Client ID and Client Secret into the BookingPress PayPal settings.
User Experience with PayPal Pop-Up Method
When users select the Pop-Up method for PayPal payments, there are certain changes in the front-end,
After users fill in their basic details and choose PayPal as their payment gateway, they will notice that the “Book now” button changes to “PayPal”.
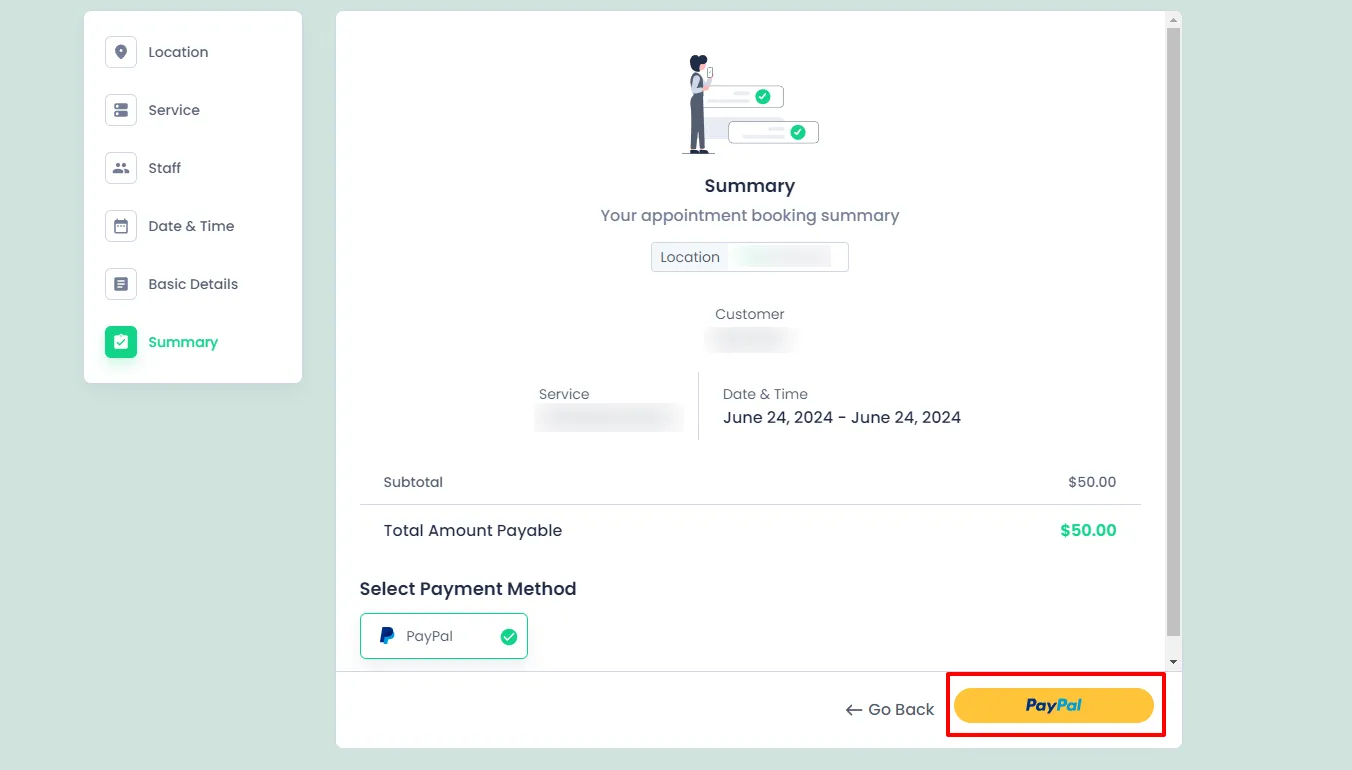
When they click on the PayPal button a pop-up is opened through which the payment is done.

Configuring the Legacy Payment Method(NVP/SOAP)
You will need API Username, API Password, and API Signature to use the Legacy PayPal Payment method. You can follow the steps below to fetch the same.
Important: Your Merchant Email is different from the email you use to log in to PayPal. Ensure you use the correct email.
- Log in to your PayPal Premier or Business account.
- Click the Profile sub-tab located in the top navigation area.
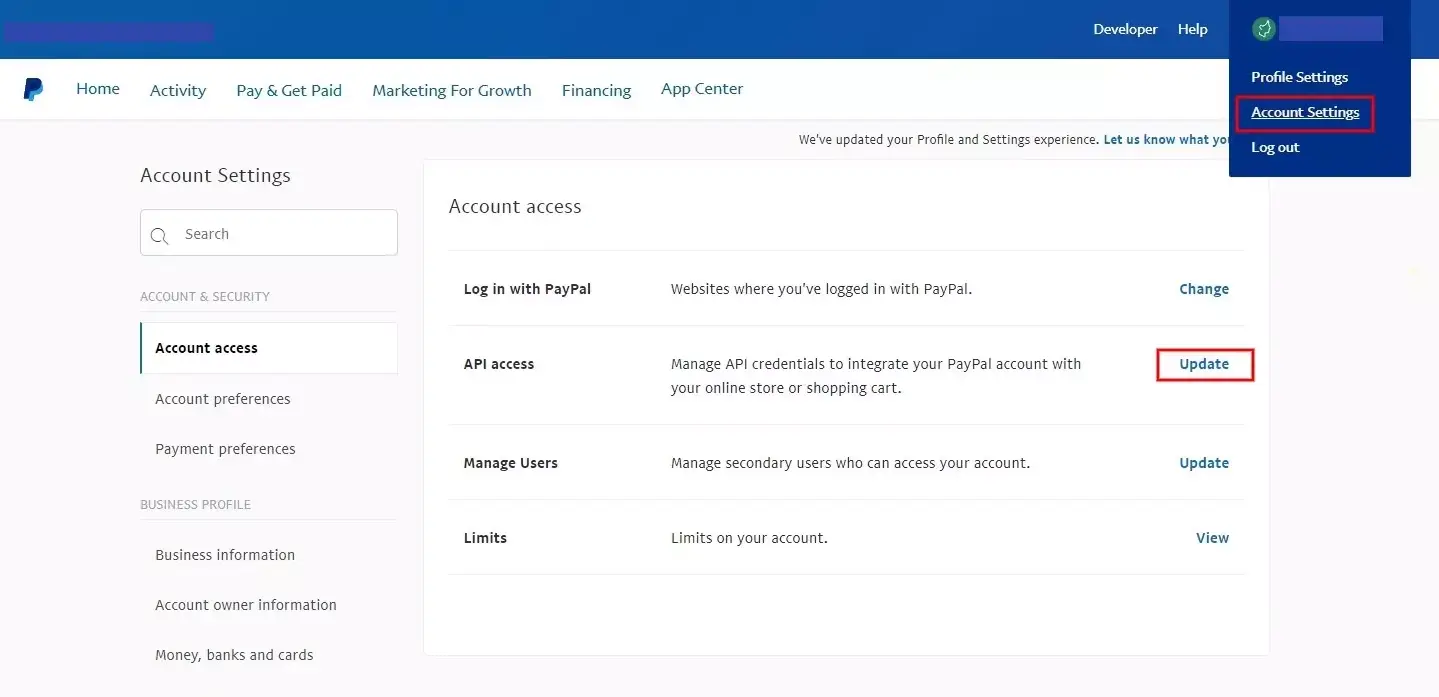
- Click the My selling preferences sub-option in the left sidebar.
- Click the API Access link under the Account Information header.
- Click the Get Started link under the Request API Credentials heading.

- Click the Update option for the API access item.
- Complete the API Credential Request form by clicking the agreement checkbox and clicking Submit.
- You will now get the API username, password, and signature.
Automatic Redirection Back to Your Website ( Legacy Method )
Important: The automatic redirection back to your website after payment is contingent upon your PayPal settings. Although we have internally provided the redirect URLs when transferring control to PayPal, it ultimately depends on PayPal to honor that request from BookingPress.
To enable PayPal’s Auto Return feature, please follow the steps outlined in this helpful guide: How Do I Use PayPal’s Auto Return Feature?
This feature ensures that your customers are seamlessly redirected back to your website upon completing their payment.
IPN Configuration
If the payment is successful but the appointments are not reflected onto BookingPress then another important aspect is to ensure that you have enabled Instant Payment Notifications (IPN) on your PayPal account. Here’s a step-by-step guide to enable IPN:
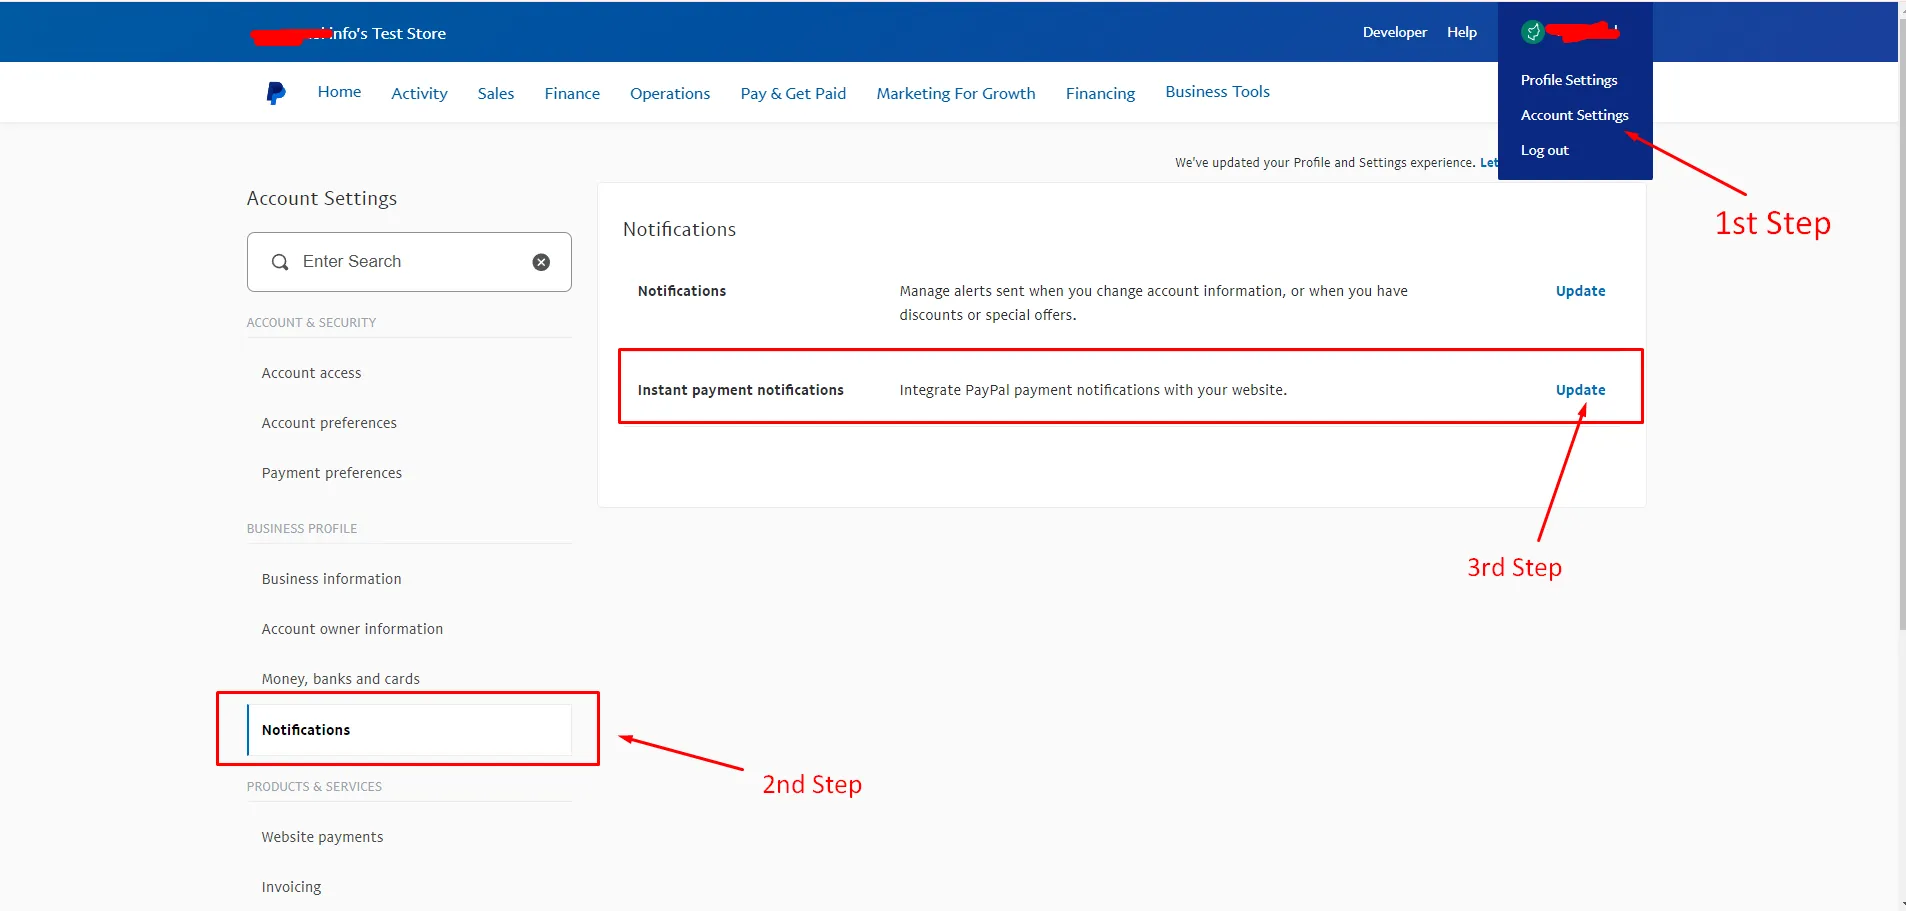
1. Log in to your PayPal account.
2. Navigate to Account Settings.
3. Select Notifications from the left panel.
4. Click on the Update button in the ‘Instant payment notification’ settings.
5. If IPN is turned off, you’ll see a screen similar to this:
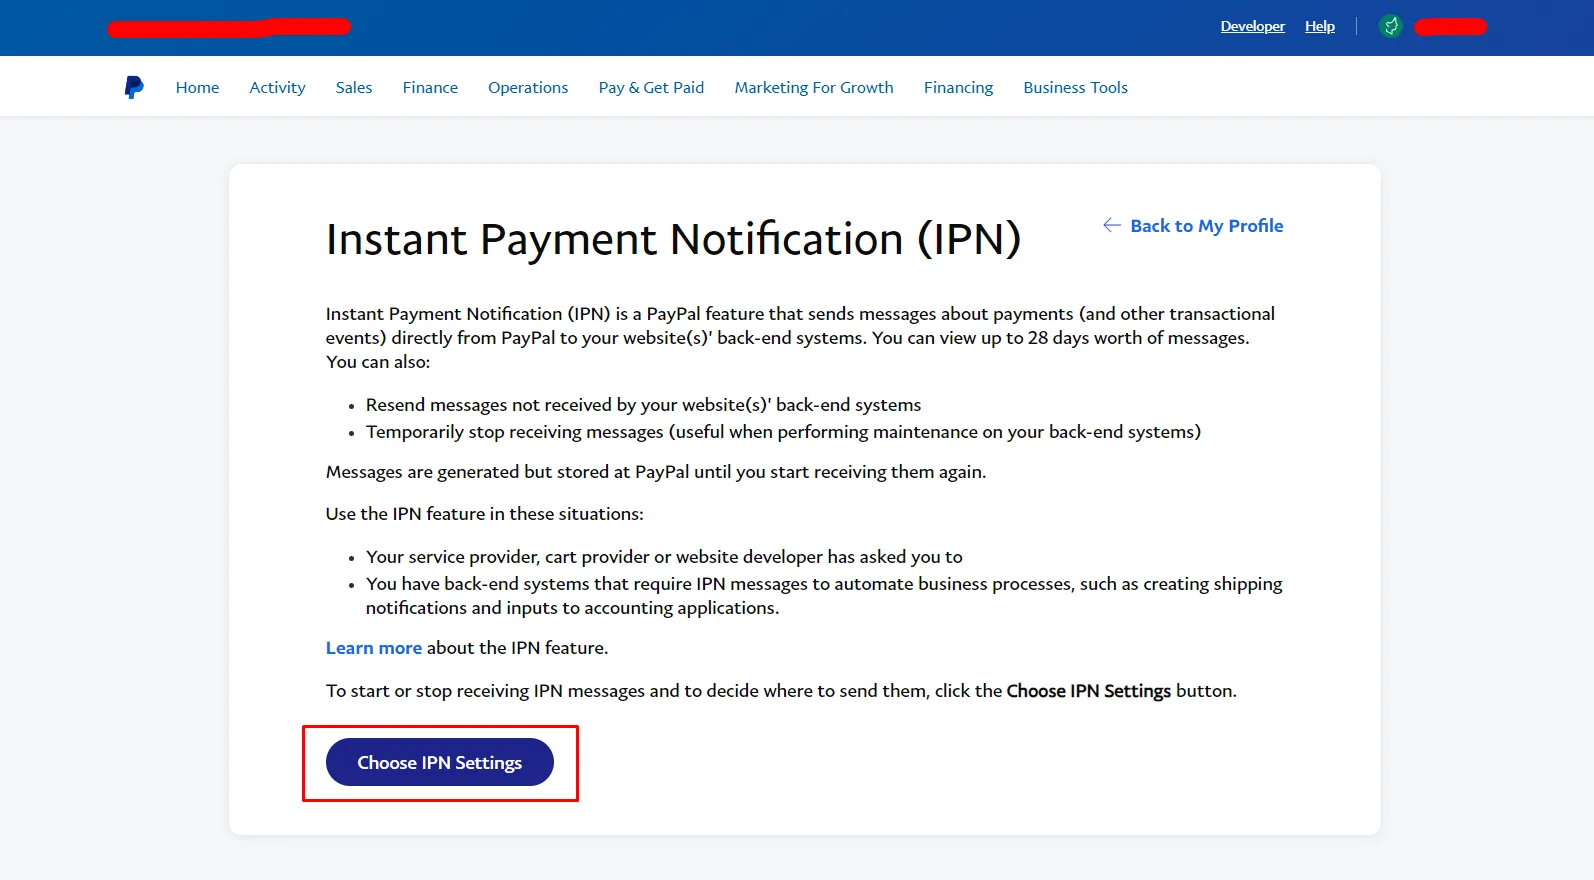
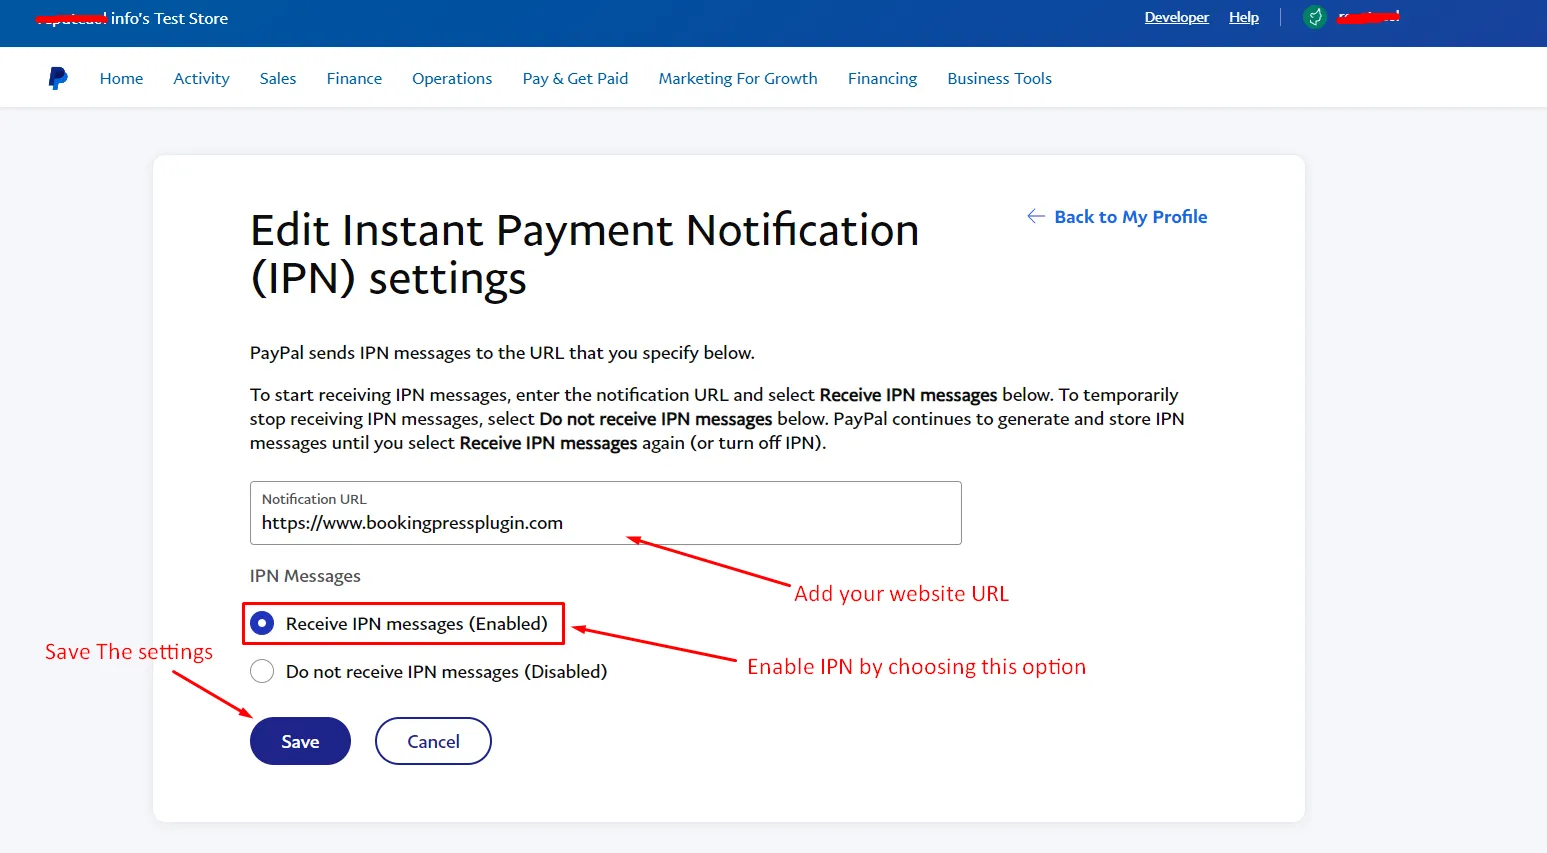
6. Click on ‘Choose IPN Settings’.
7. Enter the Notification URL with your website’s URL.
8. Select the ‘Receive IPN Messages (Enable)’ option.
9. Save the settings.
After saving the settings, you’ll be redirected to the IPN settings page, which should resemble this:
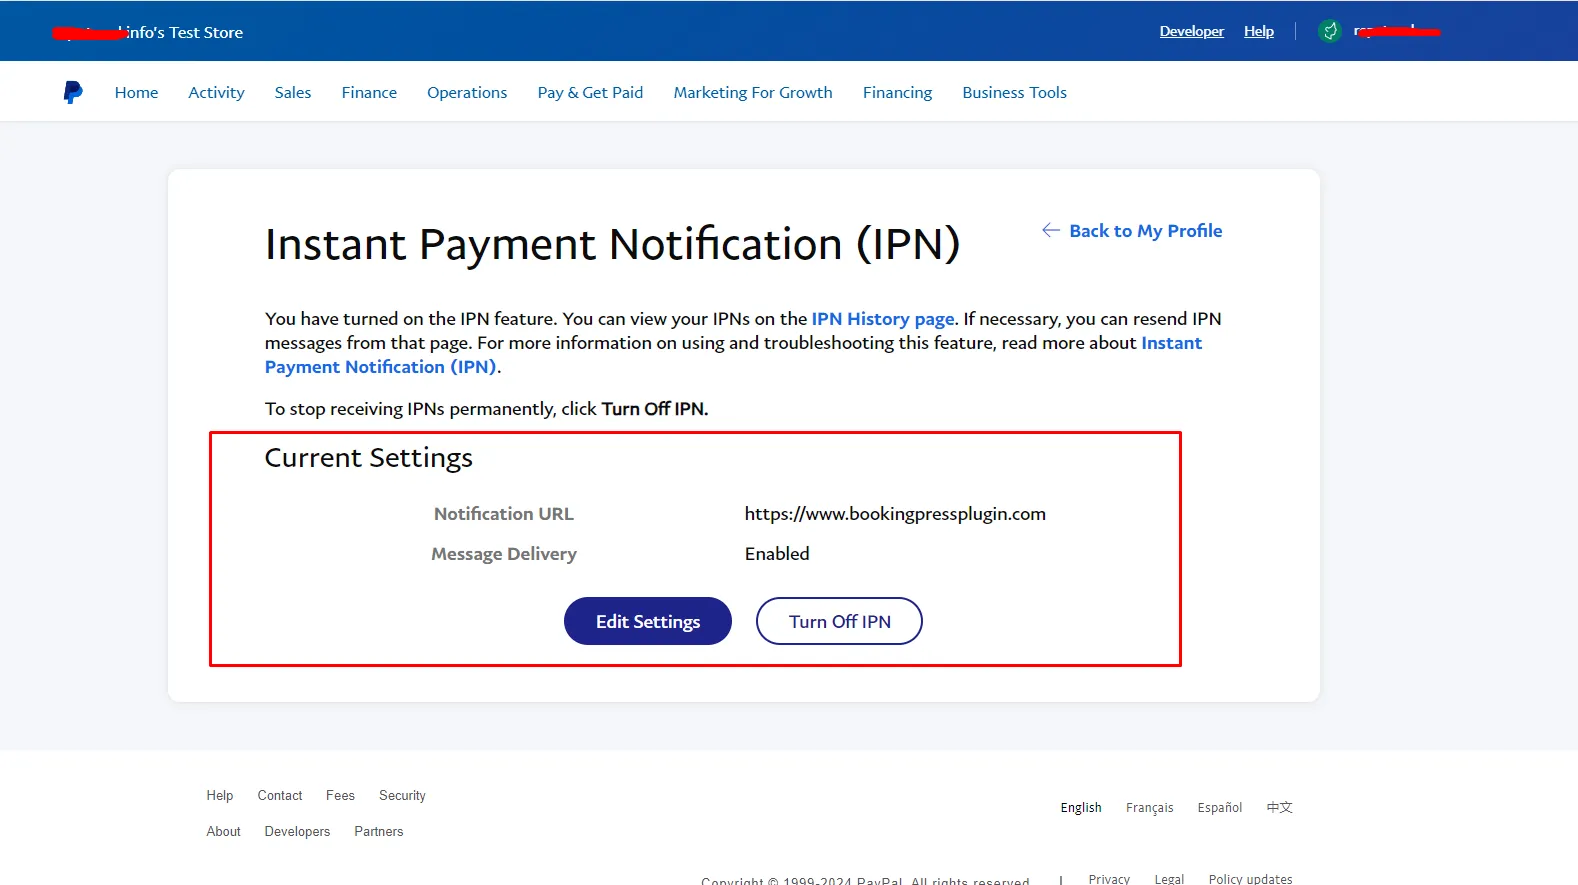
Enabling IPN settings on your PayPal account allows PayPal to notify your website whenever a payment is received. BookingPress will then capture these notifications, confirm the payment, and add an appointment in BookingPress. Subsequently, emails will be sent to both the customer and the staff/administrator.