Get Started with BookingPress: Quick Setup Guide
This quick start guide walks you through the complete flow of setting up and running BookingPress, from creating your first service to managing bookings, payments, and customers.
By the end of this guide, you’ll have a fully functional booking system ready to go.
Note: Just-in-case you need help downloading & installing your new BookingPress premium plugin, here’s a handy guide to assist you with installing & activating BookingPress.
Set Up BookingPress to Start Accepting Bookings
To quickly start accepting online bookings with BookingPress, you first need to create at least one service and then publish a booking form on your website.
This setup lets your clients select services you added and book appointments right from your BookingPress-powered, service-business site.
Please Note: If you have walked through the BookingPress setup wizard, you can start accepting booking right away – without any of these steps below. However, If you skipped it (or want to customize), simply follow the steps below.
Step 1: Create a Service
A service in BookingPress is what your customers or clients will book from your business website (Or wherever you embed your booking form). The services can be anything like consultation, haircut, meeting, makeup, or training session.
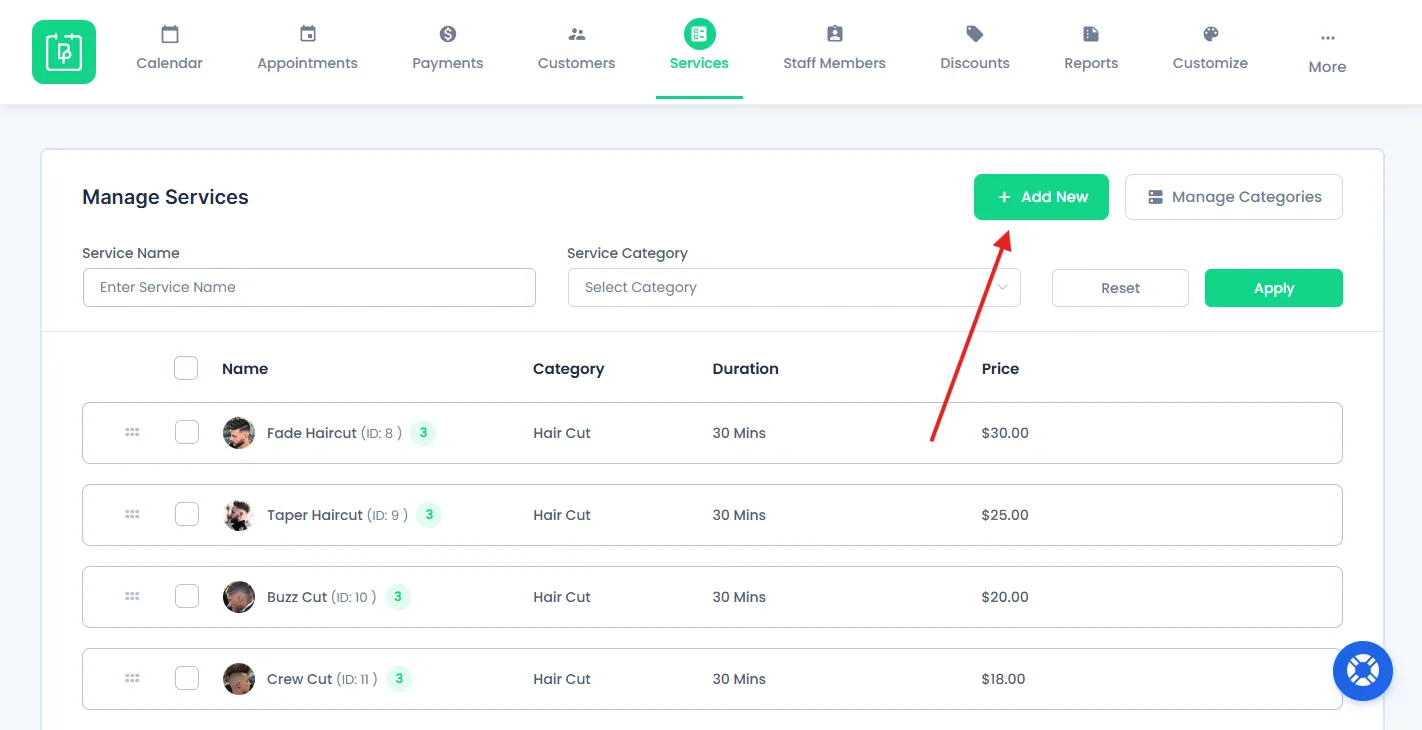
1. First of all, go to the BookingPress → Services.

2. Create a new category (If you haven’t)
Creating and assigning different categories to each service will help your clients easily find the service they want.
- Click on the Manage Categories→ Add New.
- Enter the name of your category.
- At last, click on the “Save” button.

You can create as many categories you want for your services.
3. Once the category is added, you can click on the “Add New” button on the services panel.
Next, inside the new “Add Service” page, you need to add your service details. There are a few must-fill service details such as:
- Service Name.
- Price.
- Duration.
- Buffer Time Before.
- Buffer Time After.
- Max Capacity.
However, we would also suggest you to add a service image and description so your visitors can better understand.
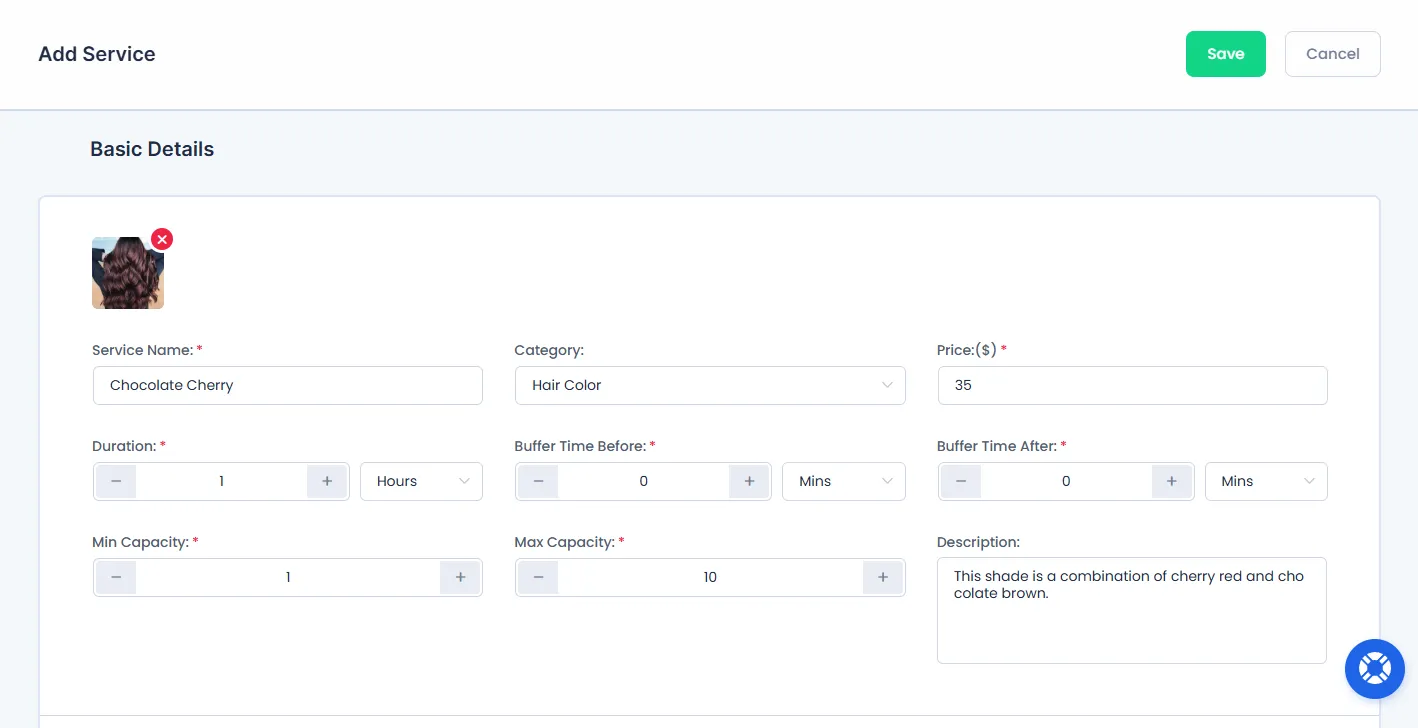
After entering all the details, click on the “Save” button at the top-right corner.
Now your new service is saved and will be shown in the list.
Step 2: Add the Booking Form to Your Website
After creating a service, the next step is to show the booking form on your website so customers can start scheduling appointments.
1. Create a page/post
First of all, you must create a WordPress Post or Page.
To create a page from the WordPress dashboard, go to your WordPress admin panel → Pages→Add Page.
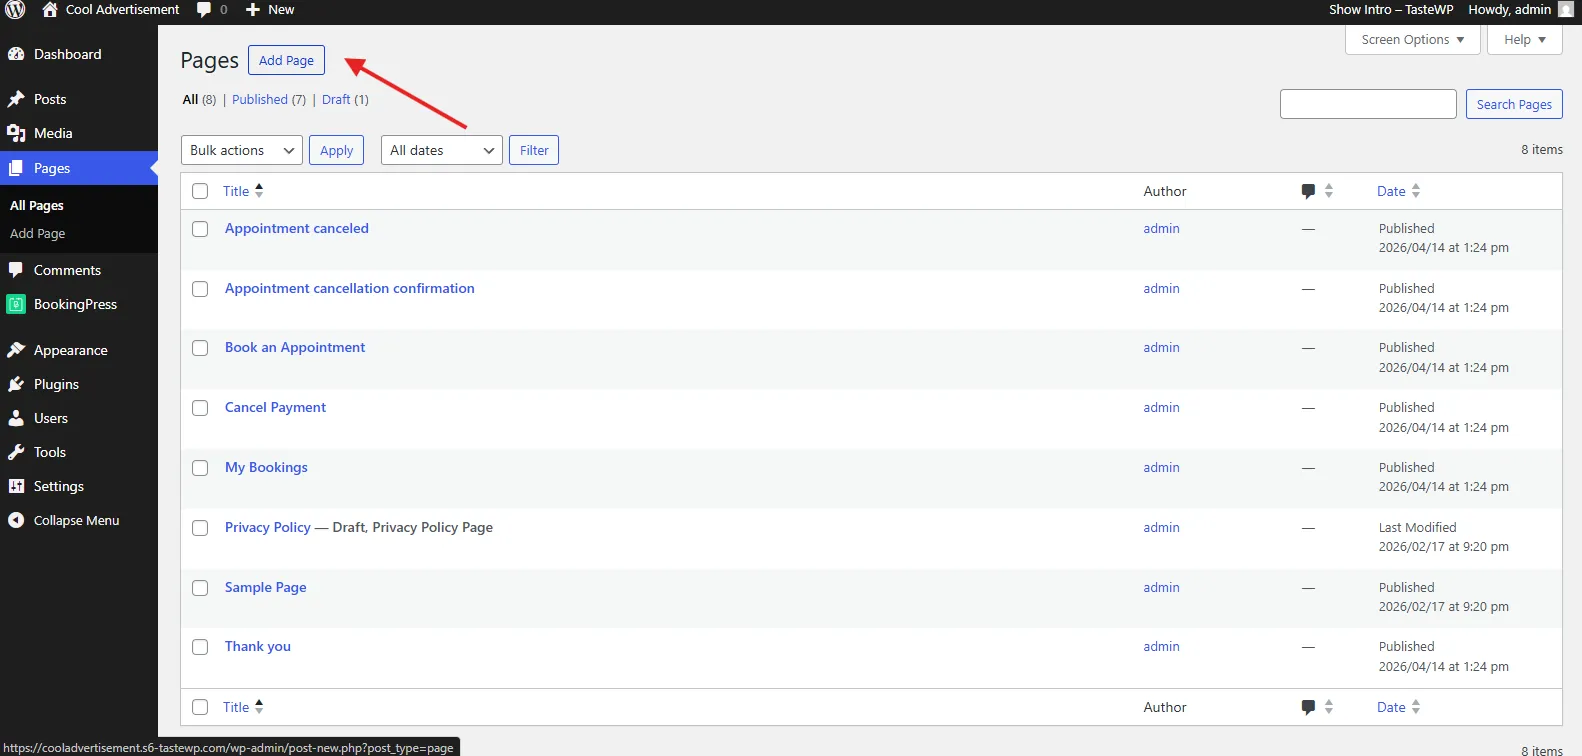
Note: BookingPress already created a “Book an Appointment” page with the booking form inside. You can either use it, your existing page, or make a new page for embedding your booking form.
2. Add the Booking Form
Next, inside the WordPress page we just created, enter the details as you see fit. Then, click on the + icon (Block Inserter) and scroll till you find the BookingPress Blocks.
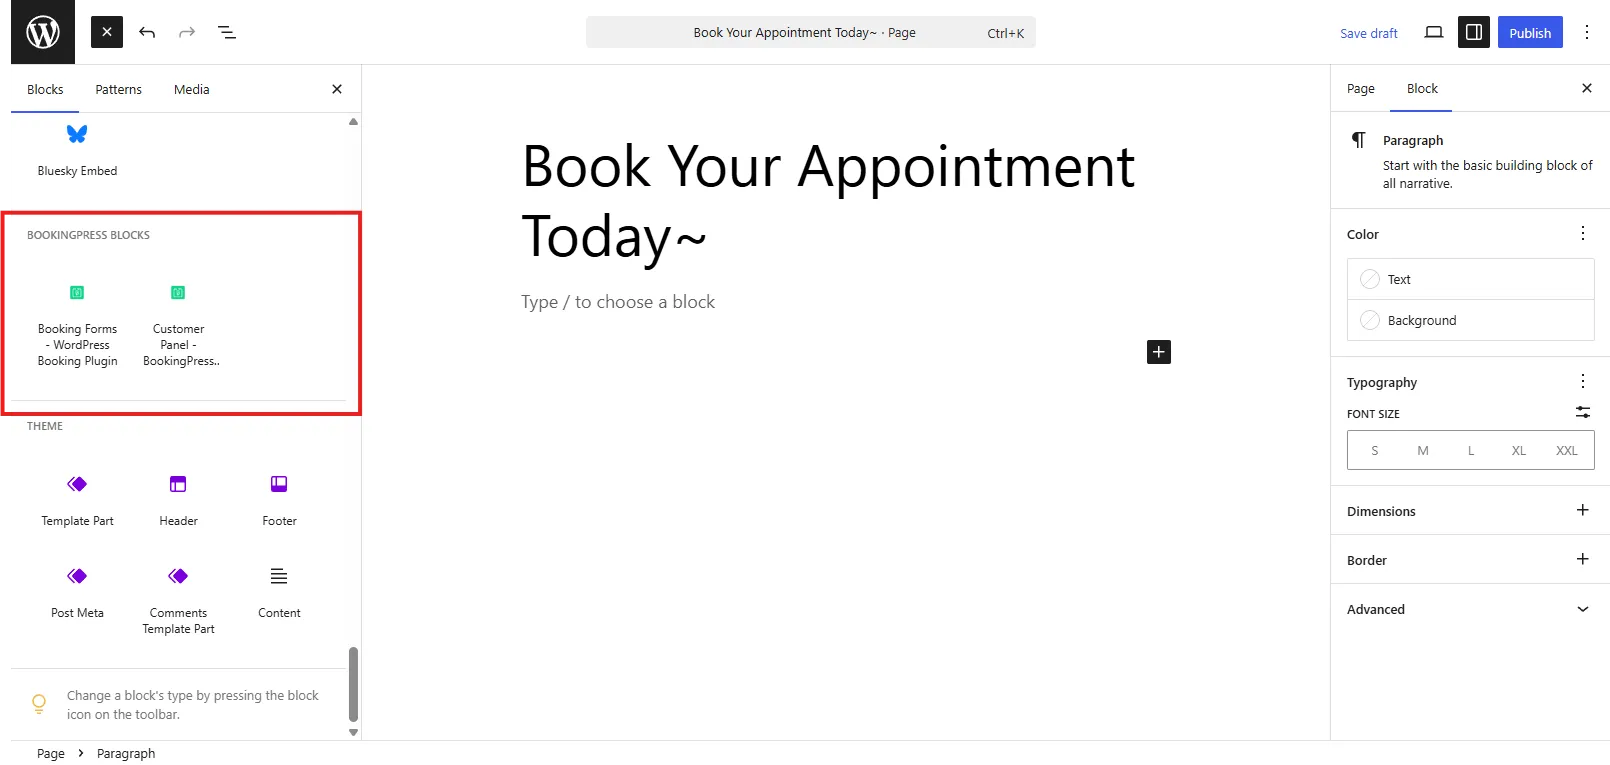
Simply click on the “Booking Forms – WordPress Booking Plugin” block, and the shortcode will appear in the text area.
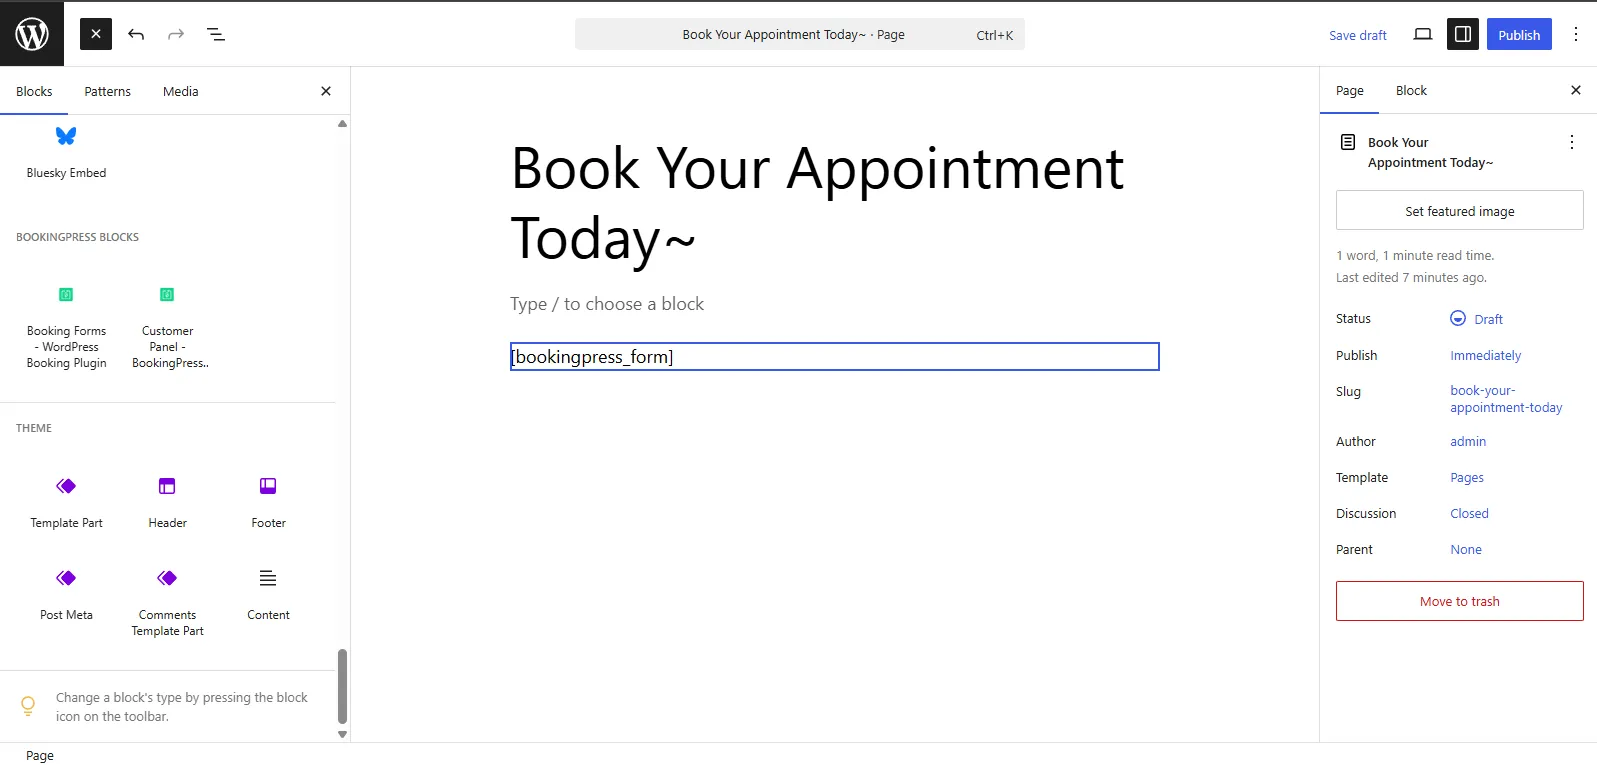
Alternatively, you can also manually type in the shortcode [bookingpress_form] .
That’s it!
After publishing, the booking form will be live to your site visitors, allowing them to select a service and complete the booking.
How Does the Booking Process Work for Customers?
Now that your booking form is live, your visitors and customers can finally book your services. And here’s how they can by following a simple multi-step booking process:
First things first, customers pick the service from the available options you have created. Here, they can see the basic service details (you’ve defined) such as service name, price, duration, and description before choosing the one they want.
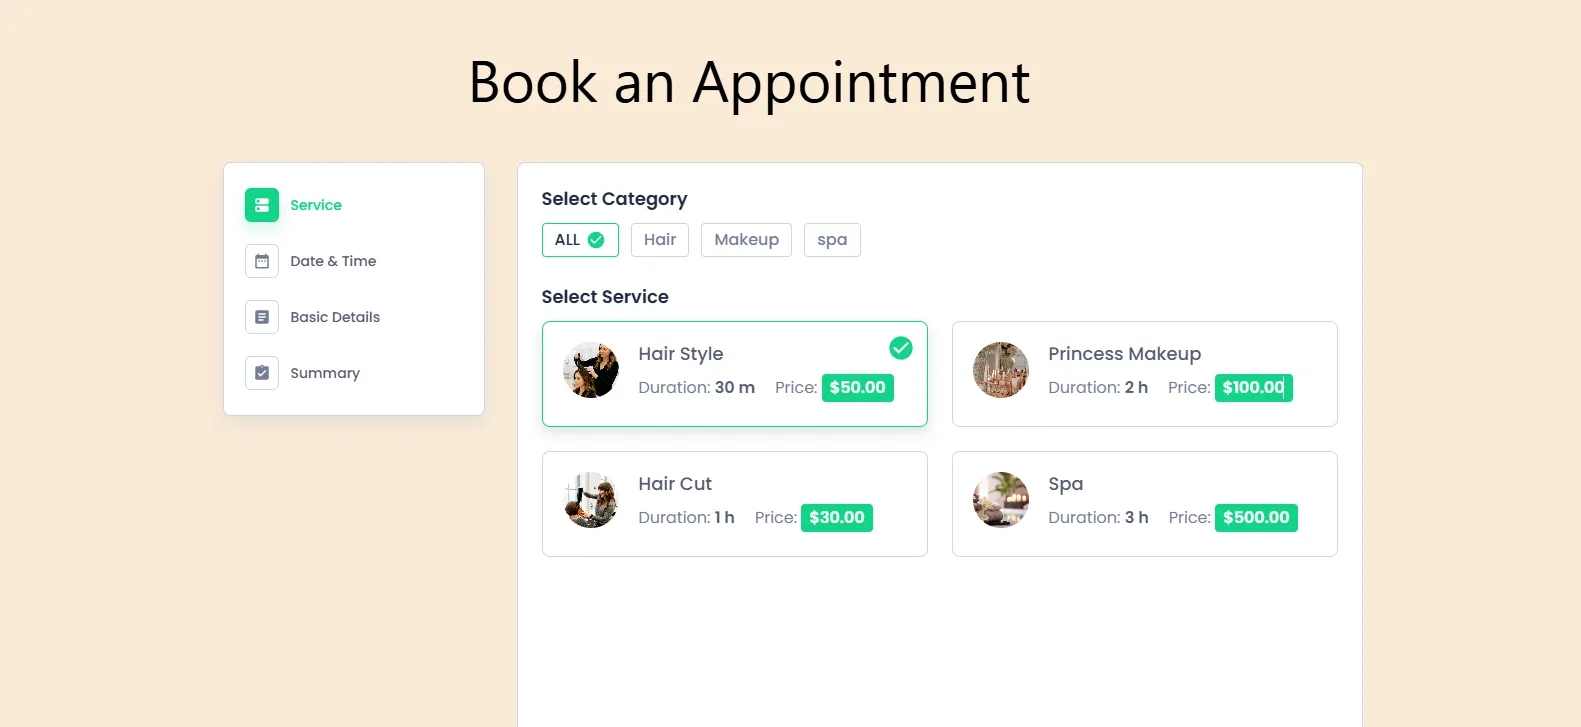
The best part is they can easily find the service they want thanks to the categories.
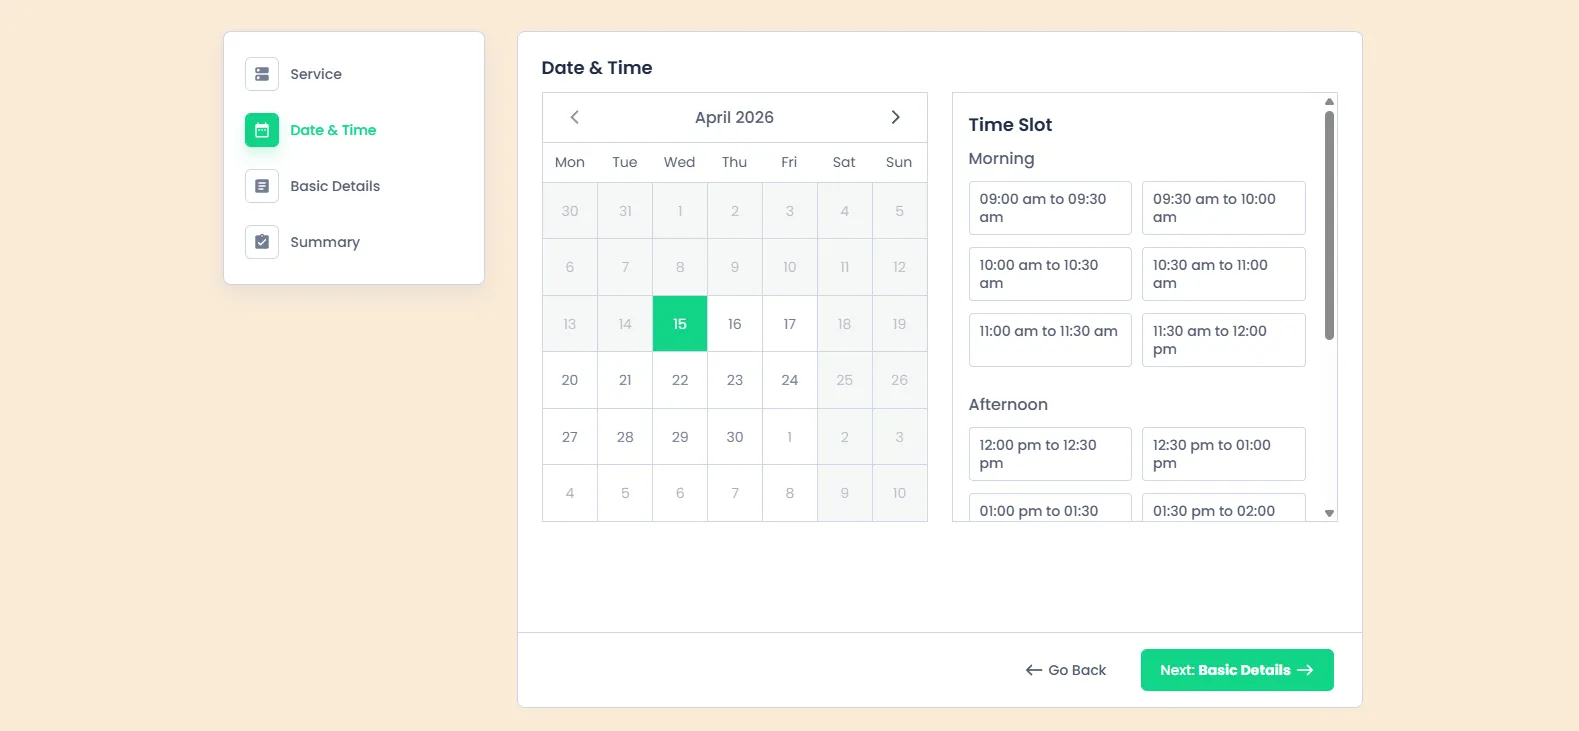
Next, they move to date and time selection, where they can pick their preferred time slot based on your availability settings (Defined during the setup wizard).
Please Note: If you want to change your working hours, you can reset them from here.
The dates which are not available are simply blocked. Only available time slots are shown, so you can ensure accurate scheduling with zero chance of booking conflicts.
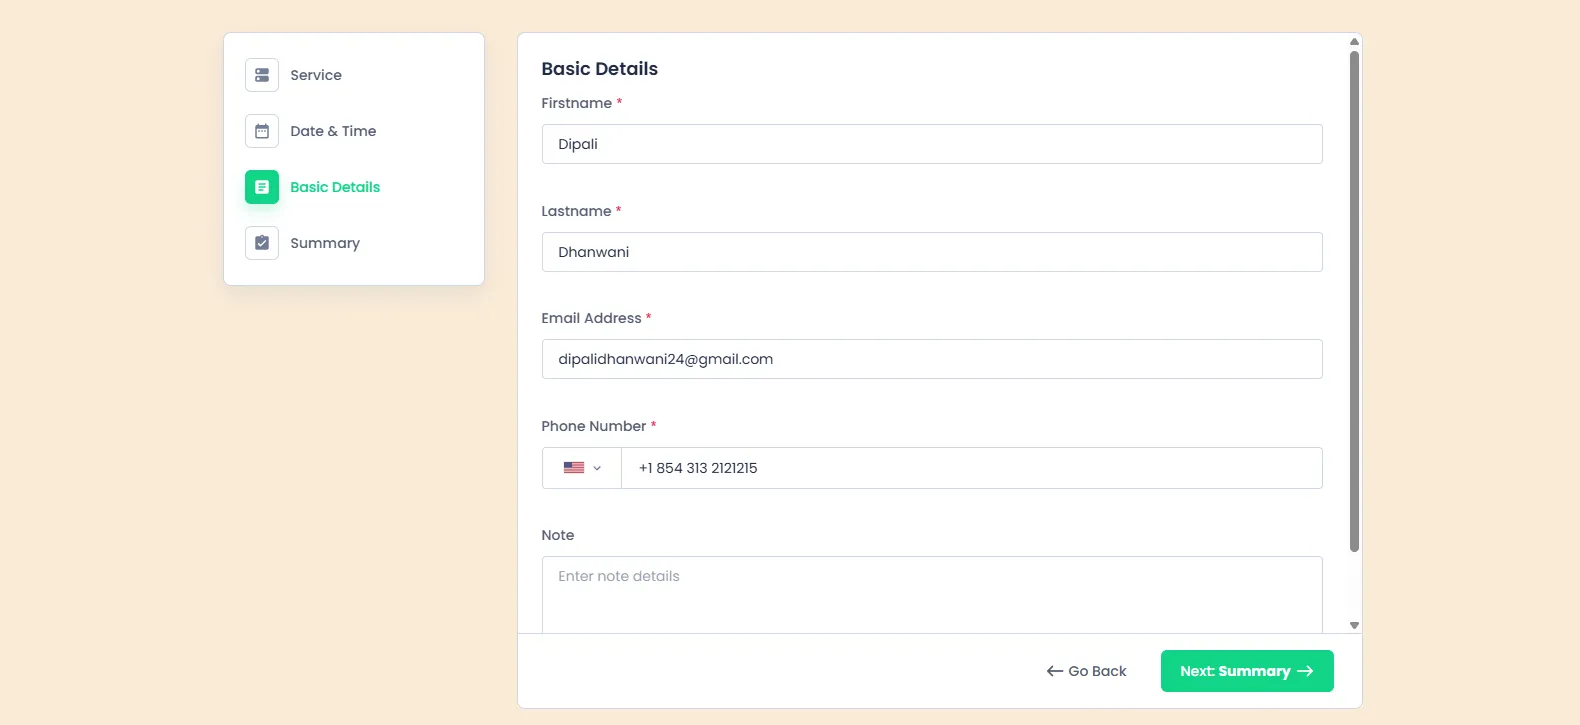
After that, customers enter their basic details, such as name, email address and phone number, which are required to complete the booking.
Finally, they reach the summary step, where they can review all the selected information, including the service, date, time, and personal details.
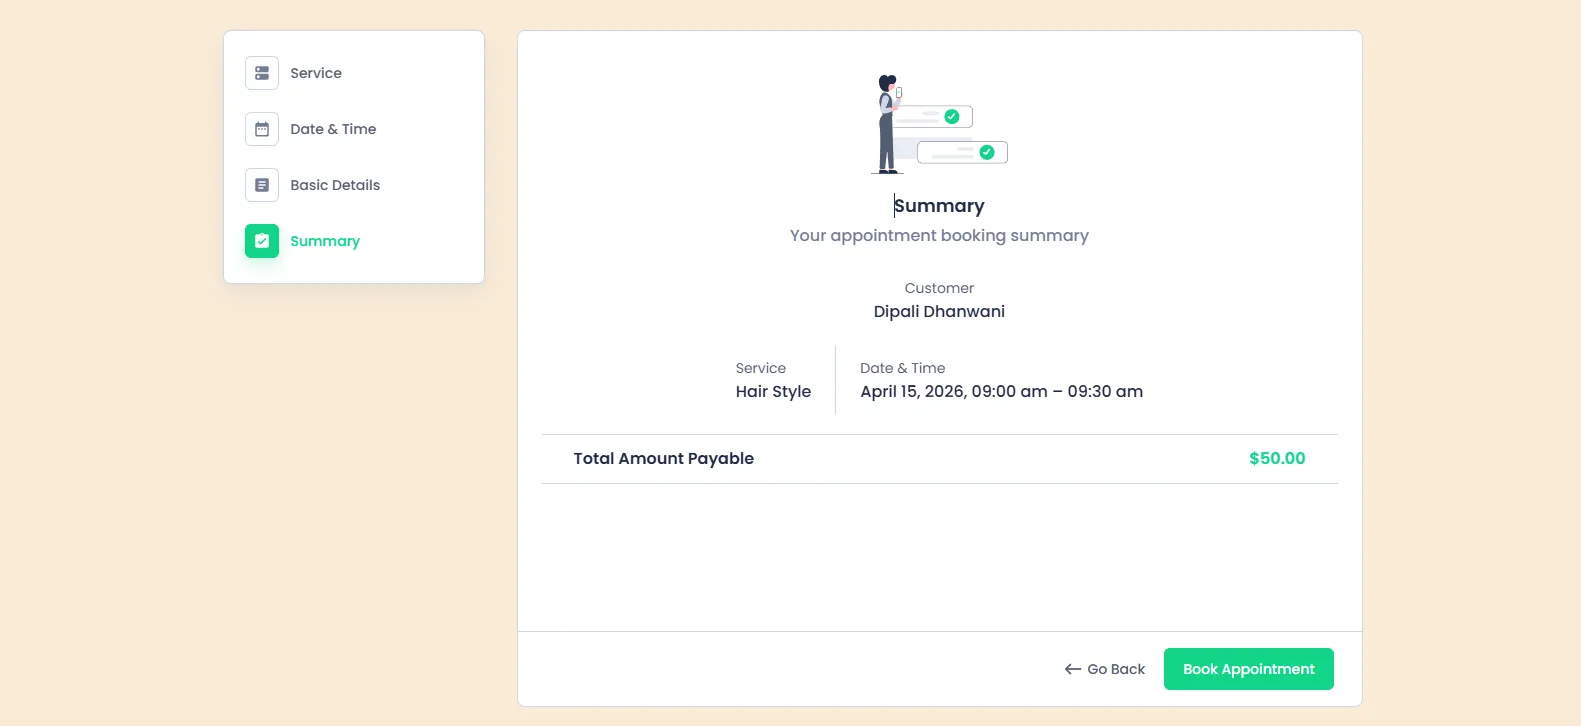
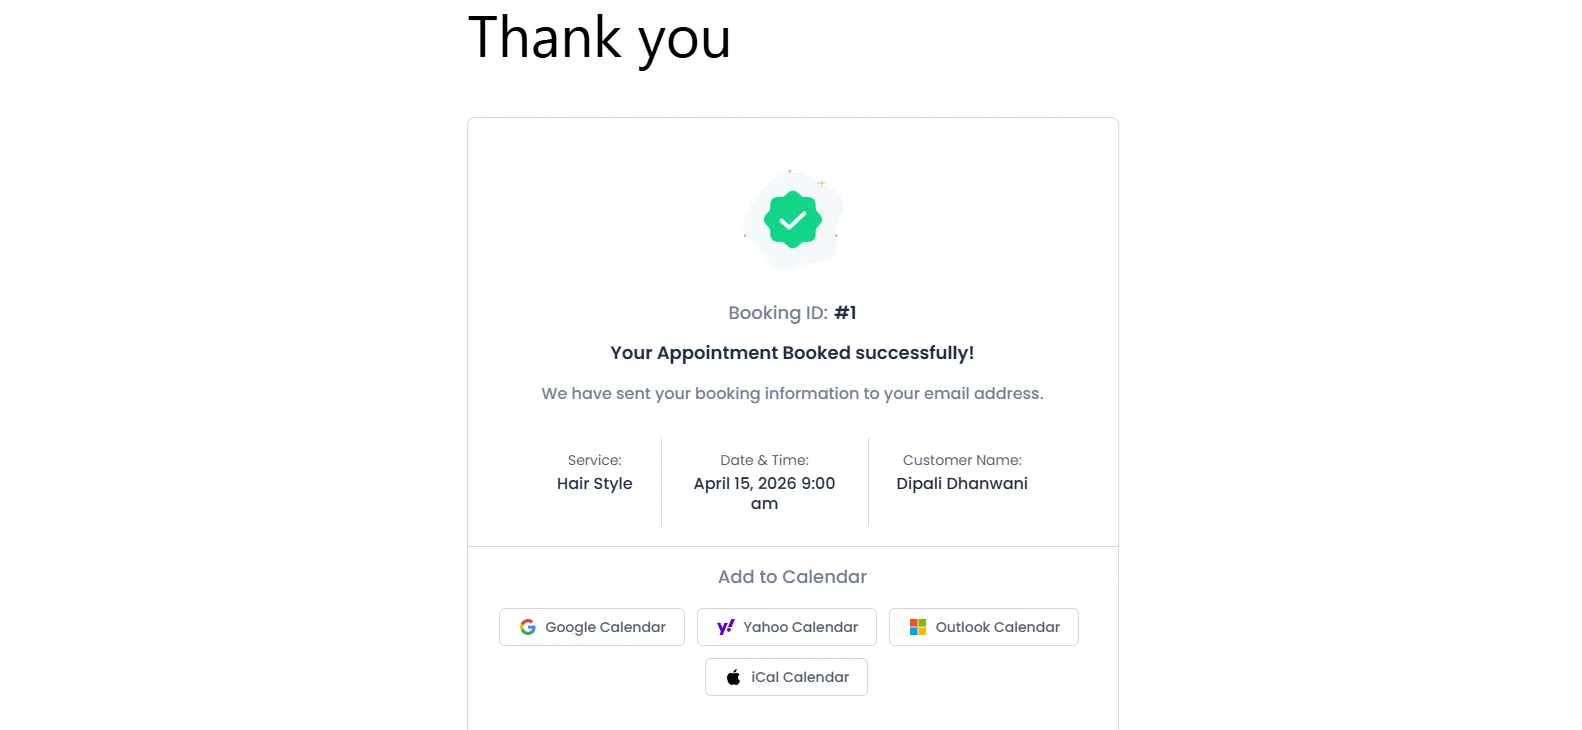
Once everything looks correct, they confirm the booking by clicking on the “Book Appointment” (and complete payment if enabled), and the appointment is successfully scheduled.
How to View and Manage Appointments in WordPress Admin
After your client has booked an appointment from the front end, you can manage it from your WordPress admin panel.
View All Appointments
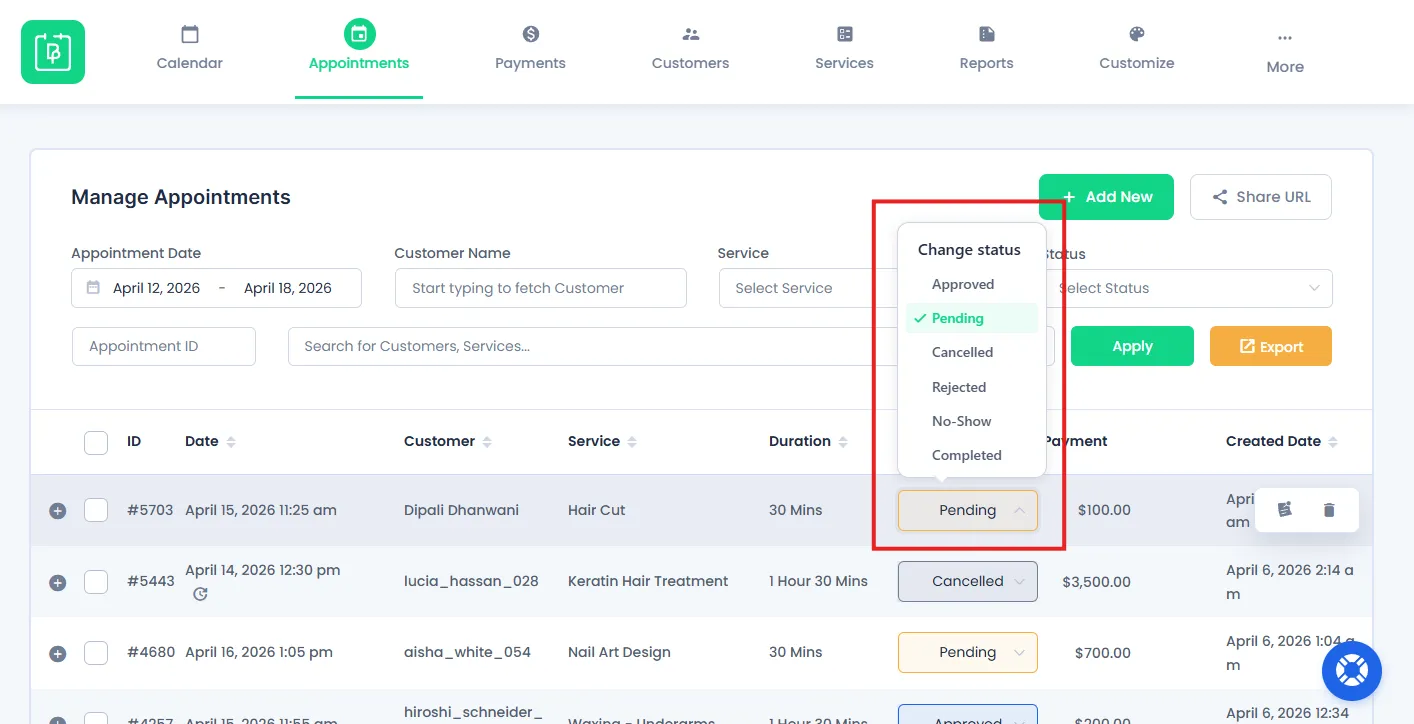
To see all booked appointments, go to BookingPress → Appointments in your WordPress dashboard.
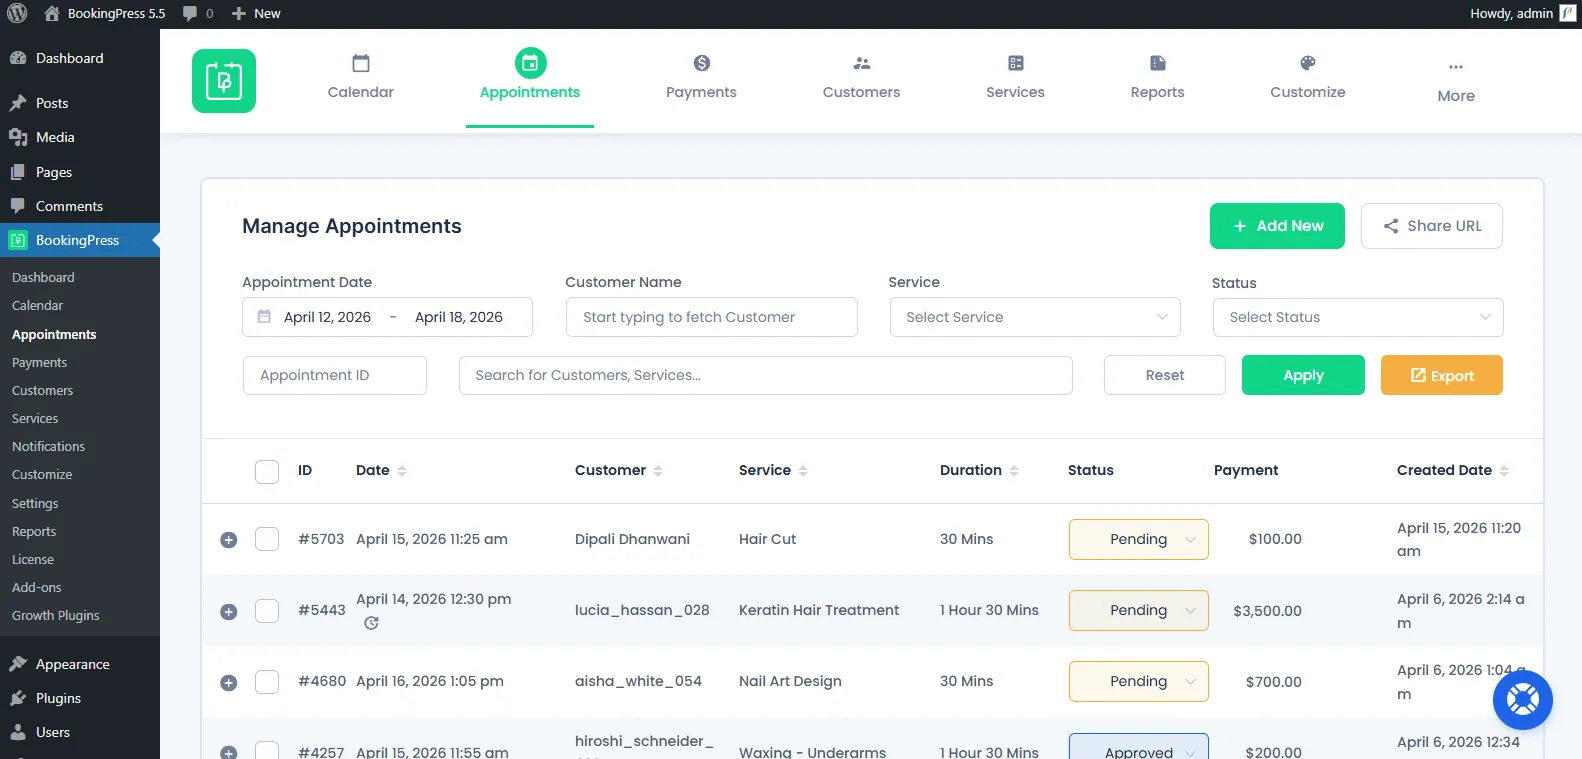
Here, you’ll find a complete list of all appointments made in your booking form, along with details such as service, date, time, duration, status, payment and customer details.
You can easily change the appointment status manually from “pending” to Approved, Cancelled, Rejected, No-show and Completed.
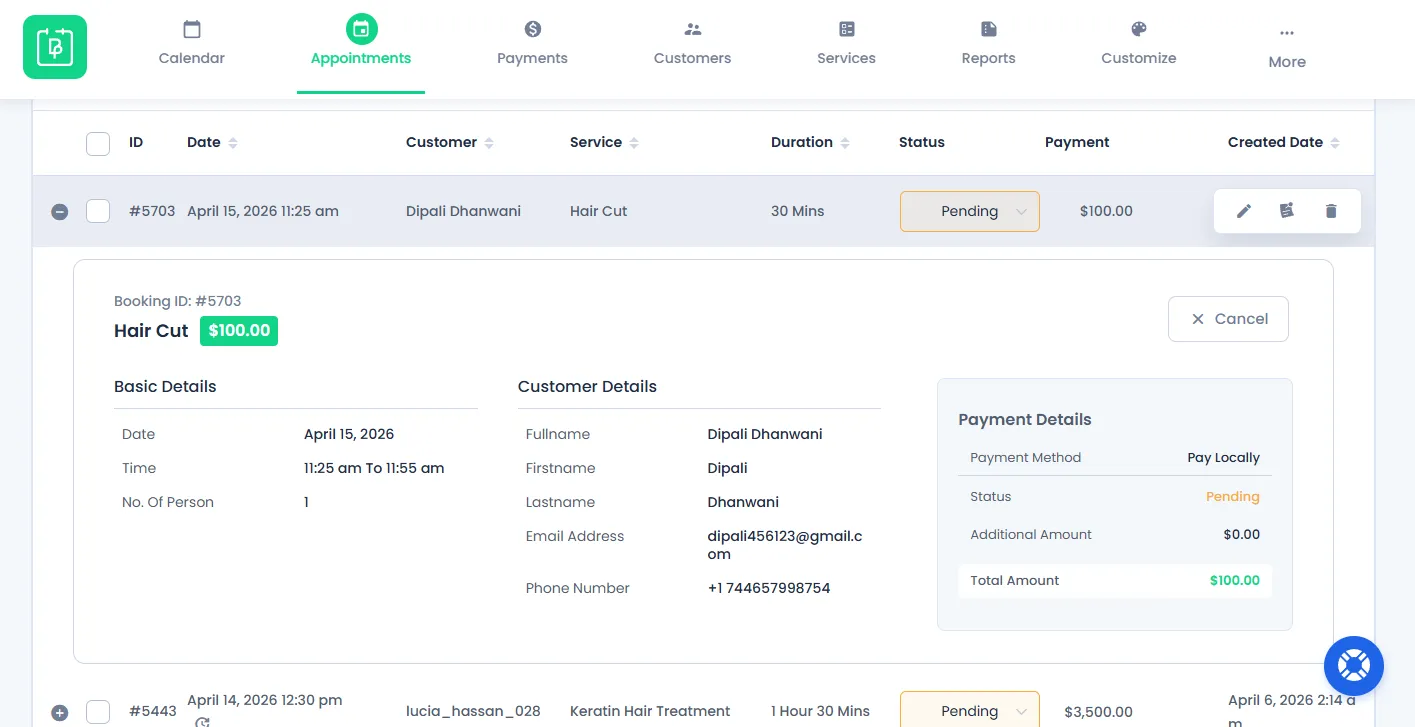
If you want more details, click on that appointment and you’ll see a section that gives you a centralized view of that selected appointment.
Edit or Update Appointment Details
You can easily manage any appointment by clicking on the Edit icon next to it.
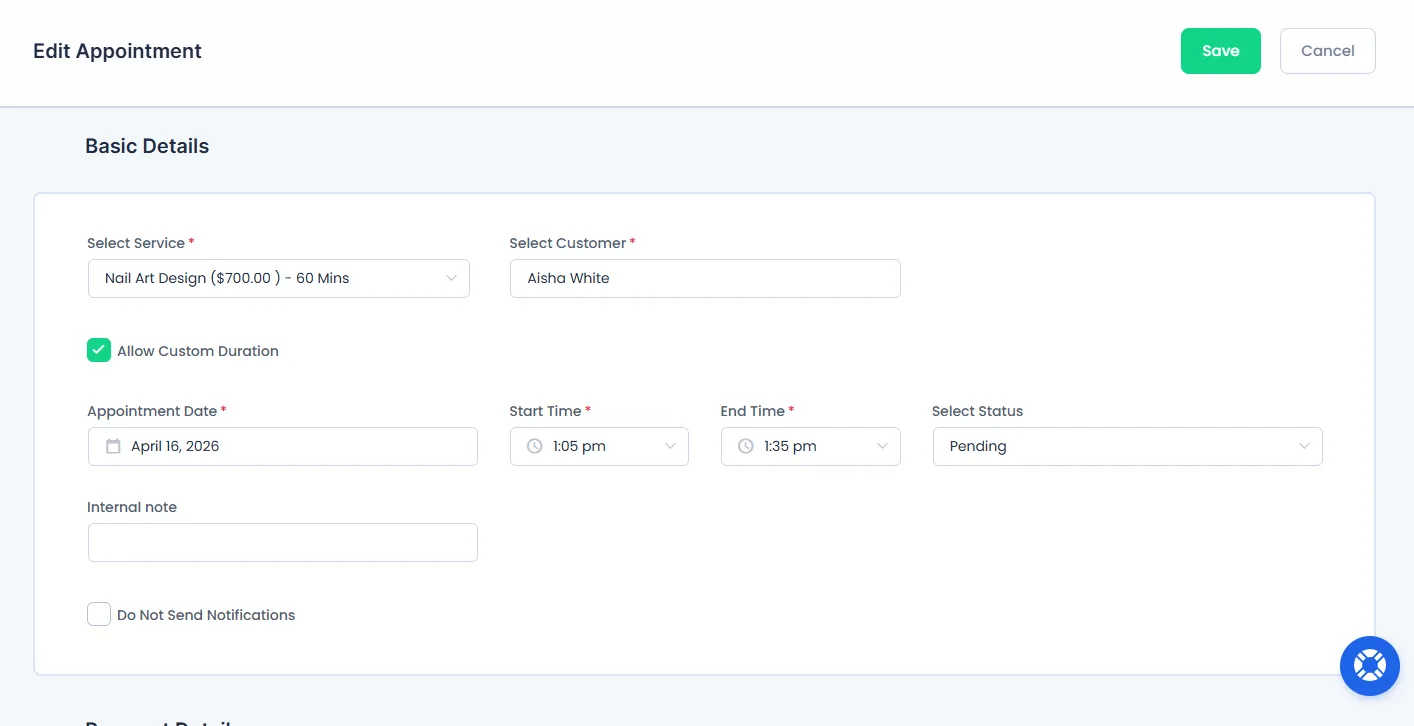
From here, you can:
- Update appointment details.
- Change the booking status.
- Modify customer or service information if needed.
After updating, the changes will be saved and shown in your appointment list.
How to Use the Calendar to Manage Your Schedule
BookingPress comes with a calendar view that helps you easily manage your appointments and stay organized by visualizing your full schedule in one place
View Bookings in Calendar Format
Go to the BookingPress → Calendar, and you’ll see your complete appointment schedule.
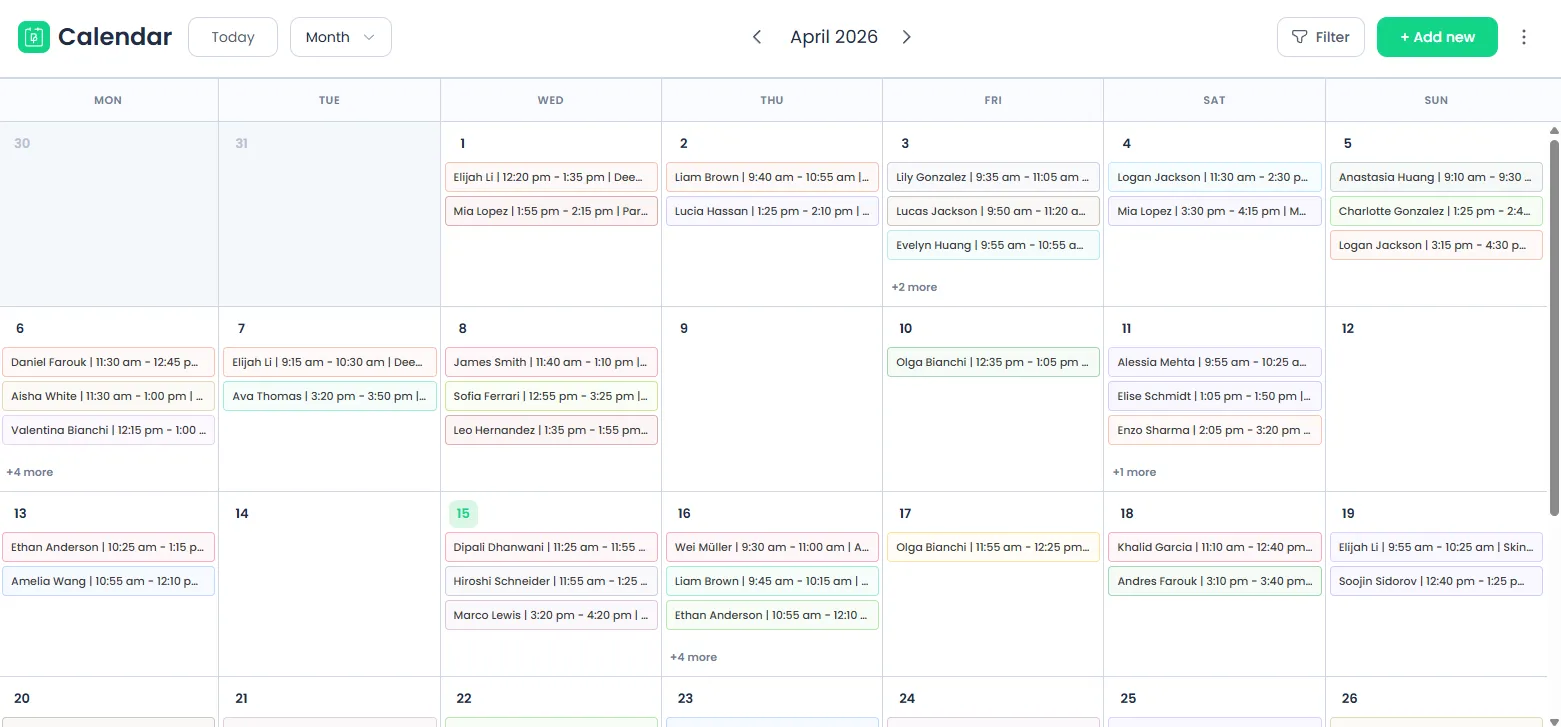
This calendar view allows you to:
- Filter all scheduled appointments by category, service and status.
- Switch between different views (daily, weekly, or monthly)
- Quickly identify upcoming and past bookings.
The calendar view gives you a clear overview of your schedule with no need to go through a list of appointments.
View, Edit, and Reschedule Appointments
From the calendar view, you can click on any appointment to access its full details. Plus, this allows you to:
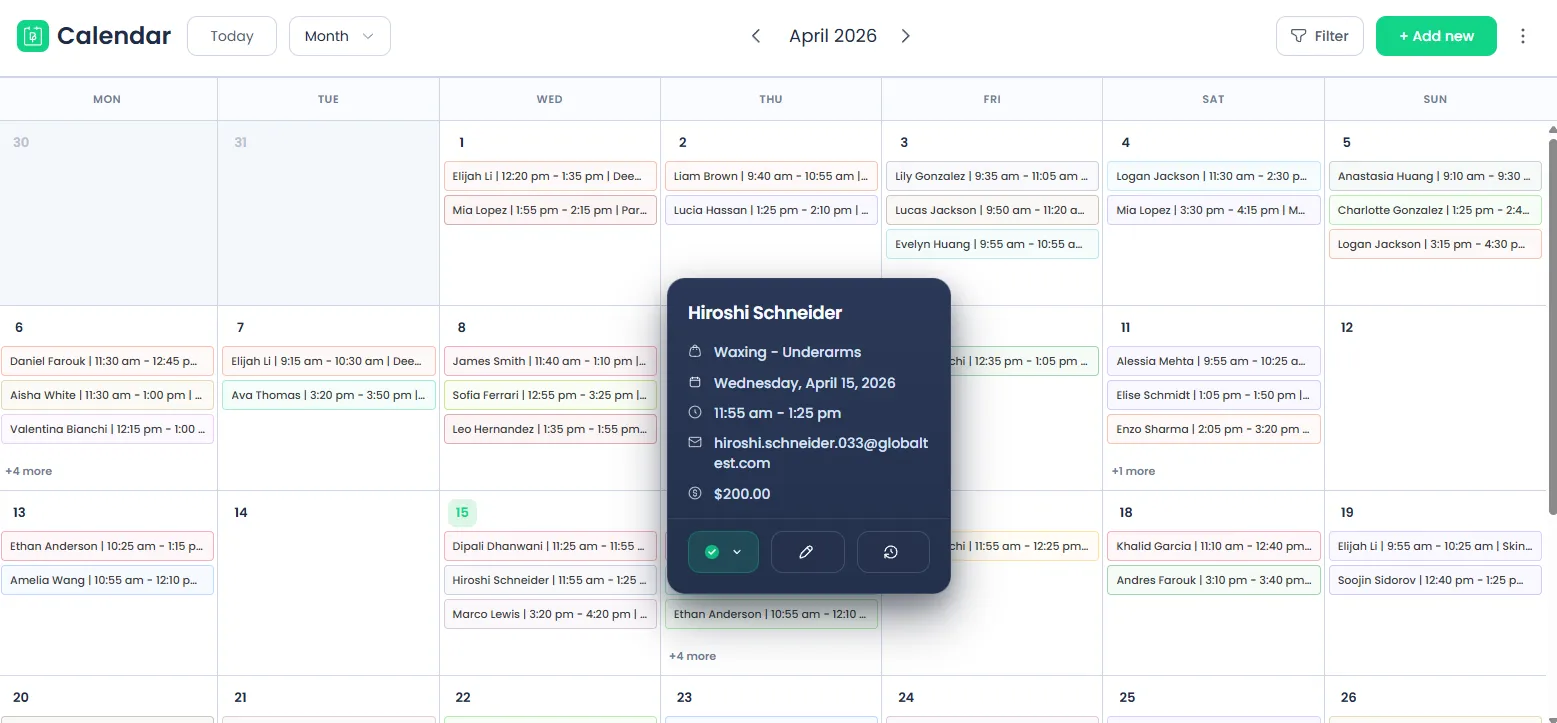
- View complete appointment information.
- Edit appointment details.
- Change appointment status.
- Reschedule the appointment to a different date or time.
Please Note: You can not edit or reschedule past or ongoing appointments.
This makes it easy to manage appointments directly from the calendar – no need to switch to in-between different sections.
How to Check and Manage Payments
BookingPress allows you to track and manage all payment-related details directly from your WordPress admin panel. It lets you stay updated on the payment status of each booking.
View Payment Status
To view the payment details, go to the BookingPress → Payments
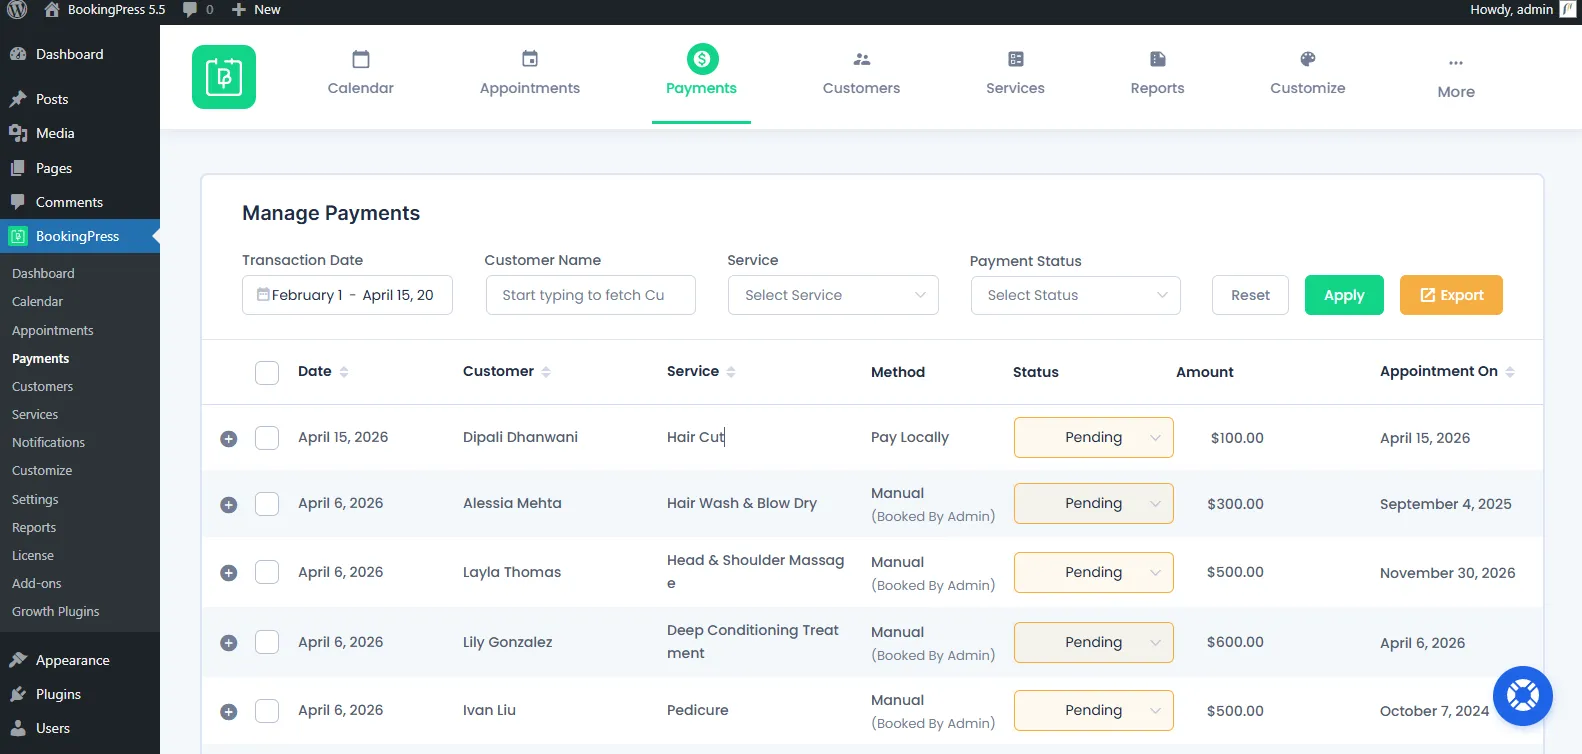
Here, you can see all:
- Payment status for each appointment.
- Transaction details.
- Customer and service details.
This helps you quickly identify which bookings are paid, pending, refunded, partially paid (deposit), Refunded (partial).
Understand Payment Flow
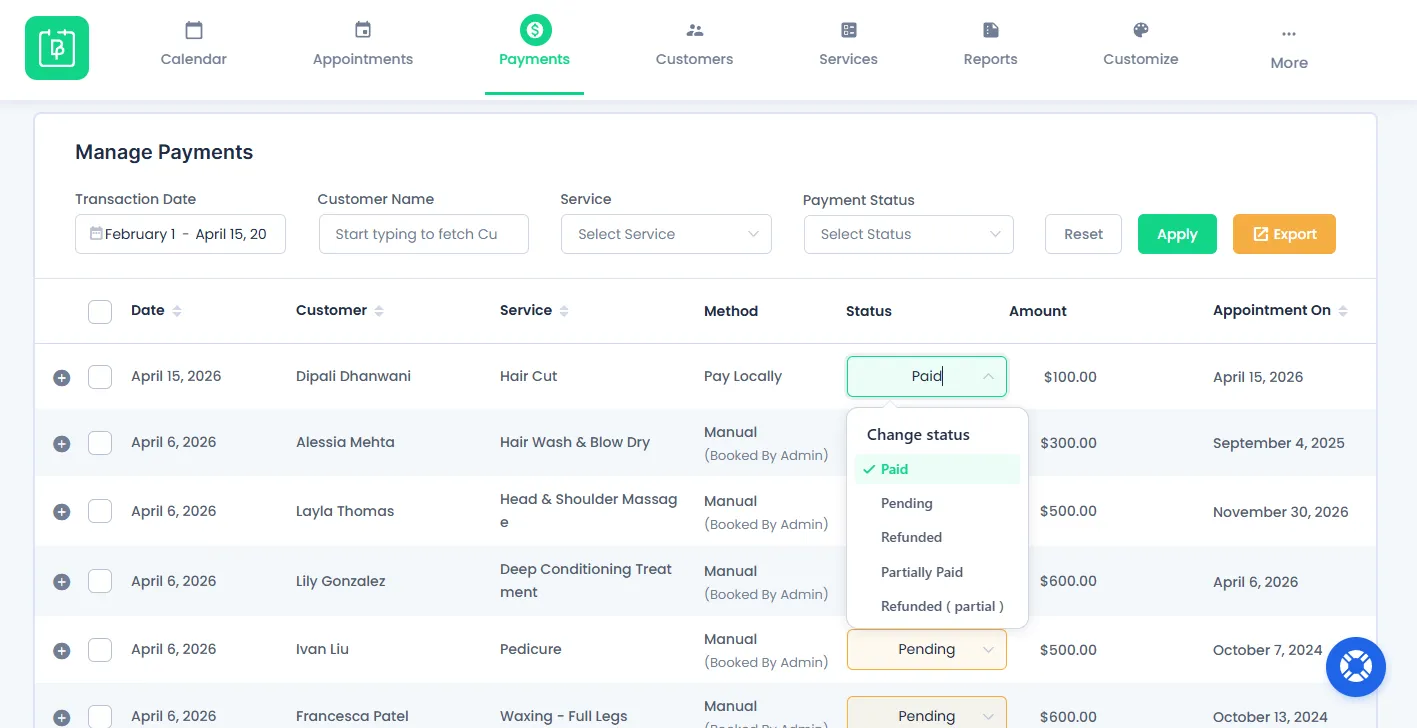
Each booking in BookingPress is assigned a payment status based on its transaction stage. Thus, here are the payment statuses in BookingPress that help you track payments more accurately:
- Paid: The full payment for the appointment has been successfully completed.
- Pending: The payment is still due.
- Refunded: The full payment has been returned to the customer
- Partially Paid (Deposit): A partial amount has been paid in advance with the remaining balance due later.
- Partially Refunded: Only a portion of the payment has been refunded to the customer.
These statuses give you clear visibility into each transaction and help you take the right action when managing bookings and payments.
How to View and Manage Customers
BookingPress allows you to manage all your customer information in one place, making it easy to maintain your client records.
Just go to the BookingPress → Customers.
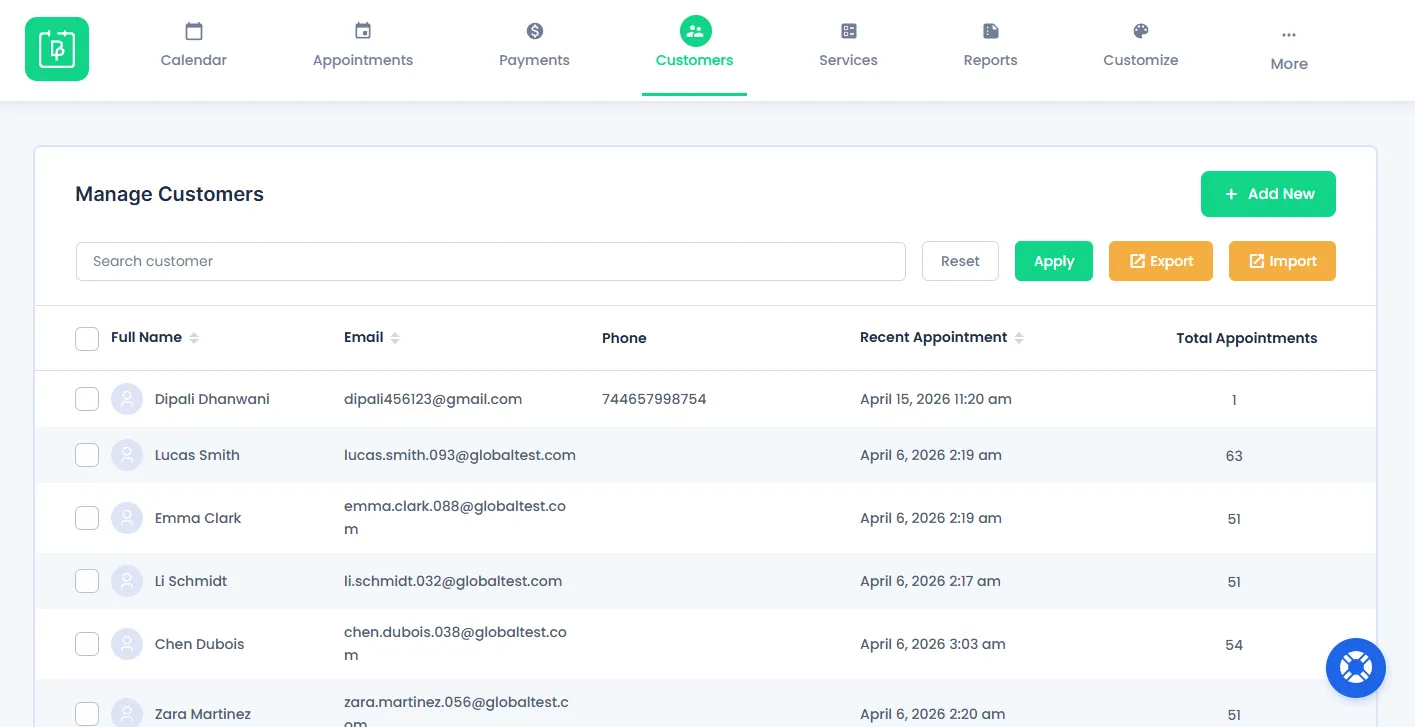
From here, you can easily view and manage your customer information. You can access customer details such as name, email, phone number, recent appointment date & time, and total appointments.
You can also edit any customer’s information by simply clicking on the “Edit” icon. BookingPress allows you to manually change their photo, username, full name, email and phone number.

Overall, this panel helps you better understand your customers and maintain your client record.
What to Do Next
Now that your BookingPress online booking system is set up and running, you can explore BookingPress additional modules to enhance your client’s appointment booking experience and streamline your workflow.
- Explore BookingPress Other Features
- Configure General settings to match your business requirements.
- Install and activate addons to extend features.
These next steps will help you get the most out of BookingPress and grow your business along with your booking system.
Need a hand?
Our world-class support team is happy to help. Send us a message and we’ll take it from there.