Setting Up BookingPress with the Setup Wizard
After installing and activating BookingPress, simply click on the BookingPress icon and you’ll be guided through the Booking Setup Wizard.
The Booking Setup Wizard easily lets you set up your BookingPress WordPress plugin in barely just a few minutes. From here, you can:
- Add your company’s information.
- Set up your website booking options.
- Add staff members. (Premium Version Only)
- Create your first bookable service.
- Customize your booking form styling.
- Prepare your booking system for accepting appointments.
You can always change these settings later from the BookingPress Settings panel.
Please Note: If you need help installing and activating BookingPress, check the BookingPress Installation and Activation Guide.
Your Site
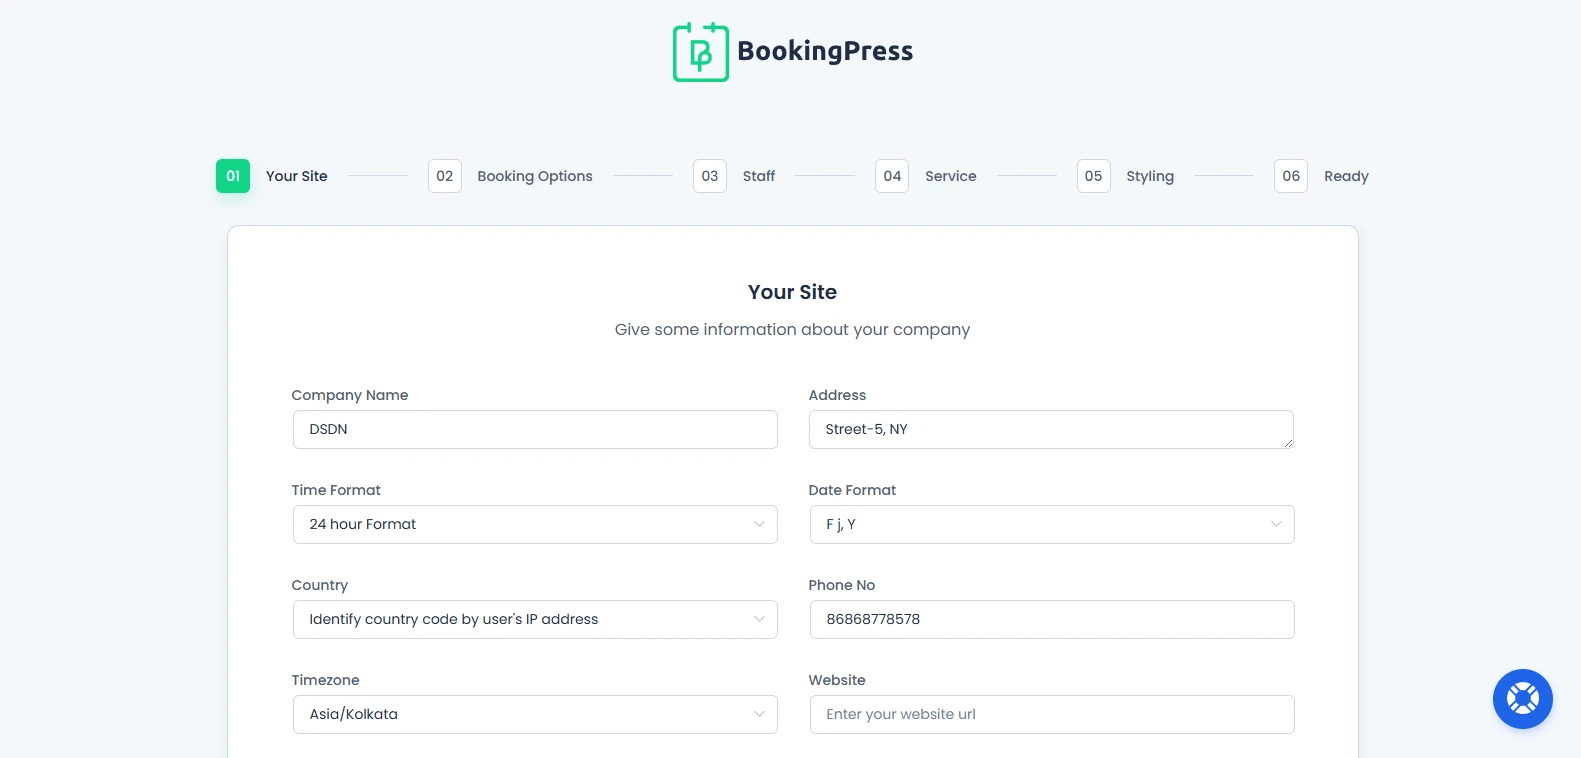
The “Your Site” section lets you add your basic business information for the booking system.
From here you can add your details about your company such as:
- Company Name: Add your company name here.
- Address: Add your company’s address.
- Time Format: Select your preferred time format, either be it “12 Hour Format” or “24 Hour Format”.
- Date Format: Here are the date formats available:
- F j, Y
- Y-m-d
- m/d/Y
- d/m/Y
- d.m.Y
- d-m-Y
- Country: Select your country from the dropdown list or choose the “Identify country code by user’s IP address”.
- Phone No: Add your phone number so customers can contact you with ease.
- Timezone: Select your Timezone as per your location or region.
- Website: Your company’s official website will be added here.
Furthermore, you get to add your Company Logo here as well to make sure it appears in your booking site, making your business seem more professional.
If your business has multiple staff members, simply select the “Yes” next to the “Do you have multiple staff?” option. This will allow you to manage appointments separately for different staff members.
You can also choose to share anonymous usage statistics to help improve BookingPress for you.
Once done, click on the “Next→” button to continue.
Note: Although we don’t recommend it, you can also skip the BookingPress Setup Wizard by clicking on the “Close and Exit Wizard Without Saving” option at the bottom of each step.
Booking Options
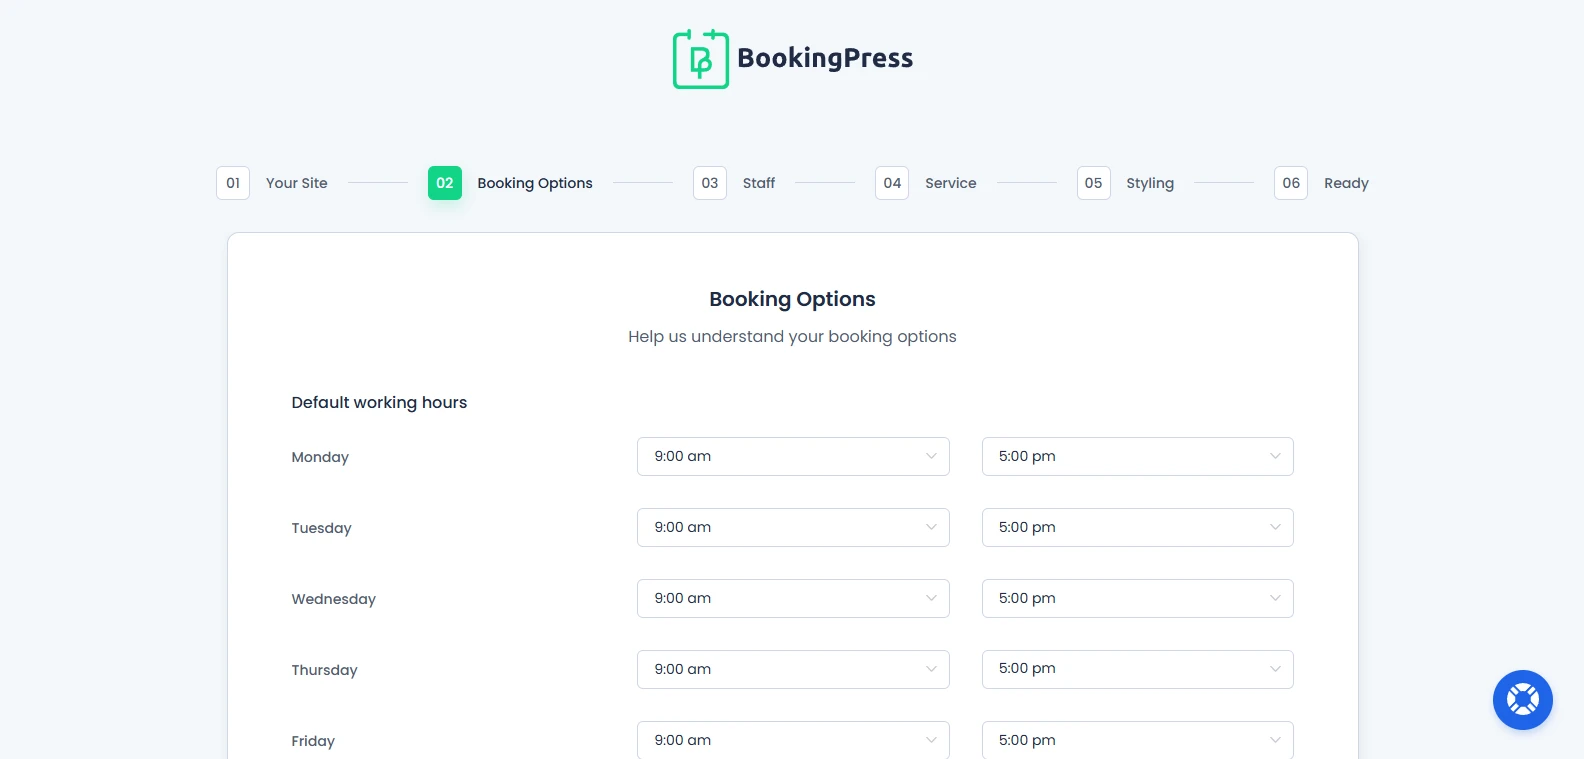
The “Booking Options” section lets you set the basic appointment and payment related settings for your booking system.
From here, you can easily:
- Set your business Default Working Hours.
- Configure your booking Currency.
- Enable Invoice Options for appointments.
- Enable Tax Option settings.
- Allow customers to use discount coupons during booking by toggling on “Allow Discount Coupon“.
The working hours you configure here will be used as the default availability for your booking system. You can always modify working hours later for services and staff members differently with the shift management.
Plus, you can also select the currency in which you’ll accept payment from the dropdown menu. After that, you can enable Invoice and Tax and Discount Coupon options as well with just a simple Toggle On.
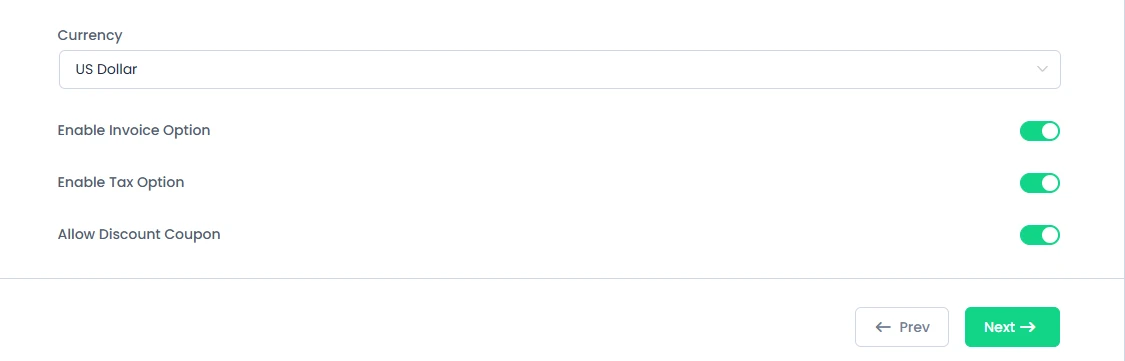
After you set your booking preferences, click on the “Next→” button to continue.
Note: If you want to make any changes in previous step, simply click on “←Prev” button at the end of the page.
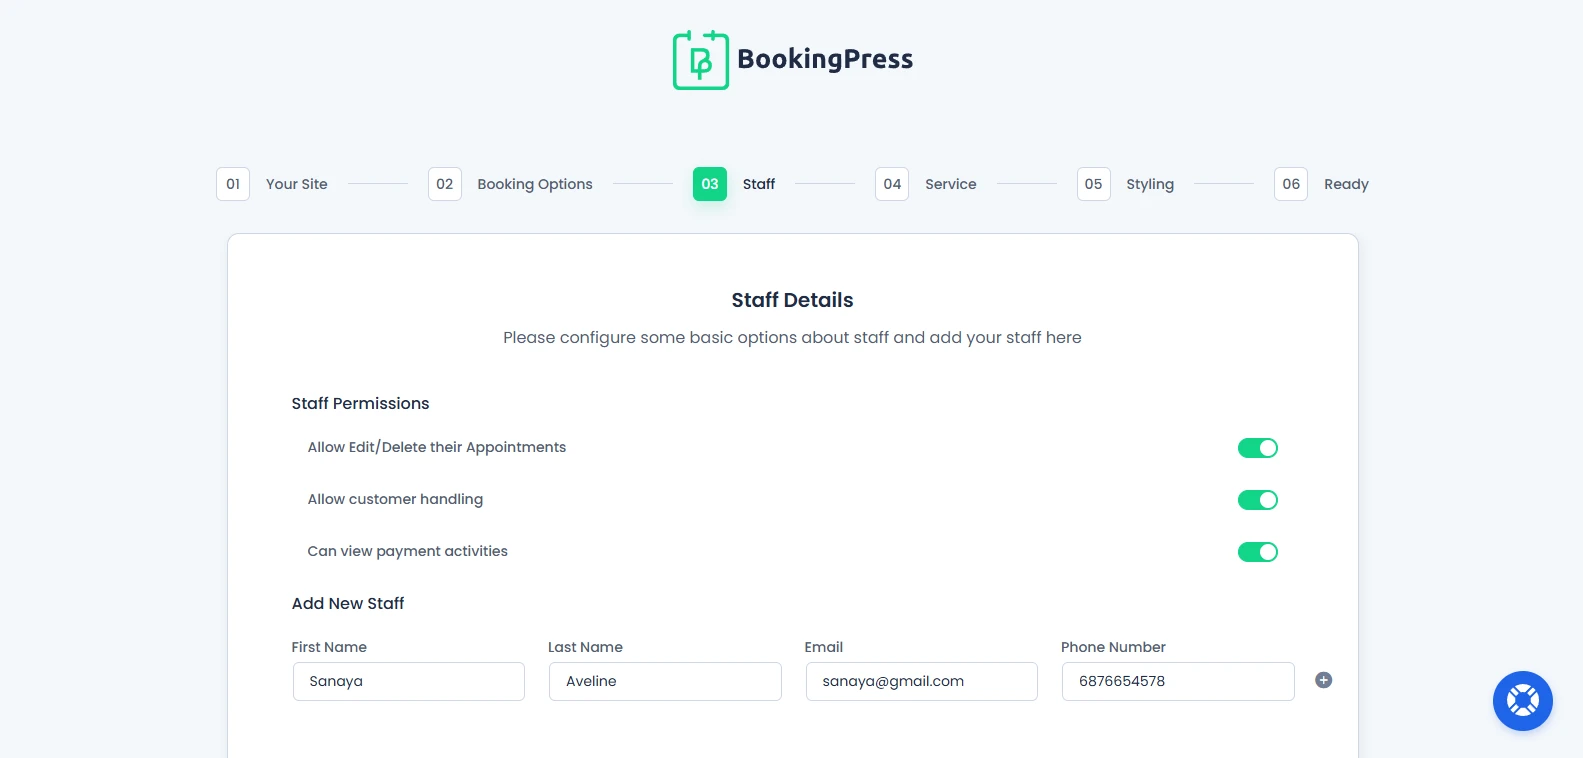
Staff
Note: The “Staff” section will be displayed only for BookingPress Premium versions.
From here, you can configure basic staff members permissions and add your staff members to the booking system.
The available staff permissions are:
- Allow staff members to edit or delete their appointments.
- Allow customer handling access.
- Allow staff members to view payment activities.
Next, you can Add New Staff member right from here by simply adding their:
- First name
- Last name
- Email address
- Phone number
You can click on the + icon to add options for adding multiple staff members as well.
After you add all your staff members, hit on the “Next→” button to continue.
Service
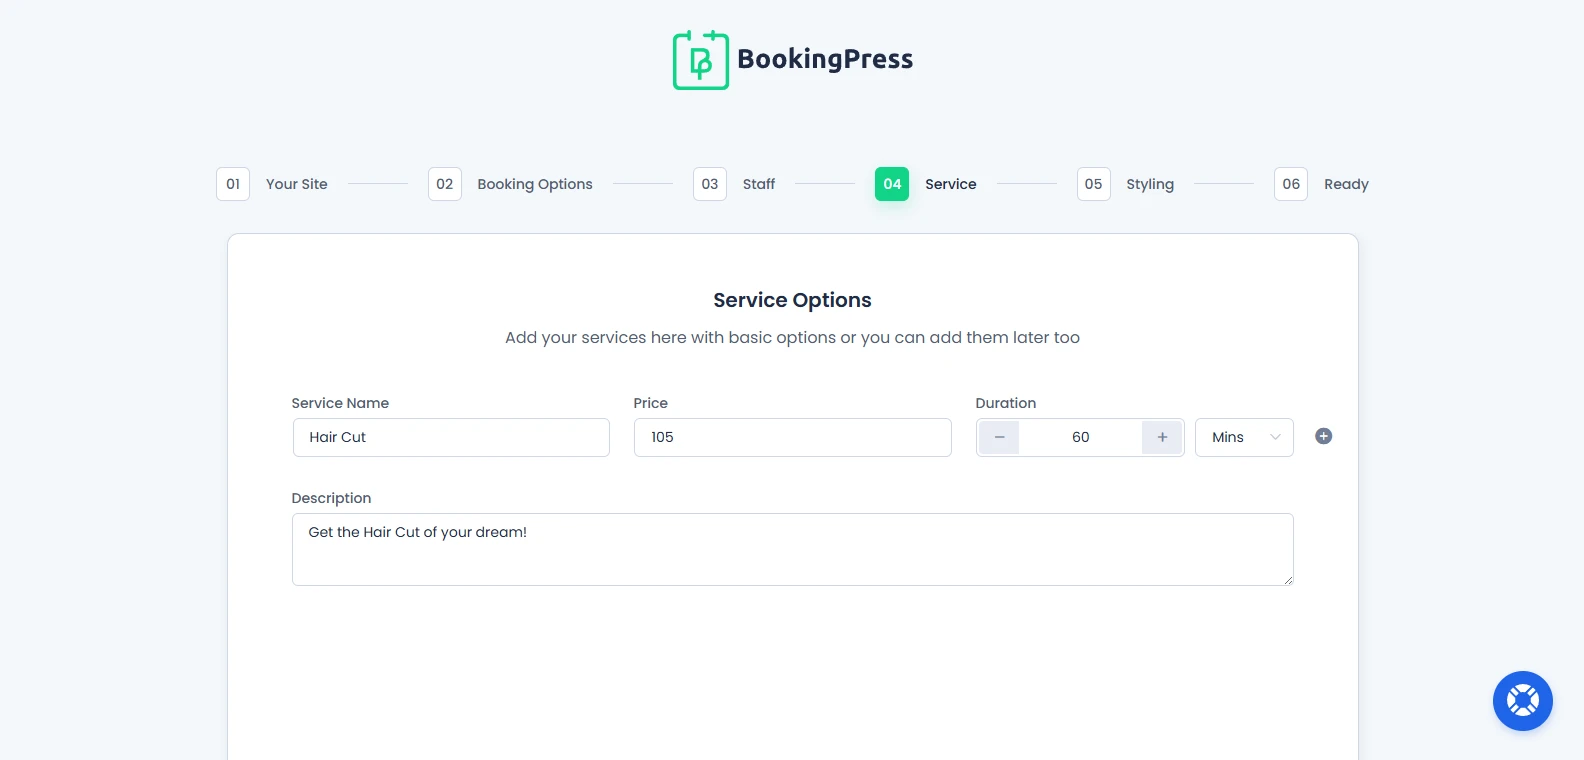
The “Service” section allows you to create your first bookable service in BookingPress. Here, you can add basic service details such as:
- Service name
- Service price
- Service duration (Mins/Hours)
- Service description
You can use the add icon to create multiple bookable services.
Don’t worry if you want to skip this for now. You can always add, edit or manage your services later from the Services page in BookingPress.
After you’ve added your services, click on the “Next→” button to continue.
Styling
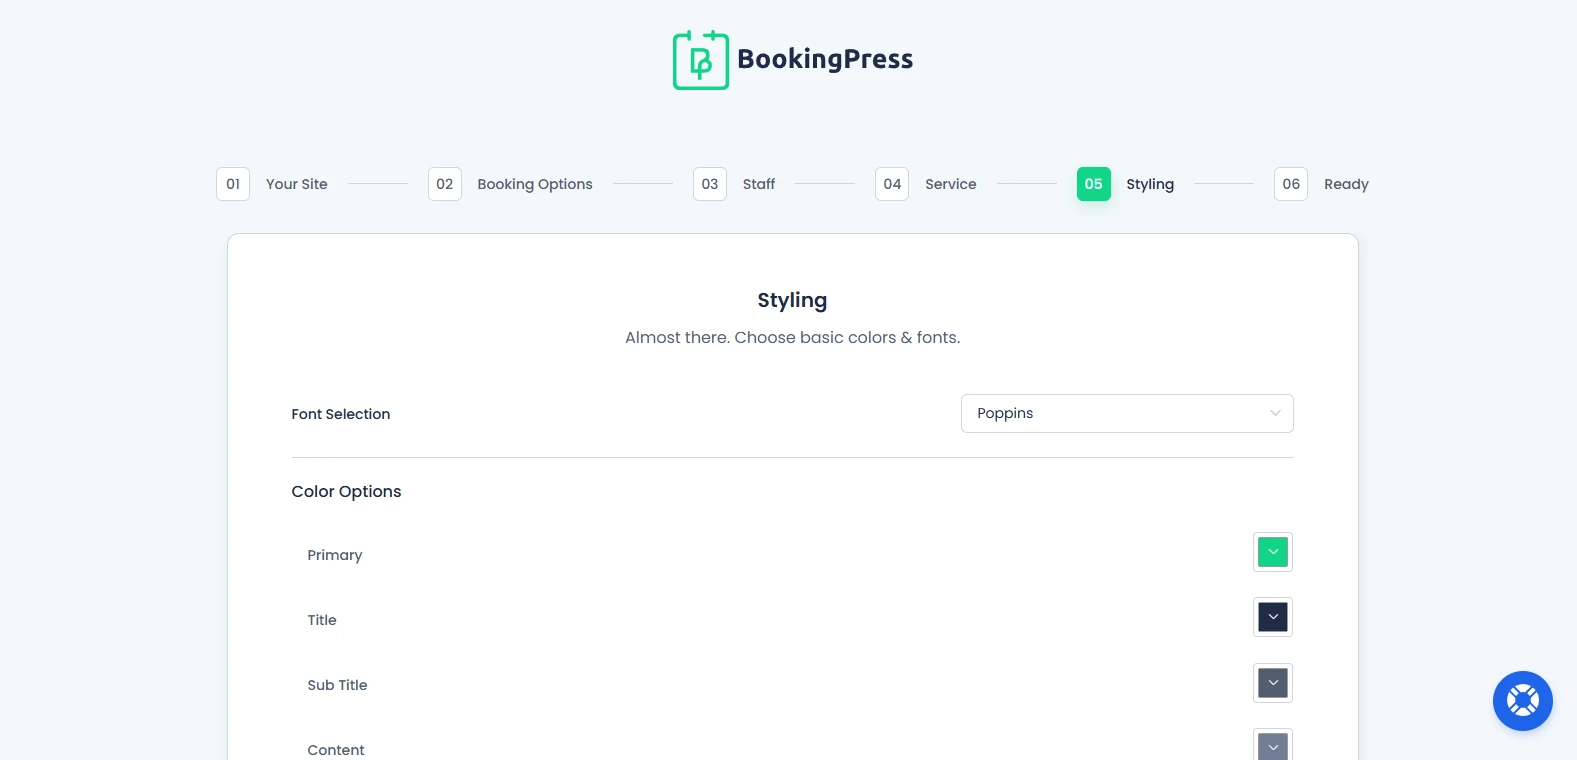
From here, you can customize the basic appearance of your booking form by:
- Selecting your preferred booking form font.
- Customize booking form colors.
- Primary
- Title
- Sub Title
- Content
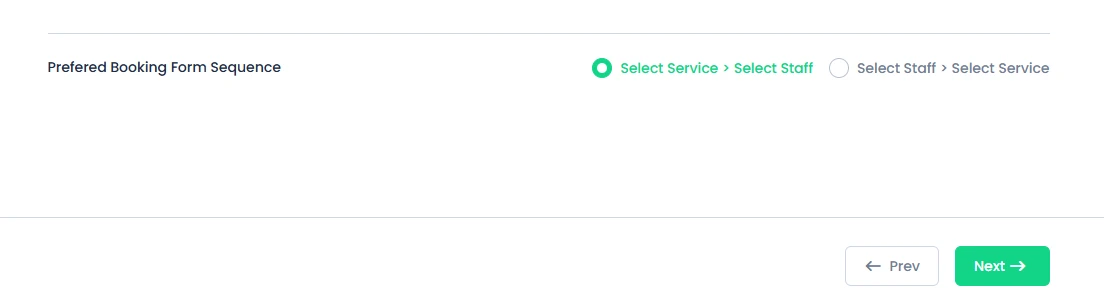
- Configure the preferred booking flow sequence.
BookingPress allows you to choose between the following booking form sequences:
- Select Service > Select Staff
- Select Staff > Select Service
This way you can control how customers move through the booking process on the frontend booking form.
Also, you can always customize your booking form styling later from the Customize page in BookingPress.
Once done, click on the “Next→” button to continue.
Ready
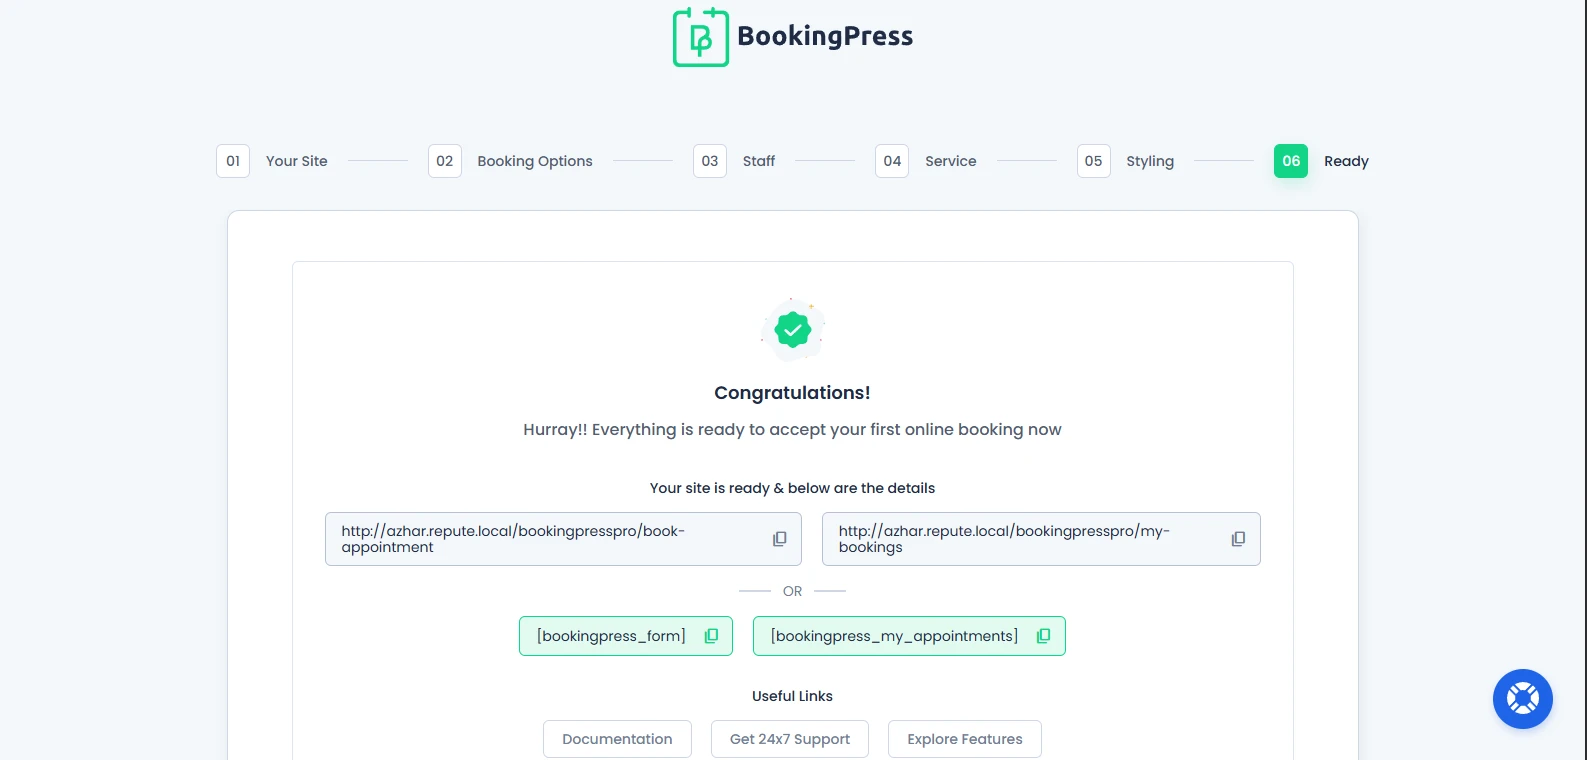
Congratulations! Your BookingPress setup is now complete, and it barely took more than 5 minutes.
Now your online booking system is ready to accept appointments.
From this section, you’ll get your:
- Booking page URL.
- Customer front-end panel URL.
- BookingPress shortcodes for embedding booking form and customer panel anywhere on your website.
The available shortcodes include:
[bookingpress_form][bookingpress_my_appointments]
You can copy and use these shortcodes inside any page, post, or widget area on your WordPress website. You’ll also find some useful links and recommended tools to further customize and enhance your booking experience.
If needed, you can always update your booking settings later from the BookingPress Setting panel.
Lastly, click on the “Finish” button and you’ll be redirected to the BookingPress Dashboard from where you can monitor your entire service business data.
Need a hand?
Our world-class support team is happy to help. Send us a message and we’ll take it from there.