How BookingPress Availability Works (And How to Avoid Conflicts)
Availability setup is the foundation of your BookingPress scheduling system; you always start with it. Today, we want to make sure you understand how the plugin works and how everything connects!
Let’s talk about how to…
- Set up the global schedule.
- Add individual staff schedules only when needed.
- Use locations and service availability rules only if your business requires them.
- Create general timeslot rules.
BookingPress is designed so you can begin with a basic setup and go deeper when you need more complex rules. Details below.
Staff scheduling: Set availability for every person
Setting up staff availability is one of the first (and most important) steps when customizing BookingPress for any working hours/shifts scenario.
It works well for one-person business, a team, and even a multi-branch organization.
At a high level, BookingPress availability works in various availability configurations:
- A global schedule that applies to everyone by default (general settings – okay for a solo business).
- Optional individual schedules that override the global one (for multiple people).
- Optional location and service-based rules for advanced setups.
Let’s set up your availability with BookingPress to help you have correct timeslots and avoid any booking conflicts.
Step 1: Create your global schedule
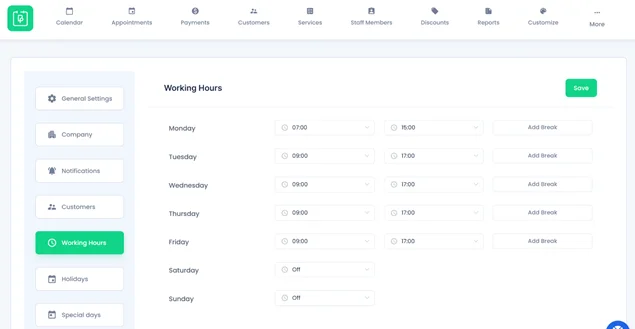
In the General Settings > Working Hours, you can set the simplest default working timetable that will apply to the entire schedule. This is ‘how the business operates unless you add extra rules’.
This menu lets you set working days and hours (set start/end time or mark a day as OFF), weekends (open or closed), and breaks (add multiple breaks per day if needed).
It applies to all staff members who don’t have a custom schedule. If you need to block time (make unavailable), use the Holidays menu:

- One-time (e.g. a specific date).
- Repeating yearly (e.g. public holidays).
- Special days (events, inventory, seasonal changes).
It’s nice to have the global schedule first, even if you plan to customize staff later.
Step 2: Customize availability for individual staff members
To setup this, go to BookingPress > Staff Members > Select a staff member > hover over it > Shift Management.
Individual schedules are optional but really useful. They allow you to override the global schedule and create an individual schedule for specific people.
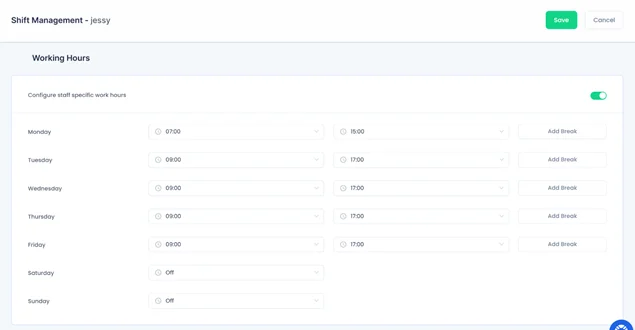
In the Shift Management menu, you can
- Enable “Configure staff specific work hours.”
- Set daily working hours, breaks and days off. (just like the global schedule but applies only to that staff member).
It’s also easy to:
- Create personal holidays (one-time or recurring).
- Define special days just for that staff member.
- Choose which services a special day applies to.
This fits any part-time workflows, holiday workers, etc. Remember, individual schedules take priority over the global one.
Optional: Let the same staff work in multiple locations
If your business operates in more than one location, BookingPress allows the same staff member to work across multiple locations with different availability.
To change availability this way, you need to enable the Locations add-on and assign locations to a staff member. Then go to Settings > General Settings > Enable “Staff members can serve in multiple locations”.

First, assign locations via Staff Members > Edit Staff Member > Assigned Services.
For each service:
- Select all locations where this staff member can provide it.
- Save changes.

In this menu, at a glance, you can see which services are offered by that person at each location.
To set location-specific hours for an individual person, go to Staff Members > Shift Management > Select a location from the dropdown > Set working hours and special working rules via Special days.
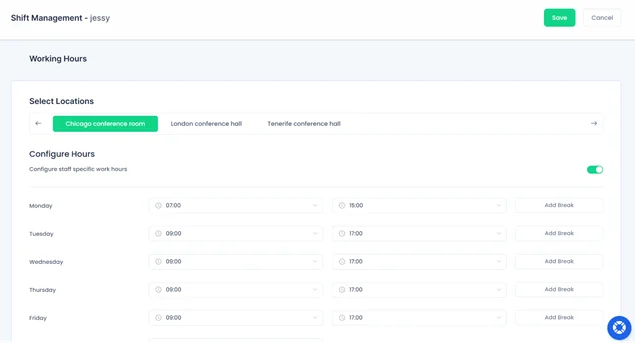
Now, one staff member can have:
- Morning shifts in Location A.
- Evening shifts in Location B.
Different service availability per location
You can also control when services are available, independently of staff: go to BookingPress > Services > Shift Management.
For each service, just like for staff members, you can choose a location and set working hours and special days.
This is essential when locations differ in opening hours, equipment, staff skills, etc.
How are time slots managed?
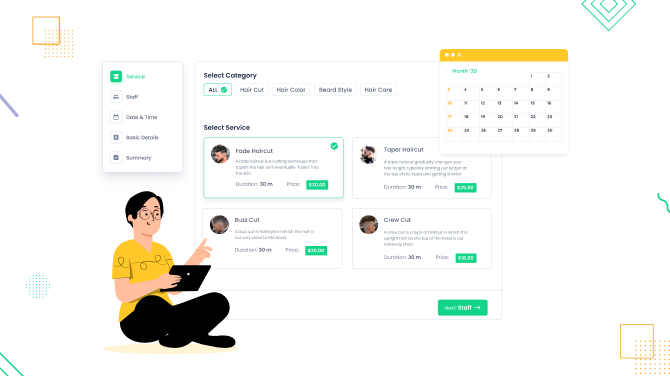
After defining when your business, staff, and locations are available, the next step is deciding how that time is divided into bookable slots, especially when your customers open a booking form on your site.
Time slots are the bridge between:
- Staff availability.
- Service duration.
- Location working hours.
- What customers see in the booking form.
BookingPress calculates available appointments by combining all three: if a staff member is working, a service is available, and the location is open, only then can a time slot appear.
Global / default time slot rules in BookingPress
Once again, you have some global settings for timeslots – that can be altered at lower levels: BookingPress > Settings > General Settings > find many timeslot-related settings.
These settings define the default logic BookingPress uses when creating bookable time slots.
When setting up ‘Default Service Duration’, it defines the default length of new services you create. If set to 15 minutes, every new service will automatically be created as a 15 minute service.
This works as a starting template.
Next, the ‘Default Time Slot Step’ controls how often bookings can start. BookingPress divides working hours into equal steps based on this value. For example:
If the time slot step is 10 minutes, bookings can start at:
- 9:00
- 9:10
- 9:20
Even if a service lasts 30 minutes, it can still start every 10 minutes, unless you restrict it further. This setting affects:
- Staff schedules.
- Location working hours.
- All services (unless overridden).
If you want to tie time slots directly to service length, enable the ‘Show Time as Per Service Duration’ option in this menu. If enabled, a 30-minute service is displayed like: 9:00, 9:30, 10:00. Services of other lengths will show respective timeslots.
Then BookingPress divides working hours exactly by the service duration, not by a generic step. This is awesome when services must start back-to-back, or you want a predictable schedule.
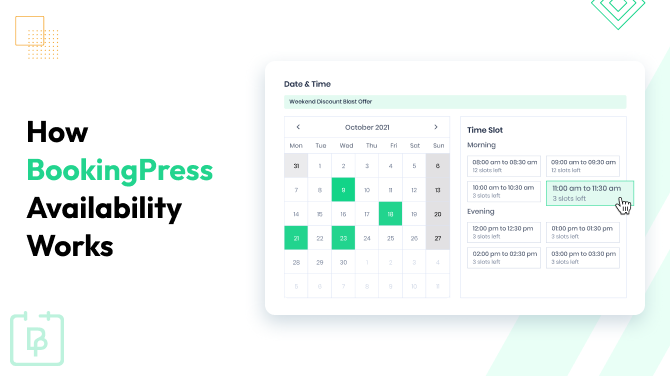
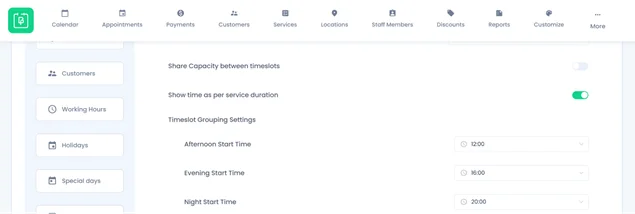
Time slot grouping (Morning, Afternoon, Evening)

Using this toggle, you can control how time slots are visually grouped in the booking form. It lets you easily set afternoon starts, evening starts, and night starts. For instance, if evening starts at 4:00 PM, all time slots after that will appear under “Evening”.
However, grouping is visual only – it does not affect availability or booking logic.
Moreover, if you turn on ‘Show booking-slots in client timezone’, this will also affect how clients see timeslots (in their timezone). This is a cool feature for virtual appointments.
BookingPress does not create time slots blindly. For a slot to appear, all conditions must be true:
- The location (if any) is open.
- The service is available at that location.
- The staff member is working at that time.
- The service duration fits fully into the available time.
Multi-service bookings (back-to-back appointments)
If you use the Multi-Service add-on, time slot logic becomes smarter. When a client selects multiple services, BookingPress adds up their durations to build one continuous appointment. In this case, it schedules services back-to-back automatically.
For example:
- Service A: 30 minutes
- Service B: 45 minutes
- Total appointment: 75 minutes
Share timeslots between services
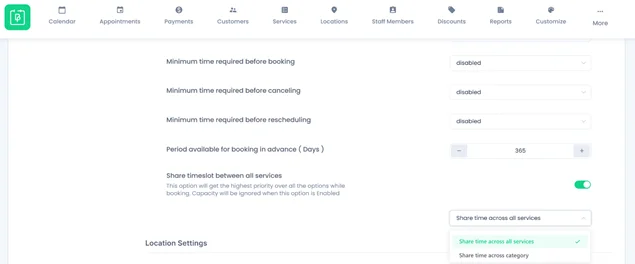
You may also enable this in General Settings > Appointment settings > ‘Share timeslots between services’. This works if you want a booking of a time slot for one service to block that same time for other services.
This is useful if one staff member handles all services and can only do one appointment at a time.
You can also limit this to a service category, so time is only shared between services within the same category, not across all services.
What customers see
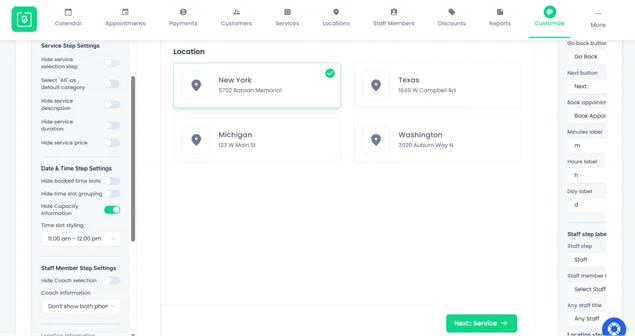
You can control how timeslots appear in the booking form using the Booking Form Display Settings: BookingPress > Customize > Form > Date & Time Step.
These settings do not change availability logic but help you set up how it’s presented:
- Hide booked time slots (removes already-booked slots from the list).
- Hide time slot grouping (removes Morning / Afternoon / Evening labels).
- Hide Capacity Information (hide how many spots are left).
- Time slot styling (how time slots look (layout and format).
Let’s Conclude
Overall, using availability settings in BookingPress, you can decide when booking is possible. Service duration decides how long the appointment lasts and time slot settings define when appointments can start. You have the flexibility to use staff, service, and location rules to filter out invalid times and cover many more real-life availability scenarios.
A combination of extra BookingPress add-ons you might use on your WordPress site always has some rules of priority, so make sure to check out the docs for more info.
Related articles:


Brian is a WordPress expert with a decade of developing experience & technical-writing. He enjoys blogging, movies & hiking.

Get BookingPress Premium
60+ Premium Addons
20+ Payment Gateways
Plan starts at just $89
Get Premium NowLike our insights? Click the badge to add BookingPress as your preferred source on Google.

Add as a Preferred
Source on Google