How to Manage Appointment for Multiple Business Locations

If you own a multi-location business and are looking to integrate appointment scheduling software with your WordPress website, this post is for you.
We will show you how to add multiple locations and how to create individual schedules for every service and employee based on the location.
So let’s get things moving without further ado.
To follow our tutorial on how to manage appointments for business having multiple locations, the following things are required:
- A WordPress theme installed on your hosting (costs vary based on the hosting and theme). Here is our list of the best small business WordPress themes in 2023 if you are still in the search.
- The BookingPress booking plugin ($119/year).
- The Location add-on for BookingPress (free with the above-mentioned plan of BookingPress).
If you are not familiar with the BookingPress plugin, you should know that it’s a breeze to launch it with your preferences thanks to the built-in installation wizard.
Thanks to the step-by-step workflow it provides, you’ll save a ton of time and will get going in minutes with the services, employees, and schedule already set up.
First, you need to install, activate, and pre-configure the BookingPress plugin (all the information on the key elements must be added to the plugin for proper work).
Here is a bird’s-eye view of the configuration process.
- Add staff members, and allow everyone to manage their bookings.
- Add services and set up their duration and cost.
- Configure appointment scheduling settings.
- Set up payment methods, emails, and more.
- Upload and turn on extra add-ons for invoices, deposits, coupons, and more.
Now you can start working with the Location add-on to add multiple departments, salons, shops, etc.
Before you begin, note that the timezone settings for the locations are fetched from your WordPress. You can find it under Admin Panel > Settings.
Go to the Add-ons menu, find the Location add-on, and click ‘Activate’ (we’re assuming you’ve downloaded it in your BookingPress account and installed it on WordPress).
You’ll notice the new ‘Location’ menu right on the main dashboard of your BookingPress plugin.
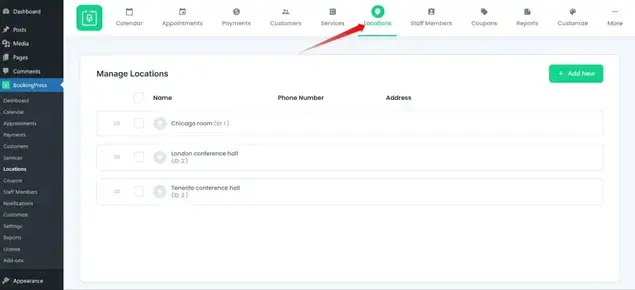
You should click ‘Add new’ to add every new location.
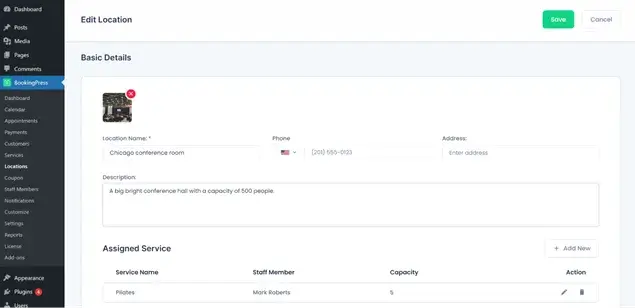
In the location settings, your options include:
- Upload an image (will be shown in the booking widget).
- Add a location name.
- Add a location phone number.
- Add an address.
- Add a text description.
- Assign services that are provided at this location.
You can now create different schedules for different services based on their location.
This means that you can set different working hours, breaks, and availability for each service, depending on where it is being offered.
For example, you could have a different schedule for massage therapy in your downtown office than you do for massage therapy in your suburban spa.
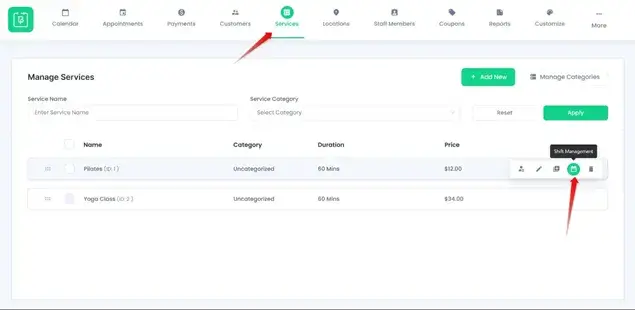
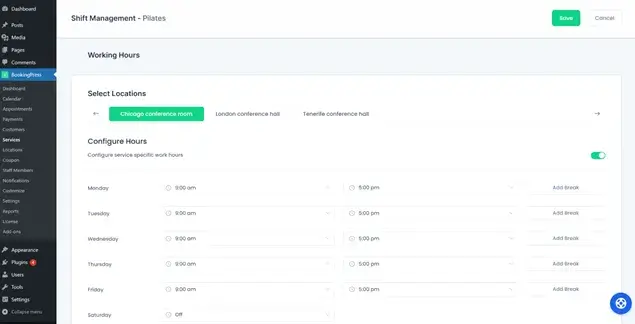
Go to Services > click ‘Shift management’ > enable ‘Configure hours’ > set a schedule. You can add regular working hours and breaks.
In this menu, you will see the location switcher that allows you to toggle between locations and create individual schedules for everyone.
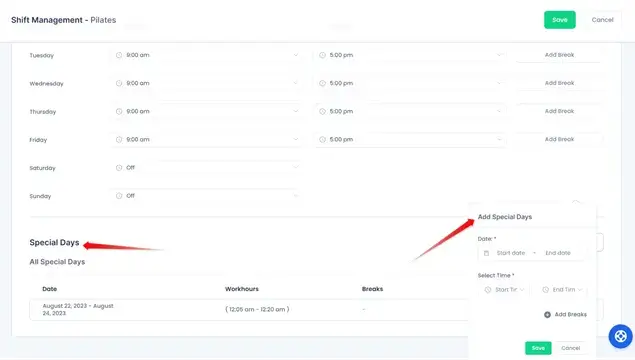
Note that you can also add a ‘special day’ schedule that will be different from the main one: it can be added with different working hours and breaks.
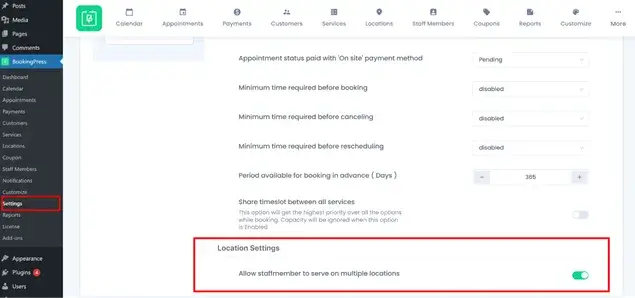
Furthermore, you can also make changes to the individual staff working hours based on the location.
Go to Settings > General settings > scroll to ‘Allow staff member to serve on multiple locations’ option and enable it > Save the changes. This will allow you to create an individual schedule per the staff member/per location.
For this, you simply need to go to the shift management settings but from the Staff Members menu.
To decide when the location selection step must appear in the booking form, go to BookingPress > Customize > Forms > Booking form sequence > drag and drop the fields into the needed order.
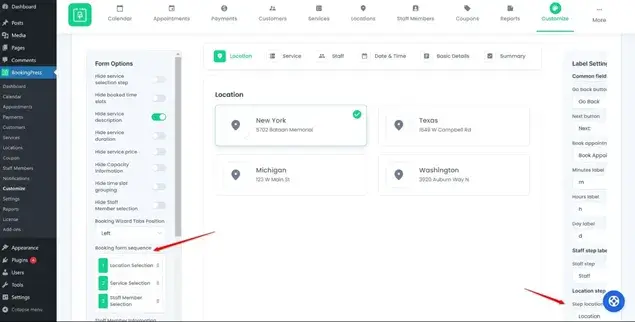
Customers are now able to choose a location on your site when requesting a booking.
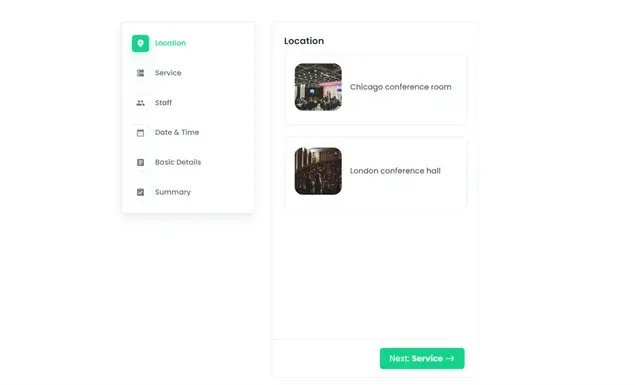
Note that if you have both the Cart Add-on and Location Addon activated, the Location step in the booking form will be hidden from the customer once they have selected a location, service, and staff member. The service and staff members will then be displayed as per the availability of the location that was selected.
Overall, you can see that by integrating the Location add-on for BookingPress, you won’t just be able to serve your clients in different locations, but will also introduce more schedule and workflow flexibility to your entire team!
If you enjoyed reading this article, you should check out these:


Brian is a WordPress expert with a decade of developing experience & technical-writing. He enjoys blogging, movies & hiking.

Get BookingPress Premium
60+ Premium Addons
21+ Payment Gateways
Plan starts at just $89
Get Premium NowLike our insights? Click the badge to add BookingPress as your preferred source on Google.

Add as a Preferred
Source on Google