n8n Integration Addon
To get and Activate n8n Integration, please follow the below steps.
- First, login to the BookingPress Website, and you will be redirected to the My Account page.
- Now, click on the “Access Passes” link from the left menu panel.
- After going to the Access Passes, click on the “View your downloads” button.
- From the list, please look for the “Make.com Integration” add-on, click on the download button, and it will automatically start downloading the addon. After the download is finished, upload the downloaded zip file to WordPress just link any other WordPress Plugin, then install and activate the addon to use it.
The n8n Integration Addon allows you to seamlessly connect BookingPress with thousands of third-party applications such as Google Sheets, Slack, Trello, Gmail, and many more.
Using n8n webhooks, you can automatically send appointment, customer, and payment data from BookingPress to other platforms whenever specific events occur – such as when an appointment is created, updated, or canceled.
Once activated you can configure the same in BookingPress > Settings > Integrations > n8n Integration
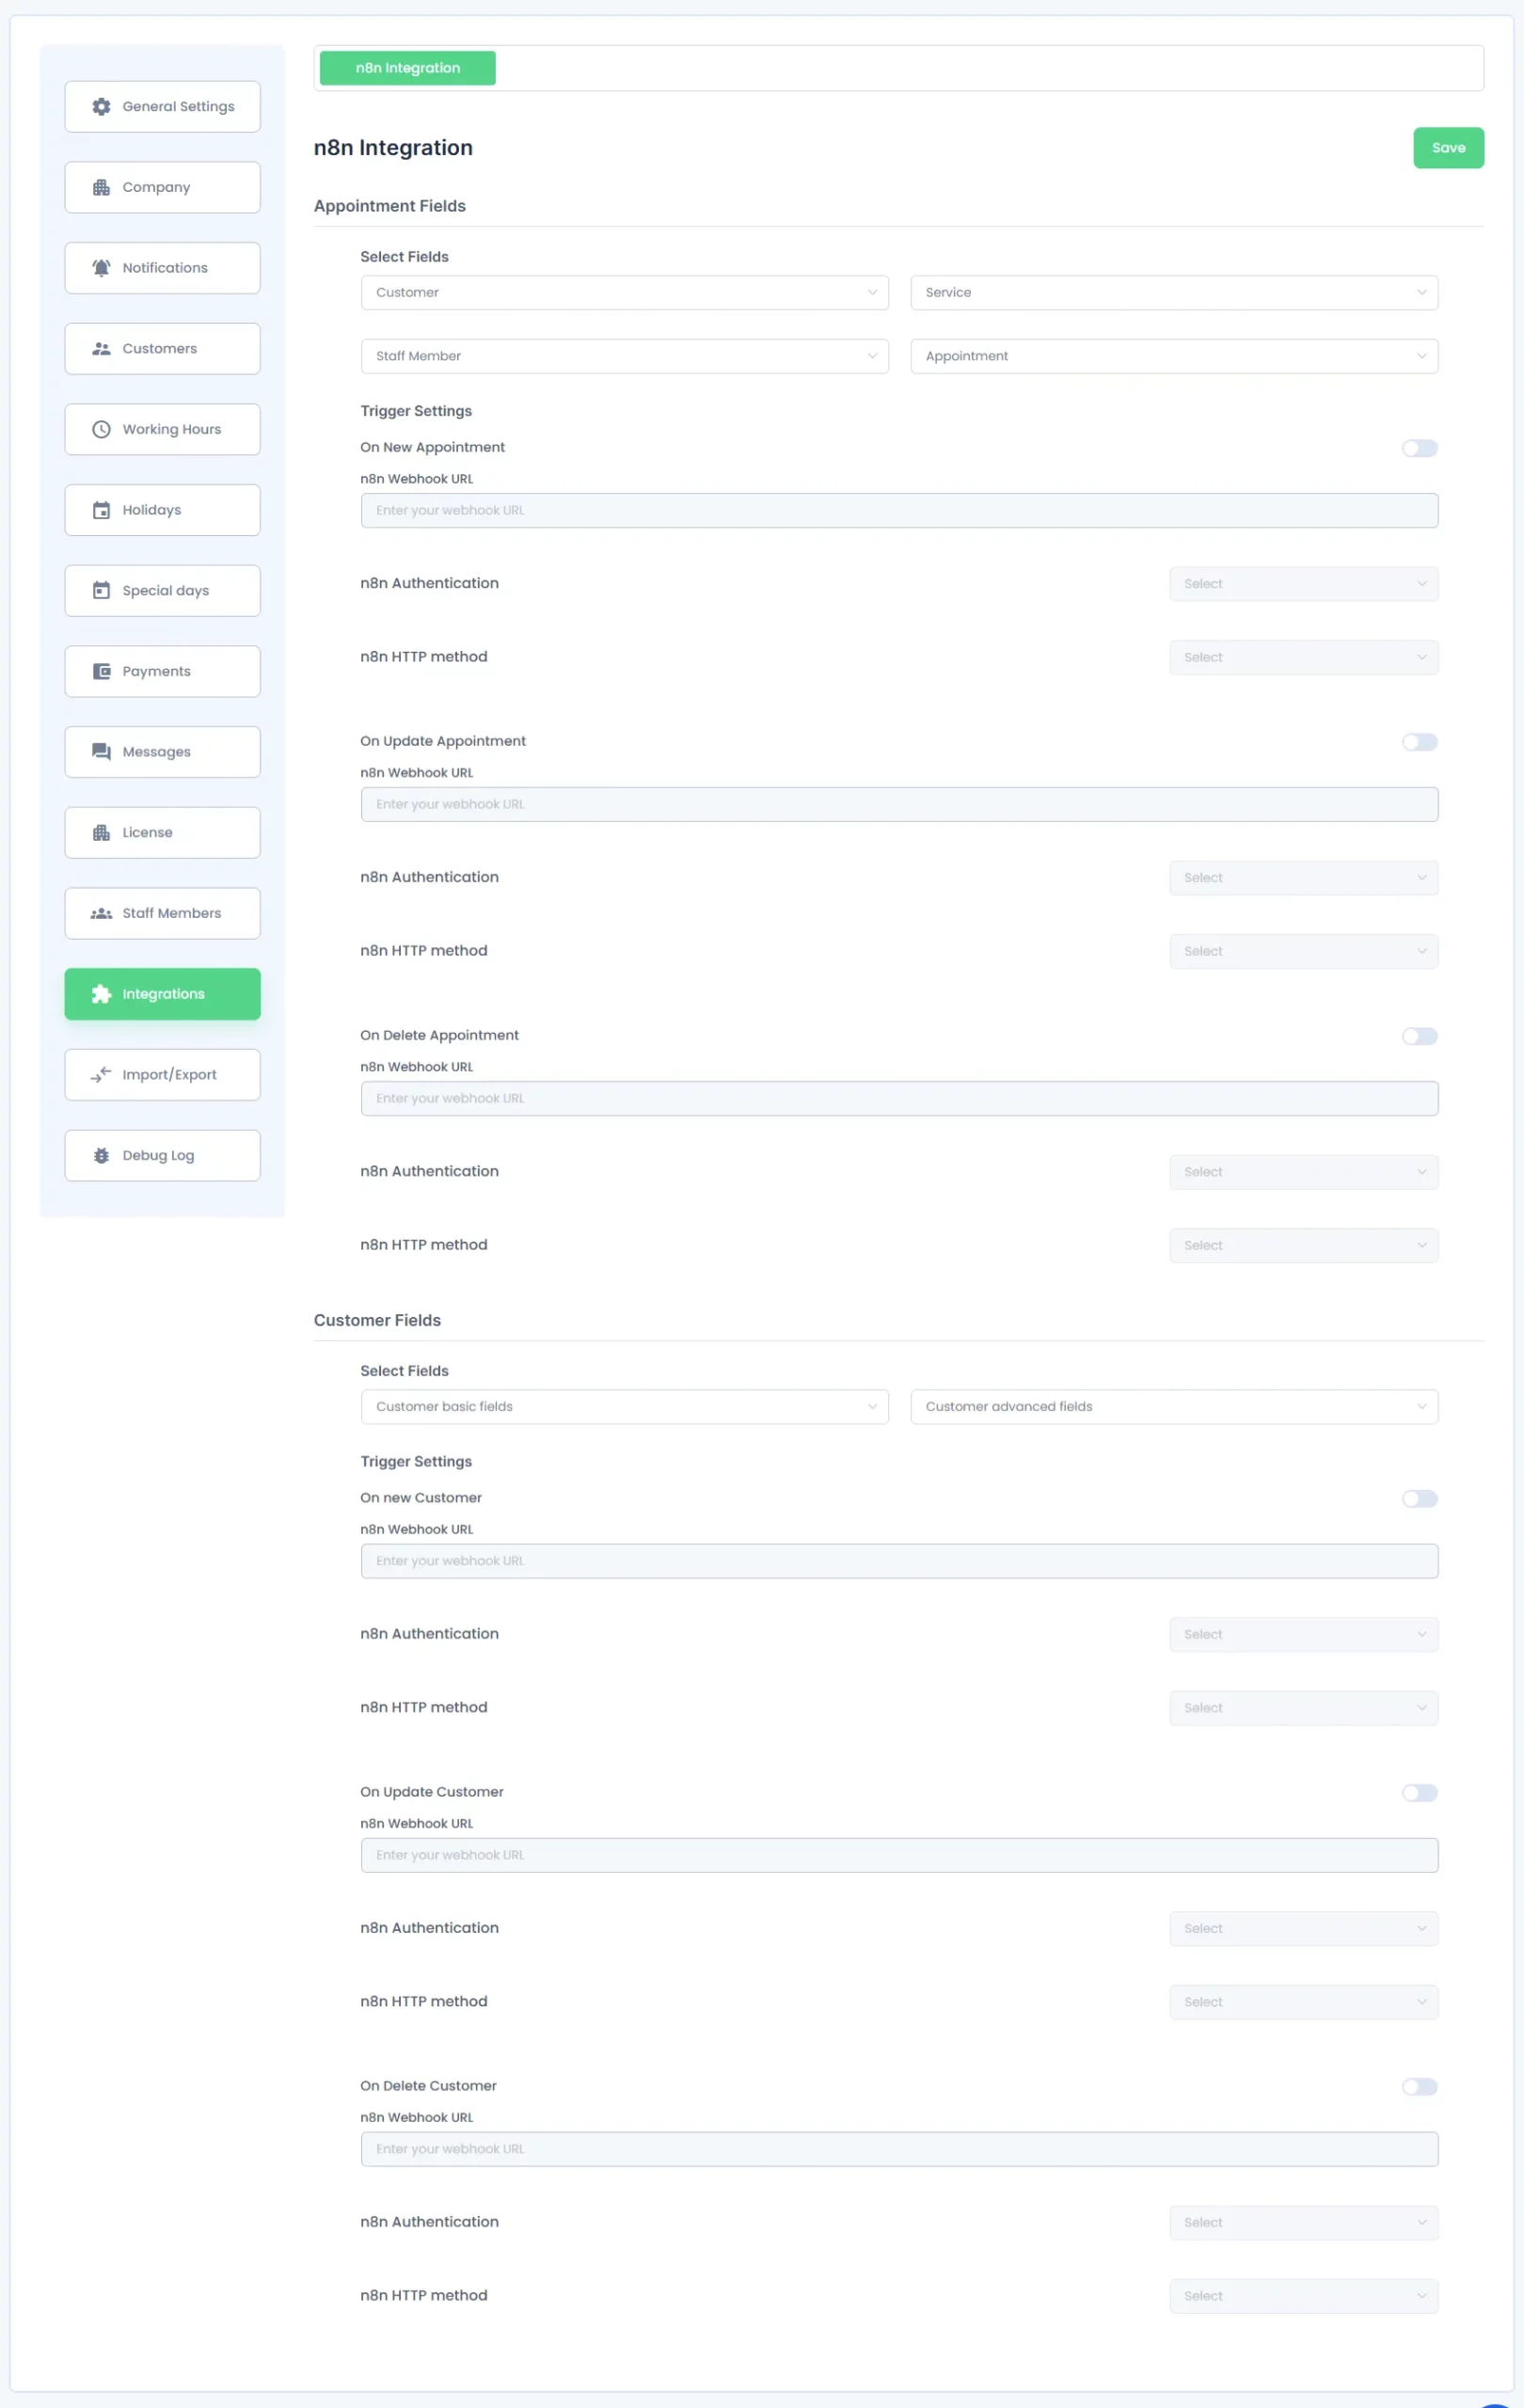
Configuring the n8n Integration in BookingPress
Within the n8n Integration settings, you can define which data fields to send and configure n8n webhook URLs, n8n authentication and n8n HTTP method for specific events.
Appointment Fields
Under the Appointment Fields section, you can select the data to be sent from:
- Customer
- Service
- Staff Member (if Staff Add-on is active)
- Appointment
- Location (if Location Add-on is active)
- Zoom (if Zoom Add-on is active)
Each dropdown contains related fields that you can include in the webhook payload.
After selecting the required fields, enable the desired event triggers:
- On New Appointment
- On Update Appointment
- On Delete Appointment
Paste the respective n8n webhook URL, n8n authentication and n8n HTTP method under each setting.
Customer Fields
In the Customer Fields section:
- You can select data from the Customer and Form Fields dropdowns.
- Enable the event triggers:
- On New Customer
- On Update Customer
- On Delete Customer
- Enter the corresponding n8n webhook URL, n8n authentication and n8n HTTP method for each event.
Once you’ve configured the fields and URLs, click Save to apply the changes.
How to Access and Set Up n8n Integration
Step 1: Access Integration Settings in BookingPress
- Go to BookingPress → Integrations → n8n Integration.
- Here you can configure webhook URLs for various trigger events such as:
- On New Appointment
- On Update Appointment
- On Delete Appointment
- On New Customer
- On Update Customer
- On Delete Customer
- You can also choose which fields (Customer, Service, Appointment, Location, etc.) to send to Make.com.
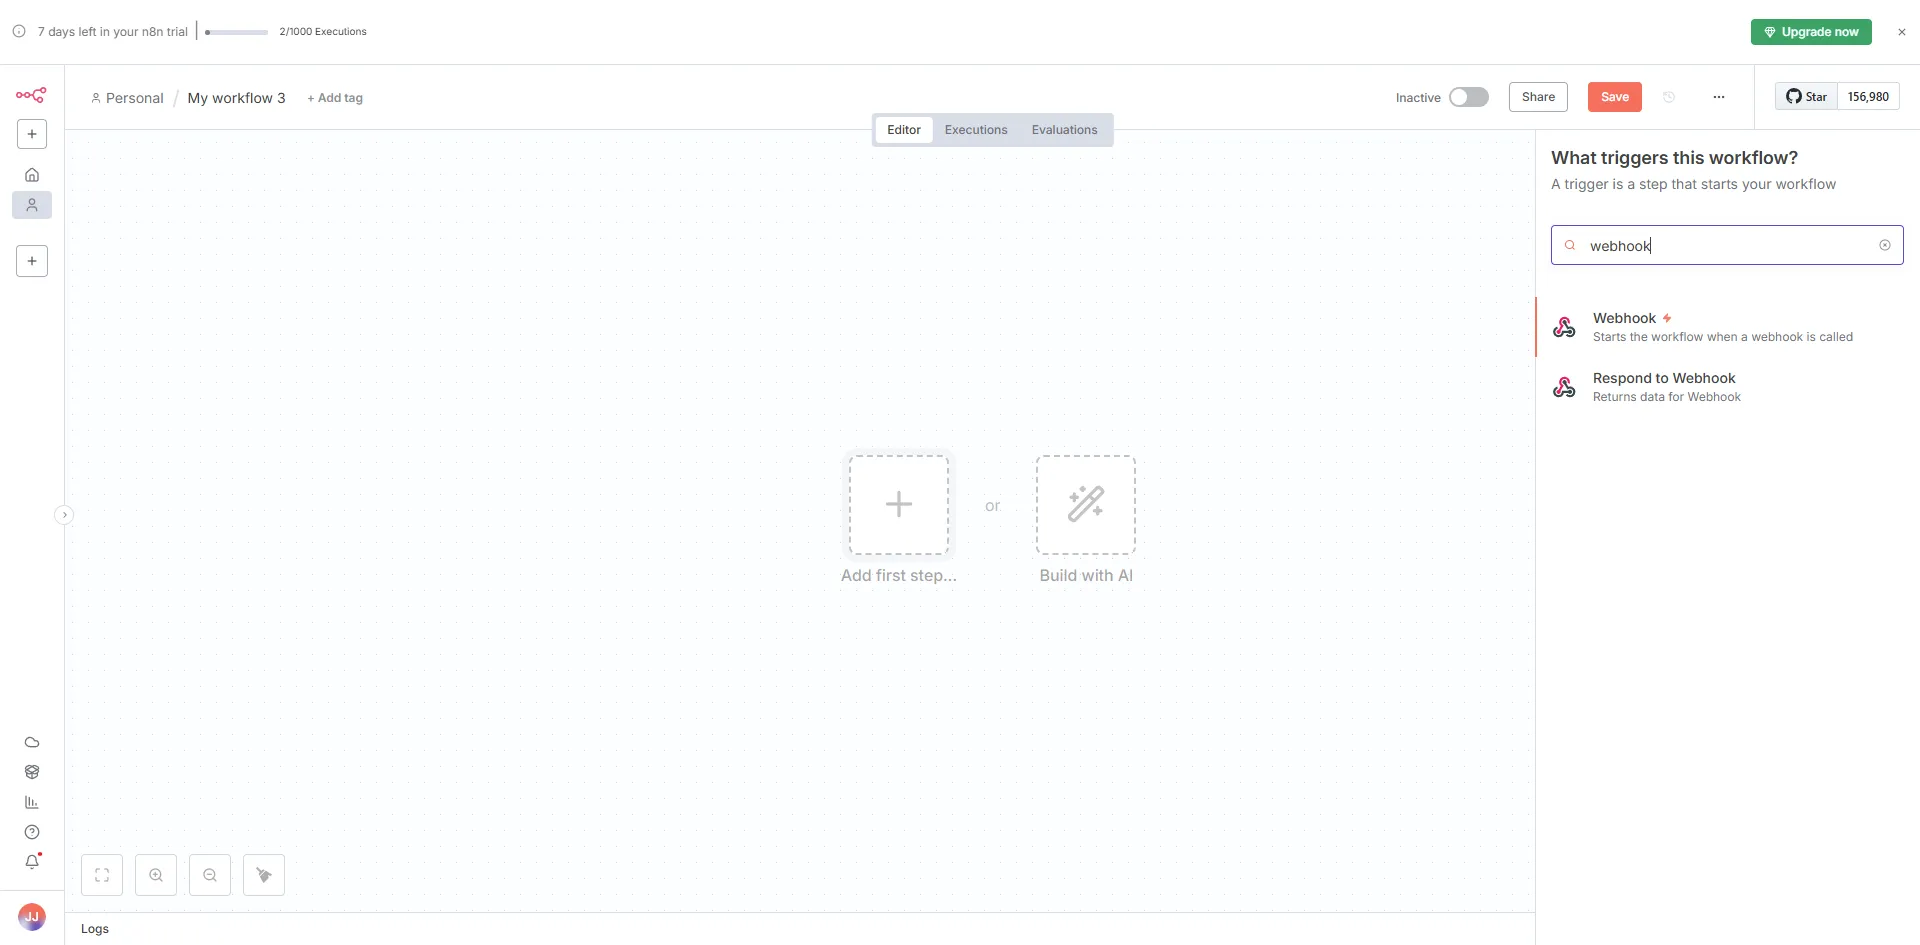
Step 2: Set Up Webhook, Authentication and HTTP method in n8n integration
- Visit https://app.n8n.cloud.
- Log in to your Make.com account. If you don’t have one, you can create a free account.
- From your dashboard, click Webhook in the left sidebar.
- Click + Create a new Webhook on the top left corner.
- In the module selection Add First Step, search and select Webhooks.
- Choose Webhook, then click Create a webhook.
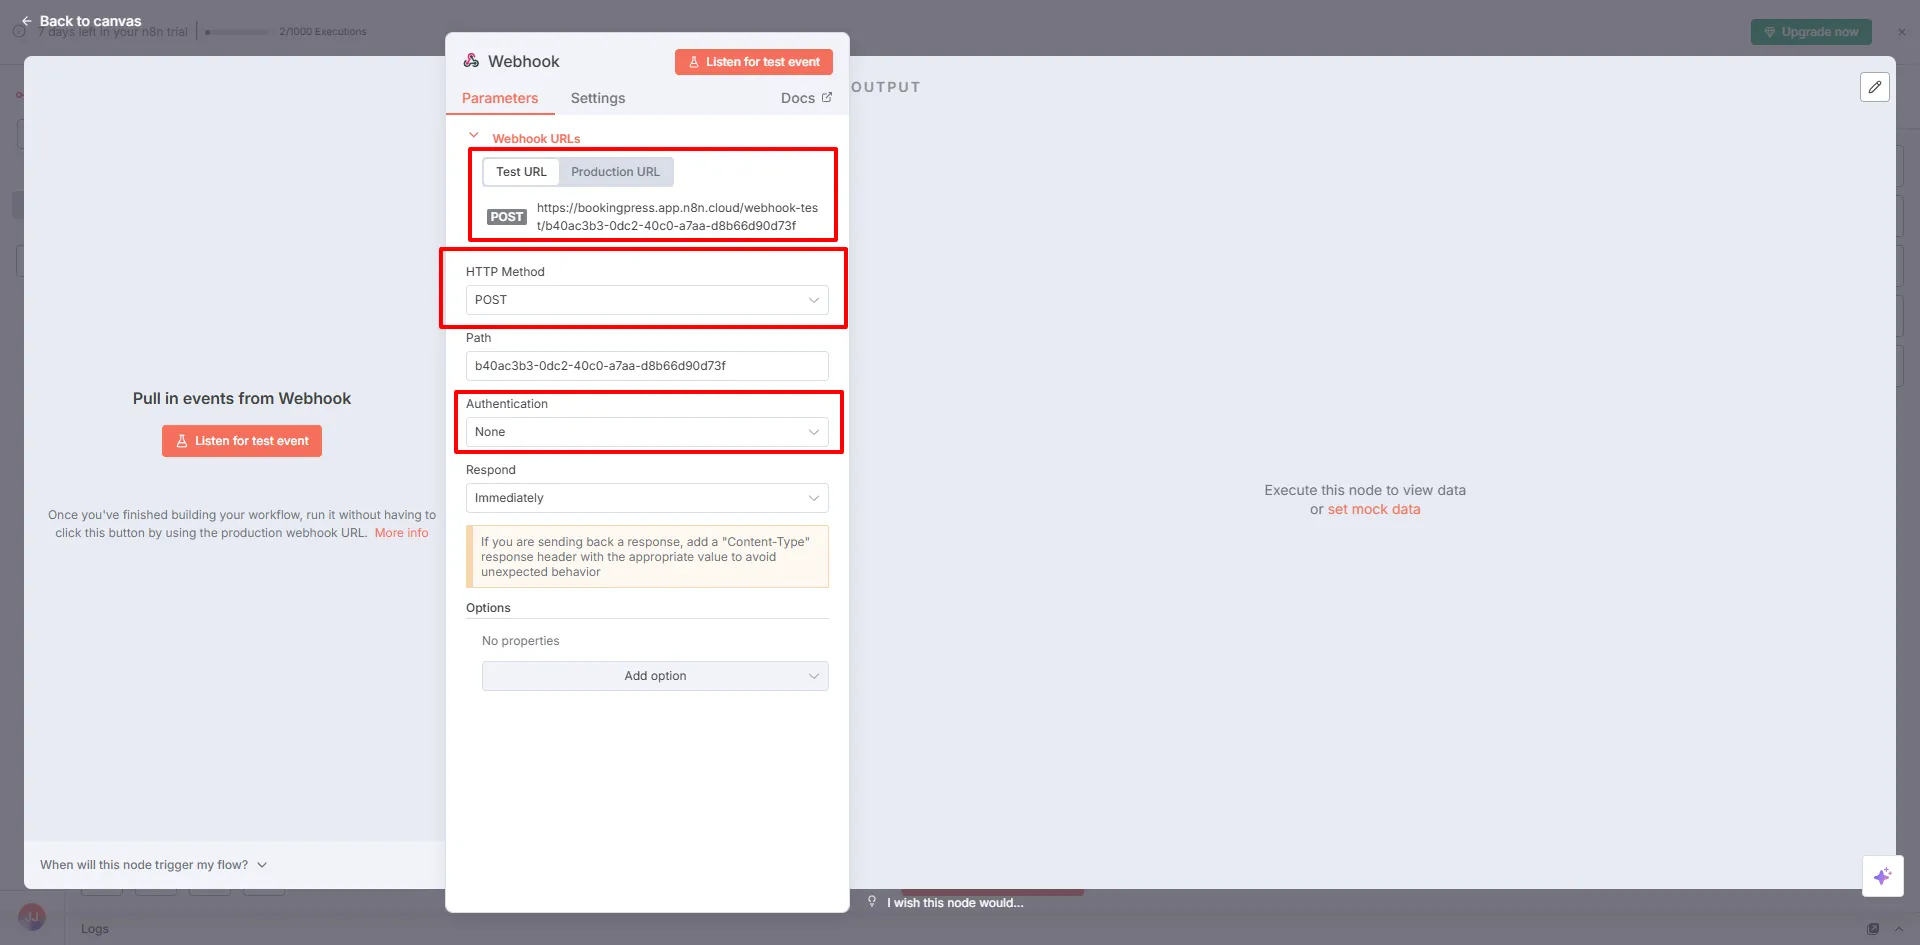
- Now select the test mode or Production URL.
- Enter your desired webhook name, Authentication method and HTTP request.
- Copy this Webhook URL ,Authentication and HTTP request method for future used.
- Select the secound field where you want to send the data.
Step 3: Connect the Webhook, Authentication and HTTP method to BookingPress
- Go back to BookingPress → Integrations → n8n Integration.
- Paste the Webhook URL, Authentication and HTTP method into the corresponding trigger event field (e.g., “On New Appointment”).
- Enable the trigger toggle and click Save.

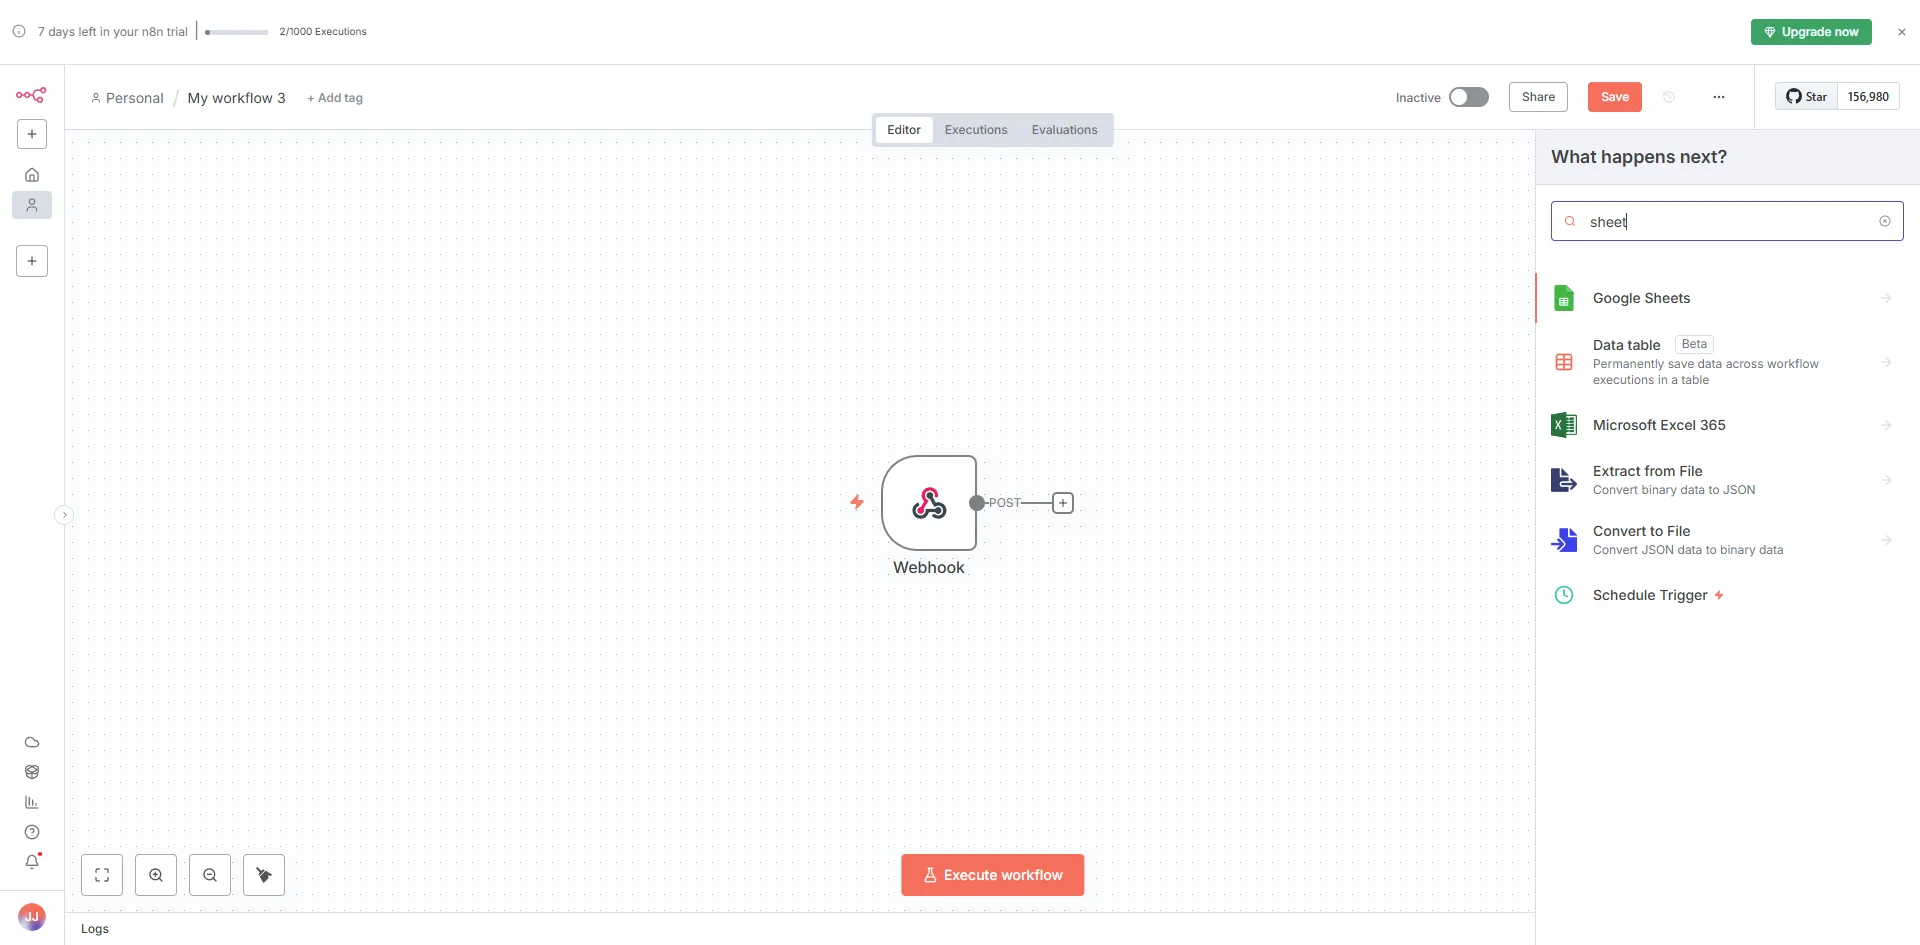
Step 4: Add Additional Modules in n8n Integration
- After setting up the webhook, click the + icon in n8n to add another module.
- For example, select Google Sheets to automatically insert booking details into a spreadsheet.
- Configure the Google Sheets module step by step (choose spreadsheet, worksheet, and data mapping).
- You can connect other apps as needed to build your automation workflow.

Whenever a new appointment is created in BookingPress, the n8n webhook will automatically send booking details to Google Sheets or notify your team on Slack — ensuring smooth and instant data flow between platforms.