Multi-Service Configuration
To get and activate the Multi-Service Add-on, please follow the steps below.
- First, log in to the BookingPress Website, and you will be redirected to the My Account page.
- Now, click on the “Access Passes” link from the left menu panel.
- After going to the Access Passes, click on the “View your downloads” button.
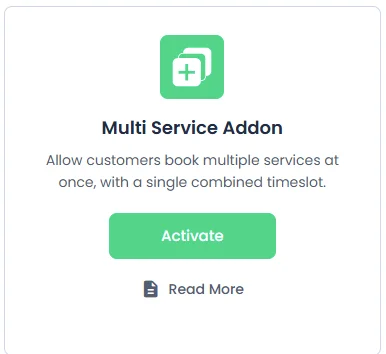
- From the list, please look for the “Multi-Service” addon, click on the download button, and it will automatically start downloading the addon. After the download is finished, upload the downloaded zip file to WordPress, just like any other WordPress Plugin, then install and activate the addon to use it.
Once the same has been activated, the user can simply use the Multi-Service functionality in the front-end.
Booking Experience
In the front-end, during the Service Selection step, users can select multiple services if the Multiple Service add-on is active. Additionally, users will see the selected services displayed in the top-right corner.
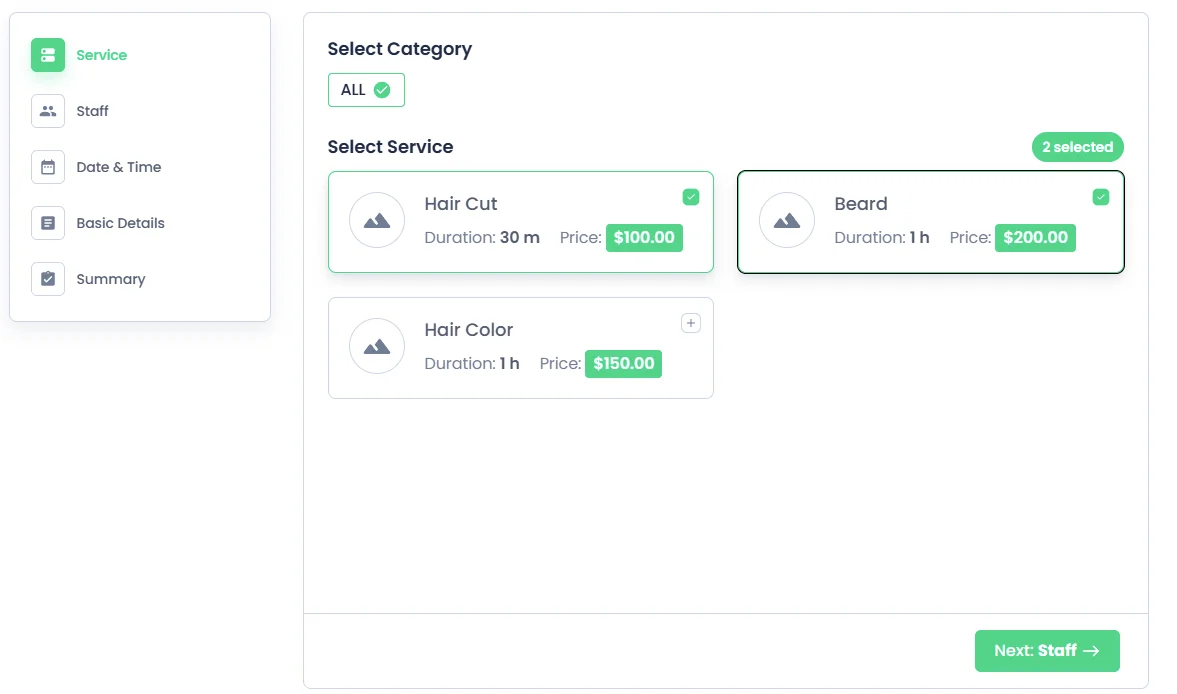
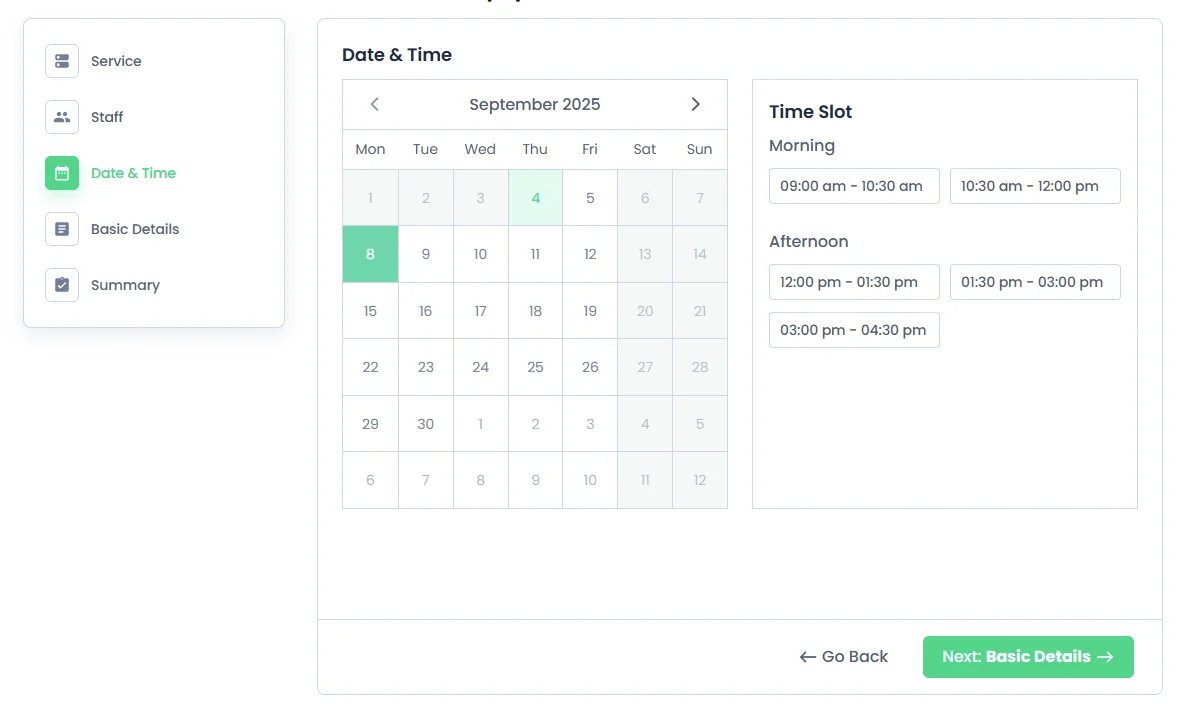
After selecting multiple services, the customer gets the timeslots combined with the duration of all selected services.
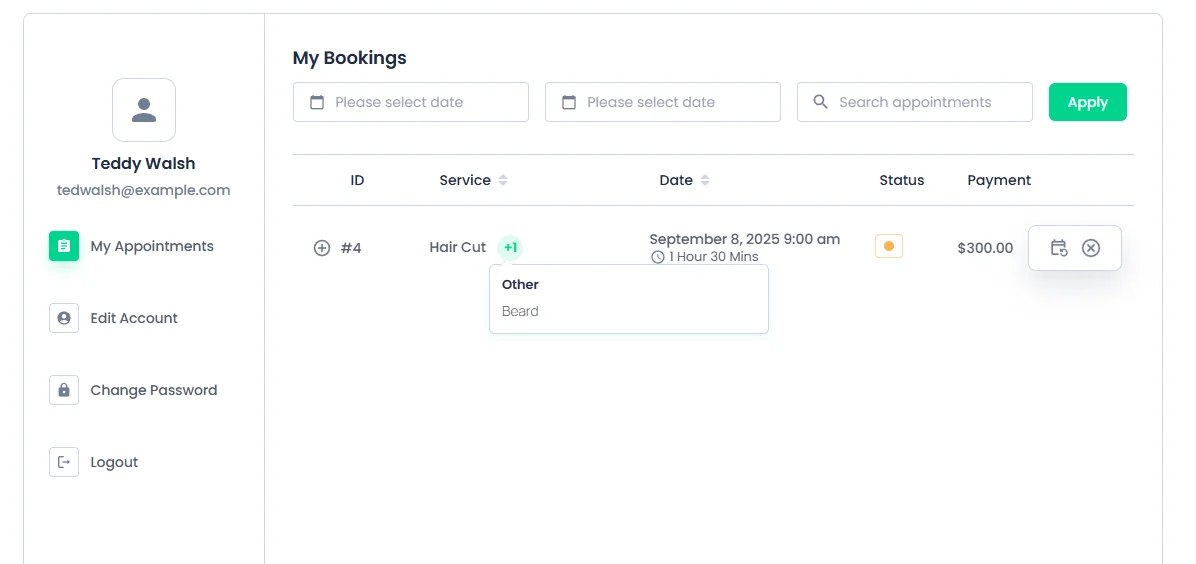
Once booked, customers can view their appointment details, including the selected services, in the My Bookings/Customer Panel section.
If multiple services are selected, a “+1” symbol will appear next to the service’s name. Hovering over this symbol will display the full list of selected services for the appointment.
Managing Appointments with Multi Services
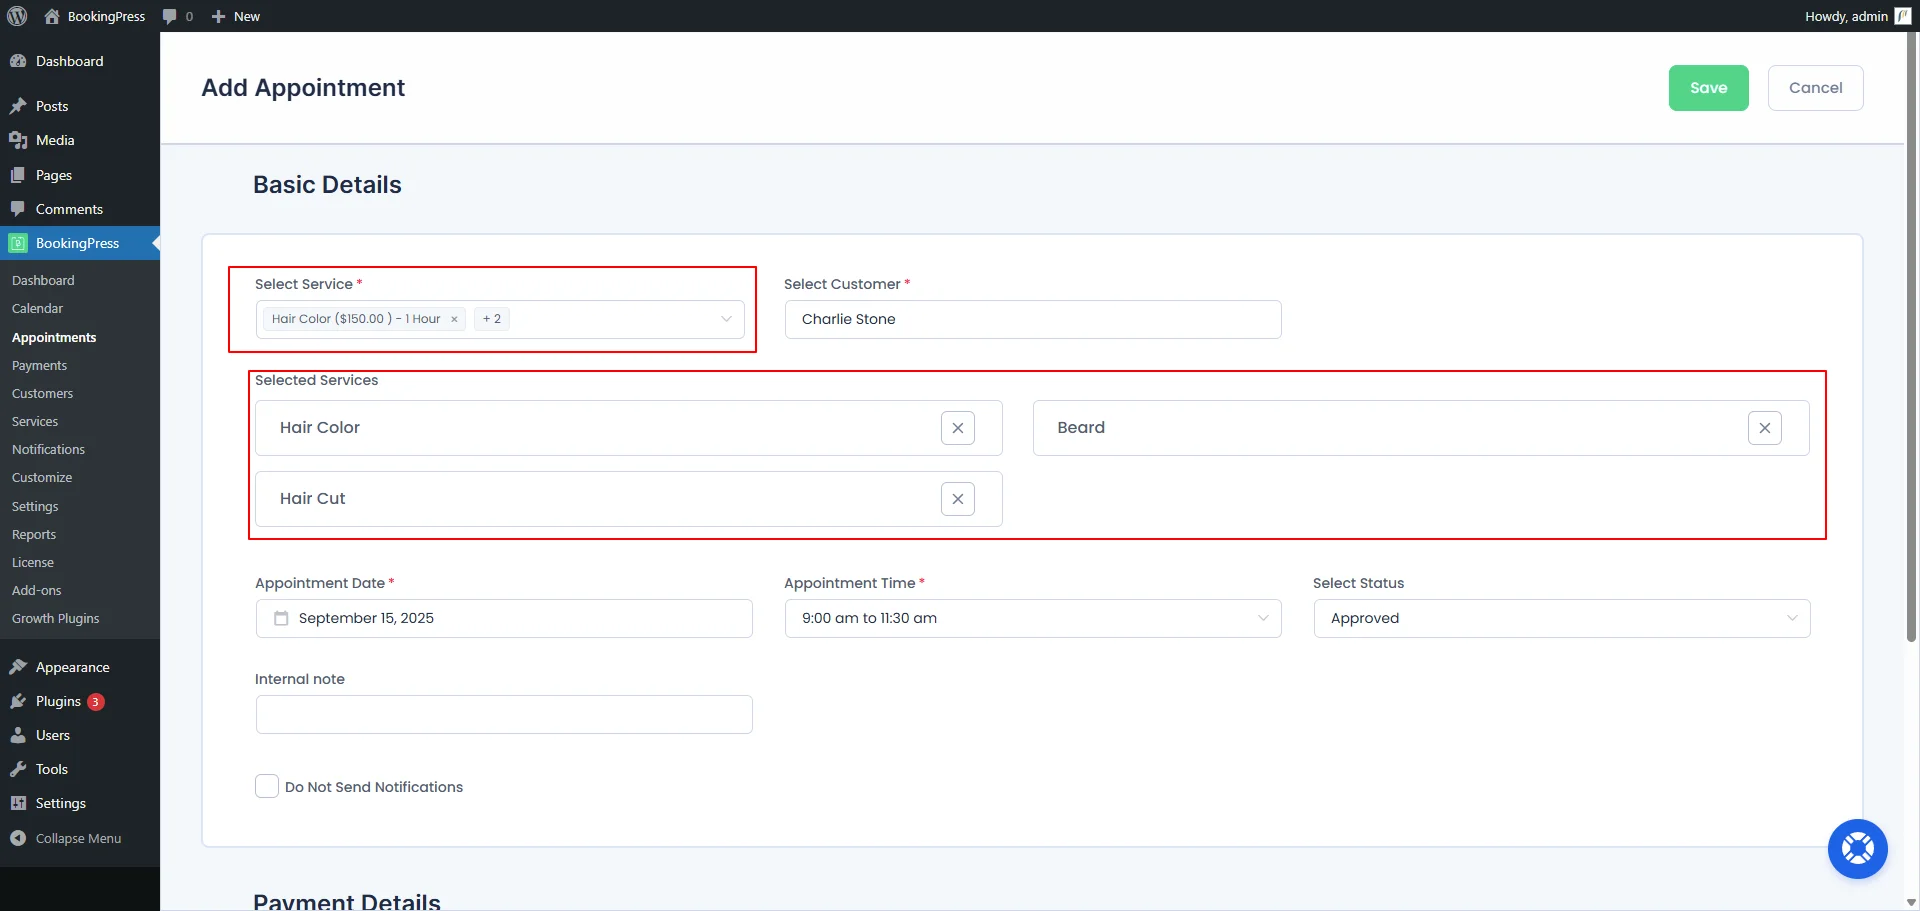
- In
BookingPress > Appointments, admin users can view bookings with multiple services. - Appointments involving multiple services will display the services, separated by commas (e.g.,
Hair Cut, Beard). - Also, the expand view will displays the full details of the booked service along with their respective timeslots and price

When booking an Appointment from the Back-end, multiple services can be selected.
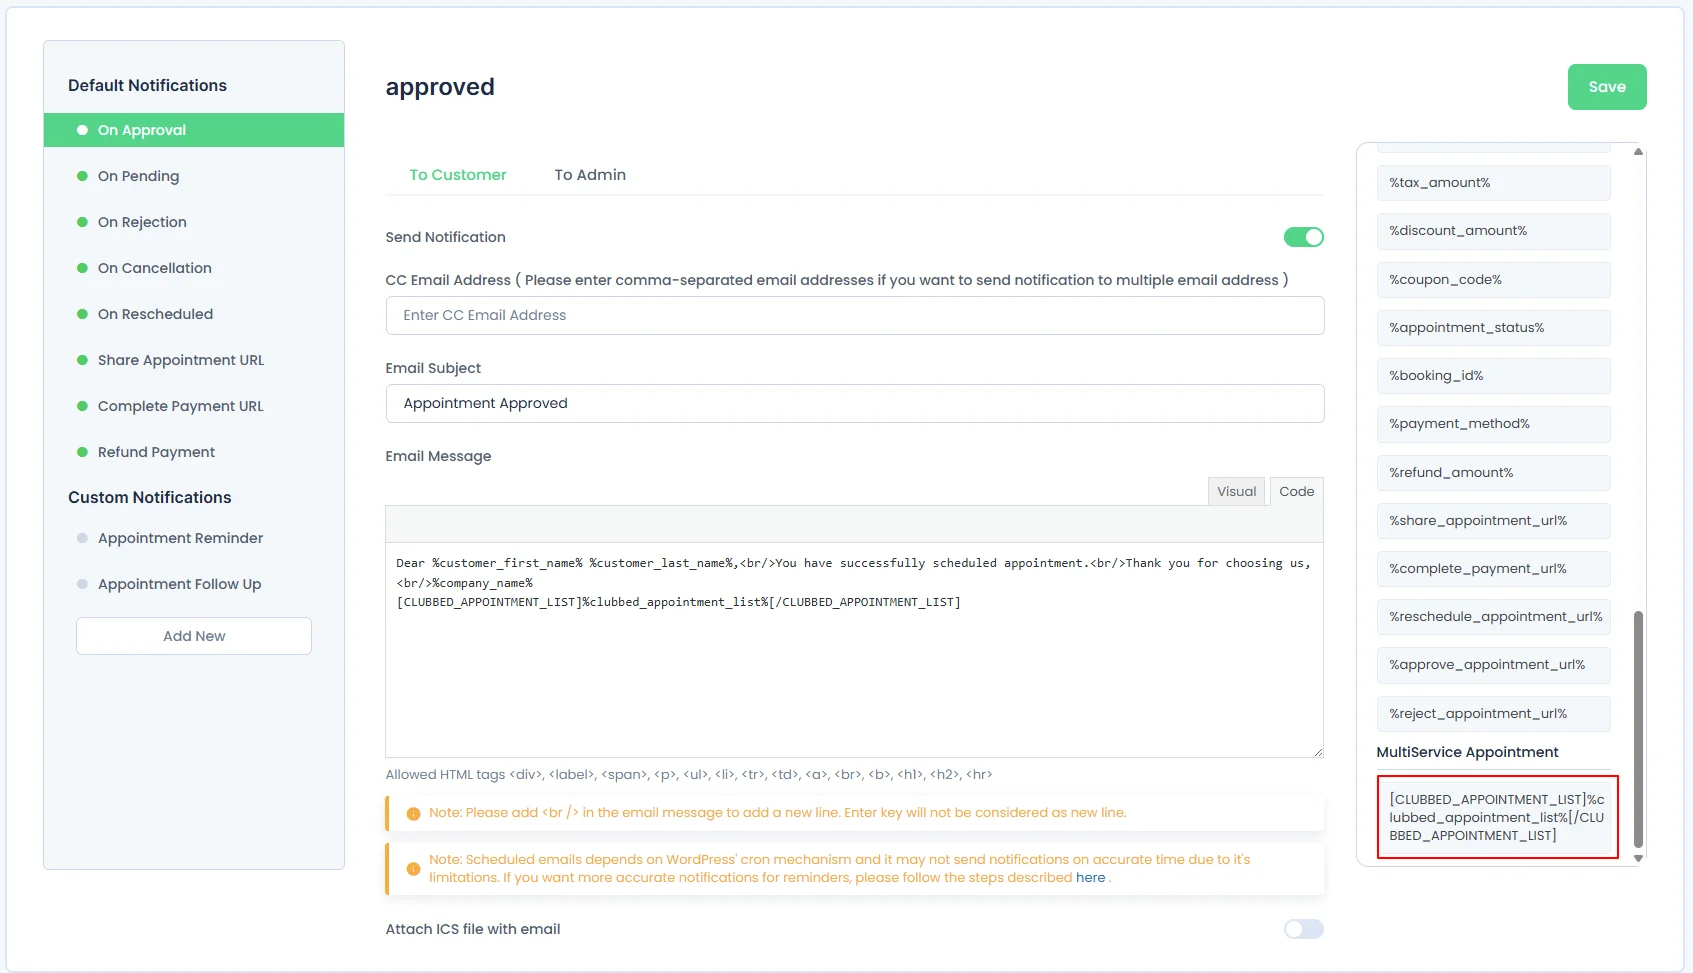
Notification Configuration for Multi-Service
If your appointment involves multiple services and you wish to display all their names in the email notification, you can use the following shortcode.
[CLUBBED_APPOINTMENT_LIST]%clubbed_appointment_list%[/CLUBBED_APPOINTMENT_LIST]
This shortcode will automatically display the list of all selected services when multiple services are selected for an appointment.
Note: Following Add-ons will not work when multi service add-on is activated
Cart Add-on
Multi-Staff Add-on
Deposit Add-on
Multi Quantity Add-on
Recurring Appointment ( Backend )
Custom Service Duration ( Backend )
Note: Following Add-on functionality will not work if multi service add-on is activated & more than one services are selected
Recurring Appointment
Custom Service Duration