Roles & Capability Addon
The BookingPress Roles & Capabilities Addon allows you to manage and assign BookingPress-specific capabilities to selected WordPress user roles.
With this addon, admin can manage access control across your team – deciding who can view, edit, or manage different parts of BookingPress, such as appointments, payments, customers, and more.
Activating Roles & Capabilities Addon
To use Roles & Capability features, first, you have to activate the Roles & Capability Addon:
- First, log in to the BookingPress Website, and you will be redirected to the My Account page.
- Next, simply click on the “Access Passes” link from the left menu panel.
- After going to the Access Passes, click on the “View your downloads” button.
- From the list, look for the “Roles & Capability” add-on, and click on the download button
- Once it’s downloaded successfully, upload the downloaded zip file to your WordPress dashboard.
- Lastly, install and activate the Migration addon to get started.
How to Use Roles & Capabilities
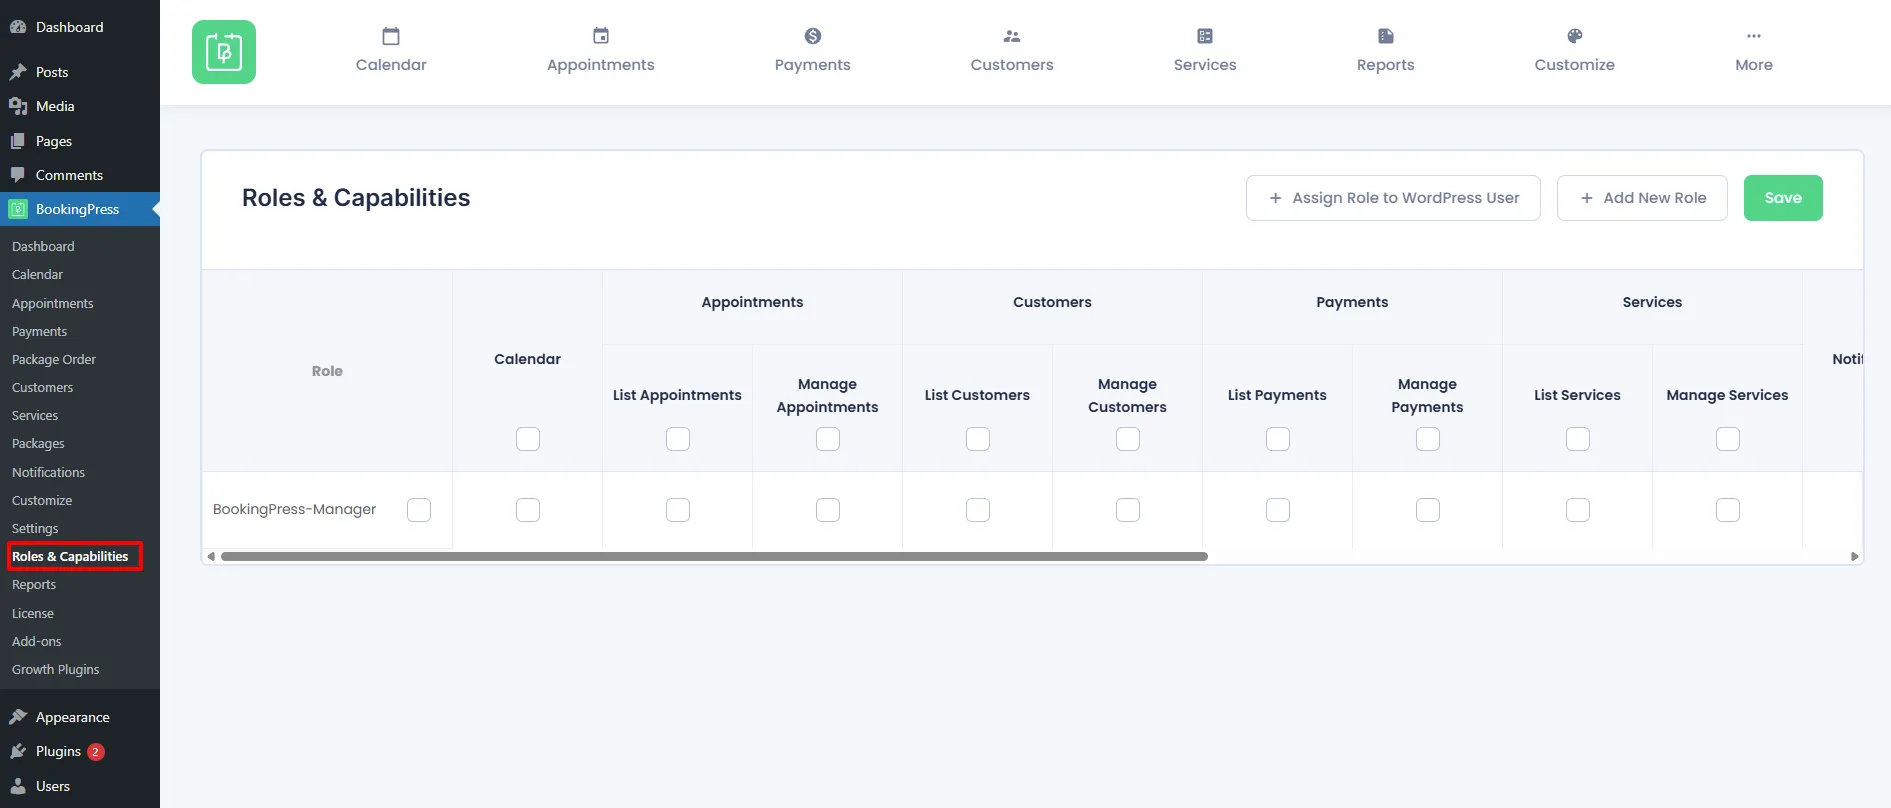
Once the addon is activated, go to BookingPress -> Roles & Capabilities. From this page, you can manage all user roles and assign specific BookingPress capabilities as per your requirements.
Default Role
By default, you’ll see one predefined role named BookingPress Manager.
You can modify the permissions for this role by selecting or deselecting the capabilities in the permission section.
Once you’ve configured the permissions, you can assign the BookingPress Manager role to an existing WordPress user, or you can create a new user in WordPress and assign this role to them.
Understanding Permissions
In the Roles & Capabilities section, each permission checkbox determines what the assigned user can access or manage within BookingPress.
Calendar:
- If the Calendar permission is enabled, the user can access the BookingPress Calendar page.
Appointments:
- If only List Appointments is selected, the user can view all appointments.
- If Manage Appointments is enabled, the user can view, edit, and update appointment details.
Customers:
- List Customers allows the user to view the customer list.
- Manage Customers grants permission to add, edit, or delete customers.
Payments:
- List Payments lets the user view all payment records.
- Manage Payments enables them to edit or update payment details.
Services:
- List Services allows users to view the list of services.
- Manage Services grants permission to add or modify services.
Notifications:
- Enable the Notifications checkbox to give the user access to the BookingPress Notifications page.
Settings:
Within the Settings section, you can enable access for specific configuration options such as:
- Notification Settings
- Work Hours Settings
- Holiday Settings
- Special Days Settings
- Manage Settings
Assigning a Role to a WordPress User
To assign a specific created role to a WordPress user, follow these steps:
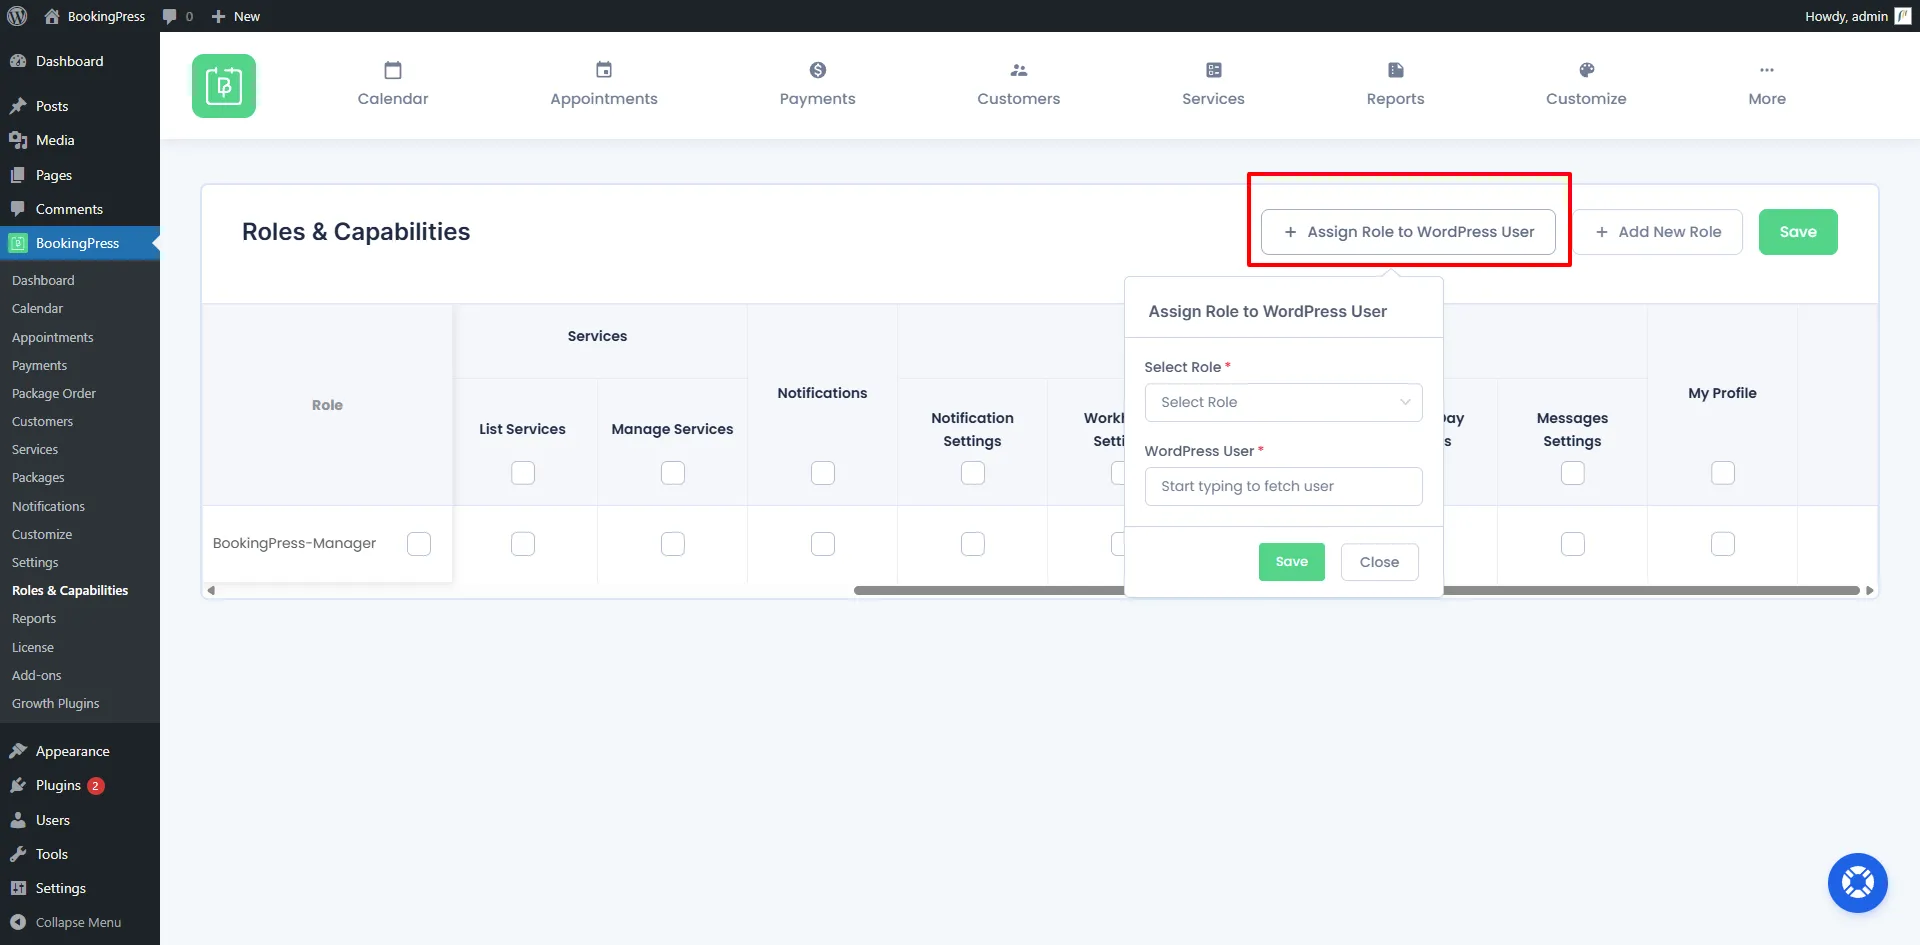
- Click on the “+ Assign Role to WordPress User” button at the top right corner.
- A pop-up window will appear titled “Assign Role to WordPress User”.
- From the Select Role dropdown, choose the BookingPress role you want to assign (e.g., BookingPress Manager).
- In the WordPress User field, start typing to search for and select the user you wish to assign the role to.
- Click Save to apply the changes.
Once saved, the selected BookingPress role and its assigned capabilities will be applied to that WordPress user. This user will then have access to BookingPress features as defined by the permissions associated with the selected role.
Add New Role
If you want to create a custom BookingPress role with specific permissions, you can easily do so from the Roles & Capabilities section.
- Go to BookingPress → Roles & Capabilities.
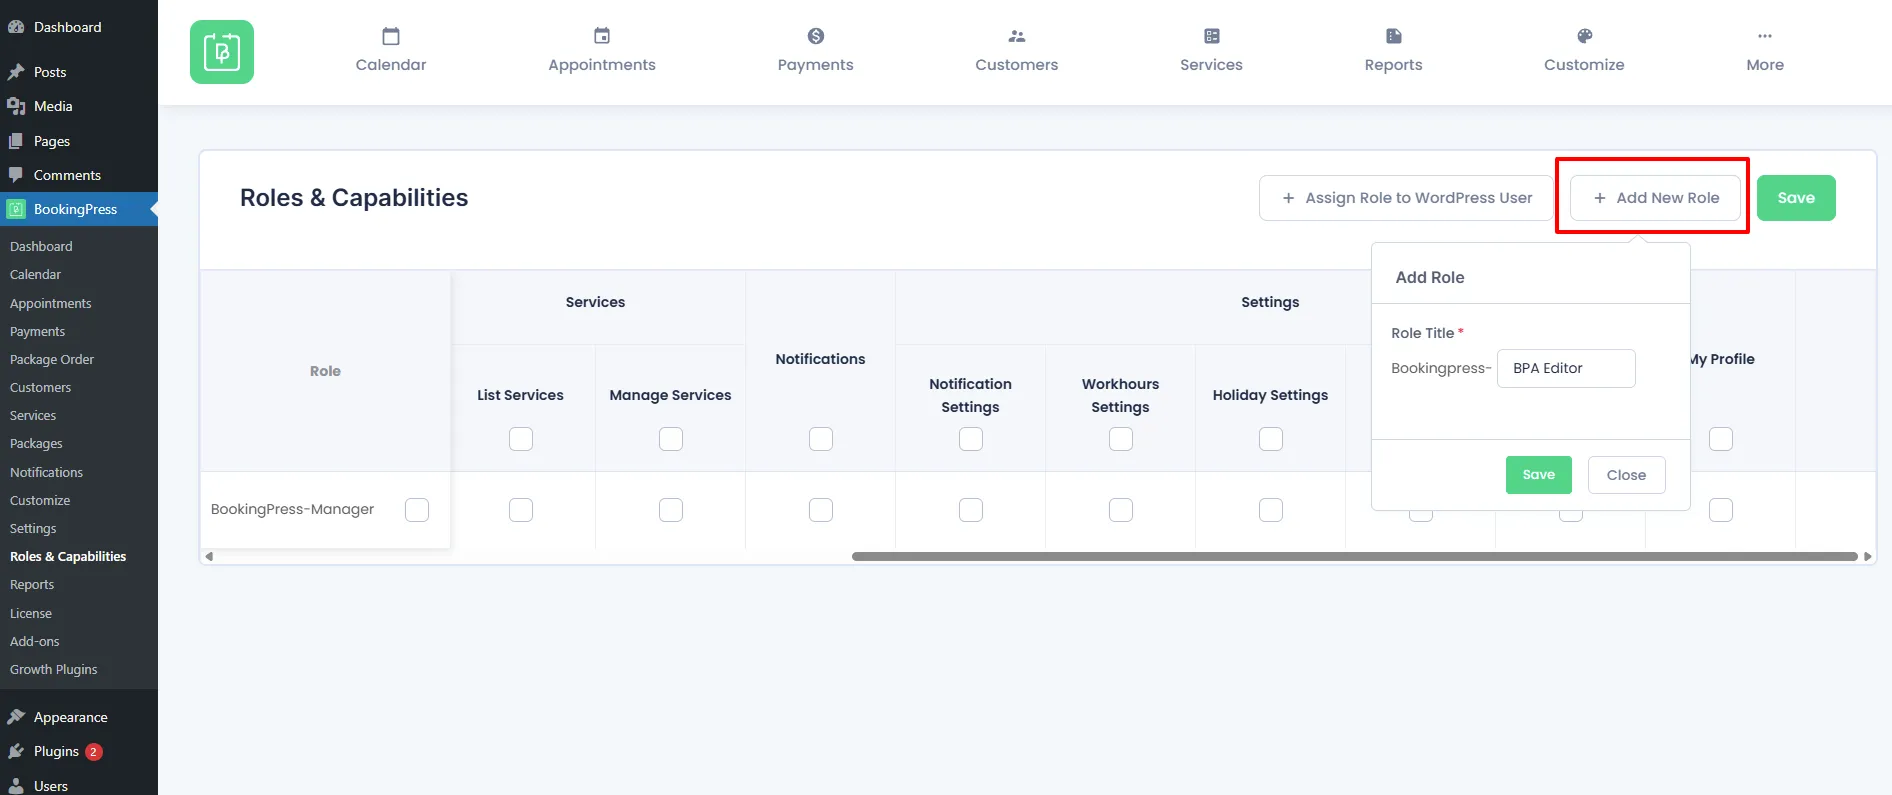
- Click on the “+ Add New Role” button at the top right corner.
- A pop-up will appear titled “Add Role”.
- Enter a Role Title in the input field (for example, BPA Editor, or Receptionist).
- Click Save to create the new role.
Once the new role is created, it will appear in the list below. You can then assign specific permissions to this role by checking or unchecking the required capabilities. After setting up permissions, you can assign the role to any WordPress user as needed.