Manage Your Website Customers with BookingPress
The BookingPress Customers page allows you to view, create, edit and manage all your customers list. Want to know your top customer with most appointments? Want to know their recent appointment? Everything can be done from this page.
Here, we’ll give a quick overview of how to view, edit, and manage your customers list from the back-end.
How to View and Search Customer List in BookingPress?
You can view and manage your customer list by reaching WordPress → BookingPress → Customers.
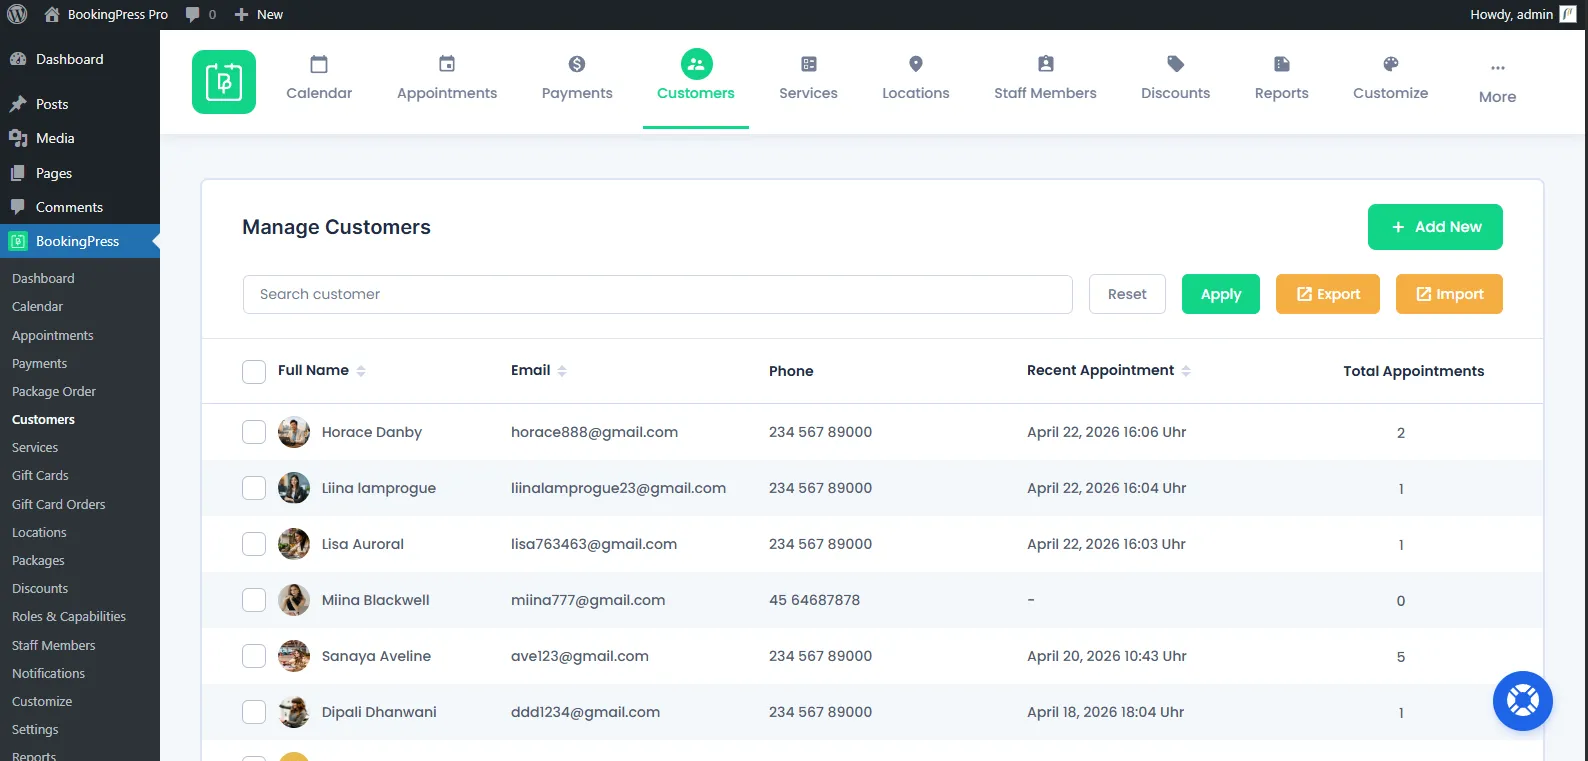
On this Customers page, you can see all the necessary information of your customers such as their:
- Full Name
- Phone
- Recent Appointment
- Total Appointments
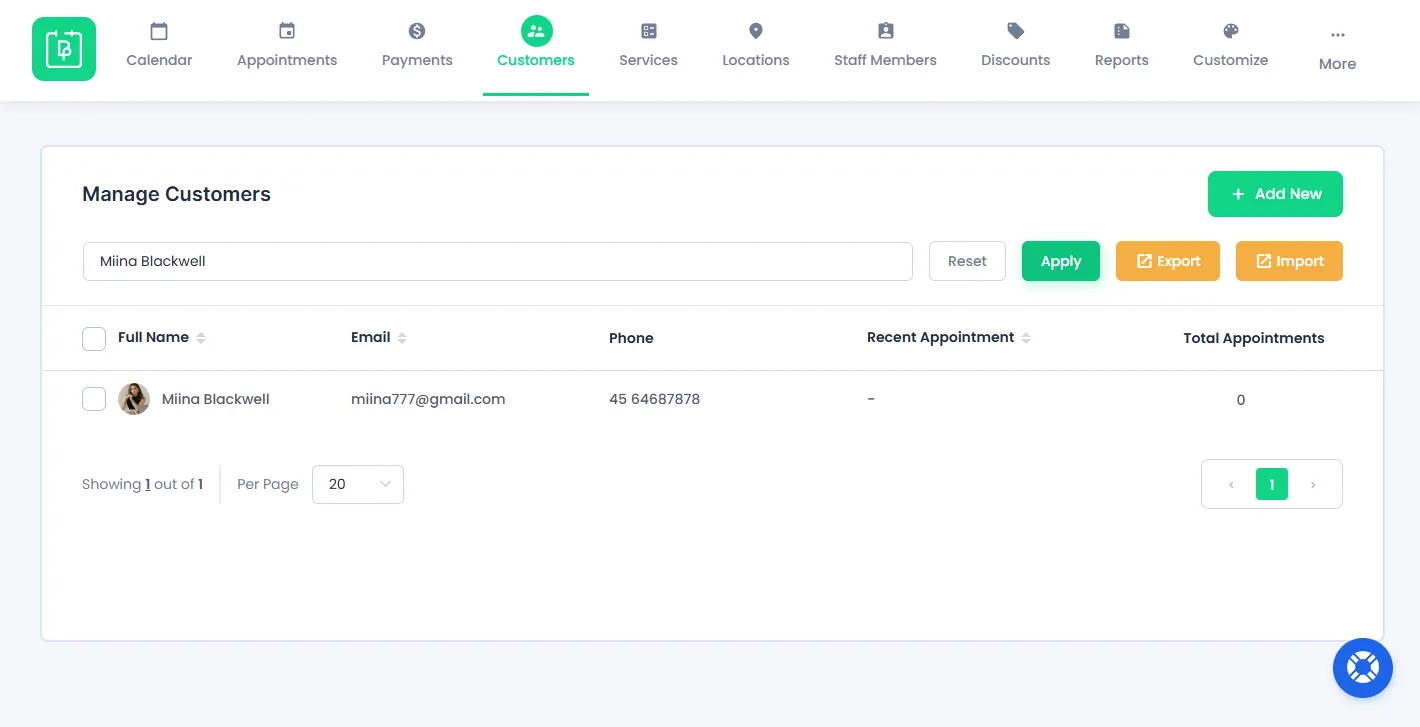
If you are looking for a specific customer, just go to the search bar and you can easily search by:
- Customer Name
- Customer Email
- Customer Phone No.
After entering your customer details, click on the “Apply” button next to the search bar.
Please Note: To set the number of records to be shown per page inside Customers, select the required number in the “Default items per page” in the “General Settings“.
How Do You Add Customers in BookingPress?
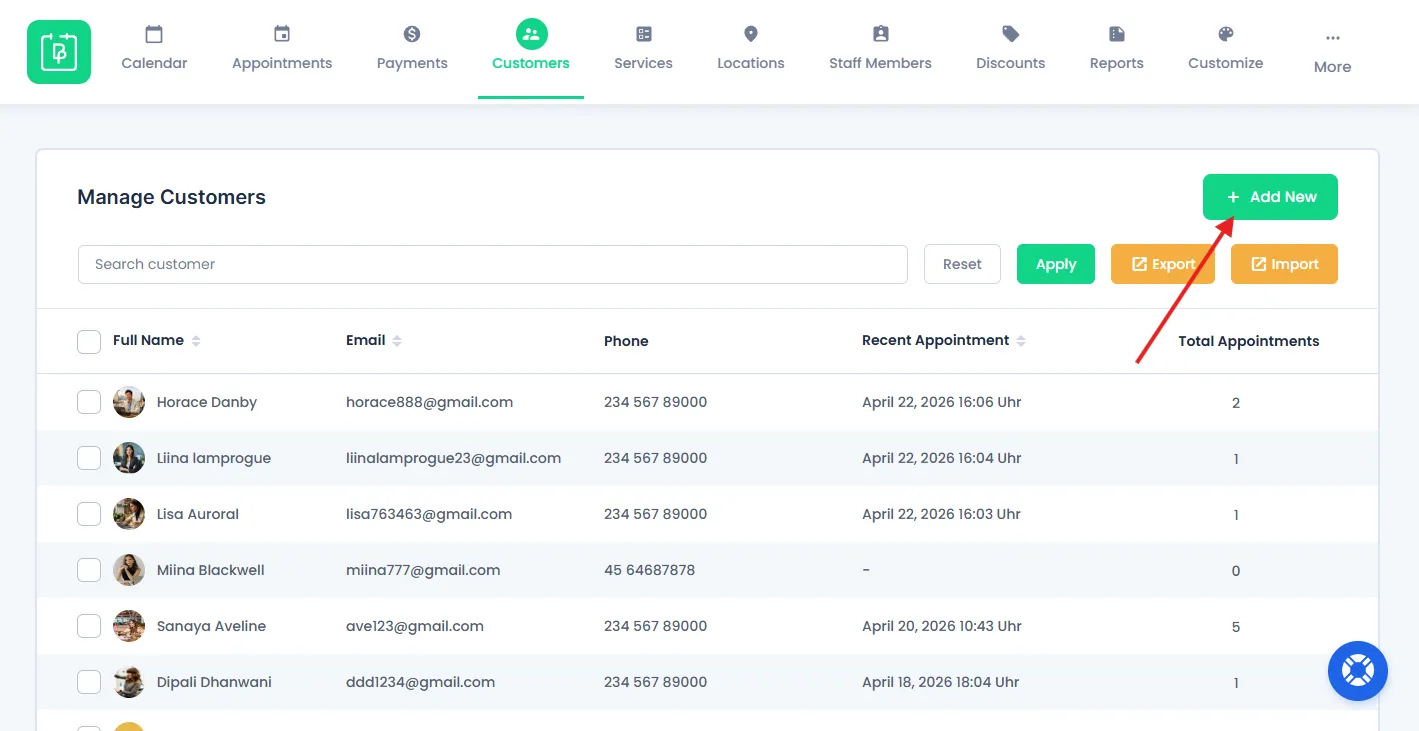
To create a new customer from the back end, click on the “Add New” button from the top right corner of the page.
It will open a Add Customer page where you can add all basic details of your customer such as their:
- Customer Image
- First Name
- Username
- Password
- Last Name
- Email address
- Phone number
- Notes
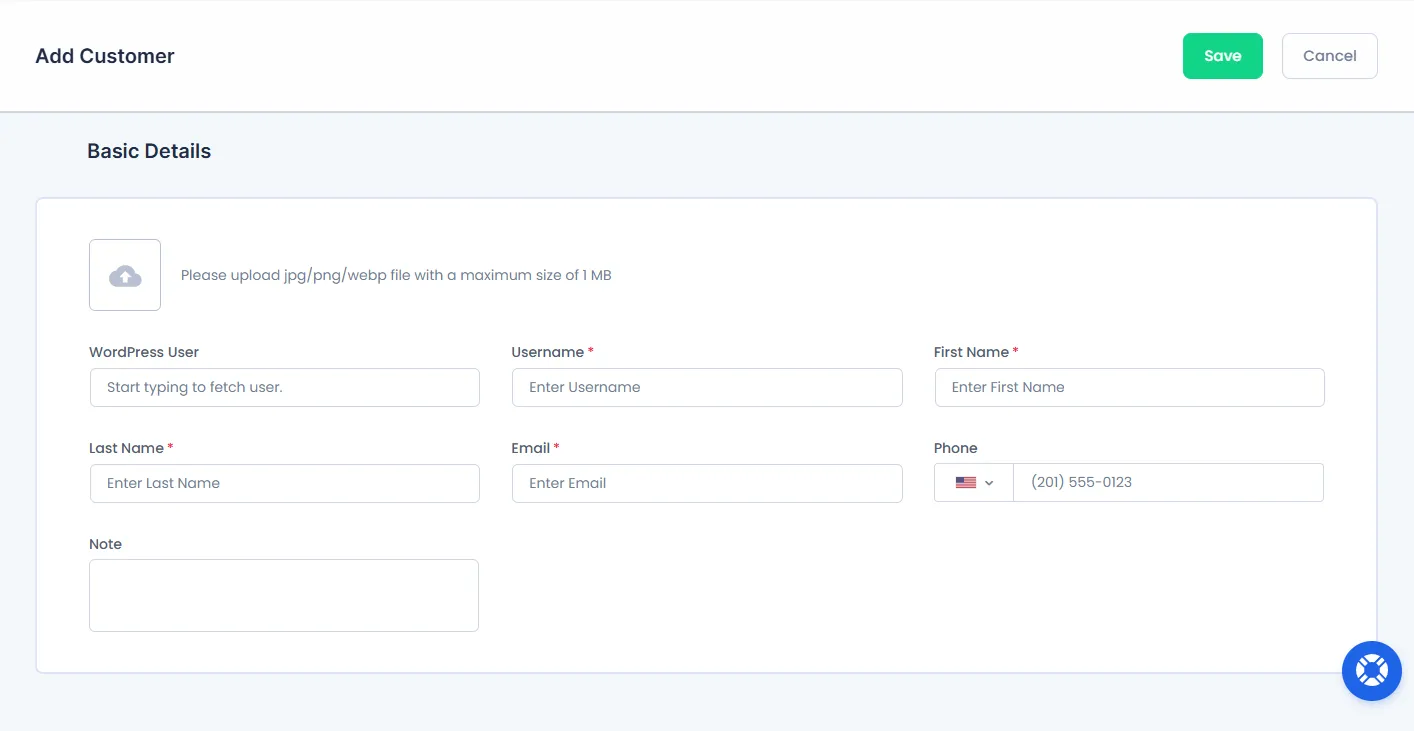
Here, you can also connect existing “WordPress Users” with BookingPress customers. When you connect a WordPress user with a BookingPress customer, he will get the “BookingPress Customer” role. And after that, he can manage his appointments from the front end.
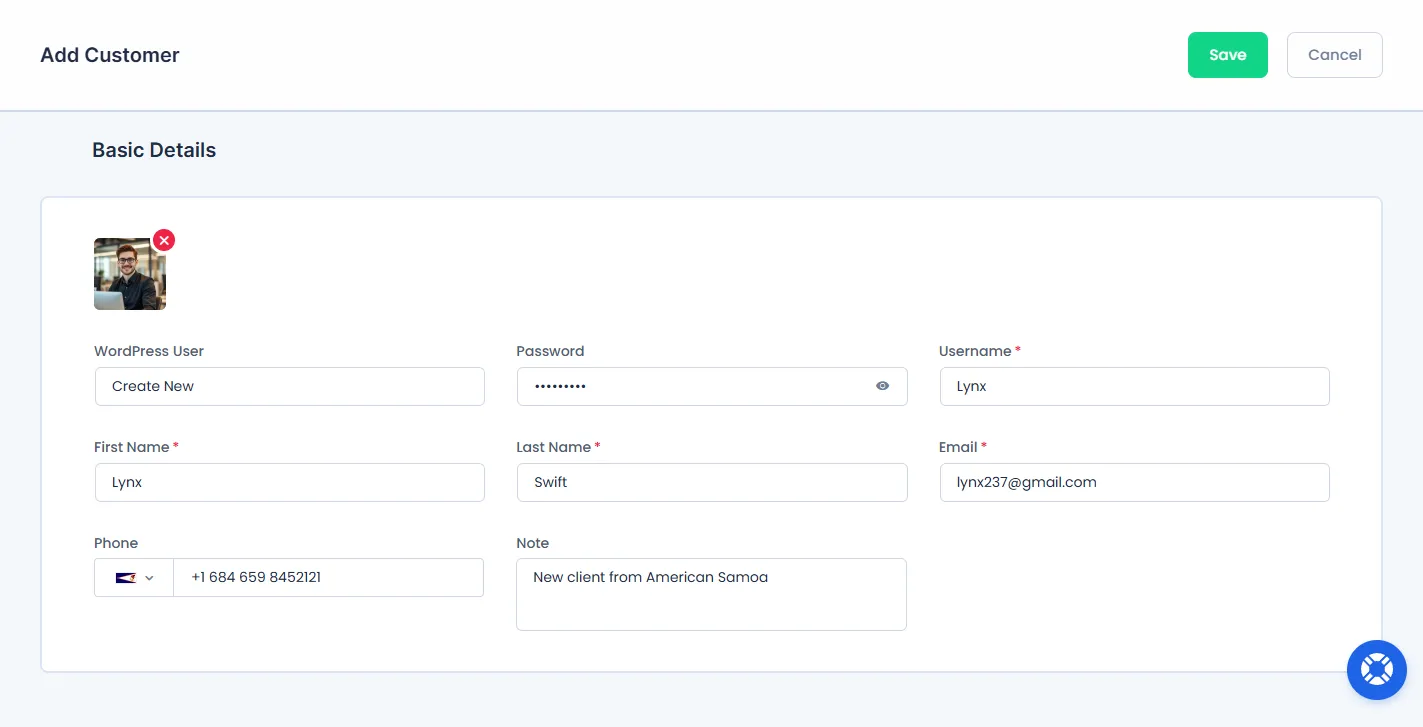
At last after entering all the details, hit the “Save” button to add the customer details.
How Do You Edit Customer Data in BookingPress?
To edit an existing customer, just hover over any customers’ row and it will display an action bar that has an “Edit” icon.
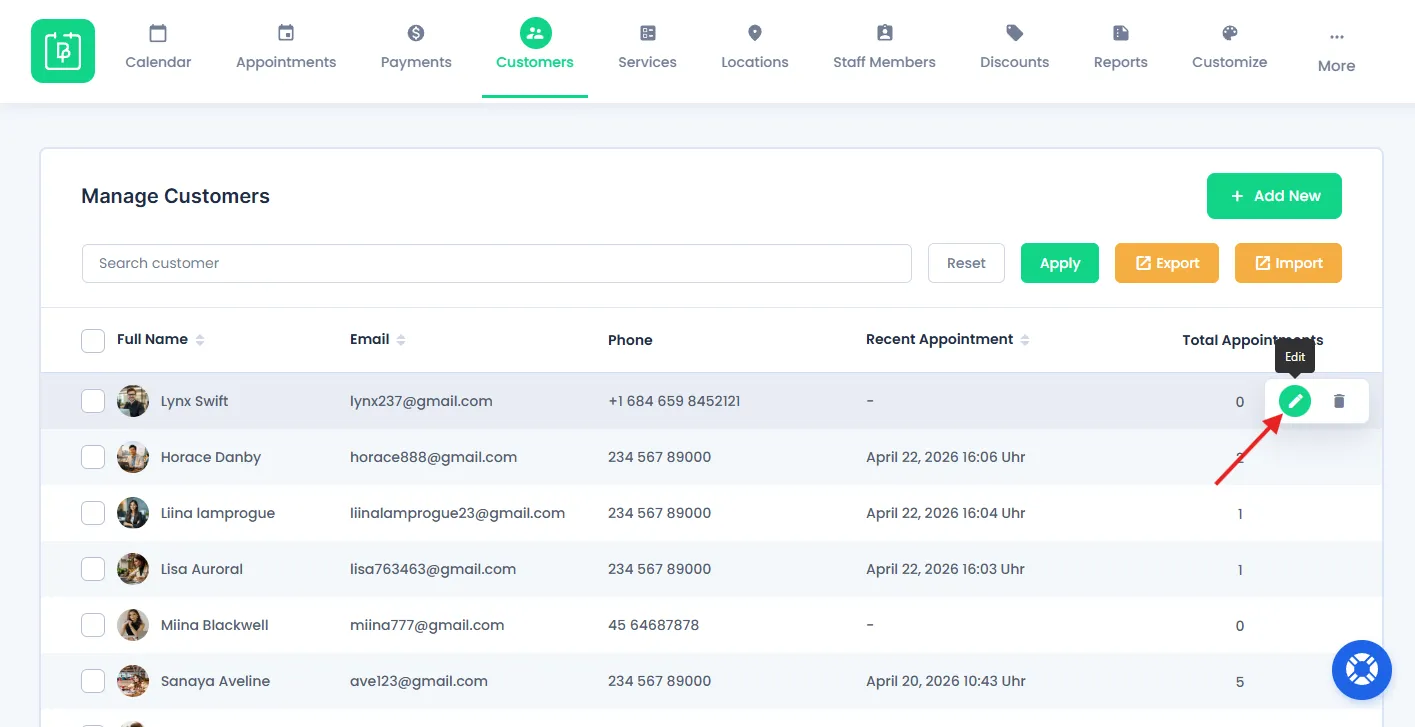
Click on that Edit icon, and an “Edit Customer” page will appear.
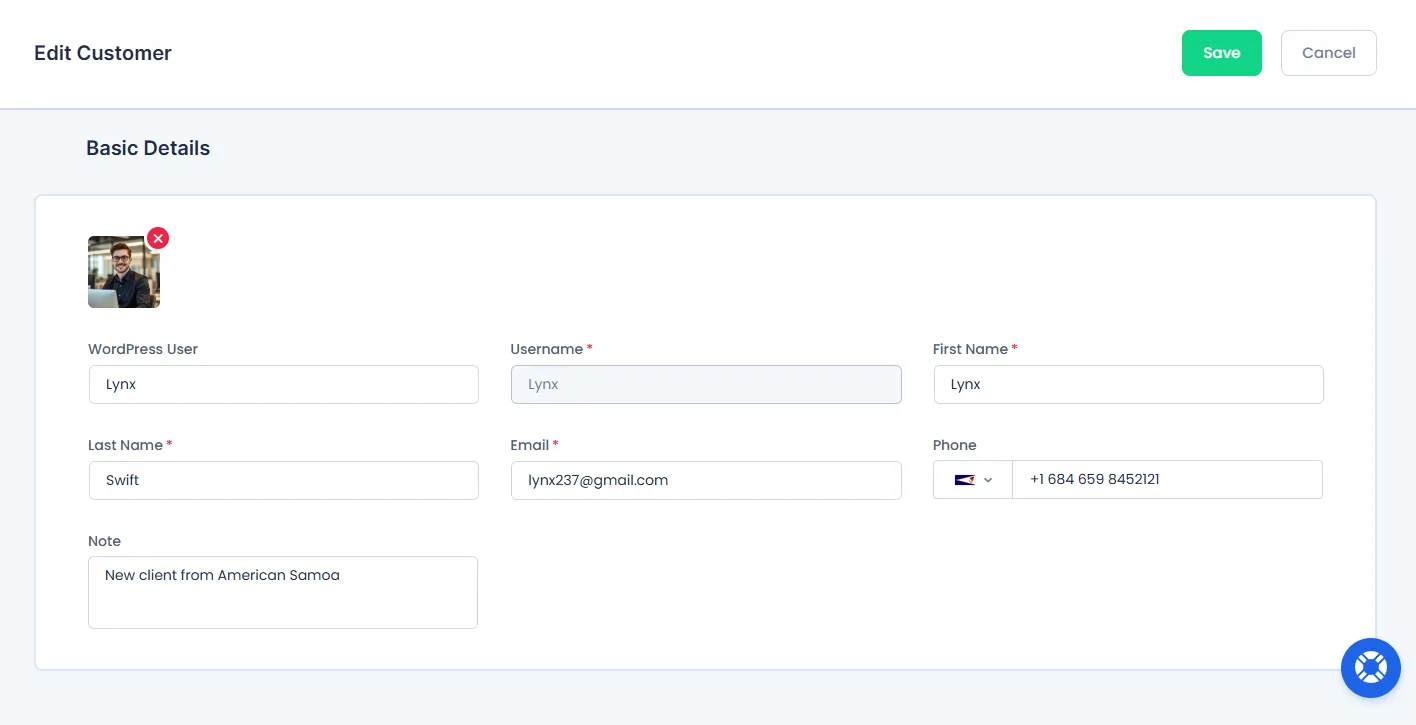
Here you’ll have the almost identical form as the “Add Customer” page. The only difference is the “Edit Customer” page’s form is already filled.
You can easily change customers’ Avatar, First Name, Last Name, Email address, Phone number, Notes, and more fields.
At last, hit the “Save” button to edit all new customer details.
How to Delete a Customer from the Customers List?
Remember when you hovered over a customer’s record and a small action bar showed up. Just next to the Edit icon, you might have also noticed the Delete icon.
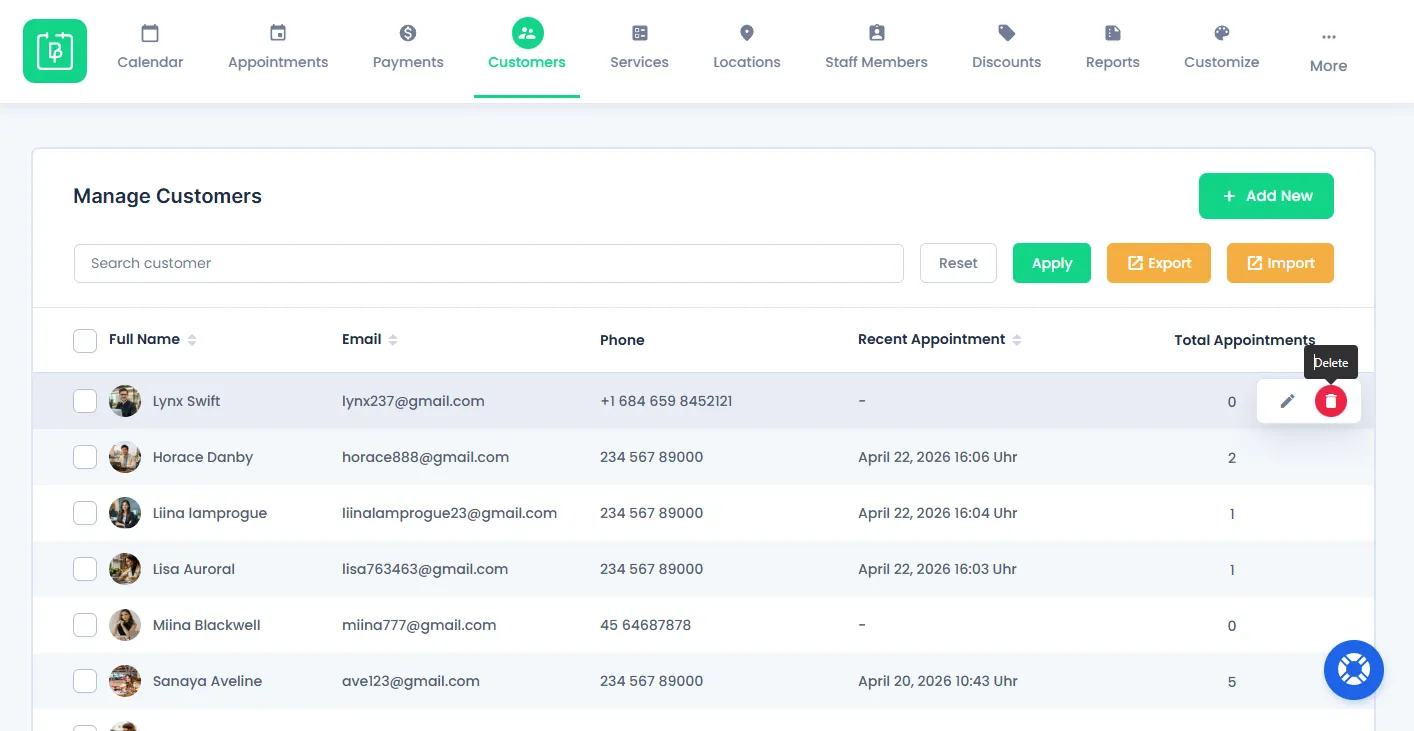
Click on that Delete icon and it will ask for the confirmation to delete.
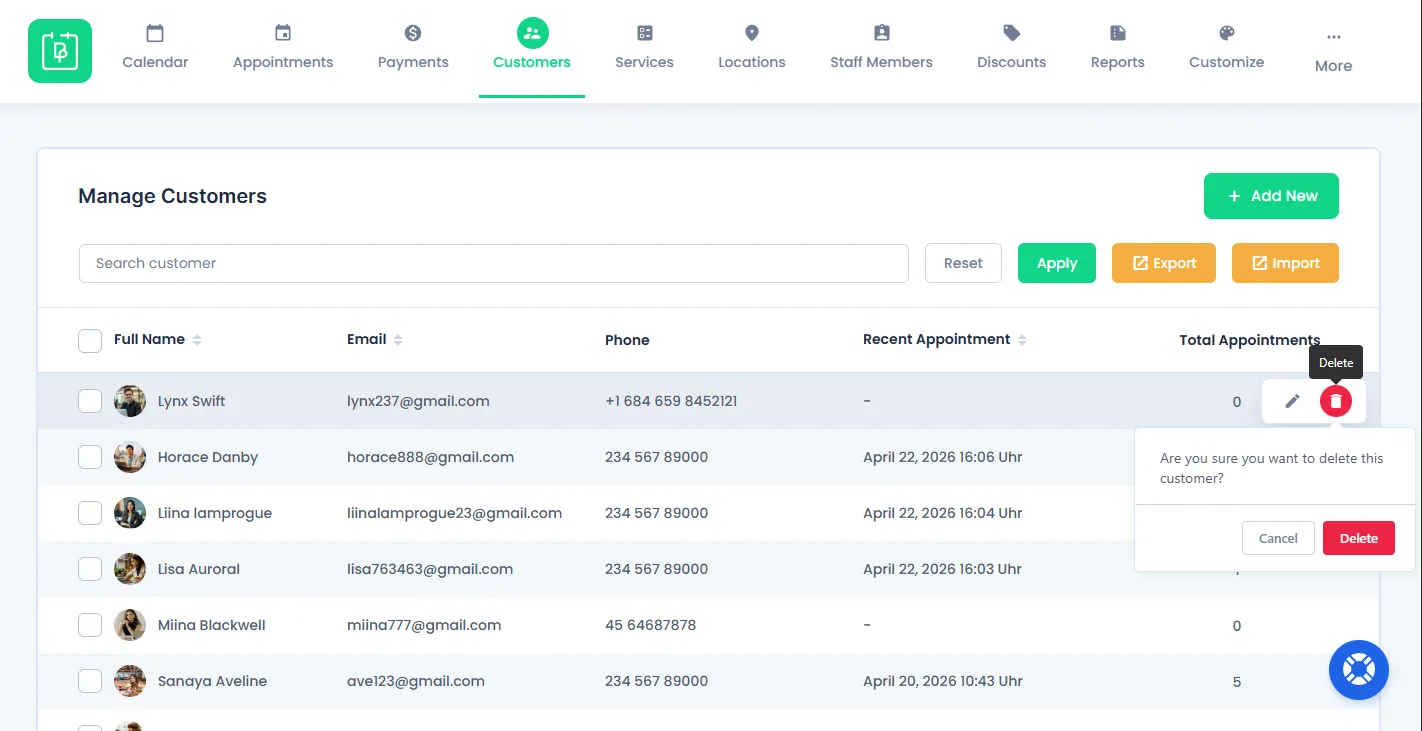
Click on the “Delete” button from the confirmation box for deleting that customer right away.
Please Note: If you delete the customer, the system will delete his booked appointments and payment transactions too. So, please double-check before deleting the customer.
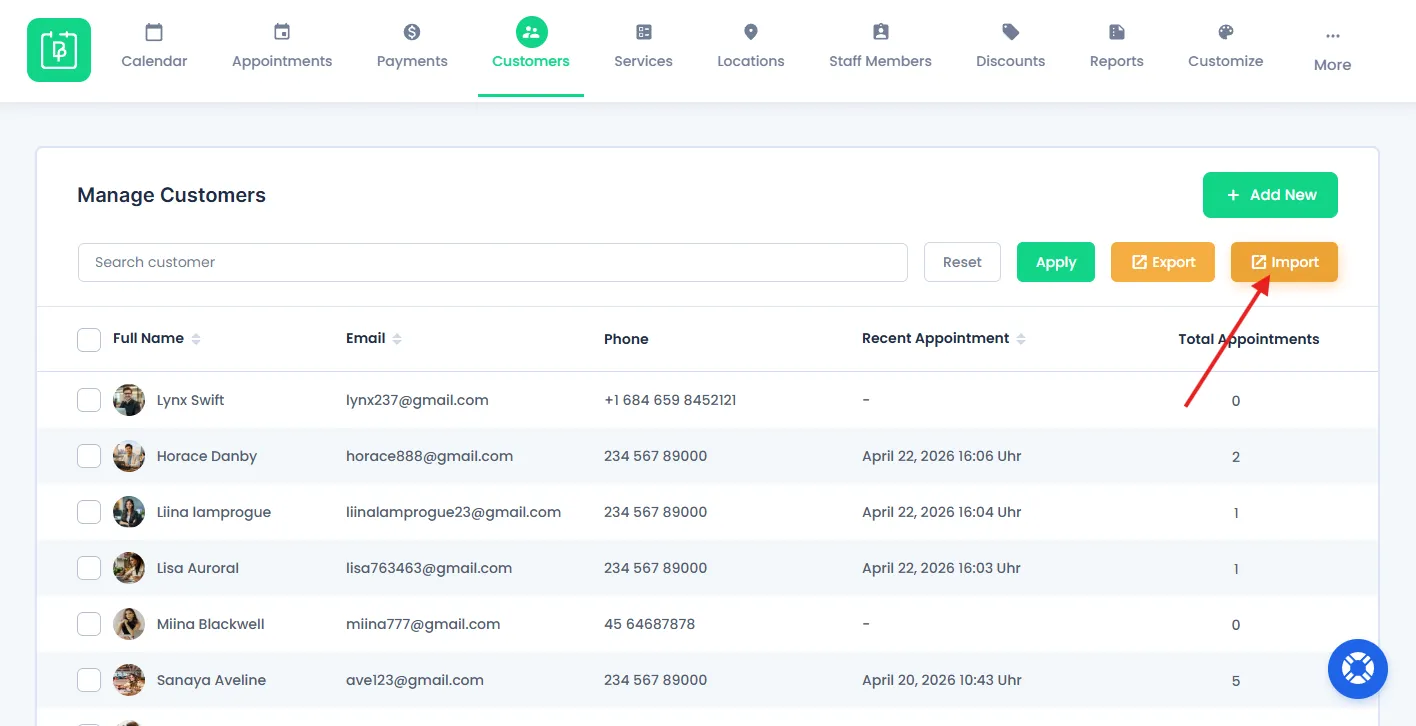
Export Customer List From BookingPress
If you want to export all your customer data, you can do it from here.
Inside the Customers page, you’ll see the Export button right next to the search bar’s Apply button. Hit that Export button, and a popup box will appear.
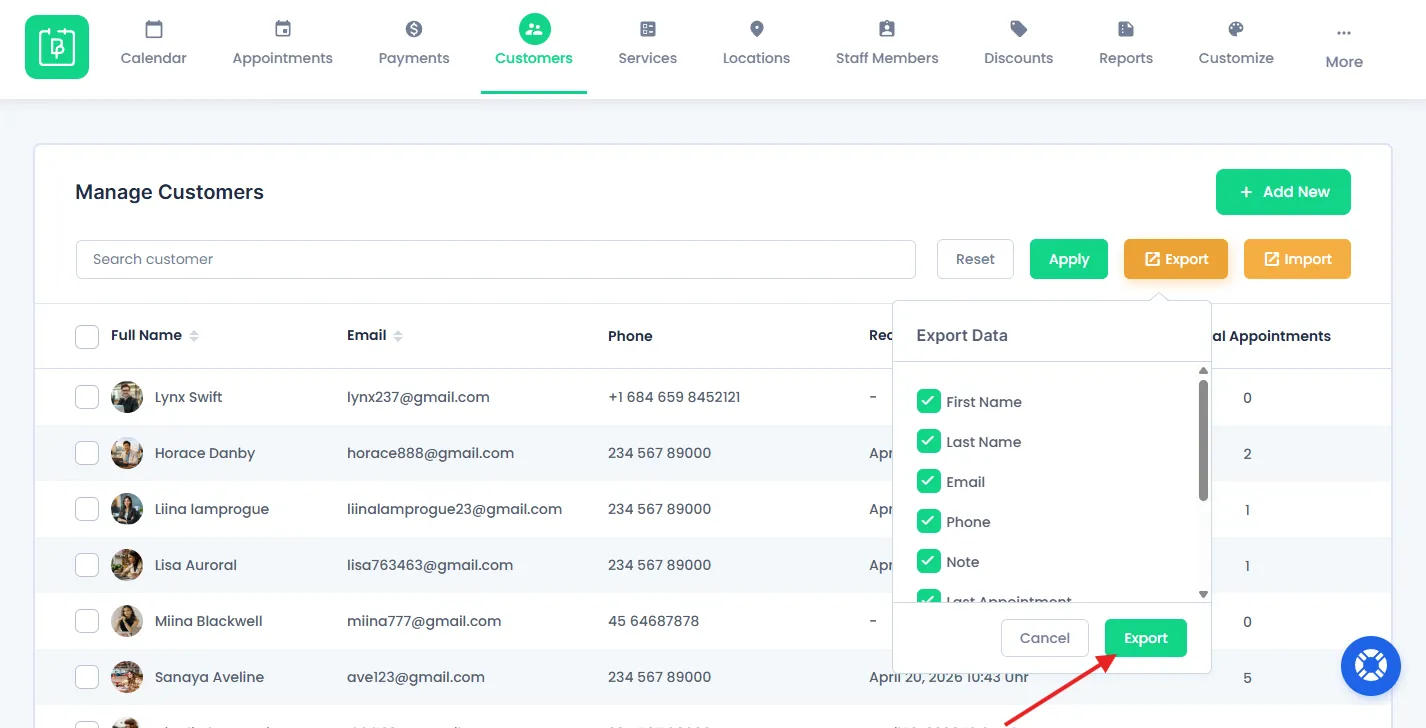
From the popup box, tick the export data fields you want to export in your files such as customer:
- Customer First Name
- Customer late Name
- Phone
- Note
- Last Appointment
- Total Appointment
- User Name
- User Email
Once all Customer export data is selected, click on the final “Export” button. Now, data will be downloaded in .csv file format.
After downloading, you just open the .csv file in any software or excel sheet.
This makes it so much easier to use that customer exported data for business analysis.
Import Customer List From BookingPress
If you’re new to BookingPress or already have an existing customer list, you can easily import.
You can import customer data using a .csv file.
Please Note: Make sure the file format matches the export structure for a successful import.
First of all, click on the “Import” button to upload your csv file.
Upload the .csv file here, and you’ll see a complete new section.
Toggle on the “Create WordPress User” for importing new customers and WordPress users. Next, map all the customer fields with the CSV columns accordingly to ensure all data goes in the correct field.
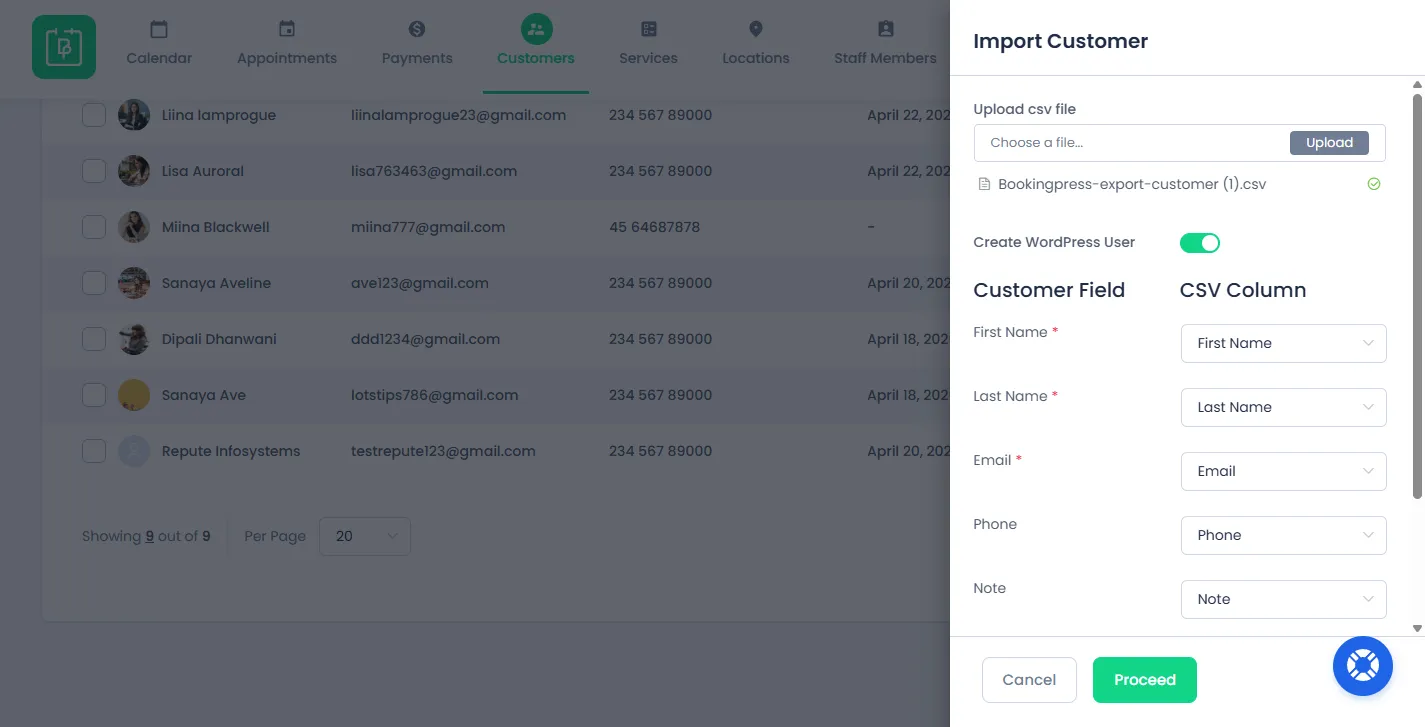
Once everything is set, click on “Proceed” to complete the import process.
Need a hand?
Our world-class support team is happy to help. Send us a message and we’ll take it from there.