Customer Field Settings
Customer Field Settings allow you to add extra fields to your booking form and collect additional customer data.
You can manage Customer Field Settings from BookingPress → Settings → Customers → Custom Field Settings.
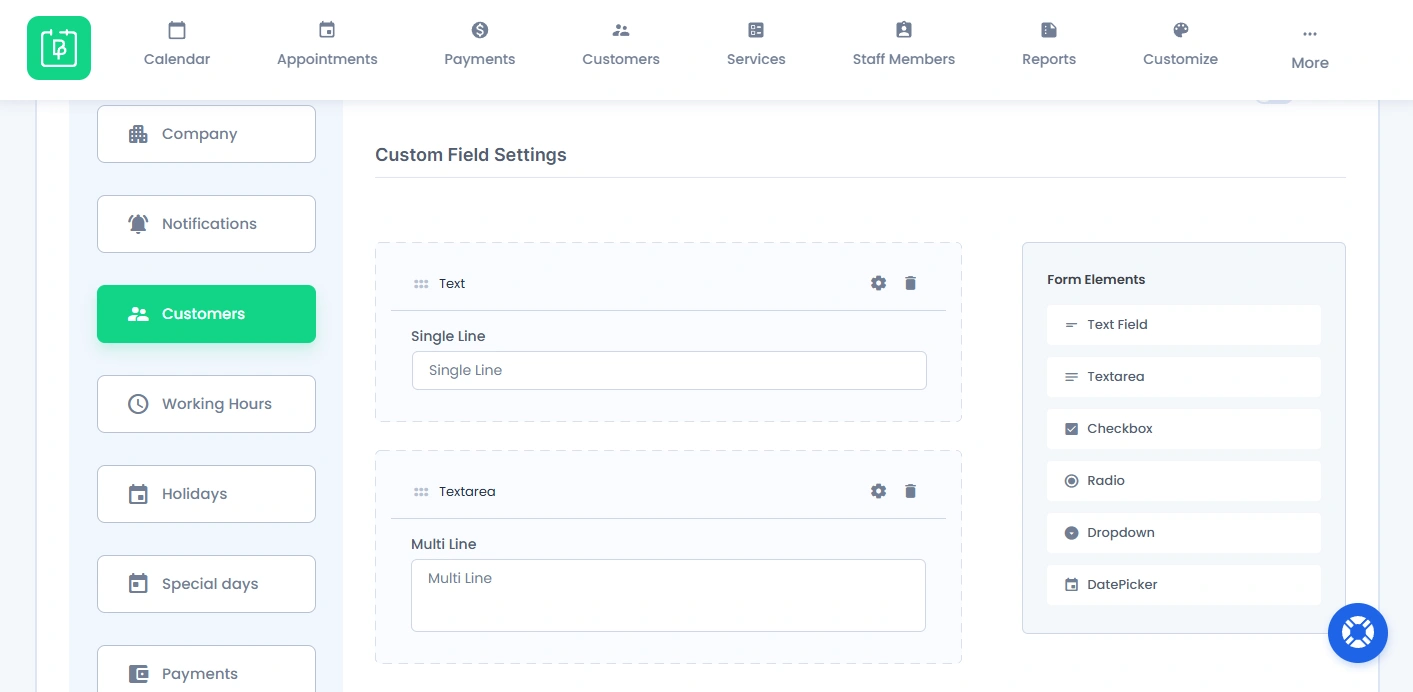
Available Form Elements
Using BookingPress, you can add extra form fields types:
- Text Field
- Textarea
- Checkbox
- Radio Button
- Dropdown
- DatePicker
These form fields help you collect additional customer details as per your service business needs. For example, you can collect:
- Phone Numbers
- Notes or Instructions
- Appointment Preferences
- Additional Guest Details
- Birth Dates
- and custom options
Where Customer Field Data Is Stored
All customer custom form field data is automatically stored inside the customer profile at BookingPress → Customers.
From there, you can easily view, edit and manage all customer details.
How to Use Customer Fields in Booking Forms
After you create custom fields here, you can add them to your booking form from BookingPress → Customize → Custom Fields
From there, you can:
- Show or hide fields.
- Mark fields as Required.
- Rearrange field positions.
- Collect important booking information.
After adding the custom form fields you want, customers will see them on the front end booking form while making appointments. These form fields will also appear inside the customer Edit Profile page along with Basic Fields and Custom Fields.
Book Appointments for Another Person
BookingPress also allows logged-in users to book appointments for another person.
Let’s say, a client wants to book an Appointment for his friend or relative, then it is possible with BookingPress. Furthermore examples of this are:
- A parent booking for a child
- A friend booking for someone else
- An assistant booking for a client
In this case, the logged-in user can add another person’s details such as:
- Name
- Email Address
- Phone Number
BookingPress will then send appointment updates and notifications to the person who added all the customer details because the appointment belongs to that person.
Plus, remember when a logged in user books an appointment for the non-logged-in user by filling the necessary information, at that time, a new user will not be created even if the switch “Create WordPress user upon appointment booking is on.
This avoids unnecessary WordPress user creation for guest appointments booked by existing users.
Need a hand?
Our world-class support team is happy to help. Send us a message and we’ll take it from there.