Invoice
You will be able to generate the Invoice after getting and activating the plugin from BookingPress -> Addons.
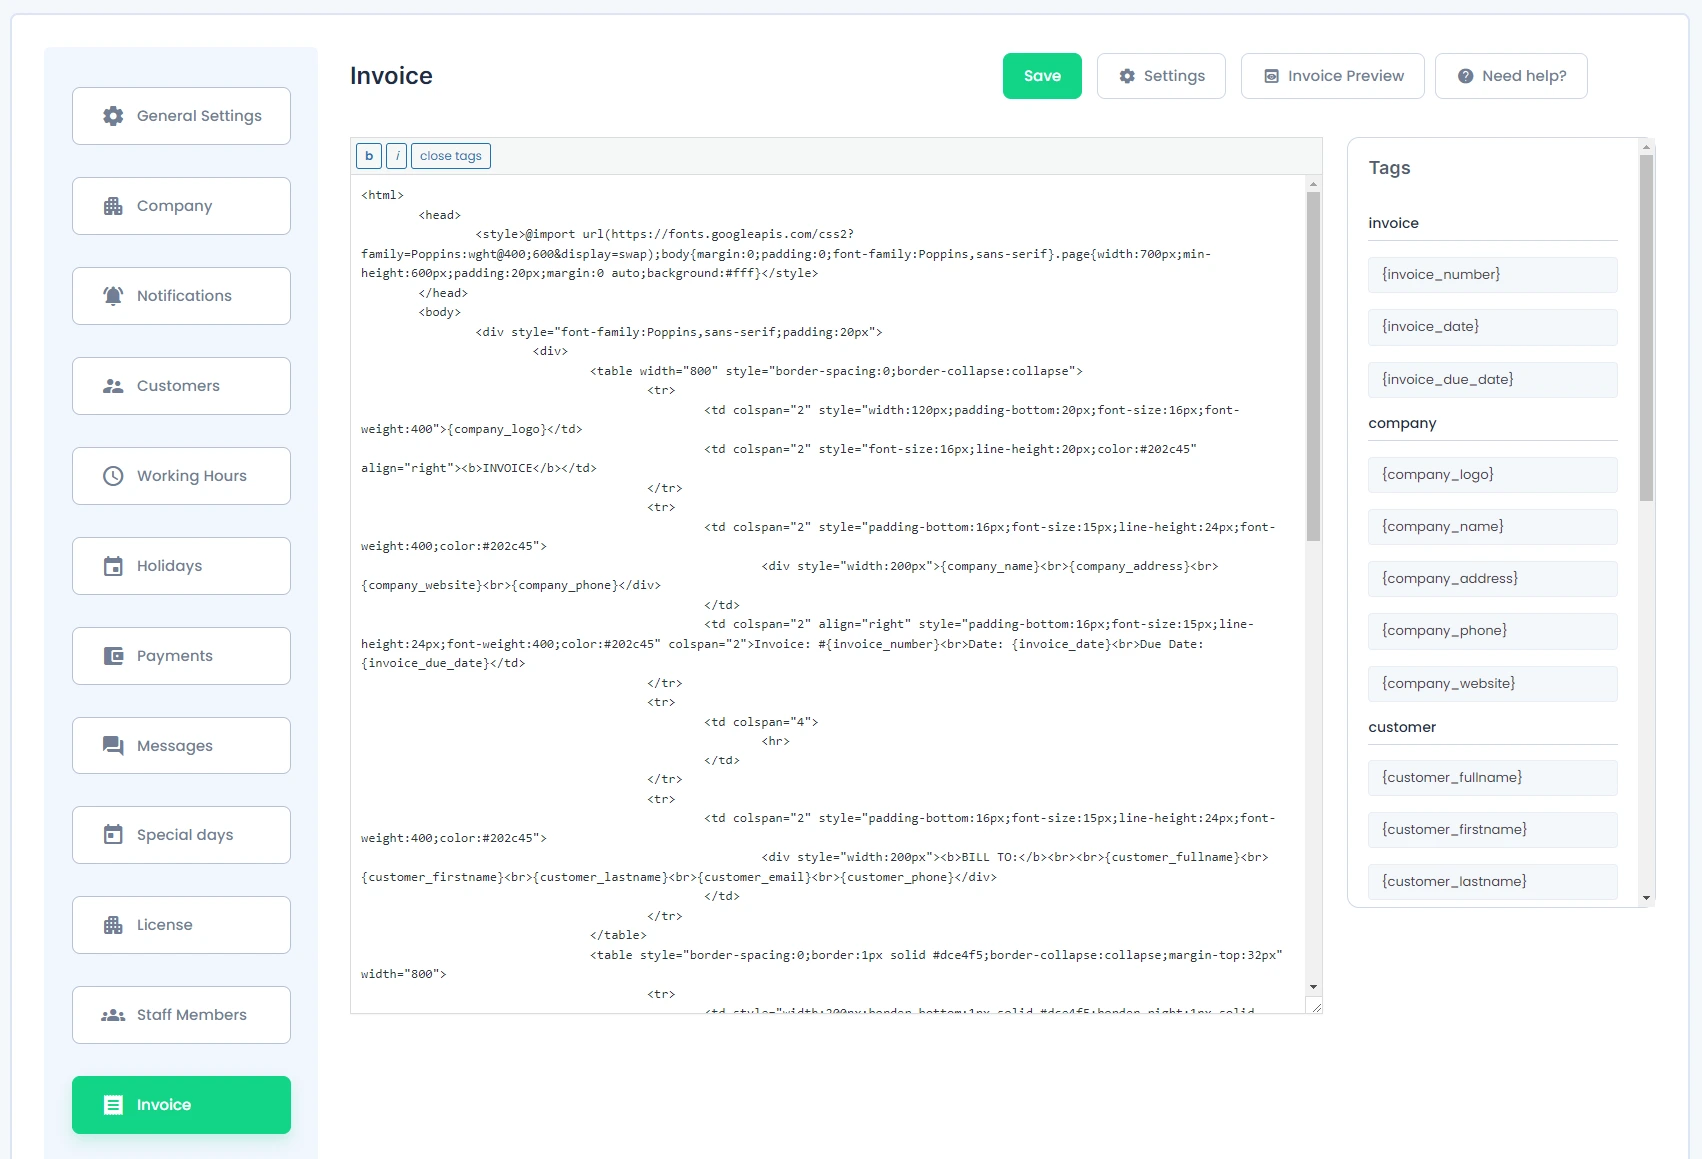
After the plugin is activated, you will find an option to edit the invoice from BookingPress -> Settings -> Invoice.
From here you can create an Invoice template in the text editor by adding the Tags according to your requirement.
You will find the tax according to the different categories:
Invoice:
{invoice_number}: Used to display Invoice Number
{invoice_date}: Used to display the date, the Invoice generated
{invoice_due_date}: Used to display the due date of the Invoice.
Company:
{company_logo}: Used to display the company logo in the Invoice
{company_name}: Used to display Company Name
{company_address}: Used to display Company Address
{company_phone}: Used to display Company Phone Number
{company_website}: Used to display Company Website
Customer:
{customer_fullname}: Used to display full name of the customer
{customer_firstname}: Used to display first name of the customer
{customer_lastname}: Used to display last name of the customer
{customer_email}: Used to display email of the customer
{customer_phone}: Used to display phone number of the customer
Service:
{service_name}: Used to display the name of the service
{service_price}: Used to display the price of the service
{service_gross_amount}: Used to display the gross/base price of the service without the included tax in case of ‘Inclusive Tax’
{service_extras}: Used to display the service extras details
Appointment Details:
{appointment_date}: Used to display the appointment date.
Staff member:
{staffmember_name}: Used to display the name of the staff member.
Cart:
[BOOKINGPRESS_CART_ITEMS] [/BOOKINGPRESS_CART_ITEMS]: Used to display the items stored in cart.
Recurring Appointment:
[BOOKINGPRESS_RECURRING_ITEMS] [/BOOKINGPRESS_RECURRING_ITEMS]: Used to display the items stored in Recurring Appointment.
Other:
{deposit_amt}: Used to display the deposit amount.
{subtotal_amt}: Used to display the subtotal amount.
{discount_amt}: Used to display the discount amount.
{tax_amt}: Used to display the text amount.
{service_tax_amt}: Used to display individual tax amounts for the service in case of cart appointments
{total_amt} : Used to display the Total amount.
After you have created the Invoice with the help of including Tax, you will also be able to preview the Invoice that you have created by clicking the “Invoice Preview” button.
1. You can also be able to manage the setting of the invoice by clicking on the “Settings” button. From here you will be able to set the rules like:
- Whether you want to show prefix/suffix in the Invoice by enabling a button.
2. When you will enable the “Invoice prefix/suffix”, you will be able to set the “Prefix” and “Suffix” according to your requirement. Other than that you will also be able to set the Minimum Length of the Invoice number.
And if you want to reset the Prefix/ Suffix of the invoice, you can do it using “Reset Invoice Counter” button. For example, if you have created dummy invoices for the testing purpose, and want to generate the invoices from the new start, then you will be able to do by resetting the invoice with “Reset Invoice Counter”.
- You can also set the Invoice due dates.
3. Invoice due date set will be calculated from the day, the Invoice is generated.
- BookingPress also provides the facility to style the Invoice by setting the fonts for the Invoice from a given list.
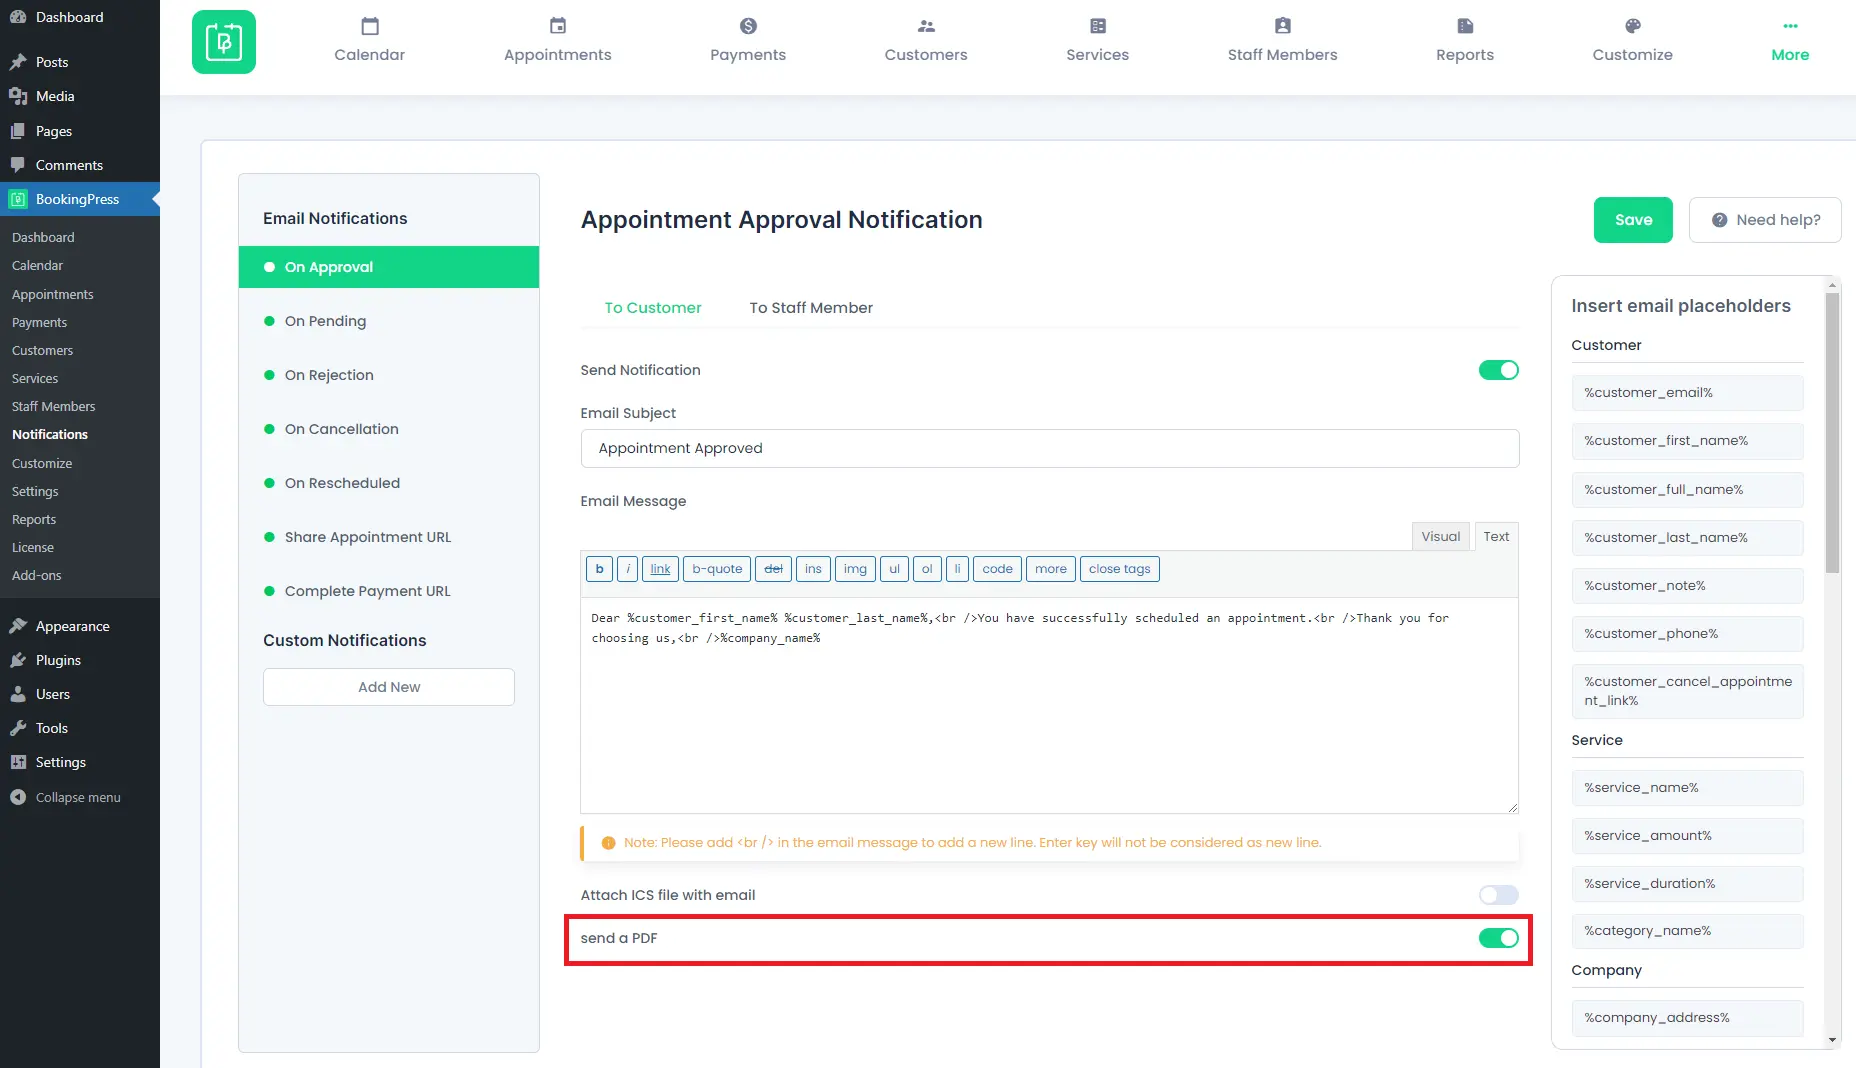
Send Invoice via Email Notification:
After the Invoice format is configured, you can send an Invoice as a PDF file to the customers via Email notifications. To enable sending the Inovice PDF files, go to “BookingPress -> Notifications”. Enable the “send a PDF” switch, and after that Invoice will be sent to the Customers as a PDF file attached with an Email notification.